
Likes
Comments
Share


@Steek88
Follow
Do I just keep doing what binding until the pistols all turn brown.

Likes
11
Share


Likes
7
Share

@Skynets_Growing
Follow
Tessa her week 10 is looking like the week before you think? I think no… on day 70 you can see clearly her big Buds under her leafes. And Tessa surprise me with her nice green… for week 10 she look so healthy… hope week 11 we can see the same 🤗


Likes
4
Share


@TiRobotProds
Follow
Excellente souche de Green Barato les colas sont de plus en plus gros et givré, elle a une odeur très remarquable d'agrumes frais.
Likes
13
Share


@RoyColt
Follow
Always R.O Water
Watering the plant 3 times for per week
1st Watering with nutriens. (1000 ppm) (27.03.2023) 4 liter
2st Watering with nutriens. (1000 ppm) (30.03.2023) 4 liter
3st Watering with only R.O water & CalMag. (300 ppm)
1000 PPFD
Likes
Comments
Share


Likes
Comments
Share


@spastagia
Follow
Hey all,
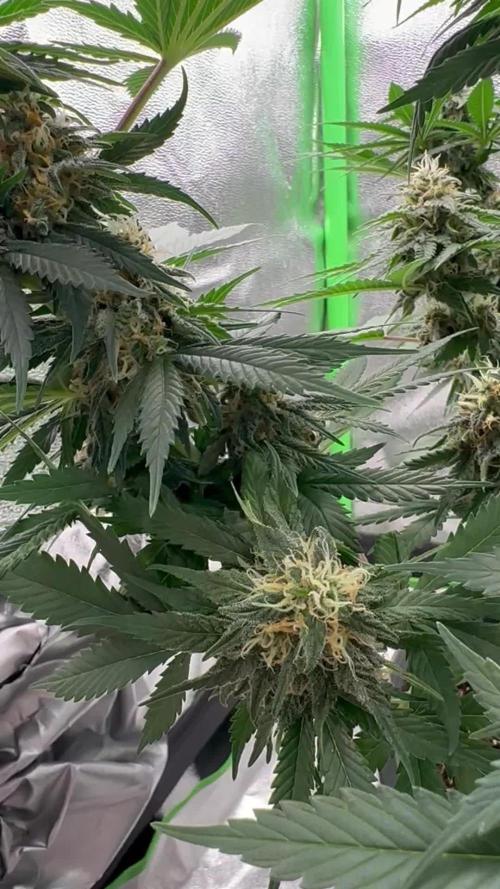
She is doing pretty well. Trichomes are stacking up. She is smelling fruity and a bit of sourness to it. I am going to flush her once this week. Did some defoliation. Nothing much!
Likes
7
Share


Likes
27
Share


@ButterfliesLittleFarm
Follow
Hello Diary.
The first week of flowering is over, so I started photographing more detailed plants and I will now start photographing on a black background as well, since they are much more interesting and beautiful now. 😍
As seen in the photos, Haze has grown quite large in the first 30 days. It has reached a height of 93 cm which is close to the limit my farm can handle.
Given the height of the Box of 180 cm and the distance from the light should be 35 cm, the height of plants up to 110 cm is the maximum acceptability. I hope Haze Berry stops before he reaches those 110cm. 😏
My plan is to do defoliation in a day or two. Watering has become quite difficult due to the amount of leaves and branches but I think it will come in handy to aerate them anyway.
The flowers are developing nicely and there are many of them, Haze looks like some weird Christmas tree. 😇
I still add BioBizz as scheduled for the current week and add CalMag but only preventively in a smaller dose. Watering is on average every two to three days.
The second Haze (which didn’t sprout on the first try, so is now a week late), I put in the middle and placed a pot underneath to bring it closer to the light.
I am satisfied with how the plants are developing, they have good conditions and I think they are enjoying my "Little Farm". 😎
Let’s take a look at what happened this week.
17/10/2020 - Day 24.
Watering and changing the light. I added BioBizz according to the schedule for the first week of flowering, I replaced Fish-Mix with Bio-Grow. I still add 1.5 ml / lit of CalMag for prevention. p.H. I dropped to 6.5 with Plagron’s Lemon Kick.
After watering I changed the light mode to 20/4.
Temp / Humidity on the farm - 25.2 degrees and 41% humidity.
20/10/2020 - Day 27.
Watering. Same procedure as three days ago. p.H - 6.5
Temp / Humidity on the farm - 26.2 degrees and 43% humidity.
21/10/2020 - Day 28.
Photographing and measuring plant height. Since the beginning of flowering, the motives for painting have doubled :), so the number of photos has increased.
Temp / Humidity on the farm - 25.5 degrees and 45% humidity.
Haze Berry Auto # 1 - Day 28. - 93 cm
Haze Berry Auto # 2 - Day 21. - 50 cm
This is it for the first week of flowering, now I still have to do defoliation and then with pleasure follow the development of flowers. See you soon.
Likes
39
Share


@DogDoctorOfficial
Follow
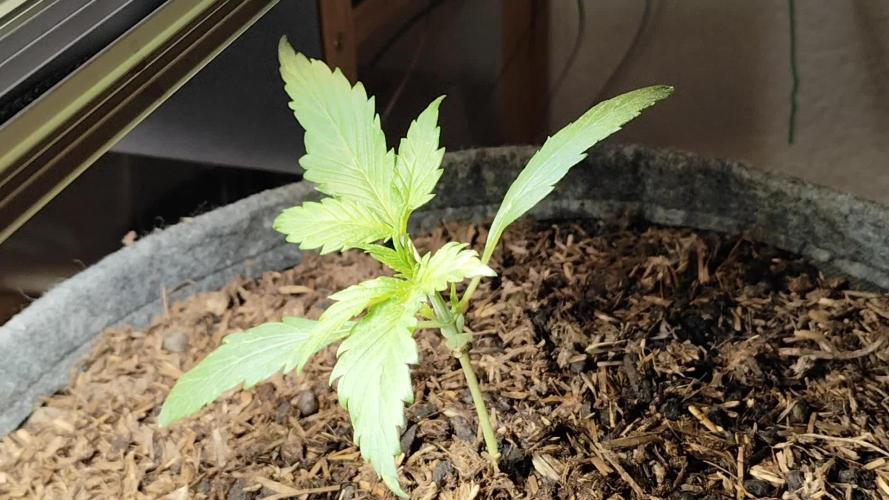
An in to soil she and her sister testers go, i know that for know everything looks the same , apart from the photos, but this will start changing with them growing. For now all of them are growing pretty much the same and now that they move in to soil and start feedings they will start showing the phenotype and genetic differences, but for now all looking great , healthy and strong af!!!
Haded a intro video from seed in to now, including how i transplant and what i use wen doing it so, and from here the moon is no limit for this babes i believe , so stay tuned as this testers they promise to be a interesting ride <3 <3 <3
She is growing amazing as all of them are, this one in particular is my favorite, but for now the only reason is her being number 9 hehehe
As always thank you all for stoping by and for supporting me on this journey, i am super passion about growing and fell blessed to have you all with me on this new journey <3 <3 <3
Genetics - Fast Buds Tester 08 09 10 11
Ligth - LUMATEK ZEUS 465 COMPACT PRO
Food - APTUS HOLLAND
#aptus #aptusplanttech #aptusgang #aptusfamily #aptustrueplantscience #inbalancewithnature #trueplantscience #fastbuds #dogdoctorofficial #growerslove
With true love comes happiness <3 <3 <3 Always believe in your self and always do things expecting nothing and with an open heart , be a giver and the universe will give back to you in ways you could not even imagine so <3 <3 <3
All info and full product details can be find in can find @
https://2fast4buds.com/ wen released
https://aptus-holland.com/
https://autopot.co.uk/
https://lumatek-lighting.com/
<3 <3 <3 Growers love to you all <3 <3 <3
Likes
29
Share


@Dick_Lucky
Follow
Finally over the hump! I think. All my ladies are doing much better all new growth seems to be really healthy and all the plants are taking off. I feel like I lost around a week with my issues, however im praying 🙏 that these babies will get tall enough to produce a decent harvest. I have so much more to learn.
C ya next week & thanks for your time.
Happy Holidays
Likes
13
Share


@HIAZ_urbanbudfarmer
Follow
Removed the 2 Xs 1500's (300watts) & replaced them with 2 P1000 (200watts) lights, now running 680 watts.
These lights fit in better & have air space all around to help cool them, these lights run a lot cooler than the xs 1500s & only get warm not hot.
Started some clones.
Likes
78
Share


@ClubRiot
Follow
Week 11 ,
pH Perfect Connoisseur Bloom Part A ( 1 ml/L )
pH Perfect Connoisseur Bloom Part B ( 1 ml/L )
CarboLoad Liquid ( 2 ml/L )
Sensi Cal-Mag Xtra ( 2 ml/L )
Sensizym ( 2 ml/L )
Bio-Heaven ( 2 ml/L )
Overdrive ( 2 ml/L)
Nirvana (2 ml/L)
Likes
62
Share


@MeaCulpa
Follow
Each of the ladies looks perfectly healthy. Which makes me very happy. However, I'm a little undecided about defoliation... but the question has already been asked. I'll get an answer right away.

Likes
Comments
Share

@Growbody
Follow
Hallo und Herzlich willkommen zu meinem neuen Grow mit der Forbidden Runtz double XL Automatic von Grower's Choice. Diese schreiben: "Eine Kreuzung zwischen „Forbidden Fruit“ und „Runtz“. Eine Sorte von Growerschoice mit sehr hohem Terpengehalt. Die Aromen waren das Wichtigste bei der Auswahl und Kreuzung dieser Genetik". Sehr süss und fruchtig soll sie sein, ganz genau mein Fall.
Die URL findet ihr hier:
https://www.growerschoice.nl/de/feminisierte-selbstbluhende-hanfsamen/forbidden-runtz-xl-auto.html#additional
Tag 24: Die Forbidden Runtz double XL Automatic von Grower's Choice bekommt kleine Seitenäste.
Tag 25: 1,0 Liter Wasser.
Tag 26: Die Forbidden Runtz double XL Automatic von Grower's Choice wächst etwa 1 cm pro Tag und bekommt etwas LST.
Tag 27: 1,0 Liter Wasser.
Tag 28: Noch etwas LST.
Tag 30: 1,0 Liter Wasser.
Schön, dass du dir den Grow angesehen hast. Bleib neugierig 👋😎

Likes
13
Share


@gdogfunk
Follow
Day 63: This should be the last week in veg. It might be a partial week...I'll make the call in a few days. I'm excited to see these babes flower!!!
Day 64: Last night I saw what appeared to be signs of overwatering, so I turned off the humidifier and the temp increased immediately and today, they look just fine. I also raised the 150W LED on that side of the tent just a bit to reduce the intensity. This will be the last week for veg. I flipped the other tent, but these babes need just a little longer before flipping.
Day 65: They looked pretty thirsty today, so I fed 1 gal of late veg nutes per plant. The soil was very dry according to my meter, so if I overwatered last time, they had plenty of dryness today.
Day 67: I came home to near wilting plants! It had been 52 hours since last feeding and I've never seen them this thirsty during this grow. I watered 1 gal/plant again and GZ is showing the same signs of over watering again. The leaf color is fine with zero nutrient issues, so I suspect there may be a root problem. I don't know what else it could be? The photos are about 4 hours after watering.
Day 68: The moisture meter showed bone dry again, so I watered a half gallon of water/cal-mag. I also decided to turn off the extra 150W LED sitting above her and just let the main LED do the work for now.
Day 69: She was dry again today, so I watered a half gallon of late veg nutes and she's appearing to be recovering just fine. I think the heat in the tent might have been causing some issues as well, so good thing I turned off that extra light for now.
Day 70: Last day of VEG!!!


Likes
11
Share


@Mcdiggley420
Follow
Blue dream autos gone into full flower gsc is still in pre flower im liking how big they're getting tho
Blue dreams not liking the strength of nutes dropped it back down to half strength hopefully she picks herself back up today
