


Likes
Comments
Share


@GorkedOut
Follow
Only 1 plant harvested, the other is a few weeks behind and is in much better health. Chopped one on day 77 and I'll let the other go until like day 82-85.
I will also prob create a better song for this strain. I was on a time constraint.

Likes
14
Share

@GREENPHOENIX6262
Follow
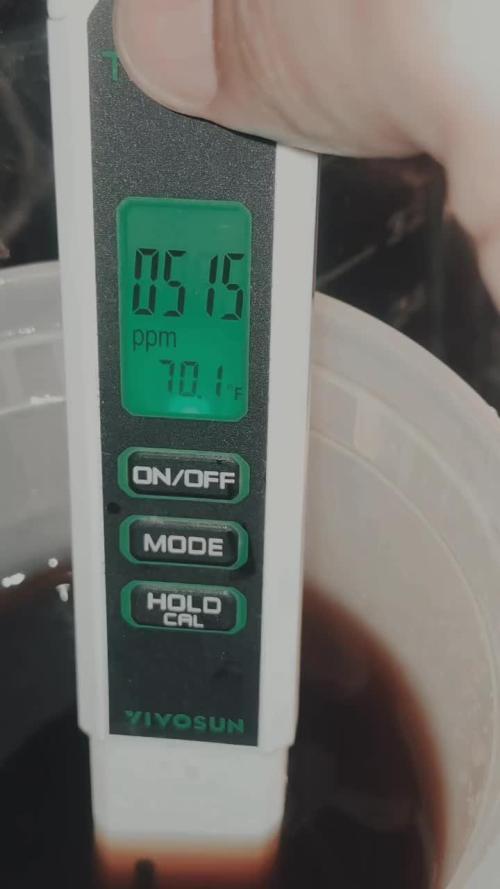
03/22 - (M) - She is perfectly - Her numbers are spot on and the feeding schedule seems to be dialed in perfectly - I will increase her carbohydrate feeds with the Raw Cane Molasse to increase terpene production.
03/22 - (C) - Hit a little snag with the babies last week and through off their PH/EC/PPM's - Gave them a hard flush yesterday (Only distilled water) to stabilize the numbers and got all of them down to optimal levels. Did some defoliation on the yellowing leaves. I will upload both night and day shots for this week for the babies
03/23 -(C) - Flushed them out hard last night and in less then 24hrs WHABAMMMM!!! they are already bouncing back - Will stick to just clean water feeds for now - They will begin a low-dosage nutrient feed (Micro-dosing) in about a week.😎😎😎😎😎😎😎
03/24 - Flush out complete - They have all bounced back and back to running accordingly - Running AC infinity supp lights and level 2 for under top canopy coverage.

Likes
3
Share

@Exempl7fy
Follow
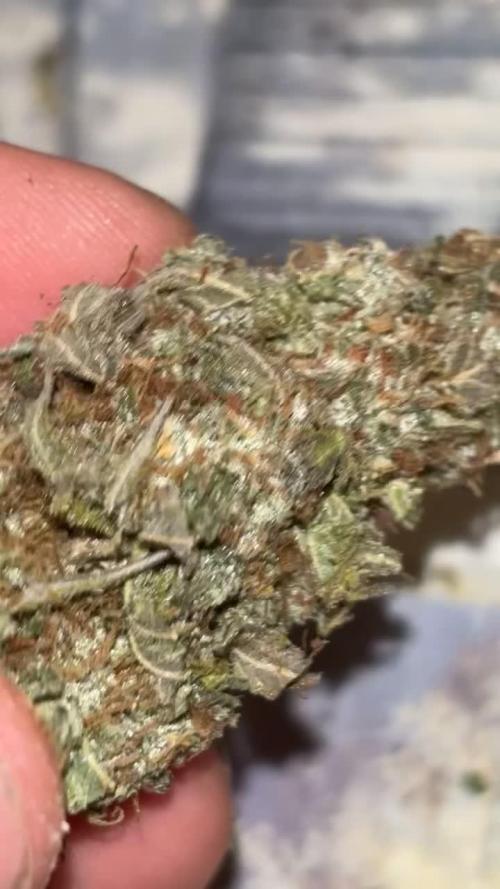
Smaller outcome then expected and the smoke test went well, clean smoke and tastes insanely well and turpy even before the cure, cannot wait to see it in a few weeks

Likes
6
Share


@captaincondor
Follow
Im suprised the tent can contain her everytime I take a peak shes just go bigger lol. My recomendation is to flip this to flower very early or if your lucky grow it outside where it I guess could easily grow to the size of a tree


Likes
45
Share


@Robbaus
Follow
Grandissima settimana! Sono a dir poco raddoppiate, non avevo mai visto una crescita così veloce! Ho cambiato le ore di luce 12/12 una settimana in anticipo rispetto ai programmi. Va tutto a meraviglia, l'unico problema che potrei incontrare è il riscaldamento dell'acqua dei vasi, devo essere bravo a stare sotto ai 28 g nel box, non sarà facile ora che arriva l'estate, terrò l'umidificatore fino a fine fioritura perché mi abbassa la temperatura di quei gradi che mi servono! Al momento ho tenuto lo stesso piano nutritivo della fase vegetativa, appena finiscono di allungarsi cambierò la soluzione di ogni vaso e iniziamo coi fertilizzanti per i fiori non vedo veramente l'ora, al momento scelta vincente l'idroponica! 👍🏼💪🏼🍀🤣🤣😎😎

Likes
143
Share


@Tropicannibis_Todd
Follow
👉Alrighty Then👈
We are back this week and they are killing it 👏 😎 🙏 zero issues 😀
👉So we are now starting our forth week of Flowering and the stretch is almost done I hope , and the buds are pumping 🤪
👉I did a slight defolation and I've continue to emend my nutrients plan for full Flower ..... 👈
😳So I will be showcasing just 3 this round even thoe I am growing 7 plants 😳
👉Black Domina From Weedseedsexpress 👍
👉Permanent Marker From Weedseedsexpress 👍
👉Sleepy Joe OG From Weedseedsexpress 👍
The other 2 are repeats cause they are pure fire 👈 You can view these 2 in the 👉Summer Classic Diary 💪 Had issues with the Banana Biscotti germination, so it's way behind and also the extra seed I popped
👉Purple Oreoz From Seedsman 👍
👉Persian Pie From Greenhouseseeds 👍
👉Banana Biscotti From Seedsman 👍
👉Gorilla Cookies From FastBuds
Soil by Promix
Nutrients by Cronks
Lights by MarsHydro & Vivosun
Well this should be fun 🙃
Thanks to all my growmies out there for stopping by its much appreciated 👈
👉Happy Growing👈

Likes
Comments
Share

@ojulhao
Follow
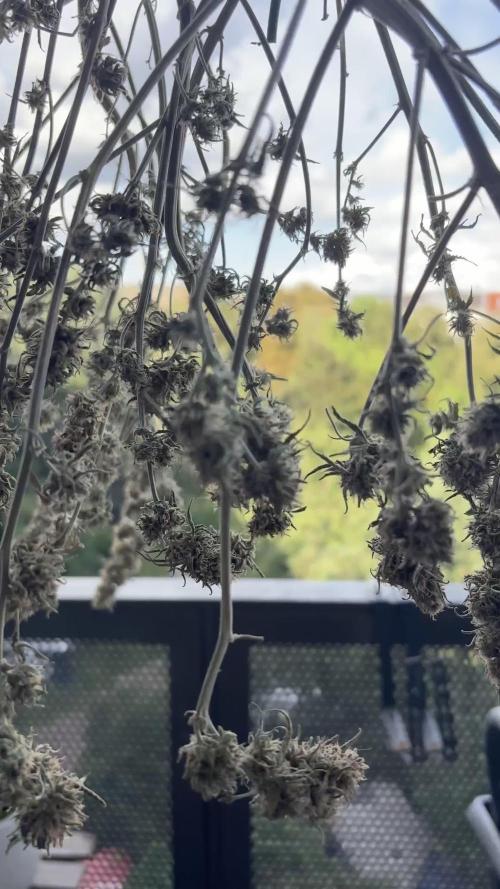
I harvested the three plants by the end of week 11. Unfortunately, due to some problems, they were already without many leaves and looked very stressed. I couldn't find out what the problem was. I had stopped the nutrients some weeks before, flushed, but nothing improved their health. I decided to harvest before they became worse. My assumption is that they were very stressed due to the very intense heat we had in the city during this summer.

Likes
65
Share


@bypado_farm
Follow
Day 29:
Watered the plants 0.3L with nuts
600 ppm, 1276 us/cm, PH 6.4
Day 31:
Watered the plants 0.5L with nuts
533 ppm, 1134 us/cm, PH 6.2
Performed a more aggressive lst
Used neem oil to prevent pests
Day 33:
Performed more lst
Did some defoliation
75% light
Day 34:
Watered the plants 0.5L with nuts
588 ppm, 1251 us/cm, PH 6.3
Day 35:
Performed more lst
Plants already recovered from topping
Day 36:
Watered the plants 0.5L with nuts
622 ppm, 1329 us/cm, PH 6.4
Added bloom
Topped the 2 younger plants
Likes
10
Share


@StoneJackson
Follow
They took a long time to grow and mature 10 months in all. They produced amazing flowers with a genuine high. Left a lot to be desired in flavour profile however not awful to smoke. Would grow again for sure as they were a high yielding, ‘set and forget’ type of strain easy and resilient enough to grow and highly impressive to see grown outdoor.
Likes
18
Share


@Killerbubu
Follow
Total de dias 29 - 31/08/2021 ( Mais um dia e vou mudar para floração.) Faco 30 dias de vegetação
Total de dias 30 - 01/09/2021 / Rega ( mudança de horário para 12/12 fase de Floração )
( Fase de Floração )
Total de dias 31 (F 01) - 02/09/2021
Total de dias 32 (F 02) - 03/09/2021 / Rega com um 1ml de Bloom.
Total de dias 33 (F 03) - 04/09/2021
Total de dias 34 (F 04) - 05/09/2021 / Rega apenas com agua

Likes
6
Share


@gr3g4l
Follow
Hola al mundo mundial.
De nuevo por aquí con nuevo seguimiento de mi humilde cultivo exterior.
Pasado el solsticio de verano.
Semillas en agua de osmosis 46 horas , luego entre servilletas unas 29 horas más y al sustrato, un sustrato light-Mix .
Segundo fué enterrar las semillas en el sustrato con precaución y ponerlo todo bajo unos fluorescentes de 150W 4000K 18/06h.
Antes de pasarlas a exterior me gusta tenerlas unos dias en interior, no muchos , entre 15-20 dias. Me gusta que salgan a ver el mundo ya con cierta madurez.

Likes
15
Share


@Rebola
Follow
Since i put my filter the temperature ir a bit high, i think the extractor in not powerfull enough 😔
All 3 Sensi Skunk are 50cm tall, and starting to flower, Big Bug is 35 cm and only a few pistils..
I realized that i started to count day 1 when it was already day 5 or so.. but no problem 😁
I dont have a ph or ec meter (will be my next investment), i just have those drops for test ph,
And today when i finished mixing the nutes, i tested with those drops and it was to low, (orange color) so i had to take off 1/4 off the solution, and
add tap water, which has high ph and i manage to bring the ph up,(yellow color).
Hope they like this mix of waters and nutes i gave them 😆
13/06/2021
Day 27 (from seed) - 1.7L water+nutes
Day30 - 2L water
Day32 - 2L water + nutes
Big Bud is not looking good 😔 bottom yellow leaves and the upper leaves very pale.. growing very slow compared to the others.
Same water and nutes for all of them, so i dont know whats the issue. ☹️

Likes
24
Share


@Diips
Follow
beautiful with all those colors ❤️ im amazed with my first grow of photoperiods! been a good learning experience!
it have also been my first time in a tent, with all of this equipment, comming from growing in a closet without any intake or exhaust fans. cant wait to see what happens the next 2 weeks!

Likes
12
Share


@Luke_Lee
Follow
-18.07.2024
The fourth week of the vegetation phase begins today. The plants are showing the first "white hairs", so they are in their pre-flowering phase.
A few of the lower leaves have been removed and light LST applied.
From this week onwards, 1-2ml Top Max is added to the water in addition with 2-3ml Bio Grow.
The lamp is 70cm above the plants and runs at 60%.
the measured values with the Photone App:
Ppfd = 700 DLi = 50
-19.07.2024
Visual control
Soil felt dry, the plants were watered with 500 ml of water each.
-20.07.2024
Visual Check
Soil still felt moist
-21.07.2024
Earth felt dry
3ml BioGrow and 2ml TopMax to 1 liter of water
both plants were watered with 500ml water
the Skywalker haze worries me a bit when you look how big Mango smile is
-22.07.2024
Visual check
Surprisingly the Earth felt dry after one day so both plants were watered with 500ml water
-23.07.2024
Visual Check
Soil still felt moist
For the next watering,i will increase the amount of water per plant to 750 ml
-24.07.2024
Last day of the vegetation phase / pre-flowering.
The plants were watered with 500ml of water per plant.
(2ml Bio Grow + 2ml Top Max per 1 liter of water)

Likes
Comments
Share


@GothBotanical
Follow
Both outdoor autos settled firmly into early-to-mid flower this week. Nice Cream Auto showed steady bud development with tightly stacking colas and strong lateral structure, holding a healthy green canopy and giving off the first creamy berry aroma. Tiger #2 Auto remained more compact but equally vigorous, pushing dense flower sites and releasing a sweet grape-diesel scent. Trichomes began appearing on sugar leaves across both plants, mostly clear but multiplying daily. The 5-gallon Nice Cream retained moisture longer while Tiger #2 dried faster under afternoon heat, prompting slight watering adjustments. By the end of the week, both plants were thriving under the warm SoCal sun, entering the stacking phase that will define mid-flower in Week 9.
Likes
27
Share


@Bread_n_Buds
Follow
Here we are at the moment of truth, the flowers are starting to form, our Ghost Train Haze reveals its sex and of course like all Zamnesia plants I will be the father of two beautiful females.
One is growing straight but I will show it to you later because I have been focusing a lot on this one in main - lining. It is a plant with a wide internodal distance so we have more time to shape it before the woodification and it lends itself very well to late lst interventions.
I managed to open it on the main line very well and the lateral branches are really, growing and stretching properly.
We will not see the super productive trees of the autumn harvest but I am willing to bet that we will have lots of beauty and lots of resin in beautiful bush-sized plants.
Wait for the uncle BreadandBuds....
We are still using soil, feeding and all the recommended additives from Plagron 100% organic. We have moved on to the flowering start schedule that keeps the same Power Roots additives - Sugar Royal, Pure Zym and adds the flowering stimulant dear in my house for obvious reasons of Biscotti. Of course the basic fertilizer is now Alga Bloom.
The Green Sensation when the flowers are already a bit swollen, do not start immediately. The Power Buds must immediately stimulate the start and development of the buds.
---- Decide on the right soil and calculate your fertilizer schedule based on the soil on the official website.
-- www.plagron.com
Try a seed of this strain that drives us crazy..
---- https://www.zamnesia.io/en/12511-zamnesia-seeds-ghost-train-haze-auto.html
Zamnesia Description // From the day its cotyledons emerge from the substrate, Ghost Train Haze Auto will surprise you with its rapid growth and robustness. When it starts to flower, this short sativa will develop long and compact buds with pungent scents of spice, citrus and fuel.
All the best that mother nature can offer is on ---- www.zamnesia.com


Likes
6
Share

@PrinceOfHerbs
Follow
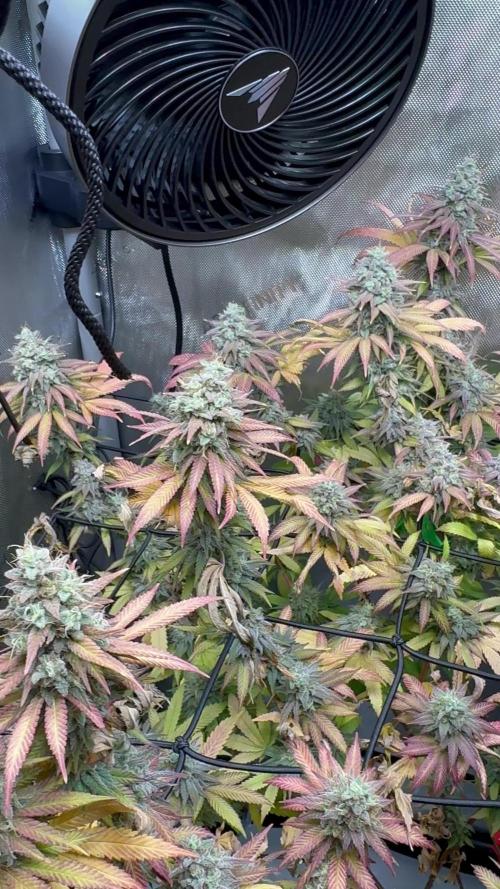
The plant is extremely resinous and has a great fragrance. The leaves turn a very autumnal color. However, the flowers are not extremely large. From now on, the plant will be rinsed with water.
Flowering Day: 55

Likes
5
Share

@deseed_uy
Follow
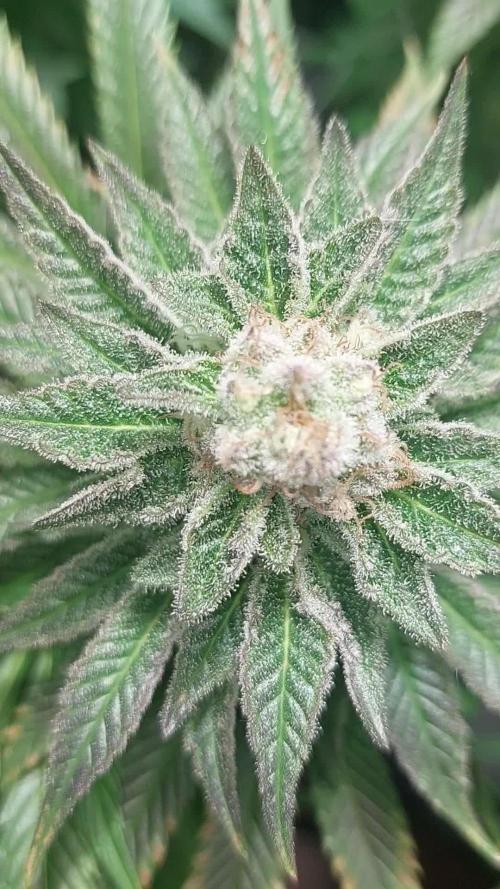
Segundo riego con overdrive para cookies 1 y 3, la numero 2 tiene el ph un poco elevado (6.8) y no se esta alimentando tanto, aún no pidió riego y está con algunas hojas apenas quemaditas, igual vienen muy lindas.
Likes
8
Share


@Rinna
Follow
The ladies are still doing great and stacking very nicely! The leaves do look very very dark green with slight tip burns, so I doses down the nutrients slightly from 1100+ to 950 ppm! The grow light makes the leaves look more light green than they actually are (check the night shots) both pheno’s smell like a nice and strong gelato (vanilla/gas) 💪🏻
