Likes
Comments
Share
@Testy
Follow
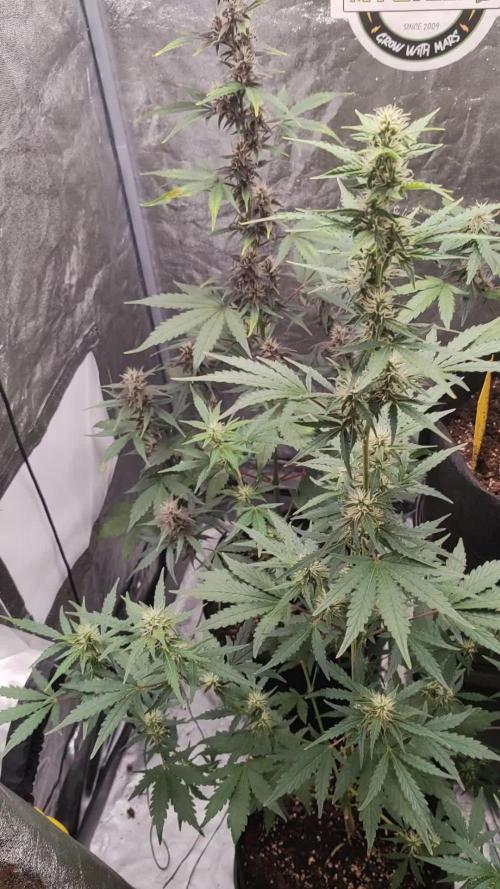
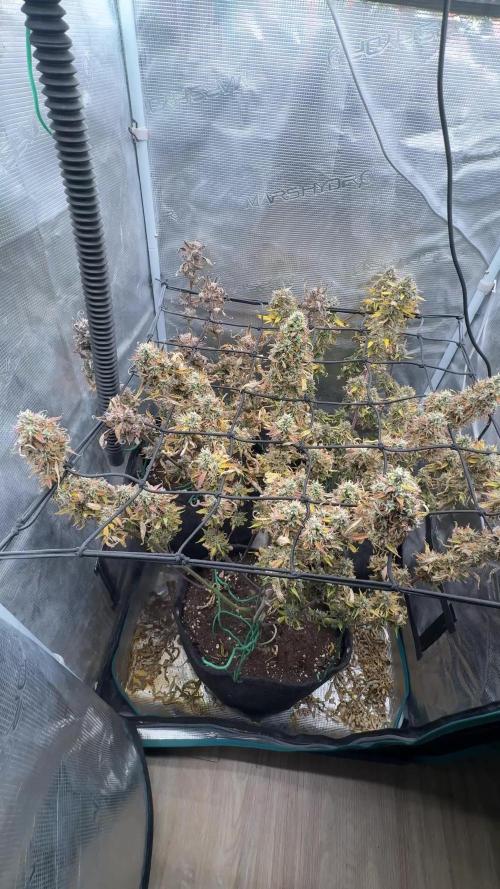
defoil some covercrop and some LST added some almicanna veg compost tea
Likes
1
Share
Se está viendo muy verde y saludable Tengo altas expectativas de esta nena... Tenemos que mudarnos a la tienda de cultivo espero poder seguir creciendo seguir Este calor está insoportable para todos!!!
Likes
28
Share
Week 6 of to a good start! They look happy and healthy. Time to flip to flower soon! 👽👉3/10 Climate is automated and working accordingly to my adjusted VPD settings. Happy and healthy, actually surprised they've grown so much lately. 👽👉4/10 Waiting for their complete recovery, so they can be flipped to flower (Defoliation the 30/9, im giving them about a week) 👽👉5/10 Water day* Plain ph balanced water. Need Runoff PH and EC down a little bit. 👽👉6/10 I applied the SCROG net. 👽👉7/10 Doing some minor tweaks to the setup + VPD settings(from 1.0 to 1.1). Approaching the flip to flower, so VPD Did a bit of defoliation before the flip next week 👽👉8/10 Today, i learned from research on biobizz nutrients https://www.thcfarmer.com/threads/biobizz-nutrients-answers-from-biobizz.78899/ (Direct answer from biobizz) With the answers, my view on feeding biobizz changed a bit, and i was luckily about to switch up the nutes. Good timing. Waterday* PH6.2 Introducing Biobizz CalMag(0.5ml/l) + BioBloom(0.25ml/l)+Topmax(0.25ml/l)+Rootjuice(0.25ml/l) Still 2ml/L Fishmix+BioHeaven(Fishmix will be switched out with BioGrow) 👽👉 9/10 Last day of the week for my plants and last day in veg! They look fantastic and well recovered at lights on! (Look at the before/after lights vids/pics) Raised VPD by 0.1: VPD settings(from 1.1 to 1.2)
Processing
Likes
49
Share
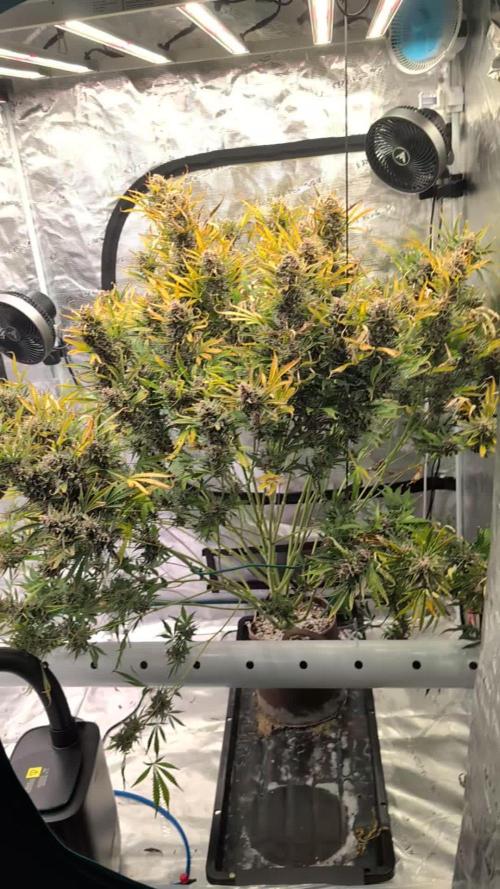
Hey everyone . This week she has developed further :-). The bush is slowly becoming a tree 😅. As usual, it smells very good and produces very nice buds. Next week the Ec will be increased a little more as soon as all the power goes into the buds 👍. I wish you all a lot of fun with the new update, stay healthy and let it grow 🙏🏻👍 Strain : Sour Diesel ☝️🏼😍 Genetic: Diesel x Northern Lights 👍 Vega Lights : 2 x Todogrow Led Quantum Board 100 W 💡 Flower Lights : 2 x Todogrow Led Cxb 3590 COB 3500 K 205 W 💡 ☝️ Soil : Canna Terra Professional + ☝️ Nutrients : Canna Terra Vega, Canna Terra Flores, Rizotonic, Cannazym, CANNA Boost, Pk 13/14, Canna Cal/Mag, Canna Ph - Grow, Canna Ph - Flores ☝️ 🌱 Water: Osmosis water mixed with normal water (24 hours stale that the chlorine evaporates) to 0.2 EG. Add Cal / Mag to 0.4 Ec Ph with Organic Ph - to 6.0 💦 💧
Likes
13
Share
I accidentally snapped a main branch off attempting to lst she is still the gassiest in the tent and the most frosty..this is my first grow I plan to harvest her in 2 weeks
Likes
38
Share
They are starting to get fat. I’m harvesting pink at the end of this week, still no obvious amber trichomes but she isn’t getting much fatter either, she has about 90% orange pistils. Canna cheese is maturing well, giving out crazy color combinations and getting thicker by the day, she’s next after pink kush.
Likes
7
Share
Another boring week in flower. One of the indigo childs is fading to yellow. Checked the trichomes and I'm starting to see some ambers. Will probably wait till 7.5 week. The rest of the indigos will probably go 8-8.5 weeks. The medipak needs a lot more time. Not a resinous as I would have liked to see at this point. But I have a feeling that it might be my fault with not providing them proper environment for a sativa. I also suspect there might have been a fungal issue from the medipak tent as one suddenly died. Classic fusarium. We shall see with the others.
Likes
17
Share
Einen wunderschönen guten Tag, liebe Grow-Community, und herzlich willkommen zur neunten Woche meines kleinen Outdoorprojekts! Heute dann doch mal wieder an einem Montag :). Ich habe es nach dem Mary-Jane-Wachenden leider noch nicht nach Hause geschafft. Allerdings habe ich paar Bilder vorproduziert, um hier nicht mit leeren Händen aufzutauchen. Ich bin die letzte Woche ein wenig durch die heimischen Wälder flaniert und habe den ein oder anderen Schatz bergen können. Aber alles der Reihe nach … Da ich messbedingt nicht bei den Pflanzen sein konnte und das mit dem Gießdienst an Dritte abgeben mal so, mal so funktioniert. Dachte ich mir, man muss der Verdunstung und der damit einhergehenden Trockenheit etwas entgegensetzen. Ich habe mich als kurz und knapp für eine Mulchschicht entschieden. Diese schützt nicht nur vor Austrocknung, sondern macht ebenso die obere Erdschicht für die Durchwurzelung brauchbar. Sie ist obendrein ein weiterer Schritt zu einem gesunden Bodennahrungsnetzwerk. Dieses wird durch die in dem auf dem Grünschnitt/Waldlaub enthaltenen Mikroorganismen (Protozonen, Wimperntierchen), welche durch das Belüften im Tank nochmals gefördert werden, noch einmal gestärkt. Last but not least führt der Mulch dazu, dass Schadorganismen das Einfallen in die obere Erdschicht erschwert wird. Aber was ist drin? Ähnlich wie schon beim Komposttee wird bakterienreiches organisches Material in einen Tank mit vorzugsweise Regenwasser gegeben und anschließend über einen gewissen Zeitraum belüftet (siehe Woche 5). Der wohl größte Unterschied zum Komposttee ist, dass wir eher auf das Material und nicht auf die Flüssigkeit aus sind. Dieses besteht zu ca. 90 % aus Grünschnitt (in meinem Fall eine Biokleintiermischung) und zu ca. 10 % aus Laub, welches ich in einem wenig bis gar nicht bewanderten Waldstück gesammelt habe. Die richtige Platzwahl: Bei der Platzwahl war mir wichtig, einen möglichst naturbelassenen Teil des Waldes auszusuchen, um eine Kontaminierung von bspw. Müll oder Hundeurin zu vermeiden. Ebenso habe ich nach Material Ausschau gehalten, welches schon Kontakt mit einem Pilzmyzel und dem ein oder anderen Regenwurm aufwies. Beides sind Indikatoren für ein gesundes Bodenleben. Zum Schluss … Nun einfach alles in einen großen Tank, Wasser drauf und Pumpe an. Belüftet wurde das Ganze für drei Tage. Danach das Material entfernen und luftig um die Pflanzen aus Ringen (leicht in den Boden einarbeiten). Um mit so wenig Waste wie möglich zu arbeiten, habe ich dann noch das Wasser gegossen. Dieses ist sehr reich an Mikroorganismen. Aber nun (besser spät als nie) noch ein paar Credits: Und zwar an Flo von Florganics, von dem ich das meiste Wissen um den Komposttee, die Erdmischung sowie auch das Mulchen bezogen habe. All die genannten Themen sind nochmal deutlich detaillierter auf seinem Yt-Kanal (Florganics) zu finden. Noch ein kurzes Wort zu den Damen: Soweit sehen alle sehr saftig und grün aus. Mit dem Toppen warte ich noch, bis ich wieder da bin. Alles in allem sollte am Ende doch ein wenig herauskommen (im Optimalfall 50 g/Person). Das war’s für diese Woche. Euch nun einen schönen Restmontag und einen guten Wochenstart. Peace
Likes
56
Share
Bonjour à tous les padawans et maîtres jedis Jour84 arrosage avec 2 litres d'eau ph6.3 Jour86 arrosage avec 2. 5litres d'eau ph6.3 Jour89 arrosage avec 2 litres d'eau ph6.3 LE MEILLEUR MOMENT POUR RINCER SON CANNABIS Le rinçage commence en général deux semaines avant la récolte. Si le plant a une période de floraison de huit semaines, le rinçage doit commencer six semaines après le début de la période de floraison. Il est préférable de regarder de près les trichomes sur le plant pour déterminer quand votre cannabis est prêt à être récolter. Si les petits trichomes commencent juste à passer d’une couleur transparente à une teinte laiteuse et blanche, c’est une bonne indication que les plants peuvent commencer à être rincés. Il faut s’arranger pour que la majorité des trichomes aient changé vers la couleur désirée pour la récolte après deux semaines – ça devient plus facile à faire avec l’expérience, alors accrochez-vous ! Le rinçage peut également être un bon moyen de remettre à zéro la terre quand un plant est toujours en phase de croissance végétative. Parfois, un cultivateur suralimente par accident son cannabis, ce qui provoque un changement de couleur et un flétrissement du bout des feuilles. Ceci est appelé une « brûlure par nutriments ». Rincer la terre peut éliminer les nutriments excédentaires, ce qui aide à résoudre le problème. Cependant, c’est une mesure drastique à ce stade de la culture, alors assurez-vous que le problème soit bien une brûlure par nutriments et non quelque chose d’autre. Le rinçage ne concerne pas que le moment de la récolte. Cette technique peut aussi être mise en place durant la phase de croissance afin de débarrasser le sol des nutriments. Bien évidemment, les nutriments permettent à votre plante de rester en bonne santé et vous assurent des rendements maximaux, mais une trop grande quantité peut causer une accumulation et un état statique durant lequel la plante ne peut plus y accéder. Le blocage des nutriments peut être causé par une accumulation saline ou des niveaux de pH incorrects. Ces deux causes peuvent être résolues par un rinçage de votre plante à l’eau claire. Les fluides viendront pousser les nutriments en dehors du substrat et le débarrasseront de l’accumulation, permettant ainsi aux racines de pouvoir accéder à nouveau aux nutriments. EMPÊCHER LE BLOCAGE D'ABSORPTION DES NUTRIMENTS AVANT QU’IL NE POSE PROBLÈME Au mieux, le blocage des nutriments peut être un problème, au pire, il peut être un vrai désastre. Comme le dit l’adage, il vaut mieux prévenir que guérir. Il vaut mieux prendre de l’avant pour empêcher le blocage des nutriments plutôt que de s’y atteler lorsque c’est trop tard. Empêcher le blocage des nutriments peut se faire par le biais d’un rinçage de routine. En rinçant vos plantes une fois avant la floraison et une fois au milieu de cette dernière, vous minimiserez l’accumulation de nutriments. LES ENZYMES À LA RESCOUSSE Après le rinçage pour contrer l’accumulation ou le blocage des nutriments, vous remarquerez peut-être que vos plantes ont une apparence vert foncé, c’est le signe d’un excès de nutriments. Dans ce cas, certains cultivateurs choisissent d’ajouter une formule riche en enzymes à leur substrat. Au cas où vous auriez oublié vos cours de biologie, les enzymes sont des protéines qui catalysent les réactions. Elles aident à rincer le substrat en décomposant l’amidon, les glucides et les nutriments. Il existe sur le marché toute une variété de produits qui contiennent des formules d’enzymes très efficaces. Si l’eau ne suffit pas à vos plantes, ces petites protéines ne feront qu’une bouchée de l’accumulation de nutriments ! COMMENT BIEN RINCER SON CANNABIS Rincer votre plant de cannabis est un processus simple. À chaque fois que vous apporteriez normalement des nutriments, vous rincez à la place. De l’eau du robinet non traitée est tout ce dont vous avez besoin pour rincer, assurez-vous juste que son pH est sans danger pour le cannabis. La plupart de l’eau de puits a un pH sain et ne nécessite pas de traitement, mais s’il est nécessaire de traiter l’eau de rinçage pour avoir un pH adapté, faites-le. Les ajustements du pH seront donc la seule chose à considérer. Inonder la terre avec autant d’eau fraîche qu’elle puisse contenir. Laissez l’eau durant quelques minutes pour qu’elle puisse absorber les nutriments, puis inondez la terre encore pour rincer les nutriments loin du plant. Si vous cultivez en intérieur dans des pots, notez la couleur de l’eau qui s’échappe du fond des pots. Elle sera tâchée et aura une couleur sale. C’est à cette étape qu’un appareil de mesure des TDS (Total des Solides Dissous) est utile. Si vous récupérez et mesurez le TDS de l’eau « évacuée », elle devrait avoir un taux de 1300ppm, ce qui est assez élevé. Il est important de rincer le plant jusqu’à ce que total baisse à un niveau de 50ppm, ou du moins qu’il s’approche du TDS de l’eau fraîche que vous utilisez pour rincer le plant. La couleur de l’eau d’évacuation va s’éclaircir et apparaîtra plus propre. Vous devez tirer autant que possible de minéraux dissous du plant. Comment et Quand Rincer les Plants de Cannabis Rincer les plants de cannabis avant la récolte peut faire la différence entre les meilleurs têtes ou la plus rude pour la gorge. Cette petite tâche est simple et facile à faire. Ajoutez juste de l’eau ! Attention car le moment du rinçage joue un rôle critique. Le b.a.-ba du rinçage de ses plants de cannabis. Sommaire: 1. Qu’est-ce que le rinçage ? 2. Le meilleur moment pour rincer son cannabis 3. Empêcher le blocage d'absorption des nutriments avant qu’il ne pose problème 4. Les enzymes à la rescousse 5. Comment bien rincer son cannabis 6. Comment rincer ses plantes en hydroponie 7. Les résultats du rinçage de son cannabis 8. Quand éviter de rincer son cannabis Vous avez enfin fini vos cultures et vous vous retrouvez avec un magnifique plant couvert de super têtes, maintenant sèches, vous avez fait le curing et vous êtes prêt à fumer – et pourtant quelque chose ne va pas. La weed semble ne pas vouloir se consumer et quand vous tirez une bouffée, c’est comme si on vous avait donné un coup de poing dans les poumons et vous toussez en craignant pour votre vie ! Le goût est rude et décevant. Si c’est une situation que vous avez vécue, il y a des chances pour que vos plants n’aient pas été rincés correctement avant la récolte. Cette fumée bien loin d’être agréable est provoquée par la présence dans le plant des nutriments et minéraux utilisés lors de la culture, ce qui altère la façon dont le plant se consume. Rincer le plant élimine ces nutriments restants, ce qui améliore la qualité des sensations. Heureusement, le rinçage des plants de cannabis se fait facilement et sans effort, et cela vous permet de produire des têtes douces et délicieuses en un rien de temps. ARTICLE LIÉ Comment Utiliser les Nutriments pour Cannabis QU’EST-CE QUE LE RINÇAGE ? L’acte de rincer un plant implique d’utiliser de l’eau pour éliminer tout nutriment présent dans la terre. Une grande quantité d’eau est passée à travers la terre et drainée sur une base régulière. Tous les minéraux et nutriments présents dans la terre sont rincés avec le temps avec l’eau, ce qui laisse une terre propre. Mais pourquoi vouloir éliminer tous les minéraux de la terre ? N’est-ce pas mauvais pour la récolte ? En fait, cela aide à la récolte de manière significative. Quand les nutriments sont éliminés de la terre, ceci force le plant de cannabis à utiliser tous les nutriments toujours présents dans le plant. C’est comme pour le corps humain. Quand on consomme beaucoup d’aliments, ce que nous n’utilisons pas est transformé en graisses. Dans les situations extrêmes où la nourriture est rare, le corps s’appuie sur cette graisse stockée pour tirer de l’énergie. Comme rincer force le cannabis à utiliser tous les nutriments restants dans le plant, aucun ne devrait rester et altérer les têtes récoltées. Cependant, si vous le faites trop tôt, cela peut nuire à la santé du plant, le moment est donc clé. LE MEILLEUR MOMENT POUR RINCER SON CANNABIS Le rinçage commence en général deux semaines avant la récolte. Si le plant a une période de floraison de huit semaines, le rinçage doit commencer six semaines après le début de la période de floraison. Il est préférable de regarder de près les trichomes sur le plant pour déterminer quand votre cannabis est prêt à être récolter. Si les petits trichomes commencent juste à passer d’une couleur transparente à une teinte laiteuse et blanche, c’est une bonne indication que les plants peuvent commencer à être rincés. Il faut s’arranger pour que la majorité des trichomes aient changé vers la couleur désirée pour la récolte après deux semaines – ça devient plus facile à faire avec l’expérience, alors accrochez-vous ! Le rinçage peut également être un bon moyen de remettre à zéro la terre quand un plant est toujours en phase de croissance végétative. Parfois, un cultivateur suralimente par accident son cannabis, ce qui provoque un changement de couleur et un flétrissement du bout des feuilles. Ceci est appelé une « brûlure par nutriments ». Rincer la terre peut éliminer les nutriments excédentaires, ce qui aide à résoudre le problème. Cependant, c’est une mesure drastique à ce stade de la culture, alors assurez-vous que le problème soit bien une brûlure par nutriments et non quelque chose d’autre. Flushing Le rinçage ne concerne pas que le moment de la récolte. Cette technique peut aussi être mise en place durant la phase de croissance afin de débarrasser le sol des nutriments. Bien évidemment, les nutriments permettent à votre plante de rester en bonne santé et vous assurent des rendements maximaux, mais une trop grande quantité peut causer une accumulation et un état statique durant lequel la plante ne peut plus y accéder. Le blocage des nutriments peut être causé par une accumulation saline ou des niveaux de pH incorrects. Ces deux causes peuvent être résolues par un rinçage de votre plante à l’eau claire. Les fluides viendront pousser les nutriments en dehors du substrat et le débarrasseront de l’accumulation, permettant ainsi aux racines de pouvoir accéder à nouveau aux nutriments. EMPÊCHER LE BLOCAGE D'ABSORPTION DES NUTRIMENTS AVANT QU’IL NE POSE PROBLÈME Au mieux, le blocage des nutriments peut être un problème, au pire, il peut être un vrai désastre. Comme le dit l’adage, il vaut mieux prévenir que guérir. Il vaut mieux prendre de l’avant pour empêcher le blocage des nutriments plutôt que de s’y atteler lorsque c’est trop tard. Empêcher le blocage des nutriments peut se faire par le biais d’un rinçage de routine. En rinçant vos plantes une fois avant la floraison et une fois au milieu de cette dernière, vous minimiserez l’accumulation de nutriments. LES ENZYMES À LA RESCOUSSE Après le rinçage pour contrer l’accumulation ou le blocage des nutriments, vous remarquerez peut-être que vos plantes ont une apparence vert foncé, c’est le signe d’un excès de nutriments. Dans ce cas, certains cultivateurs choisissent d’ajouter une formule riche en enzymes à leur substrat. Au cas où vous auriez oublié vos cours de biologie, les enzymes sont des protéines qui catalysent les réactions. Elles aident à rincer le substrat en décomposant l’amidon, les glucides et les nutriments. Il existe sur le marché toute une variété de produits qui contiennent des formules d’enzymes très efficaces. Si l’eau ne suffit pas à vos plantes, ces petites protéines ne feront qu’une bouchée de l’accumulation de nutriments ! Comment et Quand Rincer les Plants de Cannabis COMMENT BIEN RINCER SON CANNABIS Rincer votre plant de cannabis est un processus simple. À chaque fois que vous apporteriez normalement des nutriments, vous rincez à la place. De l’eau du robinet non traitée est tout ce dont vous avez besoin pour rincer, assurez-vous juste que son pH est sans danger pour le cannabis. La plupart de l’eau de puits a un pH sain et ne nécessite pas de traitement, mais s’il est nécessaire de traiter l’eau de rinçage pour avoir un pH adapté, faites-le. Les ajustements du pH seront donc la seule chose à considérer. Inonder la terre avec autant d’eau fraîche qu’elle puisse contenir. Laissez l’eau durant quelques minutes pour qu’elle puisse absorber les nutriments, puis inondez la terre encore pour rincer les nutriments loin du plant. Si vous cultivez en intérieur dans des pots, notez la couleur de l’eau qui s’échappe du fond des pots. Elle sera tâchée et aura une couleur sale. C’est à cette étape qu’un appareil de mesure des TDS (Total des Solides Dissous) est utile. Si vous récupérez et mesurez le TDS de l’eau « évacuée », elle devrait avoir un taux de 1300ppm, ce qui est assez élevé. Il est important de rincer le plant jusqu’à ce que total baisse à un niveau de 50ppm, ou du moins qu’il s’approche du TDS de l’eau fraîche que vous utilisez pour rincer le plant. La couleur de l’eau d’évacuation va s’éclaircir et apparaîtra plus propre. Vous devez tirer autant que possible de minéraux dissous du plant. COMMENT RINCER SES PLANTES EN HYDROPONIE Le rinçage des plantes en hydroponie est bien plus simple que de se débarrasser des nutriments en terre. Les cultivateurs en hydroponie pourront simplement drainer leur système et le remplacer par une eau au pH neutre. Le rinçage des plantes en hydroponie est aussi un processus bien plus court. Une fois que la réserve d’eau aura été modifiée, les plantes en hydro n’auront pas accès aux nutriments externes. Pour cette raison, un rinçage de deux jours suffira. LES RÉSULTATS DU RINÇAGE DE SON CANNABIS Après la récolte des têtes, prenez du temps pour bien faire le curing pour atteindre le potentiel le plus élevé. Un affinage correct par curing permet de réduire encore plus le côté rude des têtes, en éliminant des choses comme un excès de chlorophylle. Vous serez étonné de voir la différence que ce petite effort peut avoir sur votre produit. Tout votre travail se sentira dans la première bouffée de cette weed douce comme de la soie, qui caresse la gorge comme du miel. Le plus doux de la nature. Vous pouvez donc améliorer la qualité de votre cannabis en ajoutant juste de l’eau ! QUAND ÉVITER DE RINCER SES PLANTES Le seul moment où nous recommandons d’éviter le rinçage de son cannabis est lorsque l’on travaille avec une terre biologique amendée ou un super soil. Ces substrats ont été développés avec précaution afin d’héberger des micro-organismes bienfaisants tels que des bactéries ou des champignons. Cette délicate biodiversité pourrait être éliminée et endommagée par le rinçage. Une fois de plus, l’absence de rinçage ne devrait pas poser de soucis, car aucun nutriment externe ou synthétique n’aura été ajouté au substrat. À la place, les plantes comptent sur les micro-organismes pour décomposer la matière organique et la livrer aux racines. May the force be with you 💪
Likes
3
Share
@Ribemarti
Follow
Dia 38 de floración, Destacar el olor a chicle afrutado que hacen estas plantas es impresionante y mucha resina!! De las 19 plantas 3 han sacado expresion de la gelato, las demas todas de la bubblegum Estoy regando con 2,1 Litros por planta con una E.C de 1800 Partiendo de agua base a 400 ms y con la tabla de biobiz y el gold complet lo ajusto a 1800 ms P.H 6,5 y temperatura del agua de riego 22/ 23 grados Ahora ya empezaran a engordar hasta el dia de su corte, el banco dice entre 60/70 dias de floracion , veremos la proxima semana los avances que dan estas preciosas, ( OLOR MUY FUERTE A CHICLE AFRUTADO)
Likes
49
Share
6/15. Glad I listened to my intuition and held off watering. IT Rained andctheb again last night. Plants seem to be doingvreal well. Slight burn on lower leaves where it was before from being in the garage and I found on spot that LOOKED like it could've been caused by a pillar but it's right on a burn. I sefoliated one leaf. This is minor stuff. Next watering I'll be adding silica. I'm not giving nutes until the plants tell the need them. The 3 gallon ones may receive nutes first as they'll run out. I'll update as I progress. Went back over at 8:30. It's just overcast with showers. Plants seemed to like it. They all look good. Noticed a chunk out of a leaf and a POSSIBLE pillar spot. I'm going to have to get the BT out and and give the girls an application. I'm waiting until they settle in a bit more though. I need to start LST as well AND the light dep. Unfortunately "life" has made things difficult. I'll get back over there today though and I'll start the light dep. Kinda makes me wonder though. The 1pth planet I wanted to light deo is tge same size as the others in the much bigger containers. The thought came that maybe I should just hold on to them as extras in case something happens. I also am going to start silica next watering but it will be a few weeks before any nutes are given. UPDATE: WENT BACK OVER AT FIVE AND TOOK ACSHOT TON OF PICTURES. IM TRYING TO UOLOAD NOW. THINGS ARE POPPING OFF AND IM GETTING A NICE SWEET SKUNKY ODOR. WHILE I WASCTHERE WE GOT A QUICK SHOWER. DIDNT LAST MORE THAN TEN MINUTES BUT IT RAINED HARD. I FOUND A TEMPORARY SPOT TO LIGHT DEP THE TWO PURPLE PUNCH AND THE ONE TENTH PLANET. I DONT SEE ANY LIGHT LEALS AND ITS SURE AS HELL DARKER THAN IT IS AT NIGHT. I'LL SEE HOW IT GOES LEQVING THE COVER ON ALL NIGHT. IF IT DOESNT WORK I MAY JEED TO ADD A FAN OR CHANCECTHE SPACE. I ALMOST DIDNT WANT TO DO THIS AS THE 10TH PLANET IS KEEPING PACE WITH ITS SISTERS, DESPITE THE SMALLER POT. OH WELL I WANT TO GIVE IT A SHOT AND I DONT WANT MY CAGE OVER CROWDED. I'M LOOKONG TO DO A 6:30 TO 6:30 SCHEDULE. 6/16 First night of light dep for the three little ones. I won't be able to call them that soon. I'm currently trying to upload a video. My grow buddy mentioned the droopiness of a couple of my plants in this video and how I hadn't been watering. This kinda scared me so I ran over and checked the too few inches on the two that had a little droop and came out dry. I had some water already phed ready to go (I'm hoping that the ph doesn't change if it's stored a day or two) and used the gallon to moisten the dry topsoil. Looking back over my diary we have had nothing but rain. I then tried the "lift the pot method" and came to the conclusion that these bags were indeed still holding moisture. I assumed they would be considering the thunderstorms we've had. I held off on fullt watering because the weather said the next dry day is going to be Monday. Today is Friday so thats two solid days of rain. Three if you count today through the night. I concentrated my watering of the one gallon on the couple plants that appeared to droop. If it doesn't rain like they say it will I will need to water. I need to set up a decent watering schedule but I need it to hold off raining long enough to do so. UPDATE: I WENT BACK OVER AND PUT THE 3 GALS IN FOR BED AND CHECKED OUT THE REST OF THE GARDEN. I WATERED THE 3 GAL GIRLS A LITTLE MORE SINCE THEY WONT BE OUTSIDE. THE BIT OF WATER I GAVE SEEMED TO HELP LIFT SOME OF THE GIRLS. AT LEAST I THINK IT DID. THE RAIN SHOULDVE COME ALREADY. I WOULDVE WATERED MORE HAD THE BAGS NOT BEEN SO HEAVY. 6/17 Rained all night which is good. Brought the three transplants out but left them under the overhang so they. Dont get soaked. So far light depoing is going good. Well its only been two nights but we'll see. I'll update as I go. Not feeling well today. Went back over and checked on the plants and did a video. Probably won't get uploaded until tomorrow. I'm giving it a shot. It's raining in good shape. Plants looked fine when I was there. I need to get my supports and my trellis in place. Video won't upload. No suprise. I'll get it tomorrow. 6/18 Uploaded videos if they fuck up from me editing I'm gonna be pissed. Anyway it's still pouring with high winds. I added a couple supports where it looked like it needed it. I need to put my trellis up. I've been able to keep up with the light dep and those plants haven't been used and abused. They stay in the building facing the sun when the weather is this bad. I think they're looking great. I may start a new diary just for them. Sun came out around four. Trying to upload a couple videos but doesn't look like it's going to happen. Tucked the three little ones in at six. It had stopped raining and the wind died down some. If adverse conditions create good plants then I'm on the way to a great harvest. Minor bleaching and burns on a few lower fan leaves and some wrinkling on some from wind burn other than that plants seem to be acclimated. Did a video but will have to wait until tomorrow to upload 6/19 It's not raining! We got four inches this past storm lol. Having the bags raised on pollens I believe has greatly helped. As did the high winds that help dry the soil in the bag. Had to add a few temporary supports. Light dep is going good. Adjusted amd found a better spot. I'm considering getting "pool noodles" or some other thing like a Hulu hoops or pvc pipe and making either a frame on the roof for the entire cage or on top of each individual plants posts so I could roll clear plastic over it when it rains. I'm thinking about later on in the fall when this could really help. I found a roll of plastic. Also thought about putting that up on the back wall but I didn't. What I'm doing right now is working. I just need to keep up with it. I also need a solid watering schedule to stick too. It's hard when each plants needs are different. Oh well. I'm just happy to be growing again. I pray to the cannabis gods and the Lord above himself that I'm not plagued with the problems of last year. 6/20. I'm sick as fuck but I got the little girls out in the sun. Light dep is going good. Plants look great. I'll update when I feel better and if I do anything. Still feel like shit. Luckily I looked up just in time to get to the grow and put the little ones to bed. They were thirsty (especially the bushy 10th planet so I gave them about 3/4 of a gallon of water. Got lots of run off from 10th planet. Didn't notice as much from the others but I was hurrying. I'll upload later. Still sick. 6/21 Plants seem to be doing great. I removed some lower growth on a few just to see how they respond. I'm going to do some defoliation down low and I want to see how the plants respond. I'm planning my first full watering Thursday as we have a real good stretch of weather after that. Grow bags are still heavy as hell so they have sufficient water. I'll be adding silica nextcl watering. Not time for nutes but I think it would be okay to start the silica and in another week I might start small doses of nutes. The light dep on the little girls is go8ng great! It's cool I'll get to sample some of these strains before fall. I'll update after I do something. Tucked the girls in at 6. I might need to think about transplanting that 10th planet in the 3 gallon. I watered until runoff yesterday and it's light as hell today. Plus I fimked it and it's bushy as hell. I've Bern turning it si it gets all angles of the sun. I have a bag of 707 left and a 5 gallon bucket with holes drilled all over it like an air pot and a ten gallon grow bag. This will take some thought. Hot af today. I wad able to lift the grow bags so I decided tomorrow will be the girls first real watering. I think I'll be adding silica and possibly kelp me kelp you due to the heat stress I've been noticing. Nothing bad just a few tacoed leaves. I've had several people that have seen my grow in person tell me that this is by far the healthiest (not biggest I've had bigger) but by farcthe healthies5 crop I've grown. They believe I'll have my best year ever this year. I hope they are right. Vid won't be uploaded until tomorrow. 6/22 WATERED TODAY. I'm still a little gun shy with watering. That fusarium last year pretty much traumatized me. I left the container plants alone. I gave them a little water but not enough to do much. I used a pump sprayer on a mist setting and went one by one and back around gently watering the entire medium. This took forever and I'll be finding a different way to water. I hope this was enough water. I'll check later on and if they look like they want more I give it to them. I started LST on the light dep 10th planet and tucked some branches of a another under the tomato cage. I had missed that earlier. I also went around and cleaned up the bottoms on most. Getting rid of things that will amount to nothing. I noticed what looked like thrip damage on ONE leaf on ONE plant. I also saw a chunk missing from a grasshopper bite and a finger of a fan leaf petiol was broken so I'm going to need to get my ipm up and running. I'm unsure whether I'll be using chemicals or predators. Probably BT and spinosad. That's what I've had the best luck with. I also noticed bottom leaves dying off on the bottom of a couple plants. It was where the burns were though so I'm almost 100% its just related to the light burns they got when i first put them up. I'll be updating the diary as I do more stuff.
Likes
11
Share
@Souri93
Follow
Belle floraison avec des tache violette
Processing
Likes
Comments
Share
@maxpain
Follow
Looking good smelling great ....
Likes
48
Share
@McBubatz
Follow
14. Woche, P1 fällt morgen, die ist soweit gut denke ich (ca. 20% aufwärts Bernstein Trichome). P2 braucht leider noch ca. 1 woche länger. 93. Tag ist für P1 das Ende, sie wurde heute vorgetrimmt und zum trocknen aufgehängt. Ergebnisse gibt es wenn die P2 auch geerntet wird, denke nächste Woche um die Zeit. Aber eins kann ich euch versichern, is mit Abstand die schwerste die ich ist jetzt hatte😊🍀🍀. Gebt euch auch mal wie viele Trichome die gute produziert hat, Duft is noch sehr pflanzlich, Blüten sind ziemlich fest gewesen hoffe das es nach dem trocknen noch so ist. Alles in allem super Run. Hoffentlich is die gute bei den Top 10 das wäre ein träumchen, wobei ich es wirklich jedem gönne zu gewinnen und bei soviel starker Konkurrenz geht ich wahrscheinlich unter. ABER was ein geiler Contest trotzdem, hier ein dickes fettes Dankeschön an Zamnesia und Plagron für die Möglichkeit hier überhaupt mitmachen zu dürfen 🙏💙💜 98. Tag , werd die gute am Samstag/Sonntag je nachdem wie ich Zeit finde, umlegen und zum trocknen aufhängen.
Likes
110
Share
@FoTwenny
Follow
⏹️⏹️⏹️⏹️⏹️⏹️⏹️⏹️ ⏭️ WEEK 7 - BLOOM ⏮️ ⏹️⏹️⏹️⏹️⏹️⏹️⏹️⏹️ ⏭️ Sept.19 - Sept. 25 ⏮️ ⏹️⏹️⏹️⏹️⏹️⏹️⏹️⏹️ 🙋‍♀️Fo' Twenny here!🙋‍♀️ Back with another update on our Grandaddy Purple cultivar from breeder Blimburn Seeds! It's week 7 and all is looking great! She is getting super frosty and starting to present some really nice purpling. She smells of fuel right now. She is incredibly resinous and frosty! She was great the first time I ran her, but she is on a whole other lever under these quantum boards! This is going to be some very potent medicine! Now on to the details! ________________________________ 9/20 - Day 44 of Bloom: 🚿FEED DAY!🚿 She received approximately 3.25 gallons of nutrient solution. Of 10 gallons mixed, 36 oz is divided by 3 autoflowers and the remainder of the solution was shared by 3 plants. 👩‍🔬NUTRIENT SOLUTION👩‍🔬 ⬇️Mixing Rundown⬇️ 12 oz tap H2O run through x2 KDF filters Start ppm 630 Start ph 7.8 .5 tsp/gal Fox Farm Gringo Rasta Cal-Mag 1.5 tsp/gal Fox Farm's BIG Bloom 1 tsp/gal Fox Farm's Grow Big 1 tsp/gal Fox Farm's Tiger Bloom .5 tsp/gal Fox Farm's Kelp Me Kelp You 1.5 tsp/gal Fox Farm's BEMBÉ .125 tsp/gal Fox Farm's Cha-Ching pH: 5.8 I always make sure pH is in the range of 6.0- 6.6 prior to adding any microbial innocclants. pH already in range, no adjustments needed. Add 5 tsp of pH up pH: 6.1 1 tsp/gal Grower's Choice Recharge .6 ml/gal Mammoth P. pH: 6.3 PPM: 1430 ________________________________ 9/23 - Day 47 of Bloom: Photoshoot and filming! 📸 Some light selective defoliation. 🌿 ________________________________ 9/25 - Day 49 of Bloom: I have been regularly checking the moisture 💦 level in my medium and she still isn't quite ready for her next watering. Based off where it's at now, I will plan to water tomorrow. _________________________________ Want to see all the strains I have running? Please check out my other diaries & give me a follow! Happy growing my friends! ☺️🌱 Thank you for stopping by my garden! Peace, ☮️✌️ Love, 💚🤟 & Frosty Nugs! ❄️🌲 - Fo' Twenny
Likes
5
Share
Привет садоводы мой цветок потихоньку растет цвет листьев хороший завтра я буду пересаживать ее в горшок побольше 17 день и растение уже показало пол но странно , кажется немного рано ?!
Processing
Likes
11
Share
Week 5! GG4 finished week 4 on a rough note, she drooped hard overnight from 07/15 into 07/16, I'll will feed her an extra 1 liter of water + nutes this week, to prevent this from happening again. Aside from the early drying out, bud sites continue to develop nicely and she's got a good smell to her now as well as stickyness starting to appear.