The Grow Awards 2026 🏆 


Likes
Comments
Share
@Dennis_Bong
Follow
!!!!!!!!!!!!!!!!!!!!!!!!!!!!!!!!!!!!!!!!!!!!!!guckt euch letzen Report an !!!!!!!!!!!!!!!!!!!!!!!!!!!!!!!!!!!!!!!!!!!!!!!!!!!!!!
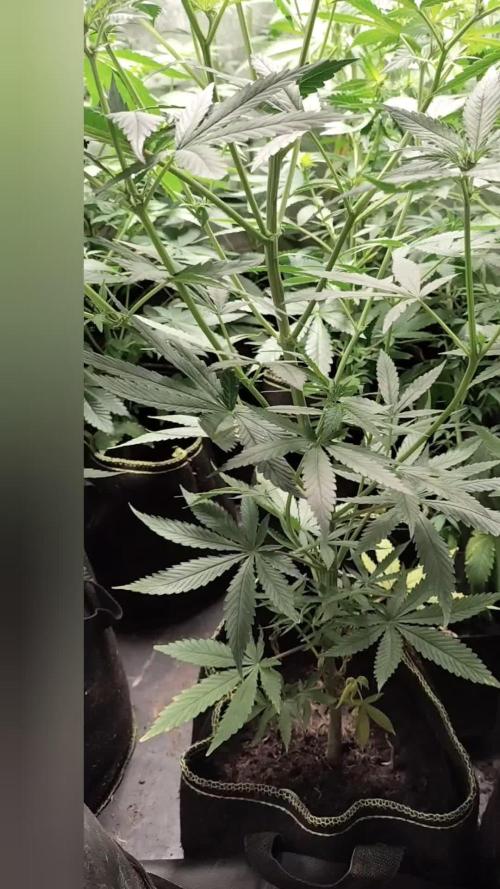
Blüte hat begonnen:
Edit:11.05
Die Pflanzen sind innerhalb von 2 Tagen explodiert. Ich habe das Licht nun auf 75 Prozent gestellt und noch einmal Cal-Mag nachgegeben, da die letzte Gabe nur eine halbe war. Die beiden Titan sehen fast identisch aus. Die beiden Epsilon sind circa 3 Tage unterschiedlich, eine ist etwa 5 cm kleiner als die andere und hat noch kaum Blüten. Ich denke, in 3 Tagen wird das der Fall sein. Die Cosmos F1 ist im Umfang circa 50-50 cm, kaum Blüten bisher. Ich hoffe, sie wird nicht noch viel größer, da der Platz langsam eng wird. Ich bin von dem Wachstum dieser Pflanze absolut begeistert. Mal gucken, was die Blüte bringt.
Edit ende
Ich habe alle Blüten entfernt, die nicht im direkten Licht sind, und alle Blätter, die die Blüten bedecken.
Die Pflanzen weisen einen Cal-Mag-Mangel auf, was bei der Blüte normal ist, gerade bei diesem Licht.
Ich habe dem Gießwasser etwas Cal-Mag hinzugefügt.
Die Pflanzen sind drei Tage älter als im letzten Report.
letzte Woche :
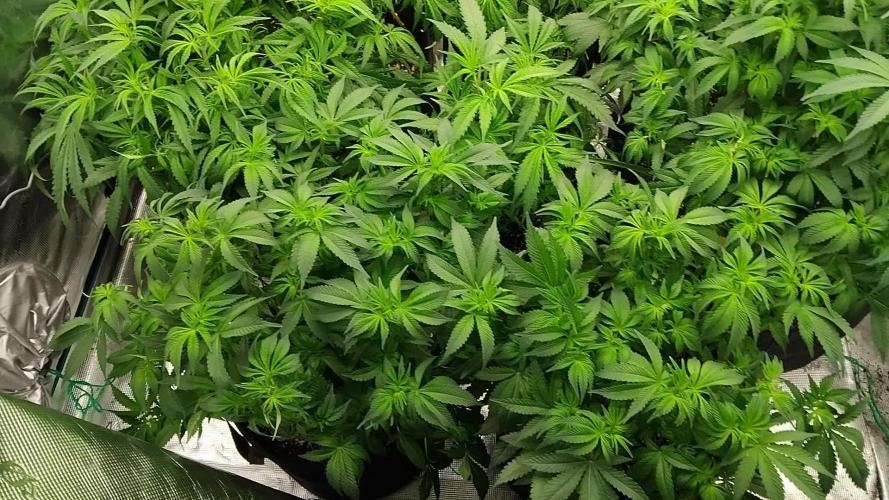
Die Pflanzen sind seit der Keimung auf diesen Fotos genau 30 Tage alt.
Ich habe eine Pflanze ausgetauscht, da es sich um eine Epsilon F1 handelte, die vermutlich Mutationen aufwies. Sie hatte verkümmerte Blätter, die nicht wie die ihrer Artgenossen aussahen, und wuchs deutlich langsamer. Daher habe ich sie nach 2,5 Wochen ausgetauscht. Der kleine Mann(die ausgetauschte Pflanze) leidet natürlich jetzt ein bisschen unter Lichtstress, deswegen werde ich wohl nur eine sehr gestauchte Pflanze erhalten. Aber besser, als die Fläche leer zu lassen.
So viel zu dem, was nicht funktioniert hat:
Die Sanlight stand die ersten 2 Wochen auf 20 Prozent.
Dann habe ich sie teilweise mit dem Dimmer höher gestellt: 2 Stunden auf 25 Prozent.
Eine Woche später bin ich auf 30 Prozent und 2 Stunden mit 35 Prozent gegangen.
Für Woche 4 habe ich 40 Prozent und 2 Stunden auf 45 Prozent gewählt.
Ich erhoffe mir, die Pflanzen so schneller an die starken Lampen zu gewöhnen.
Im Nächsten grow soll bei jeder Pflanze die TDS per Infrarot gemessen werden. Da werde ich dann ein Experiment zu machen, wie die Lichtsteigerung am besten umzusetzen ist.
Zu den Lampen kann ich bis jetzt nur Positives sagen. Im Gegensatz zur dazugehörigen App, diese ist wirklich nicht sehr gut umgesetzt. Das Menü und die Einstellungen sind teilweise irreführend und nicht sehr durchdacht. Ich muss mir immer wieder die Tutorials in der App ansehen, da diese immer wieder angezeigt werden.
Noch dazu hätte ich gerne die Möglichkeit, mehr Einstellungen treffen zu können. Das ist aber Meckern auf hohem Niveau, weil auch die App das macht, was sie soll, nur eben meiner Meinung nach nicht sehr gut umgesetzt.
Die Pflanzen wurden von mir mit Klipsen aus dem 3D-Drucker gestützt. Diese Klips kann man Stück für Stück im Winkel verstellen, so dass man die Triebe damit neigen kann. Das habe ich von Tag zu Tag im Winkel verstellt, so dass ich am Ende einen 45-Grad-Winkel habe. Das habe ich insgesamt über 6 Tage gemacht.
Die Pflanzen haben an sich ein sehr gleichmäßiges Wachstum. Die Cosmos F1 wächst so optimal, dass kein LST mit den Klipsen nötig ist. Ich habe an den Pflanzen keine Mängel entdecken können und auch keine Anzeichen von Mutationen.
Die Pflanzen haben im Durchschnitt eine Höhe von 35 cm, wobei eine etwas stärker abweicht mit 22 cm (wieder eine Epsilon F1). Der Umfang mit LST bei der Cosmos F1 liegt ohne LST bei 20 cm im Durchschnitt, wo wir wieder die Epsilon im Negativen haben mit 14 cm.
Die Pflanzen wurden alle entlaubt, das eine Woche vor der Blüte. Morgen werden die Pflanzen erneut entlaubt und ge-lollipoppt.
!!!!!!!!!!!!!!!zusätliche infos werden morgen ergänzt + Fotos !!!!!!!!!!!!!!!!!!!!!!!!!!!!!!!!
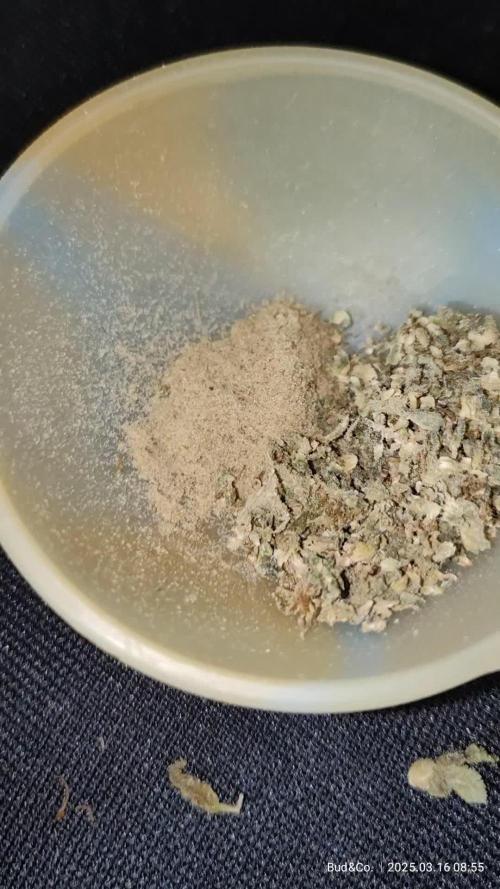
*1. Foto Mutation:
Dieses Foto wurde nur 5 Minuten nach dem Umtopfen der Pflanze aufgenommen. Vorher stand sie in einem größeren Topf, in dem sie genauso aussah. Ich habe sie umgetopft, weil ich den Topf brauchte, aber die Pflanze nicht wegwerfen wollte. Der Pflanze geht es gut, aber sie sieht im Moment etwas mitgenommen aus. Bilder folgen

Likes
109
Share
@MadeInGermany
Follow
Welcome
to the
Green House Seeds Company Cup 🏆.
Harvest day 73
Hey all together 🤗.
Today there is a short update on the harvest before the last update comes with the finished harvest 😄.
I can only say it again and again, the buds look beautiful, and it was very pleasant to cut in terms of the leaf / bud ratio 😍.
After standing in the darkroom for 48 hours, it was finally harvested 😝.
The buds were all sterile with Tool trimmed neatly by hand ✂️.
Then they came back into the darkroom on the net, where they are now gently dried for the next 7-14 days at 62% humidity and 22 degrees temperature, before they are first put in jars with Boeveda pack 62%, which takes another 2 weeks is exchanged for Boveda 58%.
But more about that in the last update, until then I wish you all a lot of fun with the update, stay healthy 🙏🏻 and let it grow ☘️🍀
You can buy this Strain and Nutrients at :
https://greenhouseseeds.nl/
☝️🏼☝️🏼☝️🏼☝️🏼☝️🏼☝️🏼☝️🏼☝️🏼☝️🏼☝️🏼☝️🏼☝️🏼
Green House Seeds Company Cup 🏆
Type:
Wonder Pie
☝️🏼
Genetics:
Wedding Cake x OG Kush
👍😍
Vega lamp: 2 x Todogrow Led
Quantum Board 100 W
💡
Flower Lamp : 2 x Todogrow Led
Cxb 3590 COB 3500 K 205 W
💡💡☝️🏼
Earth: Canna Bio
☝️🏼
Fertilizer: Bio Grow Feeding ( GHSC ) , Enhancer ( GHSC ) , Bio Bloom ( GHSC)
☝️🏼🌱
Water: Osmosis water mixed with normal water (24 hours stale that the chlorine evaporates) to 0.2 EC. Add Cal / Mag to 0.4 Ec Ph with Organic Ph - to 6.0


Likes
8
Share
@GreenPlanet
Follow
There we go again :)
No time to waste so let's started!
Growbox 40x40x120cm with the sanlight m30 for Veggie and this time for flower i will use the Mars Hydro TS 600
Strain Type: Feminized
THC: 18%
CBD: Low
Yield Indoor : 475 - 525 gr/m2
Yield Outdoor: 450 - 500 gr/plant
Height Indoor: 60 - 100 cm
Height Outdoor: 100 - 170 cm
Flowering time: 7 - 9 weeks
Genetic Background: Sweet Special x O.G. Kush
Type: Sativa 40% Indica 60%
Effect: Physically stoned
Climate: Mild
Flavor: Citrus, Sweet
Likes
20
Share
@Hawkbo
Follow
Sorry for the delay was in a wedding this weekend came home and been trimmin like a dog the past few days and didnt have time to do the update but I'll do another one before tuesday to get back on track. As of Friday sept 6 its day 46. In the video the plants from back left to right are ..
Gelato-> Cream Cookies -> Gelato
Middle row from left to right are Lemon A.K 1 -> 6 Shooter-> Lemon A.K
Front is Tester 5 -> Lemon A.K -> Tester 26

Processing
Likes
7
Share
@Ruuddata
Follow
#Crop King Seeds
Planting 3 Seeds Using 2 Different Techniques to germinate the Seeds
- The First 2 Seeds were germinated (Jul 2nd) using the water / paper towel technique
* The seeds were dropped in a half glass of bottled water (It stayed afloat) and kept in a closed dark area.
* After 12 Hours the 2 seeds were pushed down to reach the bottom of the glass using my finger.
* After 24 hours the 2 seeds were transferred / Now using the paper towel method to complete the germination
- The last seed was germinated (Jul 3) using just the paper towel method
* This method took longer to break the seed surface.
On Jul 6 Decided to transfer all 3 seedlings into the Aerogarden.
* Seed G1 had about 5cm roots. Some flowers already sprouting
* Seed G2 had about 3 cm roots. Still had seed top.
* Seed G3 had only just cracked . No length


Processing
Likes
4
Share
@Grownewgenetics
Follow
These is a project in the we try (test) tge products of our sponsors to see how good they genetics are, for example we have know 6 seeds banks on these round.
Sweetseeds with the dark devil auto have break the time record for seed on the ground , 20 hours , only these tine have the seeds from sweetseeds on the soil and they just jump out to 2 cm , simple amazing

Likes
4
Share
@losgrowershermanos
Follow
Cultivo de 2 Super Lemon Haze com Fertilizante Flowermind em vasos de 17 litros. Compostos de 70% Carolina Soil, 30% Hummus de minhoca


Processing
Likes
5
Share
@Hexus
Follow
Days 78-84 - Been lax in updates, but I still log every week to completion. Back injury in addition to The Nineteen, Rona Style, has been a bit of a pain in the posterior. (That means ass) Plants are gigantic and sassy. Had Dangergirl come out and defoliate/lollipop the bottoms out of the girls, saving me painful labor and increasing my yields, so yay for her! Plants are happy, pompoms are getting thick, and everything looks good. Switched FF01 to flower on day 84.

Likes
4
Share
@Xpie77
Follow
Hier is het kweekverslag voor week 1 van de bloeifase van je American Patriot planten van Weedseedsexpress. Deze overgangsweek luidt het begin van de bloei in. Je kweekt nog steeds met een Mars Hydro 450W LED, 11-liter potten en potgrond.
---
🌸 Kweekverslag – American Patriot (Weedseedsexpress)
📅 Week 6 totaal / Week 1 Bloei
Fase: Overgang van groei naar bloei
Lichtschema: 12/12
Verlichting: Mars Hydro 450W LED
Potmaat: 11 liter
Medium: Potgrond
Temperatuur: 24–26°C (dag) / 18–21°C (nacht)
Luchtvochtigheid: 45–50%
Afstand lamp – top: ±30–35 cm
---
🔄 Veranderingen deze week:
Lichtcyclus aangepast van 18/6 naar 12/12
Planten reageren zichtbaar: internodale stretch gestart
Eerste bloeiverschijnselen zichtbaar (witte haartjes bij topjes)
---
🌿 Structuur & Groei:
Hoogte explosief: +5–10 cm sinds begin week
Planten worden slanker, maar strekken krachtig omhoog
Takken verstevigen zich vanzelf — geen ondersteuning nodig (nog)
Toppen beginnen zich te vormen (voorbloei)
---
💧 Water & Voeding:
Watergift: ±1.5 liter per plant, 2–3 keer per week
pH: 6.3
Voeding aangepast voor bloei:
Bio-Bloom: 1 ml/L
Bio-Grow: 0.5–1 ml/L (voor ondersteuning groei)
Top Max (optioneel): 0.5 ml/L (voor bloeistimulatie)
---
Observaties:
Geur: Licht toegenomen, kruidig en zoet
Bladeren: Gezond donkergroen
Geen tekorten zichtbaar – blad licht glanzend, steng

Likes
36
Share
@Salokin
Follow
Training has been continued. She is developing very nicely. As of today she has been switched to 12/12, as the net starts to get busy and anticipating another stretch I thought it would be time.

Likes
9
Share
@0JuJu0
Follow
Planted in 25L Pot with pre-fertilized compost soil and a little bit of coco, perlite and little pieces of old woodsticks.
As a fly protection i use spiders and there web to solve this problem because thats the only one i have. So when you see in my tent, webs and the little bit of soil on the bottom what keeps the tentfloor dry and is also good for the spiders, please keep that in your mind.
Likes
31
Share
@Mr_ZAF_Budz
Follow
Hello Canna Fam
Firstly thank you for stopping by and I hope you enjoy my diary entry.
So week 9 has come to an end and the ladies are slowly stacking on the buds. There is a bit of either calcium, manganese or magnesium deficiency after the late flowering gorilla glue finished her stretch but I think I have managed to correct the problem.
Some of the buds on the LSD-25 seem to be foxtailing, possibly due to light stress and being so close to CMH light.
The trichome production is really starting to build nicely and I will start to flush in a weeks time for 2 weeks, therefore pushing the ladies to 12 or 13 weeks before harvest. The late flowering Gorilla Glue will most likely only be ready to harvest in another 4-5 weeks.
Thanks again and happy growing✌️🏼
Likes
18
Share
@DogDoctorOfficial
Follow
Week 7 VEG – The White OG (Seedsman Seeds)
This week was all about shaping, training, and refining. We stepped into the art of mainlining, guiding her structure into perfection while giving her the space to shine. A little seduction, a little discipline, and a whole lot of plant love. 😏✨
🌿 Mainlining: The Art of Balance
Mainlining isn’t just training—it’s sculpting. By evenly distributing energy and growth, we create a strong, symmetrical plant that’s ready to thrive.
🔹 Topped and trained – Ensuring equal energy flow and balanced growth.
🔹 Leaving two nodes per branch – Structuring her for a powerful, even canopy.
🔹 Guiding her gently – With the right support, she bends but never breaks.
🍃 Defoliation: Light, Air, and Growth
Less is more when it comes to defoliation! The goal? More light penetration, better airflow, and a happier plant.
💡 Removing lower leaves – Redirecting energy to the most important growth points.
💨 Improving airflow – Keeping her environment fresh and reducing moisture buildup.
🌞 Allowing deeper light penetration – No more shadows, just pure, even growth.
🔥 The Studio Treatment
This week, she got the VIP studio treatment—out of the tent, under the lens, and shining against that sleek black background. Sometimes, you just have to appreciate the beauty of the work in progress.
Tent Conditions & Feedings
🔸 Temps: Around 18°C – a little chilly, but she’s handling it like a champ.
🔸 RH: 60% – Keeping that balance for steady veg growth.
🔸 Feed: Still running Aptus Holland’s organic-mineral lineup—strong, steady, and full of potential.
🔸 Lights: Future of Grow LED, 200 PPFD—keeping her compact and thriving.
💚 Shoutouts & Love
Huge thank you to the amazing sponsors and supporters!
🌱 @Seedsman @AptusHolland @FutureofGrow @TrolMaster @ProMixSoil @Cannakan
🌍 Special shoutout to the entire Grow Diaries family, the followers, the lovers, the haters—this one’s for you all!
👀 New episodes dropping weekly on YouTube! Come check it out! SeedsmanSeeds - DOGDOCTOR 10% off discount code is live!
🔥 Mainlining, training, defoliating—it’s all part of the dance. Let’s keep this beauty thriving!
Bonus Content: New Episodes Weekly on YouTube! 🎥
Don’t forget to check out my YouTube channel for weekly episodes with tips, tricks, and behind-the-scenes action. Links are in the profile—come join the fun!
Growers Love! 💚
DISCOUNT CODE - SeedsmanSeeds - DOGDOCTOR 10% off
As always thank you all for stopping by, for the love and for it all , this journey of mine wold just not be the same without you guys, the love and support is very much appreciated and i fell honored and so joyful with you all in my life 🙏
With true love comes happiness 💚🙏 Always believe in your self and always do things expecting nothing and with an open heart , be a giver and the universe will give back to you in ways you could not even imagine so 💚
Friendly reminder all you see here is pure research and for educational purposes only
💚Growers Love To you All and remember to keep that smile big and alive 💚

Likes
6
Share
@BudeCo
Follow
Everything is ok
Growing faster than i wish.
I should defoliation again and put some clips tomorrow.
Need some topping after almost a week.
Its health and fine.


Likes
Comments
Share
@Topshelf_only
Follow
5 day since switching to 12/12 did a bit of defoliation tonight .both plants are already feeling quite sticky and there is not a pistol insight yet. The cyco additives definitely make a huge difference to the nuggets at the end


