The Grow Awards 2026 🏆 


Likes
Comments
Share
@Dennis_Bong
Follow
!!!!!!!!!!!!!!!!!!!!!!!!!!!!!!!!!!!!!!!!!!!!!!guckt euch letzen Report an !!!!!!!!!!!!!!!!!!!!!!!!!!!!!!!!!!!!!!!!!!!!!!!!!!!!!!
Blüte hat begonnen:
Edit:11.05
Die Pflanzen sind innerhalb von 2 Tagen explodiert. Ich habe das Licht nun auf 75 Prozent gestellt und noch einmal Cal-Mag nachgegeben, da die letzte Gabe nur eine halbe war. Die beiden Titan sehen fast identisch aus. Die beiden Epsilon sind circa 3 Tage unterschiedlich, eine ist etwa 5 cm kleiner als die andere und hat noch kaum Blüten. Ich denke, in 3 Tagen wird das der Fall sein. Die Cosmos F1 ist im Umfang circa 50-50 cm, kaum Blüten bisher. Ich hoffe, sie wird nicht noch viel größer, da der Platz langsam eng wird. Ich bin von dem Wachstum dieser Pflanze absolut begeistert. Mal gucken, was die Blüte bringt.
Edit ende
Ich habe alle Blüten entfernt, die nicht im direkten Licht sind, und alle Blätter, die die Blüten bedecken.
Die Pflanzen weisen einen Cal-Mag-Mangel auf, was bei der Blüte normal ist, gerade bei diesem Licht.
Ich habe dem Gießwasser etwas Cal-Mag hinzugefügt.
Die Pflanzen sind drei Tage älter als im letzten Report.
letzte Woche :
Die Pflanzen sind seit der Keimung auf diesen Fotos genau 30 Tage alt.
Ich habe eine Pflanze ausgetauscht, da es sich um eine Epsilon F1 handelte, die vermutlich Mutationen aufwies. Sie hatte verkümmerte Blätter, die nicht wie die ihrer Artgenossen aussahen, und wuchs deutlich langsamer. Daher habe ich sie nach 2,5 Wochen ausgetauscht. Der kleine Mann(die ausgetauschte Pflanze) leidet natürlich jetzt ein bisschen unter Lichtstress, deswegen werde ich wohl nur eine sehr gestauchte Pflanze erhalten. Aber besser, als die Fläche leer zu lassen.
So viel zu dem, was nicht funktioniert hat:
Die Sanlight stand die ersten 2 Wochen auf 20 Prozent.
Dann habe ich sie teilweise mit dem Dimmer höher gestellt: 2 Stunden auf 25 Prozent.
Eine Woche später bin ich auf 30 Prozent und 2 Stunden mit 35 Prozent gegangen.
Für Woche 4 habe ich 40 Prozent und 2 Stunden auf 45 Prozent gewählt.
Ich erhoffe mir, die Pflanzen so schneller an die starken Lampen zu gewöhnen.
Im Nächsten grow soll bei jeder Pflanze die TDS per Infrarot gemessen werden. Da werde ich dann ein Experiment zu machen, wie die Lichtsteigerung am besten umzusetzen ist.
Zu den Lampen kann ich bis jetzt nur Positives sagen. Im Gegensatz zur dazugehörigen App, diese ist wirklich nicht sehr gut umgesetzt. Das Menü und die Einstellungen sind teilweise irreführend und nicht sehr durchdacht. Ich muss mir immer wieder die Tutorials in der App ansehen, da diese immer wieder angezeigt werden.
Noch dazu hätte ich gerne die Möglichkeit, mehr Einstellungen treffen zu können. Das ist aber Meckern auf hohem Niveau, weil auch die App das macht, was sie soll, nur eben meiner Meinung nach nicht sehr gut umgesetzt.
Die Pflanzen wurden von mir mit Klipsen aus dem 3D-Drucker gestützt. Diese Klips kann man Stück für Stück im Winkel verstellen, so dass man die Triebe damit neigen kann. Das habe ich von Tag zu Tag im Winkel verstellt, so dass ich am Ende einen 45-Grad-Winkel habe. Das habe ich insgesamt über 6 Tage gemacht.
Die Pflanzen haben an sich ein sehr gleichmäßiges Wachstum. Die Cosmos F1 wächst so optimal, dass kein LST mit den Klipsen nötig ist. Ich habe an den Pflanzen keine Mängel entdecken können und auch keine Anzeichen von Mutationen.
Die Pflanzen haben im Durchschnitt eine Höhe von 35 cm, wobei eine etwas stärker abweicht mit 22 cm (wieder eine Epsilon F1). Der Umfang mit LST bei der Cosmos F1 liegt ohne LST bei 20 cm im Durchschnitt, wo wir wieder die Epsilon im Negativen haben mit 14 cm.
Die Pflanzen wurden alle entlaubt, das eine Woche vor der Blüte. Morgen werden die Pflanzen erneut entlaubt und ge-lollipoppt.
!!!!!!!!!!!!!!!zusätliche infos werden morgen ergänzt + Fotos !!!!!!!!!!!!!!!!!!!!!!!!!!!!!!!!
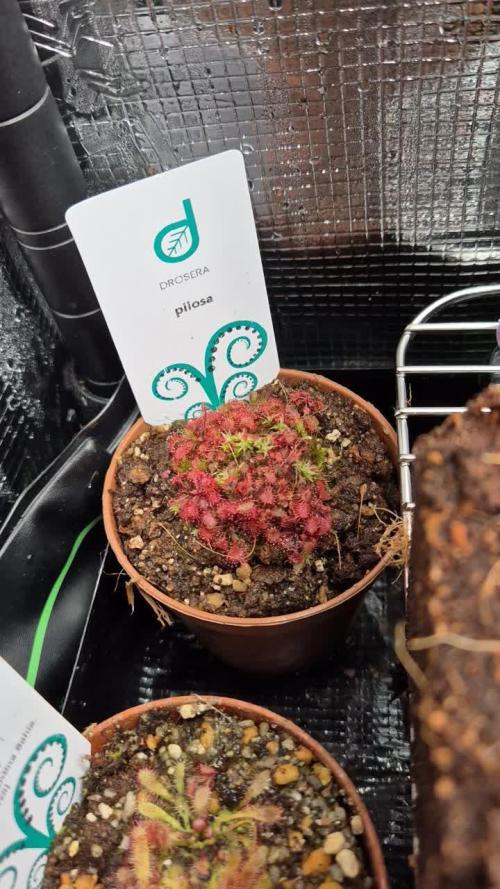
*1. Foto Mutation:
Dieses Foto wurde nur 5 Minuten nach dem Umtopfen der Pflanze aufgenommen. Vorher stand sie in einem größeren Topf, in dem sie genauso aussah. Ich habe sie umgetopft, weil ich den Topf brauchte, aber die Pflanze nicht wegwerfen wollte. Der Pflanze geht es gut, aber sie sieht im Moment etwas mitgenommen aus. Bilder folgen

Likes
22
Share
@Smith420
Follow
It doesn’t look so good. Can someone tell me if i under-watered or over watered? They look sad?

Likes
22
Share
@bypado_farm
Follow
16 days of slow drying each plant with the environment controlled inside the tent with 2 meters.
I have two fans on, pointing at the floor to circulate the air
temps - 20 - 23 º
humid - 50- 60 %


Likes
9
Share
@TiRobotProds
Follow
8e Semaine de floraison impeccable grossi bien chargé en résine irrigation a l'eau uniquement durant les 2 dernières semaines. J'ai vérifié les colas es celle-ci c'est fait polinisé par le male Sour tangie dawg mais rien de grave quelques graines, cela me permettra d'avoir une nouvelle génétique issue de ces deux plantes donc a voir ne pas ce précipiter. Elle dégage une plus douce odeur durant ces derniers jours.


Likes
18
Share
@BrownsBuds
Follow
Was away again this week but the plants have been fine. I watered them when I left and 5 days later the soil was dry and they needed a water so i fed them 1 litre each yesterday. Today I’ve tried to tie some more branches down to the scrog net to allow more light to all the buds.
I have ordered a new thermostat with a day and night temperature so soon will be able to do lower night temps

Likes
4
Share
@matias_scrog
Follow
TODO VA GENIAL, MUCHISIMA RESINA Y OLOR EN ESTA ETAPA. HE NOTADO QUE ALGUNAS HOJITAS SE ESTAN QUEMANDO EN LAS PUNTAS Y DOBLANDOSE HACIA ARRIBA, SUPONGO QUE FUE DEMASIADA COMIDA. DE TODOS MODOS ES MINIMO, NADA DE QUE PREOCUPARSE POR EL MOMENTO, VOY A HACER DOS RIEGOS CON AGUA Y LUEGO VOLVEMOS A FERTILIZAR!

Likes
9
Share
@KushCultivation
Follow
week 7 the buds look dens.
I did minor defoliation and need to clean the plants more under the scrog.
They are frosting up very nice and smells like creamy cheese cake.
The EC has dropped from 1600 to 1440.
Next week I will give them more food and fresh water in the reservoir and switch to 660w Boost HPS


Likes
13
Share
@SaFiyaFarms
Follow
Today Week 6 Day 48...was supposed to do this a week ago but as You can see I am about to Transplant Updated pictures tomorrow Week 7 Day 49

Likes
125
Share
@SlowpokeFuegobud
Follow
🍊 🍋 🍮 🍭 🍊 🍋 🍮 🍭 🍊 🍋 🍮 🍭 🍊 🍋 🍮 🍭
Welcome to week 12, and the last week, dear friends!! 😘
The Sacitrus Bomb Auto is soooo beautiful and glittering! You could take her out to a ball right away! 💄 😍
Watering with each 5ml of Growzyme, Humic Acids + Bigfruits 💧
I went for a short vacation and just plugged a bottle with a ceramic cone into the soil of my two autoflower plants. 🤞 🙏 I also switched the light cycle to 14/10 (14 day) Of course everything was ok when I got home. 😊
Thanks, everybody!! 💚 💚 💚 Grower love!!! 😘🙏 🌱
_________________________________________________________________________________
SETUP:
80x80x180 cm Zelsius
240W Full Spectrum LED IR UV dimmable
DW240H-A6-HS
Heatsink color red
LED Chips:
512pcs SAMSUNG LM301H + 24pcs Osram 660nm + 8pcs Osram IR 730nm + 8pcs UV 385nm
Color mix: 2700K + 4000K
2,8umol/J
Driver HLG-240H-C2100B
Coverage: veg 5x3ft / flower 4x2ft
Product size: 628x205x68mm
Green Buzz Nutrients
Shouts go out to my sponsors @GreenBuzzNutrients, thanks so much for your support! ❤️
If anyone would like to try their amazing organic products, use code GD42025 for generous 25% discount (for orders of minimum 75€) ✨
https://greenbuzznutrients.com/
Mills Nutrients
Biobizz Lightmix
custom exhaust fan 320/270cm³/h
Carbon Active Granulate 240cm³/h
tab water pH 8 - EC 0,25 with Calmag to 0,5
Advanced Hydroponics pH minus Grow + Bloom to pH 6.2
🍊 🍋 🍮 🍭 🍊 🍋 🍮 🍭 🍊 🍋 🍮 🍭 🍊 🍋 🍮 🍭

Processing
Likes
9
Share
@HollowSource
Follow
This lovely lady is suffering from a little bit of what appears to be a calcium deficiency which is being remedied now with some calmag. Other than that she is doing great. The buds are fattening up real good. She is starting to develop some minty notes and is frosting up nicely.


Likes
25
Share
@Mr_Weeds_Autos
Follow
On Day 15 we checked on the ladies and seemed to respond very well to their first feeding of nutrients. When I to check on the on Day 16 the ladies seemed thirsty so they where given 250 ml of water with a 6.0 ph along with a misting, the plants then received another feeding on Day 18 but this time we went up on the nutrients slightly, I then again watered them on Day 20 and they were given the normal 250 ml of water with a 6.0 ph along with a misting. I did notice that the AK-49 strain is a lot smaller than the last time I grew it at this stage of life. Which I thought was weird so I started seeing what was different. I've come to the conclusion that it's how many plants are in the grow space using the light, meaning I need more light for this many plants. I also think that AK-49 #1 & #4 could have been overwatered which goes to show that every plant no matter the strain can have different needs. So I'll be letting them dry out and show signs that they need by being slightly droopy. Well till next time folks Happy growing and Enhance Your Life ......

Likes
5
Share
@Budhunter
Follow
Week 10 is been magical.. Sour D is showing really good smell, different one.. similar with one I smoked from the streets.. plant is a bit smaller than gelato just beside it but man, they both are reaching the stars.. my biggest plants ever.. so far Barneys farm is showing really good genetics in my hands.. let’s gooo
I will cut off silicon and big bud from next week on 👍🏼👍🏼👍🏼
Likes
9
Share
@JamaweedOPO
Follow
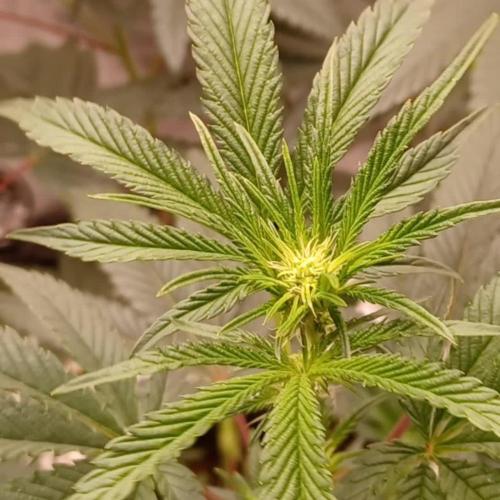
A planta está reagindo bem ao treinamento, continuando a crescer de forma saudável. Durante o processo, acabei danificando algumas folhas, mas nada preocupante até o dia 23. Esta semana, reduzi a quantidade de nutrientes e reguei mais com água. Minha lâmpada de 240W está em 60%. Devo aumentar?
Dia 24 apareceram os primeiros pistilos.
🌱
Likes
30
Share
@valiotoro
Follow
Hello everyone week 6 of flower has passed for this Skywalker haze auto 💥
Green Sensation 0,5ml/L
Mars hydro SP-6500 75%
have a great day and wish you all happy growing 😎👨🌾🏻

Likes
10
Share
@Borberad
Follow
Samen 3 lässt auch an Tag 5 noch nichts von sich sehen. Zu Absicherung unseres Keimprozesses haben wir einen Vergleichssamen unter gleichen Bedingungen mitgezogen, nur um zu schauen ob ein Systematischer Fehler vorliegt. Dieser hat jedoch schon die Erde durchbrochen und aktive Keimblätter. Am Vorgang kann es somit nicht liegen: Temp. konst. 25°C Luftfeuchte ca. 75- 80° mit Osmesewasser durchgezogener Easyplug. Öffnung im Plug zuvor großzügig aufgelockert. Wir warten ab so lange muss die wenige hübsche Pflanze als Model hinhalten. Evt. bekrabbelt sie sich ja noch.
An Tag 6 wurde der Samen mal etwas freigegraben er ist zumindest gekeimt ein Stück gewachsen. Wir warten mal noch ab ob er noch weiter wachsen will.
Tag 7 Nr 2
Um Feuchtigkeitsschwankungen gering zuhalten wurde sie in den größeren Cube gesetzt, um Algenbildung wie bei Nr.1 entstanden zu vermeiden, wurde mit Kokos gemulcht.

Likes
36
Share
@TheGreenLeopard
Follow
Nice week. Transition to center mass continues - the frost builds and the aromas are incredible. Purple berry kush - slight touch and the blast of berry kush. I showed it to a non smoker - he smelt it and said - smells like I shouldn’t be here 😂😂😂. Upcoming week will be weening off the finisher and phasing in for a full flush. Divergence on two plants in the tent as they were planted later so will keep the blooming fed.


