
Likes
Comments
Share


@IQuSX
Follow
Hi, topman!
This is 70 days from changed light 12/12.
Next reports week well be with KiT2 and 77 day.
Day of Harvest!
See you and thank you for your time.

Likes
4
Share


@LittleBigTrees
Follow
Second week of flower and I defoliated again.
There are small bud sites starting to form at the end of week two flower.
The apple fritter has fascination which is making the stems grow interestingly with lots of bud sites.

Likes
6
Share


@Dabking
Follow
Chopped on day 77; and dried for 7 days.
Plant 1: 34.8 grams dry
Plant 2: 40.8 grams dry
Total dry weight: 75.6 grams (2.70 Ounces)
The plant is super frosty and smells very sweet. It's now in a grove bag and curing. Can't wait to do a smoke report in about a month.
Hope you enjoy two song variations I made with a slideshow of the grow

Likes
98
Share


@Targona
Follow
Hello GrowDiaries friends.
70 days since my little girl sprouted from seed/harvest time🌱
Technical and general parameters from Zamnesia breeder:
Apple Fritter Automatic 🍎🍏🍎
Growing Apple Fritter Automatic according to breeder:
In the grow room, Apple Fritter Auto is a true pleasure. Its height rarely exceeds 100cm, and its structure is typical of an indica 🍀🍃🌲; think short internodes, thick, dark-green foliage, and vigorous growth. While Zamnesia’s photoperiod Apple Fritter responds extremely well to both low and high-stress training, Apple Fritter Automatic is best left to its own devices due to its short life cycle (which averages about 70 days from seed to harvest). 🌱🌿🌾
My experience: I made two major mistakes while growing it - high pH at the beginning of flowering and over-fertilizing during one watering 💩💩 It affected all the plants in the tent. Some more, some less. This plant was one of the resistant ones. Although the breeder himself states how sensitive autoflowers are and I can confirm that they really are, this strain handled this strain very well. This is definitely the most beautiful and strongest plant of the round 💚🍎🌱 The harvest turned out accordingly, I am really very satisfied 👍🌞
Strain data sheet Apple Fritter Automatic
Brand: Zamnesia Seeds
Parents: Sour Apple X Animal Cookies X Ruderalis
Genetics: Indica-dominant Auto
Flowering Type: Autoflowering
Flowering Time: 10-11 weeks from seed to harvest
THC: 23%
CBD: Low
Height (Indoor): 100cm
Height (Outdoor): 100cm
For cultivation I used:
------------------------------------------------------
Growing tent Mammoth PRO+ 80: 80x80x180cm
1x circulation fan: 15W 🌬️
LED lighting: Mars Hydro TS 1000 - 150W - vegetation and flowering 💡💡
Exhaust: duct fan - RAMTT100 🌬️
Odor filter: PRO-ECO HF carbon filter 160-240m3/h - 100mm - maximum air flow up to 240m3/h
4x Airpots 11 l
I mix substrate:
Biobizz Lightmix + Perlite + Coco coir
For sale here 👇👇👇👇👇👇👇👇👇:
⚡⚡⚡⚡⚡⚡https://www.zamnesia.com/7653-zamnesia-seeds-apple-fritter-automatic.html ⚡⚡⚡⚡⚡⚡
Thanks for the likes :)
See you soon 😍😍
Likes
20
Share


@Pulsar00
Follow
Welcome back boys,
A little update with those rock hard colas, the finish line is being seen not far away on the horizon.
I hope they gonna fat a little bit, I think we all wish the big fattening deep down ...
Stay tuned, stay stoned

Likes
8
Share


@0ni_wan_kenobi
Follow
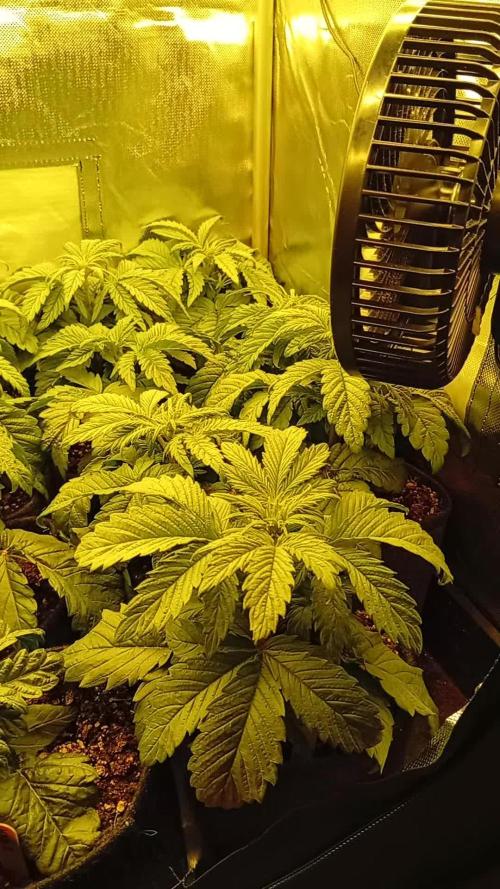
These girls are growing fast! They grew 8 inches this week, and the light got turned up to 6. While applying LST, I broke the two top branches of one of the smaller plants. I fixed it with masking tape.
Likes
6
Share

@Crusty_Juggler
Follow
17MAR - Day 26: 10L, 25ml Vega, 25ml Zym. Light 400w (max)
19MAR - Day 28: Slight nute burn

Likes
3
Share


@hinterhofgrower
Follow
.
📹 : Full Video on YouTube @hinterhofgrower, please like & subscribe
🌱 : strategic defoliation on day 30, LST & strategic defoliation day 31, LST on day 33
💧 : 3l day 31
💡 : Dli: 40 mol/m²/d
🤔 : By week 5 it had clearly started to flower, so there was no drastic trim, just the strategic removal of a few leaves that were blocking the light for potential flowers, then the removal of leaves that were completely shaded, and some LST to direct the branches outwards to create more space for the flowers and ensure the flowers were at the same height.

Likes
11
Share


@Young_agronomist
Follow
23.09.23-85 дней этому растению .
Она немного растянулась и я решил убрать пару больших листьев и немного подвязать , чтобы свет лучше проникал .
На этой неделе я поднял ппм раствора до 1000 . Все девочки активно пьют и выглядят здоровыми .
26.09.23-88 день )
За эти 3 дня растение продолжило растяжку и прибавило около 8 см 😎😎
Шишки красиво формируются и на листьях уже виден Сахар .
В планах на ближайшие дни провести легкую дефолиацию и добавить света .
Всем мир
28.09.23- 60 дней вегетации и 30 дней цветения ! Растение продолжает медленную растяжку и прибавило 5 см за 2 дня , в остальном изменений нет .
Завтра добавлю ей 120 w .

Likes
65
Share


@MadeInGermany
Follow
Flowering Day 95
Since time chance
To 12 / 12 h
Hey guys :-)
We have arrived at the end 💚
she gets this week and is harvested on flowering days 101-103.
This phenotype was significantly faster than the last one, which was probably due to the fact that it was another smaller phenotype 👍.
The buds look and smell exactly like a Dr Grinspoon should.
Unfortunately, the pearls of the pheno are not optically identical, but the smell is identical.
She was lightly rinsed with double watering and GBL Clean Fruits.
Have fun and stay healthy 💚
👇🏼👇🏼👇🏼👇🏼👇🏼👇🏼👇🏼👇🏼👇🏼👇🏼👇🏼👇🏼
You can buy this Nutrients at :
https://greenbuzzliquids.com/en/shop/
With the discount code: Made_in_Germany you get a discount of 15% on all products from an order value of 100 euros.
👇🏼👇🏼👇🏼👇🏼👇🏼👇🏼👇🏼👇🏼👇🏼👇🏼👇🏼👇🏼
You can buy this strain at :
https://www.barneysfarm.com/dr-grinspoon-5
Water 💧 💧💧
Osmosis water mixed with normal water (24 hours stale that the chlorine evaporates) to 0.2 EC. Add Cal / Mag to 0.4 Ec Ph with Organic Ph - to 5.8 - 6.5
MadeInGermany

Likes
16
Share


@grow_nerd420
Follow
Girls starts Getting Bigger 😁✌️🔥
I have no room for bigger plants so i mąkę them very compact 😂😁
Wish me Luck 😂🔥💪✌️

Likes
12
Share


@2Stones1Bird
Follow
Checkout my Instagram @smallbudz to see the Small budget grow setup for indoor use, low watt, low heat, low noise, step by step.
13/12/2019 - Change the light schedule to 12-12h after 8 weeks of no signs of flowering I think is a photo not and auto.
16/12/2019 - Fed her 1.5l of 6.5PH water with 0,5ml of each: Grow, Bloom and Max, and 1ml of each: Heaven, Alga-mic and Vera, noticed about 10% run off, I use about 1/3 of the nutrient dosage on the chart, to achieve about 200/300PPM (500 scale).
17/12/2019 - Did some defoliation on the lower branches mainly.

Likes
5
Share


@eldruida_lamota
Follow
Que pasa familia, vamos con la cosecha de estas GG4 Sherbet Fast Flowering, de FastBuds.
Por dónde empezar, las flores son bien compactas , y van repletas de resina, tienen tonos por dentro muy bonitos, y tiene un aromas dulces y afrutados.
Es muy sencilla de cultivar, es de ciclo corto mdio aunque también si le dais una semana más no pasa nada agradecer se agradece al final.
Mars hydro:
Code discount: EL420
https://www.mars-hydro.com/
Agrobeta:
https://www.agrobeta.com/agrobetatiendaonline/36-abonos-canamo
Hasta aquí todo, Buenos humos 💨💨💨
Likes
15
Share


@AustinRon
Follow
LJ4Q23 Flower 8
SOP LJ4Q23 - 8-Plant SOG from Cuts
Harvest Window
- Earliest: 2024.02.01
- Latest:
2024.02.10
Objective:
- 8 Plants - Single Colas - No Branches
- Harvest Lemon Jeffery (Narrow Leaf Phenos): 70±5 days
- Light Intensity - Ramp up from 200
- 40 DLI, at 13 hour ScotoPeriod, will need MAX Light to Achieve
______________________________________
Start of Week: [ 2023-01-17, LJ4Q 57:F:7:1]
End of Week:
[ 2024-01-23, LJ4Q 63:F:7:7]
Plant Height: [ 21, in]
Temp: [ 78, °F]
RH: [ 63, %]
VPD: [ 0.83, kPa]
Light Intensity Peak: [ 950 , µMol/m2/s]
Light Distance: [ 8, in]
Environment Targets (Flower 7 - 9):
- Scotoperiod: [ 13, h] # Contiguous dark hours daily
- TemperatureMax: [ 78, °F]
- RH: [60, %]
- VPD: [ 1.1, mS]
- LightIntensityMax: [ 1000, µMol/m2/s]
- LightDistance: [ 8, “]
Flower 8
- RLA Hydro Chart, EC 2.3, 2 GAL
- Primer A: [ 11.5, ml, gal], [ 23, ml]
- Primer B: [ 11.5, ml, gal], [ 23, ml]
- Silica Skin: [ 5.75, ml, gal], [ 11.5, ml]
- Quillaja20, [ 0.5, tsp]
- Mammoth-P: [ 6, drops, gal], [ 12, drops]
- PhotoSynthesis Plus: [ 6, ml, gal], [ 12, ml]
- Plant Success:
- King Crab: [ 0.5, ml, gal], [ 1, ml]
- Build-a-Soil:
- Quillaja20 Powder: [ 0.25, tsp/gal], [ 0.5, tsp]
- South Cascade Organics:
- SLF-100: [ 5, ml, gal], [ 10, ml]
__
Wed Jan 17, 2024
LJ4Q 50:F:7:1
- [x] Measure Runoff: [ 550, ml]
- [x] EC: [ 2.6, mS]
__
Thu Jan 18, 2024
LJ4Q 51:F:7:2
- [x] Measure Runoff: [ 450, ml]
- [x] EC: [ 2.7, mS]
- [ ] Let’s start tapering down EC - 2.0
__
Fri Jan 19, 2024
LJ4Q 52:F:7:3
- [ ] Measure Runoff: [ 450, ml]
- [ ] EC: [ 2.8, mS]
__
Sat Jan 20, 2024
LJ4Q 53:F:7:4
- [x] Measure Runoff: [ 450, ml]
- [x] EC: [ 2.8, mS]
- [x] @Lights On - Clean Xeri-Bird8 Manifold’s 75µ Filter
- [x] Dump & Clean Reservoir and Pumps
- [x] Refresh Reservoir (Been 7 Days Since Last 4 Gal Refill) 2.1 Liters/Day, 8 Plants, 260 ml/day, 56 ml/day Runoff 21%
- [x] EC: 2.4, 4 Gal
- [x] PrimerA: [ 11.5, ml, gal], [ 46, ml]
- [x] PrimerB: [ 11.5, ml, gal], [ 46, ml]
- [x] Silica Skin: [ 5.75, ml, gal], [ 23, ml]
- [x] Photosynthesis Plus: [ 6, ml, gal], [24, ml]
- [x] Quillaja20 Powder: [ 0.25, tsp, gal], [ 1, tsp]
- [x] SLF-100: [ 5, ml, gal], [20, ml]
- Consider Reducing Per Fertigation Duration ~ Try 95% Duration . . .
__
Sun Jan 21, 2024
LJ4Q 54:F:7:5
- [ ] Measure Runoff: [ XXX, ml]
- [ ] EC: [ XXX, mS]
__
Mon Jan 22, 2024
LJ4Q 55:F:7:6
- [x] Measure Runoff: [ 100, ml]
- [x] EC: [ 3.7, mS]
- [x] Added 1 Minute to Each Run Duration

__
Tue Jan 23, 2024
LJ4Q 56:F:7:7
- [ ] Measure Runoff: [ XXX, ml]
- [ ] EC: [ XXX, mS]
- [x] Dilute Reservoir to EC: 2.1 - NOT, Res was AT 2.1 @ 2024-01-23T10:55:04-0600

Likes
151
Share


@CANNASIM
Follow
------GENERAL COMMENT------
Girls are moving forward, a lot of growth for the week, the two strains are absolutely different in terms of structure. Unfortunately the three Candy Kush did not sprout, so I will run only this two girls for this cycle. Down a bit the watering mainly doing a feed every other day, trying to manage the root mass to expand. Choose to do natures candy also in veg since i'm using recharge regularly, is 0-0-0 not noticing a lot of EC raise with it, velo kelp came in to play also. One dose of sensi Cal Mag this week since i notice some paling going on, my medium is inert by the way.
------SM.BLUEBERRY COMMENT------
She is creating a lot of foliage compared to the AK, both are in the same hight. May top in a week, this will depend.

Likes
25
Share


@Ganjeiro420
Follow
Ola jardineiros e jardineiras, sejam bem vindos a mais uma semana dessa maravilha.
Estamos chegando na oitava semana de cultivo e até aqui não tive quase nenhum problema, somente a falta de CalMag no começo da floração, depois que aumentei a dose elas voltaram a sua cor normal e dês de então estão ótimas.
No começo desta semana a BPP Começou a resinar bastante o cheiro já é incrível os Buds estão Crescendo bastante e começando a engordar, acredito que agora ela cresça pouco de tamanho e comece a formar os botões lindos e resinados.
Obrigado a todos que estão acompanhando esse cultivo. 🙏
Likes
8
Share


@BuzzingHighAbove
Follow
Critical Purple Kush was an effortless grow. The plant beside her got spider kites but they didn't like that CPK so much. She had a few show up on lower leaves, never any webs. I treated for them twice and they never resurfaced.
Likes
121
Share


@DogDoctorOfficial
Follow
And with and enormous honneur and pleasure that i start collaborating with MARSHYDRO, they wore kind enough and send me a 4x4 grow tent and a TSW2000 for me to do tests and reviews, i got to admit the quality on the materials, the easy assembling, the user manual, even the art detail that came with a bunch of cool stickers, are plus things that can not go unnoticed 🙏💚 Thanks Marshydro for so many details 🙌😉 i will try and post them all in here, but you can follow me on my instagram account https://instagram.com/dogdoctorofficial for every day updates , videos giveaways etc, or in my youtube channel- https://youtube.com/channel/UCR7ta4DKLFMg2xxTMr2cpIg keep tuned 💚💚💚
Thank you MARSHYDRO for having faith in my love for growing , lets make magic together 🙏🙏🙏
For this run i will be testing some Cookies Fam Genetics, to be more exact they’re Sunset Sherbet , just moved them to they’re final pot and installed a scrog net, now i need them to bounce back , adapt to the new conditions and do a full canope 😅 so keep tuned for constant updates , this one will be a fun run 💚💚💚
Happy Halloweed for you all 🎃 🎃🎃 and remember do it for the love , with love , growers love 😅💚💚💚
Genetics - Cookies Fam genetics - 3x SunsetSherbet
Grow tent - MARSHYDRO 4x4
Ligth - MARSHYDRO TSW 2000 @75%
Filter - vanguard hydroponics Falcon Filters
Extraction - 2 x vanguard hydroponics 280m3h
Extraction control - SMSCOM Smart MK2
All i grow is medicine for myself, for me and for my best friend with is me 😆 nothing to sell, so don’t even ask 😅💚💚💚
All info and full product details can be find in can find @
https://www.mars-hydro.com/grow-tent
https://www.mars-hydro.com/led-grow-light/mars-ts-series-led-grow-light/mars-tsw-2000-led-full-spectrum-hydroponic-led-grow-light
https://marshydro.eu/ DISCOUNT CODE - DOGDOCTOR 💚💚💚🙏🙏🙏💚💚💚
https://marshydroau.com/
More info and updates @
https://growdiaries.com/grower/dogdoctor
https://instagram.com/dogdoctorofficial
https://youtube.com/channel/UCR7ta4DKLFMg2xxTMr2cpIg
💚💚💚Growers love to you all 💚💚💚

Likes
15
Share


@Organic473
Follow
I've been feeding her with P & K…also added some ashes from the dust pile. The smell i get is definitely not fruity it's more skunk.
Likes
5
Share


@EastCoastGrowShow
Follow
This week, the Diamond Handz by Square One Genetics got........well sticky. She is frosting up nicely and smells like sweet candy. I am surprised by the stacking on these main branches 😃. There is not much to do for her as she has received her last feed already. All that is needed is wellness checks and watering.....I do not mind being in the Tent as the smells are soooooooooo Damn good 😏. I also tend to pluck out any yellowing or dying leaves until the end of flower!

Likes
3
Share


