
Likes
Comments
Share


@UnCultivadorDeWeed
Follow
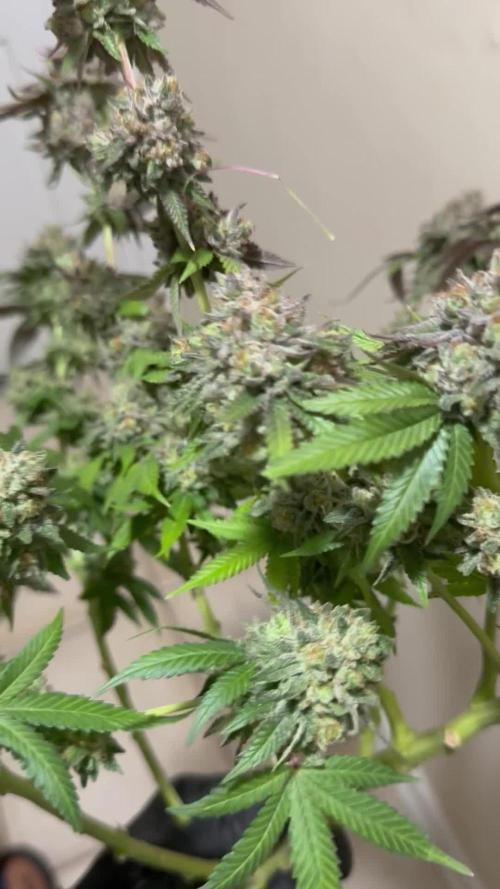
Ya la gorila se fue de corte al final de la octava semana, las big bud ya comienzan a amarillas las hojas dando aviso de que a funcionado el lavado de raíz y están consumiendo sus propias reservas de nutrientes.


Likes
47
Share


@BloodBath
Follow
Sour Wiz is still in veg. 7 weeks. Looking fantastic. EAsiest strain to grow so far. 0 issues and respond so everything well. Once I can sex I’ll separate and start planning to flower. Skywalker OG is still going great in week 9 of flower. STARTING to see a lot of bud structure and white hairs. Northern Lights is still surprising because it was so mutated and now its thriving.

Likes
4
Share

@FourTwenty_Plants
Follow
So I put the girls in to the 120x120 and did some very heavy HST to add a Scrog Net, they took about 7 days to fully recover.
Also did another final defoliation before the 12/12 flip that will happen in the next few days so stay tuned, I hope you are just as hyped as I am for what will happen to them. 🌱
Likes
12
Share


@Magic_frequency
Follow
Hi! It came to the point that I am running out of buds. Literally. i gotta come clean and admit that I couldn’t let her mature for one more week 😪. But you my situation right? One thing I am sure is that this is quality smoke 💯❤️💪
Ps
Orion


Likes
6
Share


@Floryx
Follow
-was on vacation for a week
-plants got watered every other day by my sister
-noticed some spots on leafs as well as yellow leafs
-defoliated some yellow leafs and leafs that didnt get enough light
-put the light on 12/12 today and will start with biobizz in a few days
-Whats does the spots on the leafs mean?
Happy about every comment :)
Likes
9
Share


@GrowingisFunkO
Follow
Week 16 - 06/28 - 07/04
Light - 200 W HPS & 265 W LED
Day Temperature - 78 F
Night Temperature - 68 F
Humidity - 40 +/-5
D59 Flower - Came home from vacation to some fat sugar coated buds! I flushed them with FloraKleen and molasses, this should be the last one before I snip down the main colas. Since they are close to harvest, I spent about an hour defoliating so harvest will go a little quicker.
D60 Flower - Took the ladies out to breathe, take some pics, and snipped the tops off the Royal Gorilla's. I'm going to allow the Hulkberry's to mature a little longer and probably do the same thing and snip the tops.
D61 Flower - Unfortunately HB #3 hermies on me, she had a bunch of "bananas". So I cut her down and hung her to dry, Sucks to lose her but she will do well in some RSO! Unmanicured wet weight was 251 g. I am also going to be testing out the bowl bud trimmer I just ordered on these buds to make sure they dont damage the buds too much.

Processing
Likes
32
Share


@Platinouuu
Follow
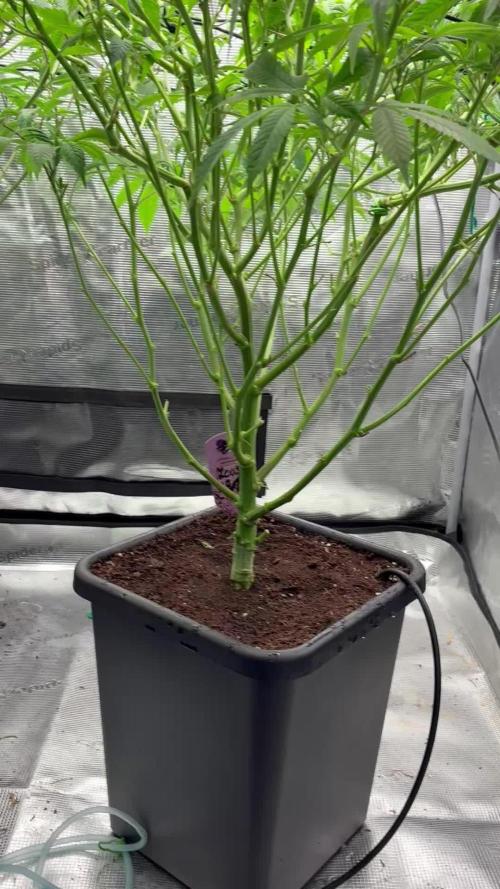
En esta ocasión le hice algunos cortes, ajustes de ramas y corte apical. Las dejare tranquilas hasta el 26 de Nov para observarlas detenidamente para cambio a floración. Cada 20 dias le doy u te cannabico que prepara y agua lo mas pura. Gracias a todos, recuerden que una de ellas (la flaquita izq abajo) es un cruce experimental. Buenos Humos, Bendiciones!

Likes
110
Share


@SlowpokeFuegobud
Follow
💜 💚 😍🥤💜💜 💚 😍🥤💜💜 💚 😍🥤💜💜 💚 😍🥤💜💜 💚 😍🥤💜
Dear growmies, welcome to the Purple Lemonade Fast Flowering diary!! ❤️
The little seed popped the fastest of all the seeds of this run! 🏆 Vigorous!!
Can't wait for this journey! 😍
DAY 1
Soaked the seeds in Humic Acid for 2 hrs, then used some of it to pimp the water and soak the paper towels. 💧
Thanks @Fast_Buds for your awesome genetics, growing Fastbuds is always a bit like riding a ferris wheel! Woohooo!! 😜 🙏 💚
Thanks to my sponsors @Green_Buzz_Nutrients, their nutes never ever let me down!! Check out my diaries on how well they work! 💚 😘 In case you want to give them a try, you can find a generous discount code in the setup description further down the road ⬇️
You can find more brand hot updates on my IG, where I share real time events from my growroom, don't miss this! 😝
_______________________________________________________________________
Purple Lemonade FF
As refreshing as cold lemonade on a hot Summer day. 🌞
• Quench your thirst. Just as good as lemonade on a hot Summer day.
• The gentle giant. Up to 550 g/m2 of gorgeous pinkish-purple buds.
• Refreshing for the mind and body. The ideal all-day strain with a perfectly balanced effect.
• Sweet n’ sour terps. Mouth-puckering lemon flavors that’ll hypnotize your taste buds.
• Properly purple. The perfect choice for purple hash and extractions.
Arising from a cross between purple and citrus Cali genetics, Purple Lemonade FF (Fast Flowering) offers a complex high made up of perfectly balanced cerebral and body effects that are ideal for daytime use. Expect an extremely enjoyable high that boosts your mood while deeply relaxing your whole body and getting
rid of muscle pain. This meticulous cross produces up to 550 g/m2 of some of the most beautiful purple buds, with pinkish and reddish hues that will catch everyone’s attention. The beautiful purple buds are ready for harvest in 7-8 weeks and come hand-in-hand with unbelievably sugary citrus terps that are just as refreshing as a cold lemonade on a hot Summer day. It’s the ideal variety for the sweet-tooth stoner seeking strains that deliver both in quality and quantity of resin.
Bud Description 🦔
Purple Lemonade FF grows chunky, spade-shaped buds that boast a whole range of pinkish-purple hues with rich, dark orange pistils shooting out of every direction. This variety stands out for the, oftentimes, lilac trichomes that give them a gorgeous pink tint and make for outstanding purple concentrates. The buds give off a delicious tart lemon aroma that reveals a sweeter, more fruity scent as you break the buds open. Definitely a must for flavor chasers and those looking for pungent terpene profiles.
Smoke Reports 💨
Purple Lemonade FF offers an effect that’s just as unique as the flavor. Expect a potent uplifting high that gives you that energy boost you need to get things done while 100% happy and stress-free. The effect gradually transforms into a wave that works its way along the limbs and through the muscles, deeply relaxing your body and putting you in the right mindset to go through a busy day with a huge smile on your face. This is an excellent all-day smoke as it not only increases energy but can also help combat chronic pain, migraine and stress.
Plant Appearance 💄
This feminized photoperiod variety develops a thick and strong structure, growing a medium-sized main cola with multiple shorter side branches, typical of hybrid strains. Purple Lemonade FF develops fairly short internodal spacing with gorgeous purple buds growing stacked on top of each other, making it the perfect choice for growers of all levels looking to get lots and lots of top-shelf purple weed, as this variety can produce up to 550 g/m2 in a 7-8 week flower cycle.
Grow Tips 🤓
This is a super fast feminized photoperiod version that takes approximately 7-8 weeks to flower with a 5-week vegetation cycle,, this means you can have faster harvests by shortening the veg cycle or have a longer veg cycle for bigger yields. Purple Lemonade FF (Fast Flowering) makes for a great candidate for growers of all levels as it’s a vigorous strain that will thrive with basic maintenance both indoors and outdoors. This is a resin powerhouse so make sure to have your trim bin close by as all the resinous sugar leaves will make for the most mouth- watering hash and extracts.
Flavor 😋
Expect a long-lasting citrus zest that taste just like it smells. Purple Lemonade FF reeks of a delicious blend of sweet fruits and tart citrus that’ll make your mouth water. On the inhale, expect sour flavors that taste just like lemon candy with hints of orange and a really subtle earthy background. And on the exhale, the citrus flavors open up, giving place to a more sugary berry fruitiness that leaves your whole mouth tasting like an extremely sweet weed-infused lemonade.
https://2fast4buds.com/seeds/purple-lemonade-fast-flowering
_______________________________________________________________
Setup:
140x70x200 cm Spiderfarmer tent
2x Monkey 16W fans (not oscillating)
1x Secret Jardin 30W
1x box fan 50W oscillating (on lowest level)
LED
Full Spectrum 320W AGLEX AGL-320W-MA
5,6 kg
foldable, dimmable
864 pieces Samsung LH301H
864umol/s
2,7umol/J
full spectrum white + RED 660nm + IR 740nm
wavelength range 380-780nm
covering 3x4ft
Green Buzz Nutrients https://greenbuzzliquids.com/
❗ Use code GD42025 for generous 25% discount (for orders of minimum 75€)
Biobizz Lightmix + coco + wormcastings + perlite
Carbon Active Granulate Filter 125/360 cm³/h
PrimaKlima exhaust EC 125-400/240 cm³/h

Likes
1
Share


@Natagoat
Follow
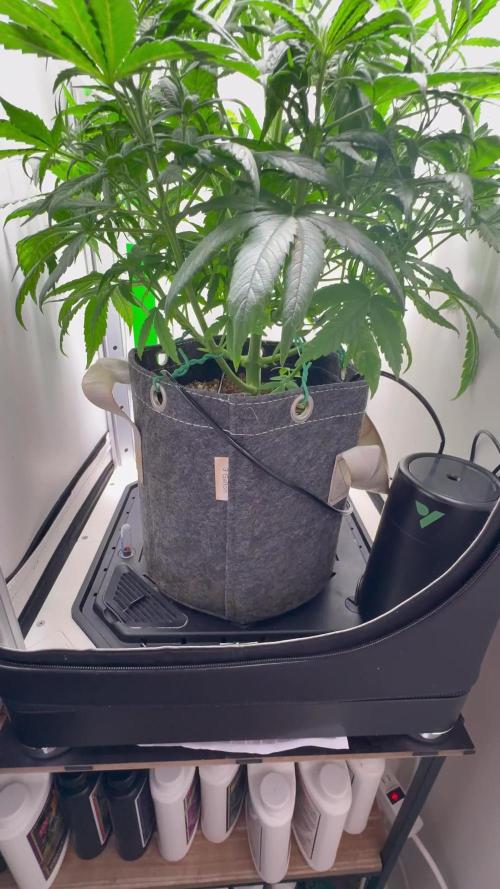
This week has seen a bit of stretch but theyre all hitting flower nicely opening the tent right now makes my heart sing. They all look so healthy and happy to me. This is hands down the deepest green Ive managed to get my plants compared to past grows I think the blurple has played a role in that and maybe from starting silicone from the moment they popped. Im glad I took a few clones from these before I flipped just hoping the clones pull through as these are some happy ladies in my opinion.

Likes
10
Share

@CCSAUTOGROW
Follow
Last week of veg for Tangie Auto. She's a beauty & is already smelling like citrus & tangerine 😋. Getting ready for the stretch!


Likes
4
Share


@Staffedition
Follow
Привет друзья.✋
Наше знакомство продолжается с новым фотоцветущим растением от Smail_Seeds сорт TROPICANNA POISONZKITTLEZ XXL Regular F1 reg.
Сегодня растению 83 дня.
Перевёл на 12/12 1.10.2023
Перешло в активную фазу цветения
Растение очень хорошо развивается, ни каких сбоев в генетике не наблюдается😀
Сорт выводим сами.
Смотри мой профиль, у нас всегда есть что то интересное.
Не забудь поставить лайк❤️, если понравилась как прошла неделя
И читайте наш TELEGRAM: https://t.me/smail_seeds
#Smail_Seeds 😀
Likes
57
Share


@Salokin
Follow
Hello Growmies!
We've reached the remarkable week 16 with our tenacious plant, and the developments are simply astounding. Following a week of dedicated flushing, the plant continues to mature gracefully, showcasing an unwavering commitment to quality as she ripens. I'll maintain the reverse osmosis (RO) water regimen until she ceases sprouting fresh white pistils, a testament to her ongoing development. It's a delicate balancing act, providing enough support for her increasingly heavy branches burdened by significant gains, yet the plant's structural integrity remains a priority.
Visually, the transformation is captivating; she's commencing a magnificent fade, with the unaffected foliage adopting a rich, deep purple hue, bordering on an almost blackish tone – a stunning display of her natural lifecycle. This chromatic shift isn't just aesthetically pleasing; it's a clear sign of the plant's life cycle progressing towards its grand finale. The chlorosis-free leaves, once vibrant and full of life, are now taking on this regal, somber palette, indicating that maturity isn't far off.
Moreover, the trichome-laden buds are a sight to behold, their calyxes continue to swell, and the once slender branches now require additional support to sustain their own weight. It's evident the rigorous cultivation efforts are paying off – the plant's resilience and your attentiveness have aligned perfectly, resulting in an abundance of almost golfball-sized nuggets that shimmer with resin.
Every plant tells a story, and this one is about to reach its crescendo – the careful nurturing, the attentive adjustments to the feeding schedule, and the delicate handling of her structure have all contributed to this moment. As we continue with the RO water and witness the plant's final stages, it's clear that the harvest will be one to remember.
Stay lifted,
Salokin.

Likes
17
Share

@SouthGermanGrowGirl
Follow
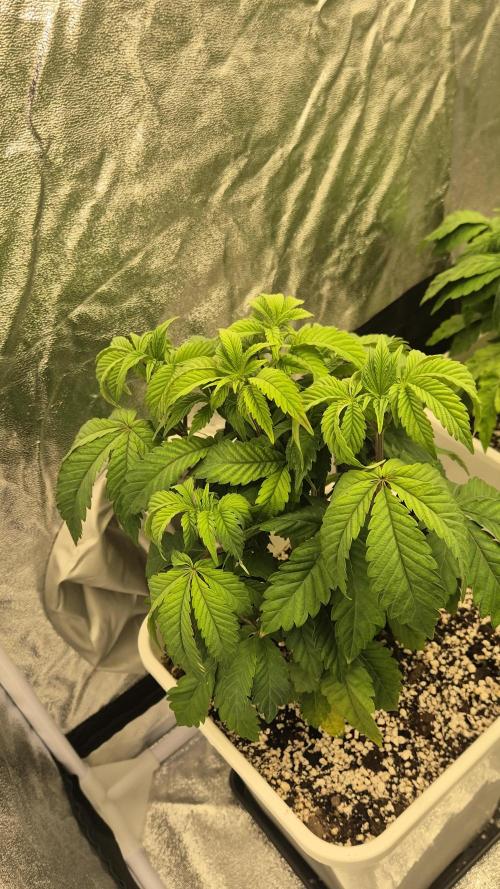
The topped and the normal one grows like princess and a Queen

Likes
18
Share


@Nune2021
Follow
Hey sorry das ich es nicht vorher geschafft habe bzw nicht komplett dokumentiert habe aber die Pflanzen machen sich gut für die Umstände vor der Blüte haben die Pflanzen Nährstoff Probleme gezeigt oder das kommt von dem Insektizid das ich angewendet habe weil ich mit trauermücken zutun hatte

Likes
17
Share


@CanadianFillmore
Follow
Week 7 begins for Mandarin dreams and Divine storm. These ladies are looking happy and healthy, bulking up, putting on weight and glistening with frost.
This grow and grow light is sponsored by Mars-Hydro, thank you Kaoritracy for hooking me up with the TSW2000.
Thanks for stopping by growfessors, tune in next week for another episode of growfessor theatre! 👽🌳💚

Likes
45
Share


@BodyByVio
Follow
Beautiful flower full of trichomes. Smell and test fantastic. Very fast flowering. She was done on day 49 but I cut her down few days later.
I love the strain, the only thing that I will like this strain to have is a better yield. Beast quality buds I ever grew.

Likes
4
Share

@CaliBoyTF
Follow
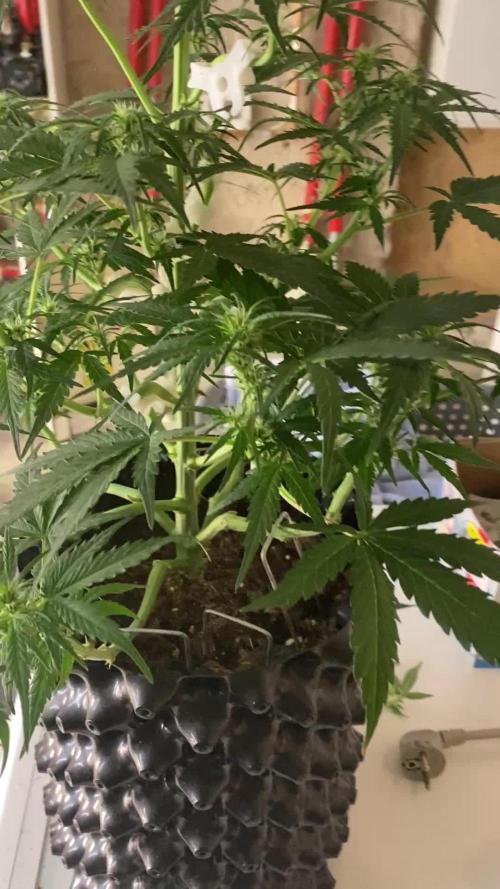
I have already removed the last fan leaves that were blocking the growth of the lateral branches. Now, after one more week, I hope they recover so I can start flowering. At least this has helped develop more bud sites which, I hope, will burst out explosively during flowering.

Likes
Comments
Share


Likes
14
Share


@420DeepGrow
Follow
Gracias al equipo de MSNL Seeds, Marshydro, XpertNutrients y Trolmaster sin ellos esto no sería posible.
💐🍁RS11:
RS11 es uno de nuestros nuevos híbridos 50/50 perfectamente equilibrados. Creamos RS11 cruzando Pink Guava x OZK x Sunset Sherbet con la intención de crear una variedad que ofrezca medidas iguales de efectos edificantes y relajantes. Aclamada como una de las variedades más sabrosas del mercado, su sabor agrio y dulce a bayas viene con un potente rango de THC del 27% al 31%.
💡TS-3000 + TS-1000: se usaran dos de las lámparas de la serie TS de Marshydro, para cubrir todas las necesidades de las plantas durante el ciclo de cultivo, uso las dos lámparas en floracion para llegar a toda la carpa de 1.50 x 1.50 x 1.80.
https://marshydro.eu/products/mars-hydro-ts-3000-led-grow-light/
🏠 : Marshydro 1.50 x 1.50 x 1.80, carpa 100% estanca con ventanas laterales para llegar a todos los lugares durante el grow
https://marshydro.eu/products/diy-150x150x200cm-grow-tent-kit
🌬️💨 Marshydro 6inch + filtro carbon para evitar olores indeseables.
https://marshydro.eu/products/ifresh-smart-6inch-filter-kits/
🍣🍦🌴 Xpert Nutrients es una empresa especializada en la producción y comercialización de fertilizantes líquidos y tierras, que garantizan excelentes cosechas y un crecimiento activo para sus plantas durante todas las fases de cultivo.
Consigue aqui tus Nutrientes:
https://xpertnutrients.com/es/shop/
💻 Trolmaster Tent-X TCS-1 como controlador de luz, optimiza tu cultivo con la última tecnología del mercado, desde donde puedes controlar todos los parametros.
https://www.trolmaster.com/Products/Details/TCS-1
📆 Semana 5:
Comienzan a formarse los cogollos, las hojas se llenan de resina cada dia y el olor es bastante fuerte. Parece que ha terminado de estirar. Practico una defoliación intensa para airear los futuros cogollos y dejar mas espacio en el cuarto de cultivo.
Agrupo de nuevo las macetas en su lugar optimo para asi rellenar por completo la carpa @marshydro.
Me quedé algo corto de nutrientes pero estoy muy contento con los resultados, cada vez le voy encontrando mas su punto optimo. Siempre es mejor quedarse corto que pasarse.
