The Grow Awards 2026 🏆 


Likes
26
Share
@Master_weeda
Follow
Bonjour à tous les padawans et maîtres jedis
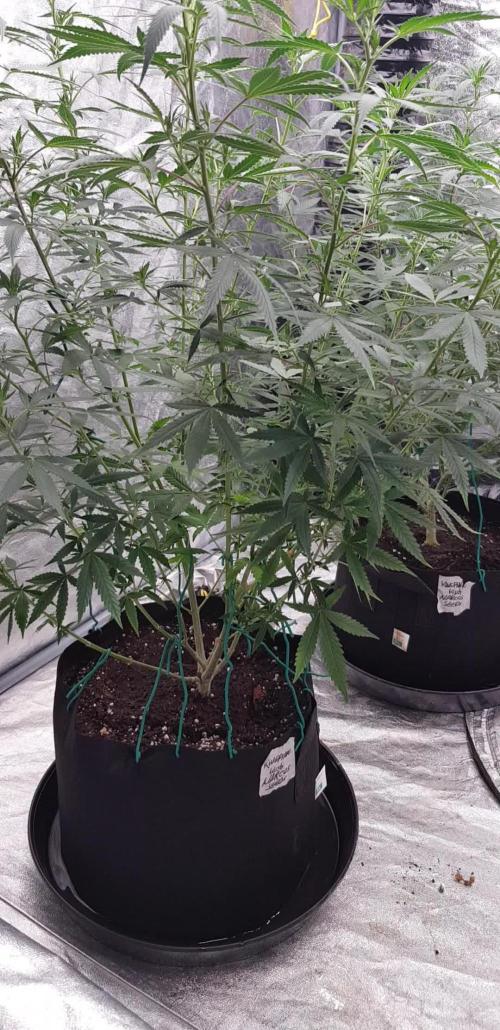
La senescence ce fais de plus en plus pressente la récolte approche J'effectuerais un dernier arrosage avec 2 litres d'eau ph6.3 pour être sûr que la plante sois bien rincée


Likes
13
Share
@VickTurbo
Follow
Sixth Week:
- Plants are doing amazing.
- Continuing to tuck under the Scrog
- Noticed some slow growth and debating adding some co2 due to hot weather incoming.

Likes
18
Share
@BudMedic
Follow
Love love this strain!! Humboldt Seed Org is my top breeder choice right now. Keeping those California genetics alive and clean!

Likes
4
Share
@JBL007
Follow
Všechno probíhá hladce, jediné co nedodržuji je vpd.
Musím říct, že club41 je neskutečný... Osypany jako kdyby na něm byl půl roční prach a to máme teprve 5 týden a bez UV.
Další kolo pojedu s UV doplnkem a opravdu mě zajímá jak to dopadne.

Likes
7
Share
@Meksi2790
Follow
first week in flower will defoliate week after all plants look real good lolipopped and cleaned
Likes
8
Share
@Munchiesfrommars
Follow
One of the biggest harvest in my life from 2 plants.
Almost 800g dry buds
Ak 47 one love.
Ak 47 for me is one of the best strains from classic.
Processing
Likes
7
Share
@Silverback_Guerilla
Follow
7/6:
Heavy thunderstorms last night and half the day today, so she won't be ready to eat again for a few days. I went out to the site about an hour after it quit raining today and saw HUNDREDS of tiny little green grasshoppers feasting on my girls!!! I immediately sprayed them all down with pyrethrins, and did it again right before dark.
I've got the fan blowing across the pots to try to dry them out faster.
I started using TPS One (one part nute solution) the other day, and the plants seem to love it. Really growing well, but I'm glad I amended their soil with some happy frog fruit and flower granular fertilizer this time. They get fed whether it's too wet or not.
7/7:
Rained again last night...and more hoppers again this morning, so i sprayed with pyrethrins.
7/12:
I tied down her main earlier this week and took about 5 or 6 cuttings from her today.
Sprayed with Bt-k again, with some fulvic acid and silica.

Processing
Likes
17
Share
@Bushbanker4
Follow
Thanks for all of your replies to my questions.
I will be slowly upping the bloombastic 0.1ml every other feed until we get to 1ml.
3rd July. I done a light defoliate around the base of the plant, a few small bud sites removed that were tiny and 6/7 leaves that were dieing from the bottom to free up space around the soil.
Day 44, lowered nutrition to nearly half.

Processing
Likes
18
Share

Likes
24
Share
@DeepRootsGrowTrees
Follow
GORILLA COOKIES 🍪 FF / FASTBUDS
WEEK #17 OVERALL
WEEK #9 FLOWER
This week she's doing good buds are looking good they are mostly dense decent trichome coverage and she's got a nice aroma to her and her buds are looking good she's got a few big buds going on. Stay Growing!!
Thank you for stopping by and taking a look it's much appreciated!!
Thank you FASTBUDS!!
FASTBUDS / GORILLA COOKIES 🍪 FF

Likes
20
Share
@adam_pawloski87
Follow
This was a real fun strain !! Definitely do it over and over again ! Thank you Fastbuds!! I’m not sure of the weight yet ,I have them hanging low an slow for 12- 14 days to try then will be trim , cure , the fun stuff!✌️Peace, love, and Positive Vibes to y’all cheers 🔥😤💨💨💨💨🤙
I will be letting know the final weight soon as it’s done drying!
Likes
Comments
Share
@AutomataClub
Follow
Parece que tenemos una verduleria en el indoor. Se siente un olor intenso a cascara de banana que dan ganas de comerse los cogollos. La alimentacion fue muy sutil.

Likes
10
Share
@Unnamed
Follow
Added a photo to show where I take RH/Temp measurements from in the tent, pretty much inside the canopy.
Went lower on EC this week to give the plant a little time to regenerate and pack some more before harvest.
The dehumidifier is pulling less and less moisture out of the air every day, this is a additional sign to me that the plant is nearing its end.
Will harvest the plant next week, maybe on Christmas :)
Values are average of the day.
DATE - °C - RH% (Tent Temp/RH)
20241216 23.6 61.7
20241217 24.2 62.2
20241218 23.3 61.5
20241219 22.9 61.7
20241220 22.1 60.7
20241221 23.1 61.5
20241222 22.6 60.9
DATE - PH
20241216 6.09
20241217 6.03
20241218 6.14
20241219 6.16
20241220 5.99
20241221 5.97
20241222 5.87
DATE - ORP (mV)
20241216 74
20241217 63
20241218 30
20241219 11
20241220 50
20241221 24
20241222 82
DATE - EC(us/cm)
20241216 2097
20241217 2004
20241218 1692
20241219 1749
20241220 1636
20241221 1688
20241222 1695
DATE - CF
20241216 20.97
20241217 20.05
20241218 16.92
20241219 17.49
20241220 16.36
20241221 16.88
20241222 16.95
DATE - °C (Reservoir)
20241216 22.1
20241217 22.1
20241218 21.8
20241219 22.2
20241220 20.9
20241221 21.6
20241222 21.4

Processing
Likes
20
Share
@Sugarnugolia
Follow
Thank you for reading!
By the end of last week I finally had the light up to 100% power. I noticed a bit of curling on my one plant afterwards but I need to soldier on with it all the way up as the other plants are eating it up and loving it.
I guess this isn't a true scrog, but I will continue to weave the buds and stems in and out of the net to try and keep as even of canopy as possible.
I continue to remove lower offshoots to the nodes and I am really trying to focus just on sites that are getting enough light to make a decent nug.
The tent is filling out nicely and I am loving it!
If I touch the flowers to bend them under the scrog, my fingers STINK like a beautiful fruit.
I can't wait to try this out and I am getting excited.
I will continue to use the same nutrient solution mix for this week.
As of 17 Nov I am starting to water 2x daily using the formula for 3part GHE listed in the picture above. After 12 hours I can see the 3 gal containers are pretty much dry from the last daily watering. Up to now I was watering everyday once (to runoff 2x a week to flush any of the excess salts away and allow my roots to stretch out a bit). Now that the roots have reached the bottom of the smartpots and fully sticking through, I am going to be watering to runoff at least 5x a week to make sure nothing is building up too much in the later flower weeks.
I appreciate everyone stopping by and taking a look. I am having a blast for my second grow and love sharing with this community!
Likes
47
Share
@GrowGuy97
Follow
Day 63 - Niagara got cut down today, she has a very strong smell & right buds can’t waif to see how she smokes! Will be doing a harvest post once she is dry! I also decided to let the Rock Machine & Doctors choice #1 go another week or two

Likes
3
Share
@CaptonianMoneymaker
Follow
Had little issue with under feeding but up all doses by 10ml per 2 litres


