The Grow Awards 2026 🏆 


Likes
Comments
Share
@Creme_De_La_Creme
Follow
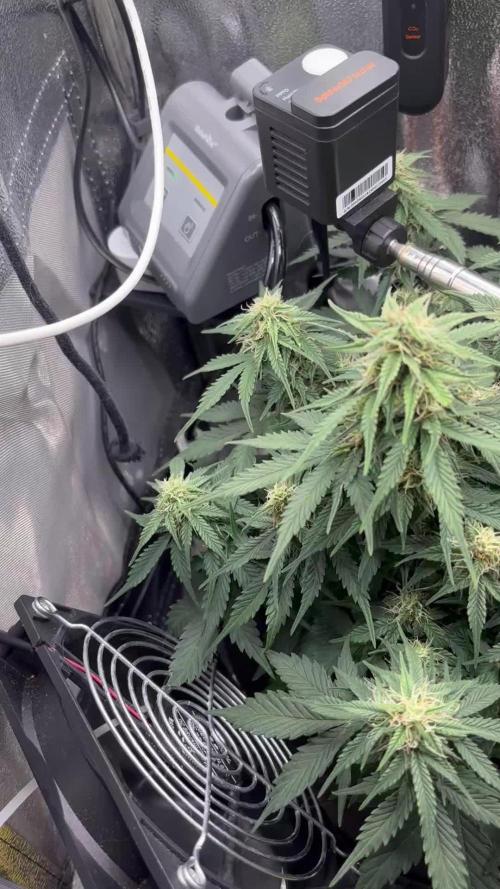
Week 6 is done !!! 👽
Did some defoliation this week, just a few large fan leaves here and there, nothing major, just exposing the heads.
super happy with this lady, she will be a BEAST ! 👌
Just took picture and video on day 41, will make up for it next week.
see you all 😎

Likes
40
Share
@Taima
Follow
Mahalo to everyone on growdiaries for following and helping during the grow!!!! I'm going to update in about 3 or 4 days for a dry weight. Also sorry for saying day 72 in the video. Its day 77. Aloha.

Likes
12
Share
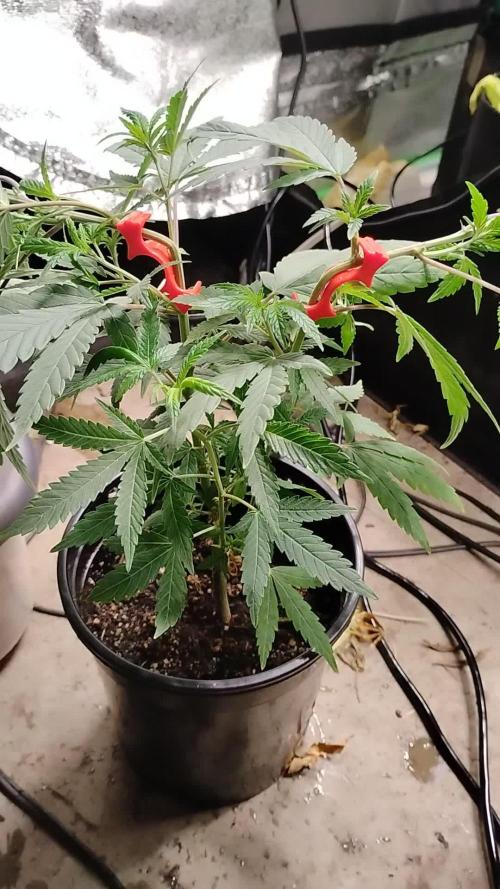
@gamberro
Follow
Things seem to be progressing well overall, buds are fattening up nicely and you can clearly see pistils gradually turning brown with more and more trichomes appearing. The smell situation is interesting: not much odor around the tent itself, but when I open it up you definitely get that classic Northern Lights smell, very piney and earthy. It's not overwhelming yet but it's there.
Now the bad news: as you can see in the photos, she's self-pollinated. I'm seeing the first seeds forming in some calyxes. I'm hoping it's just a few and won't impact the harvest too much, but in the worst case I'll just use the whole crop for hash. The hermie issue from previous weeks finally caught up with me.
Environment has been pretty stable this week. Temps sitting around 21-24°C during lights on, dropping to high teens at night (sometimes hitting 17°C). Not ideal but the NL genetics are handling it fine. Humidity has been bouncing between low 40s and mid 60s with one spike to 66%, probably from watering and humidifier refill. VPD has been in the 1.0-2.0 kPa range most of the week, which is acceptable for mid-late flower. PPFD stayed steady around 640 during lights on, and CO2 is just ambient as usual with the typical spikes here and there.
Feeding this week was a bit all over the place as I'm trying to find the right balance. On Mon 13th I gave her 1.5L with full bloom feed: Bio-Bloom, Bio-Grow, Top-Max, CalMag, SUPERthrive and Acti-Vera at pH 6.30 and EC 0.95 mS/cm going in. Runoff came out at EC 0.93 mS/cm and pH 6.11, so pretty clean. On Fri 16th I went lighter with just 1.5L of Alg-A-Mic (3 ml/L) and CalMag (0.3 ml/L) at pH 6.16 and EC 0.26 mS/cm, didn't get any runoff that time. Then today (Sun 19th) I ramped it back up with 1.5L of the full mix: Bio-Bloom (4 ml/L), Bio-Grow (4 ml/L), Top-Max (4 ml/L), CalMag (0.5 ml/L), SUPERthrive (0.27 ml/L), Acti-Vera and Alg-A-Mic at pH 6.20 and EC 1.60 mS/cm. Runoff came back at EC 1.70 mS/cm and pH 6.20, so the medium is holding a bit more salts than what I'm putting in but nothing crazy.
Visually she looks healthy apart from the seed situation. Leaves are a nice green with no signs of deficiencies or burn. The buds are stacking well and frost is definitely coming in on the sugar leaves and bud tops. Structure is still tight and compact with all the main tops sitting at roughly the same height.
Overall I'm cautiously optimistic. The hermie/seed issue is a bummer but as long as it doesn't get out of control I should still get a decent harvest. She's bulking up, staying healthy, and handling the cold temps without drama. Winter is here but she's not impressed, just keeps on growing.
Likes
40
Share
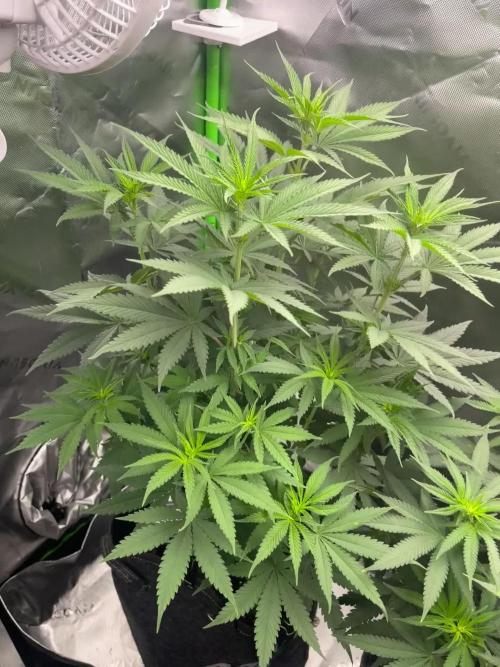
@nijuana
Follow
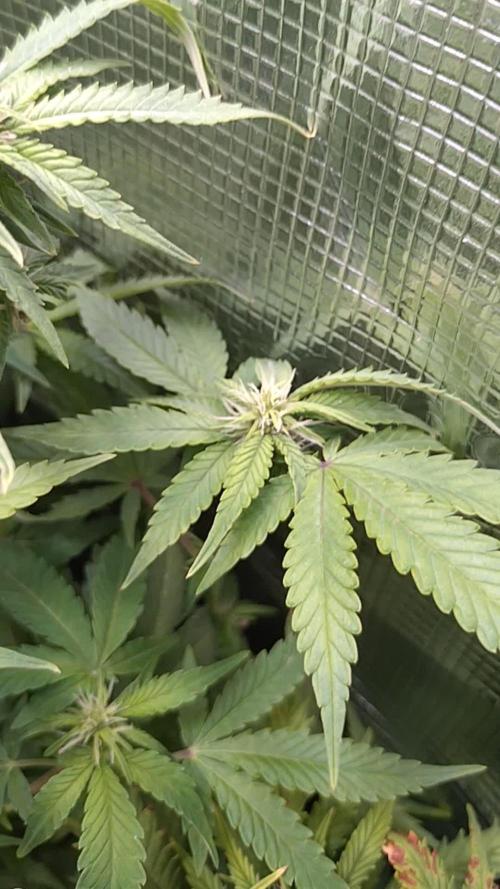
Monster plant ! So much trichomes 🙏😅
Bonus : the hermaphrodite problem was 100% resolved I removed directly passt 2 weeks everything , nothing was re-coming she focus only to do the bigger buds ever 😁🙏 and no one on the canopy was affected it's so great , so the thing is if you see that directly isolate the plant and remove everything , if you wait you're done !

Likes
12
Share
@I_Identify_As_A_Dan
Follow
Not much to report, a little defoliation covering any bud sights, havent started flushing just yet. Had some humidity spikes because of electricity going out (load shedding) but seem to be okay😇
Likes
12
Share
@Froggman
Follow
Budding nicely. Though I realized this week that this is not a GG. It is an Ice Cool.

Likes
4
Share
@AestheticGenetix
Follow
This is a fantastic genetic! This is round 2 of growing this genetic.
Breeder: ziplock seeds
Lineage:Banana creme cake jealousy x bonkerz
I took this cutting awhile back, before I flowered the plant this came from.
Expect giant colas and purpling early on.
Check ouy my YouTube for more indepth videos that aren't on here
https://youtube.com/@aestheticgenetix?si=ojXKXPAFAf_vK7-X
Likes
34
Share
@FreshCoastOrganics
Follow
Will update later on when I get the time. I have some valuable info on the powdered malted barley and other amendments.
Likes
6
Share
@KcKush
Follow
*Transplanted into 3 Gallon fabric pots using Happyfrog.
*Tested soil PH reading of 6.1 added 1tsp of lime.
*Feed Plants 1-6 with Advance Nutrients and Humic Acid PH Seemed to be 7.1
*Feed 7-11 with 20-20-20, Humic Acid, and Blueplanet CalMag. PH was 6.5
*All put under Spider Farmer SF 4000 at 26-28 inch 35%. Will lower everyday.
*Lets see how many females we get.


Likes
2
Share
@GingerGarageGrow420
Follow
Strain: Fast Buds Rainbow Melon Photo Feminized
Day 7 of Flower
Day: 56 from sprout
Medium: Growers Gold
Light: Vivosun VS2000 at 75%
Light Distance: 12 inches
Watering: By hand, ~16 oz daily
Nutrients: pH Perfect Advanced Nutrition Grow, Bloom, Micro 2 ml / L and 1 ml / L big bud.
Tiny pistols forming
Likes
5
Share
@GarciasGarden
Follow
Here we are at week 8 of flower plants are getting cut down tomorrow at day 56! I would of liked to push them another week but I’m literally getting my neighbors knocking on the door telling me it’s the smell is too strong! But I’m hyped to smoke these strains the snowcandy is a keeper forsure I got a couple more phenos of each strain I’m going to run next round so that should be promising ! Definitely go grab some of robinhoodseeds strains they are always fire!

Likes
14
Share
@Astroboy
Follow
hey my name rozay.
i’d like to thank you for the big bud,
oouiie yummy that stuff delicious…
I going to be a queen for you astro..
I can feel it astro
I am changing astro

Likes
14
Share
@ScouseCityLX
Follow
Week 9, some of the most exciting times during flower, the final stages, all the hard work is done, now it's just waiting for harvest.

Likes
14
Share
@Weedbadk
Follow
Día 1 y todas geminaron vamos a usar lst a todas y algunas lst y poda apical
Día 5 desde puesta en sustrato
Solo pulverizó
Likes
2
Share
@WeedM8
Follow
I cant wait to try this strain i dint had any problems two times one led turned off and past a bit of time with only 200w wich equivalent of 4leds of 5
Likes
17
Share
@Lazuli
Follow
Very intense high, hits very fast and long. Im not stoned but still sleep like a rock after a few hits

Likes
92
Share
@DogDoctorOfficial
Follow
Week 10 - Second Week of Flowering 🌸
As week two of flowering begins, the garden’s growth is unstoppable! These ladies are thriving, stretching up while staying beautifully vibrant and green. Every inch of this tent is optimized—each plant is soaking up light, nutrients, and water precisely as they need, filling the room with energy.
Room Conditions 🌡️
• Temperature: 27.3°C
• Humidity: 62.6%
• CO₂ Levels: 800 ppm
• VPD: 1.36 kPa (excellent range for robust flowering)
• Lighting Intensity: 818 PPFD
Solution & Medium 💧
• Solution Temp: 21.5°C | TDS: 470 ppm | pH: 6.02
• Medium: Moisture 100% (recently dried to 67%), TDS 510 ppm, Temp 22.5°C
The “dry-out” to 67% was a strategic move, helping boost nutrient uptake and root strength. Meanwhile, our slight increase in reds seems to be having the desired effect, nudging these ladies further along in the flowering process.
Eye Safety & LED Lighting 🌞🕶️
With powerful LED systems like the ThinkGrow and ICL-300, eye protection is critical. LED grow lights emit high-intensity light across the full spectrum, including intense UV and infrared components that are not easily detected by the human eye. Long-term exposure without adequate protection can lead to eye strain, and in extreme cases, damage to vision.
• Blue Light Hazard: LEDs often have elevated levels of blue light, which can harm the retina over time if proper precautions aren’t taken.
• UV Protection: Even low doses of UV can accumulate and harm eyes, so grow glasses with UV protection are essential for any indoor gardener.
Investing in quality grow room glasses can help protect from glare, UV, and infrared rays, making plant care safer and more comfortable.
Lighting Enhancements: ICL-300 In-Depth 🔆
The ICL-300 is our newest addition, specifically designed for inner canopy illumination. This LED offers a targeted light boost under the canopy, enhancing flower growth in lower and shaded areas—ideal for maximizing yield and light efficiency.
• Dual Spectrum Technology: The ICL-300 provides a custom spectrum designed to penetrate deeper into the plant canopy, promoting robust bud formation throughout.
• Enhanced Light Distribution: With strategically positioned diodes, the ICL-300 reduces shadowing and balances light distribution to all parts of the plant.
• Energy Efficiency & Heat Management: This light is designed to be energy-efficient, running cooler and reducing the risk of heat stress within the grow space.
The inner canopy light gives the plants exactly what they need, particularly during the flower stage when bud sites deep in the canopy can benefit from more direct exposure. However, after noticing slight leaf burn on some plants, I’ll hold off a bit longer before fully integrating this light to ensure optimal adjustment.
Looking Forward 🌟
As we continue dialing in conditions, it’s all about balance, precision, and taking proactive steps to optimize every aspect of the grow environment. We’ll keep a close watch on the canopy height, and next week, I’ll aim to fine-tune the light integration even further with the ICL-300.
P.S. - ICL-300 and CO₂ Sensor 🌱
The TrolMaster CO₂ Sensor (MBS-S8) has been crucial for real-time CO₂ adjustments, ensuring the plants get exactly what they need without constant monitoring. Combined with the ICL-300’s spectrum flexibility, these tools make an unbeatable setup, allowing for nuanced control over plant growth and development.
As always, a huge thanks to the Grow Fam for the tips, support, and enthusiasm! I’m excited to see what these next weeks will bring as these plants reach their full flowering potential. Stay tuned for more updates, and don’t forget: eye safety first, growers! 🌞🌿
Discount Codes so you can save big on your next check out 💚💚💚
Kannabia - DOGDOCTOR 30% off
SeedsmanSeeds - DOGDOCTOR 10% off
CannaKan- DOGDOCTOR 15% off
terpyz.eu - DOCTOR 15% off
The Neutralizer - PORKIT5-DOG 15% off
As always thank you all for stopping by, for the love and for it all , this journey of mine wold just not be the same without you guys, the love and support is very much appreciated and i fell honored and so joyful with you all in my life 🙏
With true love comes happiness 💚🙏 Always believe in your self and always do things expecting nothing and with an open heart , be a giver and the universe will give back to you in ways you could not even imagine so 💚
Friendly reminder all you see here is pure research and for educational purposes only
Growers Love to you all 💚💚💚


Likes
7
Share
@Messypies
Follow
With the majority of trichomes now turned milky with some turning Amber, i have decided to begin a 10 day flush using nothing but ph balanced water. Doing a shorter than normal flush as the plants with deficiencies don't have much nutes to use up.
Likes
9
Share
@Verbalist
Follow
The whole growth was pretty straight forward.
Good flying start and she had many healthy pairs of leaves after two weeks. Plus the pre-flowe phase also started just after two weeks.
This strain is a bit of a ”lazy flower” buds getting big in no time, but feels like I could have ripen her easy for the next two weeks.

Likes
3
Share
@Gram_Solo
Follow
😎👍
Done some defoilation this week took away a few big fan leaves and most of the growth at the bottom, going to try and concentrate on big nugs at the top. Will repeat the process each 2 week and get rid of all them nute suckers.
Been using some plant stakes to weigh the stems down for a while. it doesn't last long but gives us a shape that's compact and not getting too tall. Will get some twisty tie soon to do some proper LST.
This week will just be training and getting our shape in order.
Looking good so far 👌 🌴🌴🌴🌴

Likes
20
Share
@PhinolaGreen
Follow
9. Woche
Läuft soweit, aber mit den angegebenen 9 Wochen von Fastbuds komm ich nicht ganz hin 😜