The Grow Awards 2026 🏆 


Likes
Comments
Share
@Mazgoth
Follow
I think a beginner can grow this plant easy because of its resistance and the fact that doesn’t need much care.If you make it to the end you will get incredible result for the first time.

Likes
27
Share
@Sinistergrow702
Follow
Almost done with week 5 veg one more too go and these girls are getting flipped .they are doing great in my opinion tops coming up from every corner this should be a nice tent at the end of the day buds from side to side 😊

Likes
22
Share
@UnorthadoxDude
Follow
Hello everyone and welcome to week 9 and day 57 for these two Fast Buds Strawberry Bananana Autos.
These two have gone mad!
Beyonce is 81cm tall and well into flower as you can see.
Solange on the other hand was 118cm tall and had passed the light so I super cropped her two tallest colas a few days ago. She is now 98cm
Fertigated 10l 4 days ago and 7.5l today.
Day 60: Fertigated 10l
Day 62: The plants are now too big and/or heavy with bud to move out of the tent to photograph, and so with thanks to @growbigorgohome who suggested it, I have got a selfie stick to do in-tent photography. It's not great but it's better than nothing! Hopefully the videos will show plenty of details. Anyway I am starting to routine again now, the plants haven't gone more than 3 days without feeding, and I should be back to every other day again now. These two girls are really amazing. Beyonce is way ahead in terms of bud development, but Solange vegged longer and stretched more she was so massive I had to super-crop two colas! Anyway they are really motoring along now, I think Beyonce will be ready 2 weeks before Solange. Despite it is only day 62 we are rapidly approaching the end game here.
Likes
5
Share
@Xabii
Follow
49 Days!
Lost a day of timelapse footage, found a temporary fix tho, should not happen again.
The plant stretched a little and is full on on flower.
This will most likely end up as a single big bloop of bud again, sadly did not stretch as much as I liked it to be.
Overall a good week.
Spoiler: added lights to the bottom to get more light inside the plant at the first day of week 8, more on that next week.
Values are average of the day.
DATE - EC(us/cm)
20250705 1373
20250706 1362
20250707 1346
20250708 1378
20250709 1333
20250710 1331
20250711 1353
DATE - PH
20250705 5.67
20250706 5.67
20250707 5.90
20250708 5.95
20250709 6.17
20250710 6.15
20250711 6.13
DATE - ORP (mV)
20250705 -8
20250706 62
20250707 19
20250708 43
20250709 21
20250710 -1
20250711 -4
DATE - °C - RH% (Tent Temp/RH)
20250705 24.8 46
20250706 25.1 55
20250707 24.7 59
20250708 23.8 52
20250709 24.2 56
20250710 24.8 52
20250711 24.1 60
DATE - °C (Reservoir)
20250705 22.1
20250706 22.7
20250707 22.5
20250708 21.4
20250709 21.8
20250710 22.3
20250711 22.4
DATE - CF
20250705 13.73
20250706 13.62
20250707 13.46
20250708 13.78
20250709 13.33
20250710 13.31
20250711 13.53


Likes
4
Share
@UrbanBoer
Follow
Talk about a mission accomplished, dam you Lamby… you had me excited at one point when I thought you were an auto, but to my shock, you are a regular, you just have a long ass flowering window… at least unlike her sisters within the 4th cycle, she did not reveg she just focused on flower, the buds are bulky and firm, scent is amazing, you would mistake her for a cheese strain. I should not be disappointed by the plant’s size! Because I planted her during winter, and all outdoor or greenhouse(unless you have a GH that is climate controlled), do not grow as big as the would during spring or summer season, and due to this factor, I only got 59g of wet bud. But I have faith the other ladies will produce a higher yields.
Last I smoke this strain was earlier late summer or early Autumn, and from smoking to growing now harvest, I wish I am blown out the water with this strain, it’s time to conduct that questionnaire. Or even better go to an established cannabis club, and get them to samples bud, and ask for a review.
Likes
6
Share
@Young_agronomist
Follow
07.09.23- 63 день жизни северного сияния в горшке 3 литра .
Всего пару дней и будет харвест .
Сейчас получает только чистую воду
Веерные листья срезаны

Likes
100
Share
@ILoVeThiSpLaNt
Follow
Giorno 56
Zombie Kush #1 è pronta. 20% di tricomi ambrati e quindi si taglia. L'avrei lasciata volentieri un'altra settimana ma ho i barattoli vuoti 😀
Zombie Kush #2 ha ancora tutti i tricomi latte e rimarrà almeno un'altra settimana. Cmq bellissime cime. Tutte di uguale consistenza e colori stupendi
Le due Rainbow sono praticamente identiche e tra qualche giorno verranno tagliate visto che hanno già un buon 10% di tricomi ambrat
La Milk Monkey ne ha ancora per due settimane e mi sta colpendo particolarmente. Penso sia la pianta più collosa mai coltivata.
A settimana prossima e grazie dei like e dei commenti ❤️


Likes
2
Share
@Saintvicious
Follow
Flower stretch and bud sites are setting. Lots of tops from the lst. Fingers crossed.


Likes
2
Share
@KEVS_BEST
Follow
Woche 6 - Übergang zur Blütephase und erste Herausforderungen
Die sechste Woche markierte den Übergang von der Vegetations- in die Blütephase. Bis zum Wochenende wurde weiterhin der Terra Vega Dünger verwendet, mit einem Verhältnis von 30 ml pro 10 Liter Wasser. Am Samstag, dem ersten Tag der Blütephase, wurde jedoch deutlich, dass ein Wechsel auf den Blütedünger nötig war. Leider führte die verspätete Umstellung auf die Canna Terra Bloom Linie zu einem leichten Nährstoffmangel, der sich in den ersten Tagen der Blüte zeigte. Anfang der ersten vollen Blütewoche wurde dies korrigiert, indem vollständig auf Canna Bloom umgestellt wurde.
Die pH- und EC-Werte blieben stabil und optimal eingestellt. Die Temperaturen stiegen minimal an, blieben jedoch bei angenehmen 26 Grad. Mit Beginn der Blütephase startete der sogenannte Stretch, und die Pflanzen legten beeindruckende 2,5 cm pro Tag zu.
Während dieser Woche wurden die ersten unteren Blätter entfernt – ein leichtes Lollipopping, um die Energie auf die oberen Bereiche zu konzentrieren. Die entfernten Blätter wurden getrocknet und sogar laminiert, um den Fortschritt dieses besonderen Grows festzuhalten. Es wurden ebenfalls einige kleinere Zweige und Blätter im unteren Bereich entfernt, um die Belüftung zu verbessern. Das eigentliche, umfassendere Lollipopping wird jedoch erst in zwei bis drei Wochen erfolgen.
Trotz des anfänglichen Mangels aufgrund der zu späten Umstellung des Düngers blieben die Pflanzen insgesamt kräftig, gesund und wuchsen konstant weiter. Der Übergang in die Blütephase verlief somit erfolgreich, und die Pflanzen zeigten weiterhin ihr beeindruckendes Potenzial.
ENGLISH
Week 6 - Transition to Flowering and Initial Challenges
The sixth week marked the transition from the vegetative to the flowering phase. Until the weekend, the Terra Vega fertilizer was still used at a ratio of 30 ml per 10 liters of water. On Saturday, the first day of flowering, it became clear that switching to the flowering fertilizer was necessary. Unfortunately, the late transition to the Canna Terra Bloom line caused a slight nutrient deficiency that appeared in the first few days of flowering. This was corrected at the beginning of the first full flowering week by fully switching to Canna Bloom.
The pH and EC levels remained stable and optimally adjusted. Temperatures increased slightly but stayed at a comfortable 26 degrees. With the start of the flowering phase, the stretch began, with the plants growing an impressive 2.5 cm per day.
During this week, the first lower leaves were removed—a light lollipopping to focus the energy on the upper parts. The removed leaves were dried and even laminated to document the progress of this unique grow. Some smaller branches and leaves were also removed from the lower areas to improve ventilation. However, the main lollipopping will take place in about two to three weeks.
Despite the initial deficiency due to the late fertilizer switch, the plants remained overall strong, healthy, and continued to grow beautifully. The transition to the flowering phase was successful, and the plants continued to showcase their impressive potential.

Likes
10
Share
@Bncgrower
Follow
Another successful grow! This strain has a wonderful aroma and generous, resinous buds. This will definitely always be my go-to strain. 💪🥦


Likes
15
Share
@Huckleberry39
Follow
This is the start of her 3rd week. I can't believe how much she has grown in the last week. She is a beaut!!


Likes
73
Share
@PsiloNoid
Follow
Starting week 2 of flower on this super stinky and bushy Bruce Banner Auto from FastBuds! She has been doing a lot better the past few days but still showing some slight yellowing and burnt tips. We are gonna have to keep a close eye on her and make sure these problems don't progress. Other than that she looks perky and happy today so no adjustments yet. More updates soon!
Day 55 she is still chugging along nicely! She has been pretty perky this week and been stretching out a lot better! Its about time to defoliate a little as well. We will probably clean her up in next couple of days and remove some lower bud sites in the process. She still has some slight yellowing but it appears to mostly halted and not affecting any new growth so we let her ride it out on rain water only!
Likes
144
Share
@roro_204
Follow
They grow fast at this Age . Transferred them to 3gal pots this week
I miss how the grow room used to be so clean lol before the huge hose was installed :p
Likes
5
Share
@Wenz004
Follow
Experiment explanation see week1
This week nothing special happened with my both living soil plants...only the flowers got a bit more fat...nothing else
Got some water and compost tea...thats it
Likes
24
Share
@TerpTurtle
Follow
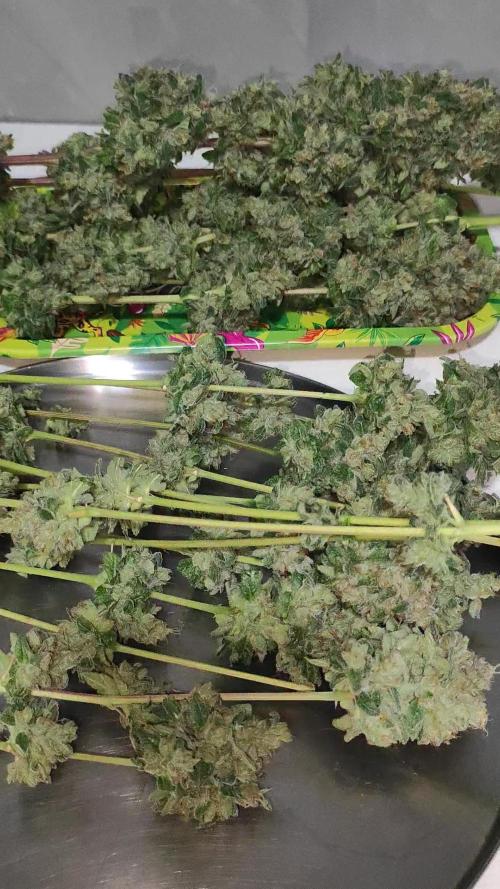
14 day dry | Curing in Grove bags, filled 7 QP bags & got 56g of keif out the trim bin from only 2 plants!
More pictures coming! STAY FROSTY GROWMIES


Likes
3
Share
@reviewsfromspace123
Follow
Sugar high came out very nice. Has a very gluey terp almost like super glue. For an f1 this genetic grows like a weed lol but seriously Sugar high by Mephisto genetics should be taken seriously!!!


