
Processing
Likes
Comments
Share


@Ledbelieve
Follow
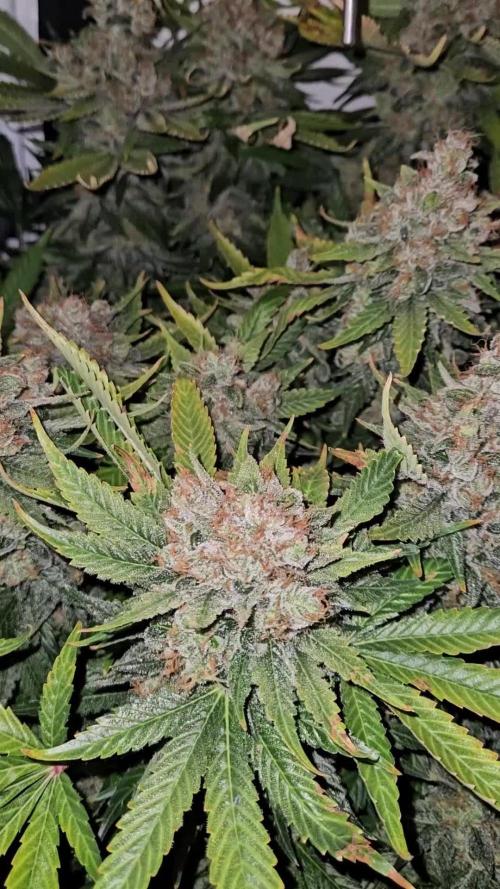
Cannot believe all lady's. Lucky guy.!! Week 2 of 🌺 flower.....

Likes
26
Share


@Highgrade_Harvests
Follow
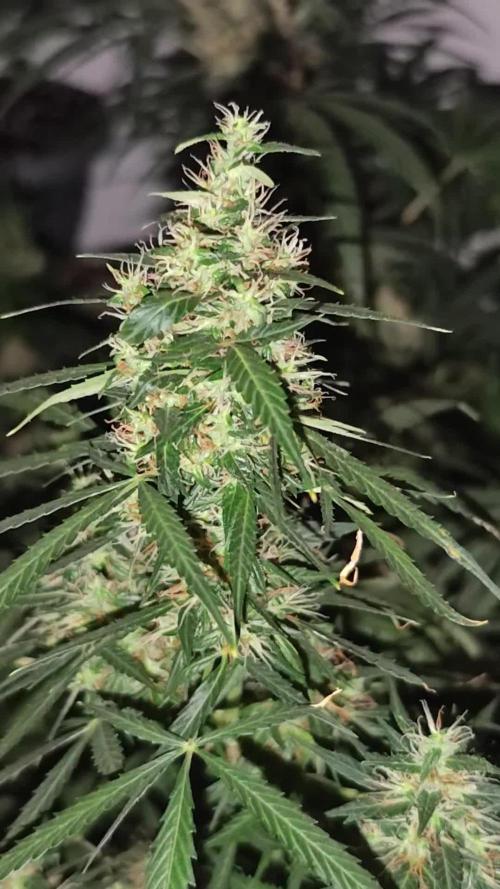
Week 10 is in the books for the gorilla gas and the tent is filled with a skunky piney aroma. Very strong. All the plants have filled out tremendously and now I'm just waiting for the trichomes to turn a little amber. Once we have about 10% I'll chop them down. Thinking about doing a 48 hour dark period also before the chop. Thanks for following along!

Likes
16
Share


@Foggedaboudit
Follow
10 weeks total for the first phenos and a bit more than 11 for the last one! I could have easily gotten double the projected yield on these had I not neglected them but whatever I pulled is rock hard, dusted in sugar and smells absolutely stupendous! You did it again FastBuds!

Likes
13
Share


@Droot
Follow
plants are going to be too big. i will have to figure something else out because i havent done any LST or anything to get them to stop,i wanted to see what they look like completely natural . i will probably angle the light and supplement the blurple light on the other side, and just turn the plant a couple times a day. if you have a better suggestion let me know
Likes
2
Share


@gr3g4l
Follow
Esta semana tocó la poda de los apicales y primer nudo dejando solo 4 nudos por planta.
Por lo que parece tienden a grandes hojas e internodos cortos.
Esta semana también aumenté la potencia del lumatex hasta el 75% unos 220W. Empecé con 100 W luego fueron 150 y ahora 220 , así hasta cambiar el fotoperiodo a 12/12h. Entonces al 100%, 300W.
Con 26 dias de vida ya tenian suficientes nudos, ramas y tocó hacer el apical y la poda del primer nudo a todas dejando 4 nudos por planta, 8 ramas secundarias.
Terminamos la semana con la nº5 con manchas en las hojas muy feas. Entiendo que tengo que tratarla diferente al resto por lo que la regaré menos y dejaré secar más entre riegos al menos un par de veces.


Likes
2
Share

@AlpenZilla
Follow
✂️ Harvest – Flowering Week 12 | Day 78 (17 weeks total)
Strawberry AK – Harvest Summary
Harvest took place today, marking 17 weeks from germination.
⚖️ Wet Weight
Strawberry AK: 1240 g
🌿 Final Impression
The Strawberry AK delivered a strong final result.
Buds appear dense, well-formed, and heavily frosted, with an overall solid finish to the run.
🧠 Post-Harvest
The plant is now hanging to dry, and final results will be determined after trimming and dry weight assessment.
Overall, a long run, but a successful outcome. 💪🌿

Likes
3
Share

@JefyKennedy
Follow
KICKASS AUTO Day 77
Critical and Ssh bloom 50
Jack bloom 40
Fertilizers
Kickass 4th dose overdrive.
Ssh big bud 1.5ml continued
Critical and Jack 1st dose overdrive (I started overdrive 1 on Jack's 40th bloom day because I watered him incorrectly)😂
An Sensi a+b 2 ml
Big Candy 1.5 ml
Sensizym 1.5 ml
Intake ppm 850, outlet ppm 850 (all)
The temperature goes up to 34°C during the day, nothing to do anymore.
Light 480 qb ppfd 700
DLI 50

Processing
Likes
3
Share


Likes
13
Share


@WeedM8
Follow
Hello m8 welcome to this journey with me in this diary will have very interesting strains hope u find something useful
Persian Girl 🏝️🧞♀️
- [ ] 1st week Veg: germinated in substrate lighting very close so it jets medium high humidity after the 3rd day they started sprouting
- [ ] 2nd week Veg: this week my ventilator broke down and as the temperature stayed very warm nothing developed much
- [ ] 3rd week Veg:fortunately this week i had fixed the ventilation and the temperature has go down a bit allowing the little plants to develop and reinforce
- [ ] 4th week:very good developments in this week I already started feeding a bit two times but i didn’t have to…once was enough
- [ ] 5th week Veg:this week they were very strong green i only had to water them good and keep the ventilators going no stop .They have good hight already ,but as i have to strains together. I want to transplant them when the hight of the other one have stretched… I’m thinking to transplant next week if not the next one Hello m8 welcome to this journey with me in this diary will have very interesting strains hope u find something useful
- [ ] 1st week Fl: first week of flowering they started stretching and looking very heal
- [ ] 2nd week Fl this week I’ve been away i had a friend taking care of them they stretching very well i hope that she starts putting energy into the flo
- [ ] 3rd week Fl they are streaching very well ..getting the light very well
- [ ] 4th week Fl:
- [ ] 5th week Fl
- [ ] 6th week Fl
- [ ] 7th week Fl
if this was useful please like and follow

Likes
2
Share


@MR_S_theGardener
Follow
In dieser Woche ist mir bei meiner Homebox der Reißverschluss abgekackt 😑 aber wie der Zufall so will sind die growpros gerade im Angebot und die Z-ups eh viel zu groß, also gleich mal n 80x80er gegönnt 😅
Zu den Pflanzen:
Z-up #1
Keine mängel, braucht bisschen länger als #2, aber wird schon. Hat jetzt zumindest die Höhe aufgeholt, die Blüten sind noch nicht so weit entwickelt. Die Abstände sind aber hervorragend wie auch bei ihrer Schwester.
Z-up #2
Zeigt immer wieder überdüngung an, aber entwickelt sich trotzdem super. Falls ich die hellen Blattspitzen falsch interpretiere, gerne was schreiben 😜 ph im drain ist 6,8 und ppm kommen bei gegoßenen 670 (hier habe ich die Nährlösung verdünnt) auf 1050ppm.
Über die Mandarin Panties werde ich nächste Woche wieder ein Update geben.
So Long, bis denne

Likes
43
Share


@sleeve
Follow
This chocolope took to the LST well. The buds have swelled to massive proportions, I am more than impressed with my first dedicated photo grow. I am definitely a dna genetics fan for good!

Likes
38
Share


@Aedaone
Follow
These girls are starting off the week getting blasted by the Sun and heat. I had to increase the water dramatically. Pots are short and because the heat and lack of humidity they are having to be drenched. Day 2 of this week, I'm noticing some ph imbalance. I don't have ro water and my tap is 7.6 ph. I'm going to water today with 5.8 ph water and see if they green up. I also took down a tree that was shading that little one. That should speed up it's development. The 10 mph winds blew one of these over on day 1 this week. I'm propping it back up on day 2 and it should straighten out. End of day 3, everyone got some organic soil acidifier. They greened up nicely. The smallest plant this week had its new growth eaten. Ants, grasshopper, I've got a big question mark there, but she's still alive. The week finished nicely. Plants are finally getting into the super soil and taking off. The extreme heat has been tuff on them but fastbuds can handle it.


Likes
32
Share


@BudBoutique
Follow
! this is my current status, gonna upload my last veg weeks within the next week - got a bit busy around Spannabis - thank you for your understanding! 💚
Welcome to Bud Boutique Grow Diary - really appreciate all your love and support :)
Dont forget to check out my other current grows!
🗓️ This Week:
after 48 hours of complete darkness (important for seedlings to make sure all plants switch into flower same time), I finally switched my lights to the 12/12 schedule and sent my ladies into the flower.
- more than healthy and going well
- Day 5: super strong and praying upas u can
- Day 3: Foliar spray with APTUS Regulator and APTUS Nutrispray to give them extra micronutrients and give them a little shell for protection.
! always use APTUS Regulator first and mix well with your water before adding any other nutrients for Feeding or Foliar!
Thank you for still staying with me 💚
___________________________________________
--- 🌱 Strain (Sponsor) ---
🏷️ Stardawg by MSNL
https://www.marijuana-seeds.nl/stardawg-feminized-seeds
--- 🥗 Nutrients and Feeding (sponsored by APTUS: APTUS Ambassador) ---
🍸 APTUS: full nutrient schedule extreme
-- Regulator, N-Boost, P-Boost, CaMg-Boost, K-Boost, Allin1 Liquid, Startbooster, Topbooster, Enzym+ every feeding
-- Fulvic-Blast, NutriSpray as Foliar each once a week
🔗 https://aptus-holland.com/
--- ♻️ Grow Control (Sponsor) ---
TROLMASTER: TENT-X + LM14 Light Adapter to dim/sunrise/sunset lights + Temp & rH Sensor all remote on App
🔗 https://www.trolmaster.eu/
--- 🏭 Grow Setup ---
💡LUMATEK Zeus Pro 600
* 🏠🌿 Indoor: Homebox 120x120x200cm (4x4)
* 📐🌀 PrimaKlima exhausting Fan 1180m3/h (running on 60-80%)
* 🌀 Can Light Filter 800m3/h & 1x Fanbox 1x Dyson fan for Air circulation
🔗 https://lumatek-lighting.com/zeus-600w-pro-29/
🔗 https://primaklima.com/de/shop/ventilatoren-de/ec-ventilatoren/pk160ec-tc/
🔗 https://canfilters.com/products/filters/
All Likes and comments are highly appreciated!!!
👨🌾 don't forget to check out my Instagram for daily educational content: budboutiquee
- Bud Boutique

Likes
56
Share

@Aedaone
Follow
The temperatures, humidity, and watering volume(if measured) in grow conditions are all averaged for the week. The pH is soil pH. Any watering done by me is well water which is 7.6 pH and 50° F. Any listed nutrients are ml/gallon of soil.
Day 1 we had a high temperature of 90 with lots of sunshine. I gave them 2.5 gallons of water per pot.
Day 2 we had lots of sunshine and a high temperature of 91°F. I watered twice today about 2-2.5 gallons each time.
Day 3 we had high temperatures of 86°F and mostly sunny skies. I watered 2.5 gallons per pot.
Day 4 we had mostly sunny skies with a high temperature of 88°F. I watered about 2.5 gallons from the water hose. I added 50ml of Ferrous Sulfate top dressed to each pot. I topped these pots off with premixed soil like I used in the pots at planting Week 1.
Day 5 we had a high temperature of 88°F with mostly sunny skies. I watered 2-2.5 gallons once today.
Day 6 we had high temperature of 89 with mostly sunny skies. I watered 2.5-3 gallons per pot.
Day 7 we had high temperature of 91 with mostly sunny skies. I watered 2.5-3 gallons per pot.
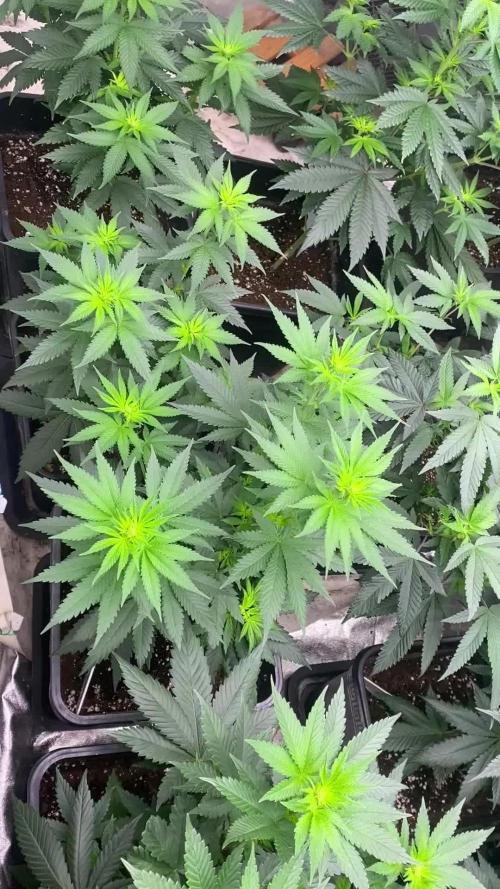
This week was a success. The plant didn't gain much additional height this week. The tallest was 54". I added a little iron, and the soil I added had premixed nutrients. Next week I'll most likely add some blood meal to the watering to boost the veg. They're loving these hot summer days.
Likes
8
Share


@Fullmeltalchemist
Follow
D56 - 11.13 - Looking great. The buds on the dwarf cheese is continue to swell and frost over while the other on is spitting out long white hairs and getting juicy! Not sure how long this dwarf is going to take to finish, but maybe 2-3 more weeks?
D60 - 11.17 - :)
Likes
5
Share


@SmallBatchNugz
Follow
Well the end of week 8 was glorious looking forward to week 9 all by itself. Yeeehaaa.

Likes
12
Share


@Kenpowarrior
Follow
●on 12/12 light so that honey girls can start to flowering. They are no auto's.
●Royal dwarf girls are on green sensation and sugar royal for better tast en smell. Lets see what it gives.
●they are growing slow now not much change to see. Waiting for fatter buds.


