
Likes
Comments
Share


@MasterKush714
Follow
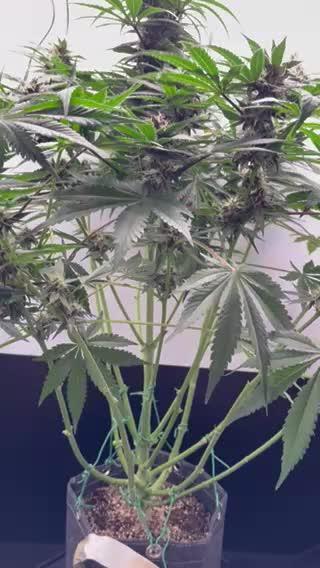
👹08/20/2024 What's brackin fam let's get it!!!!👽
Sooo the girls are pushing along, doing well the pH swing is kinda high right now but this was kinda expected, but I am adjusting as I can, will lower ppm to 1600 next water change on Wednesday which is tommorow and will be keeping pH at around 6.0 will update as the week goes on!!!
***********************************
08/22/2204
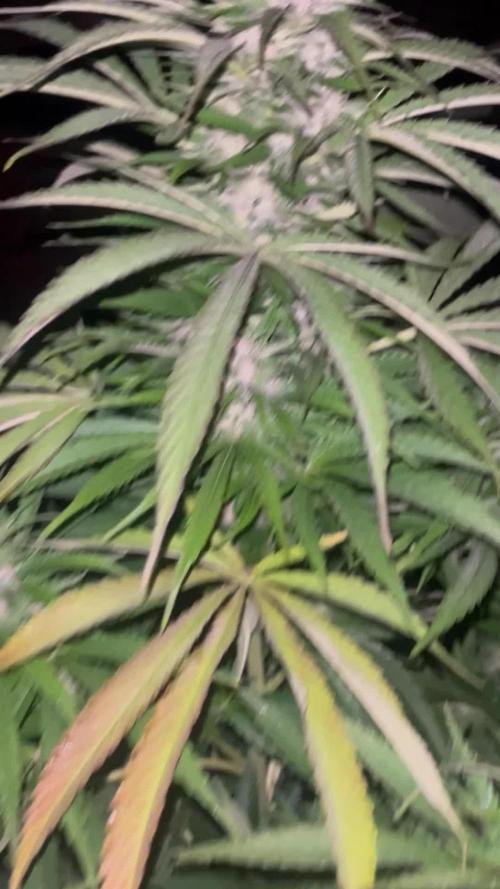
Update my girls are legit fadding I have zero reason why Iight just flip clean sterilize and re run sorry again y'all keep y'all updated 😔
Well it's official the girls had died out to root rot I'm terribly sad for this...smfh

Likes
18
Share


@NMGDOC
Follow
July, 1: flushing to lower EC.
Today i fed them with 1/2 of the snoop's premium nutrients bloom and the other half with snoop's premium nutrients grow, following the recommendations of the product. Also i incorporate Genesis from Agrobeta (last pictures).
Again, don't pay attention to the plants in the small pots, i will do another diare for them because they are one week younger (this is why i will keep the fotoperiod of 18 hours one more week)
It was too late for use the nem oil, and for the moment it's not necessary. So, i dont used it in the 4 week like i said.
July 3: Today i trimed the lower leafs. Maybe it was too late, but i just cut the leafs that were really low and looking not that good.
July 5: This is my first time growing anything, I'm super excited and i think they are doing it great jaja because i don't have any experience, so i can't compare it. Anyway, i think they look fine 😊
I can't find snoop's premium nutrients bloom in GrowDiares, but you can see composition in the last pictures 😊


Likes
17
Share


@Bobo_Zion
Follow
So we did some defoliation (finally 😂) of the ladies. killed a few brown stink bugs and a couple caterpillars. Getting them ready for next month when time while start to wind back down to 12 hours a day.
Likes
33
Share


@CaaosPLAGRON
Follow
Tra un paio di giorni la taglierò e aggiungo a questa settimana qualche altra foto delle cime fresche, a breve il raccolto... Molto curioso di vedere i risultati... Wowww ❌❌❌

Likes
18
Share


@Dendegrow
Follow
Frozen Black Cherry – Week 4
The Frozen Black Cherry is looking amazing this week! 🍒 I went ahead and lollipopped the plant to improve airflow and focus energy on the main buds. 🌿 I also added a spoonful of Greenhouse Feeding as a booster to give it that extra push. 🚀 The plant is developing beautifully, and the buds are starting to show great potential! 🌟 Can't wait to see how it turns out—stay tuned for more updates! 😎
---
Frozen Black Cherry – Woche 4
Die Frozen Black Cherry entwickelt sich diese Woche richtig prächtig! 🍒 Ich habe die Pflanze gelollipopped, um die Luftzirkulation zu verbessern und die Energie auf die Haupt-Buds zu konzentrieren. 🌿 Zudem habe ich einen Löffel Greenhouse Feeding als Booster drauf gepackt, um ihr noch einen Extra-Schub zu geben. 🚀 Sie entwickelt sich fantastisch, und die Buds zeigen schon jetzt großes Potenzial! 🌟 Ich bin gespannt, wie sie sich weiterentwickelt—bleibt dran für mehr Updates! 😎

Processing
Likes
84
Share


@Hempire
Follow
I cut a few of leaves that covered the secondary branches of light. Moreover my Moby dick’s plants grow up bushy and to my mind it covers too much of light.


Likes
32
Share


@Only4passion
Follow
All right these fastbuds auto are getting huge man I’m really impressed by those strains 💪💪🤩✌️
Likes
17
Share

@CCSAUTOVGROW
Follow
End of week 3 Flower. She is spectacular!!! Buds are starting to ripen and the sweet grape aroma is heavenly.


Likes
11
Share


@Troy_Farms
Follow
I love the strain and my first autoflower did not disappoint. She grew surprisingly bushy, and she really got chunky near the end! Super happy with how she turned out. The extra couple weeks really made a difference and she smells like fruity pebbles. Delicious! Hanging for 5-7 days before stored for curing.
Did final trim and storage for the buds, 50 gram dry weight total. They were more on the lighter side as far as density goes. But smell good and the high is great and was fun to grow! Was able to successfully breed her with a Durban Poison male and look forward to seeing the super sativa babies to come. All good things. Here is to the next round, cheers! 😎

Likes
152
Share


@BioBuds
Follow
How is it growing, my fun(k) loving friends?
***INFO*** For more on my setup, why it was monster cropped, and how I made the canopy, see Germination page and subsequent weeks.
They had 48 hrs of darkness, and the time has come to say goodbye to my friends.
I thanked them again, spend some time with them, and under the sound of Amazonian shaman's harvest and healing songs (will post link), asked for their gifts, and apologized for taking their lives.
I do this while in contact with the plants, touching, smelling them, observing every detail, no thoughts, just in the present moment.
I feel emotional as I do this and remember how they were a companion, a source of distraction in a time of worry, sadness, and loss.
How they already comforted me and kept me company in a time of painful insights about honesty, commitment, and staying true to myself.
I thank them again for their wisdom and gifts, viva Santa Maria, viva Planta Maestra, may the mother of all beings give us healing and protection.
And I proceed with the harvest as I visualize my intentions with every cut.
Branch by bud laden branch is tenderly untangled from the scrog net, taken with a clean-cut and immediately hung upside down in the grow tent, which will now double as a curing and drying room.
A couple more weeks and we will have the final cured and dried weight.
More photos and movies will follow, this is where we are so far!!
Thank you for checking in on our journey, all the love, support, and compliments were a true motivation, a very needed distraction, and guidance for me and for Sunshine.
Big hug, lots of love and take care!
***UPDATE***
The final weigh-in is ready. I hadn't seen them in a week, because of my vacation. The humidifier I set up, had failed. So the grow had dried in 7 days, what I wanted to be 14 at least. Thankfully, its Sativa ancestry shines through, the smoke isn't harsh, the buds a sticky and smelly, no hay smell at all.
We ended up at 246 grams, excluding a shitload of larf and popcorn bud, totaling at 310 grams all in, a first at a gram per watt for me, but for the Zambeza seed competition, I stated we would only weigh the quality bud. Overall I'm very happy!!
Guessed weights in the competition:
- @hashy : 0 grams
- @MrHyde : 198 grams
- @JamMAKEcan : 224 grams
- @TrickOrTrip : 260 grams
- @Greeneysgrow: 312.5 grams
- @Ohey_fu_kyu: 350 grams
- @Puffs4Pipes: 385 grams
- @Hempkid : 605 grams
- @DoDrugs420 : 621 grams
TrickorTrip was closest!! Congratulations!!! I will be contacting you to get the seeds with you!! Thanks for playing to all the others and better luck next time, I will give away some seeds again!!
Summary:
Cost of setup: 850 euro
Cost of nutrients and soil: 125 euro
Cost of seeds: None they were cloned
Cost of power: 150 euros in the power bill
Total cost: 1125,-- for setup and this run.
I smoke for medical reasons and it's used for ritual and healing purposes, never to be sold, as it loses its magical properties.
Should I have to buy Gelato of this quality at the dispensary that I frequent, it would cost me at least € 15,-- per gram.
246 x 15 = 3690 euros. also, 49 car rides of 25 miles there and back, 250 euros in gas saved.
Overall conclusion:
I think we can call this a succes. Made back my investment, my cost per grow and we saved the environment.
Thanks for all the love, tips and support! Couldnt have done this on my first indoor LED grow, without you!!
Wish you were here to smoke a fat one, some good conversation about our hobby and now... I'm hungry.... See you on the next one!! Hugs Bud!!!
PS. Should you be interested in Shamanism or Teacherplants by anything I mentioned. Pls watch the following documentaries or read these books:
- The Last Shaman on Netflix
- Fantastic Funghi on Netflix
- Food of the Gods, by Terrence McKenna
- The Herbal Jedi / Yarrow Willard on Youtube
- The Tao of Physics
- DMT: The Spirit Molecule on Youtube
- The Doors of Perception by Aldous Huxley
- Plants of the Gods by Richard Evans Schultes and Albert Hoffman
- What the bleep do we know - Down the rabbithole (although vague and some theories mentioned here, could not be replicated, like the water by Emoto)
- The Secret on Netflix- if you like enlightenment in bitesize, tellsell format
The link to Santo Daime hinarios for the Santa Maria cura, healing ceremony: https://www.youtube.com/watch?v=kSjNgg_-iD0&t=333s
If you want to learn more about permaculture / homesteading, see the following links:
- Pete Kanaris, Green Dreams TV, visits many permaculture farms in tropical area's, he is great!! https://www.youtube.com/user/GreenDreamsFL
- Supersoil recipe by Learn Organic gardening, take your ADD meds first, dont watch if prone to epilepsy... they like to talk... https://www.youtube.com/watch?v=z9_5iIqpTVA&t=1216s
- Mr Canuck, indoor organic cannabis growing master on Youtube: https://www.youtube.com/channel/UCtU2-cpxx18iQ4BvracrxDQ
- People creating food forests all over the world: https://www.youtube.com/user/happenfilms
Happy travels and enjoy!
Final update: Very happy to announce that this dairy had won the sixth place best diary of August 2021. My prize came in yesterday and I'm very happy!! Thank you Growdiaries!! Thank you Fastbuds!!! Thank you all my grow buddies here for the love and support!!
Hope to see you all, maybe at a future Growdiaries Meet and Greet? Wouldn't that be a lovely idea, per country and a yearly one on a different continent every year? The Growdiaries Conference. Would be a great Hemp growers fair... I'll keep dreaming and light another one... Big hug BioBuds

Likes
34
Share


@Maggie_de_Block
Follow
started flushing, plant should be ready in about a week
nugs are still fattening up a bit with some new white pistils
some of the trichomes on the leaves are turning amber, waiting for the trichomes on the buds to turn completely milky and then she should be ready for harvest


Likes
10
Share


@DankieDoodle
Follow
DankieDoodle 📅 Vegetative – Week 3, Days 1–7
✂️ Topping & Transition Week
This week marked an important step in shaping the structure all three girls, Pure Runtz (T.H.Seeds), Strawberry Poprocks (Anesia Seeds), and Radical Juice (Ripper Seeds), were topped cleanly above the 4th node to begin forming their SCROG-ready main frame.
All cuts healed fast, and the plants responded perfectly zero stress, vibrant color, and compact, even growth.
💧 Watering & Feeding
Day 1: Each plant received 1 L of water, following the regular schedule.
Absorption was perfect no runoff, great structure, and a healthy, active root zone.
Water Mix:
RootJuice — 1 ml/L
Biobizz Heaven — 2 ml/L
Epsom Salt — 0.15 g/L
pH — natural (7.4 tap water)
💡 Environment:
Temp: 25 °C
RH: 68–70 %
PPFD: ~550 µmol/m²/s (Mars Hydro FC4000 EVO @ 50 %)
Cycle: 18/6
VPD: ~1.0 kPa
🌿 Midweek (Day 4)
All three plants were watered again with 1 L each, using the same nutrient mix.
Substrate dried evenly, roots are expanding rapidly, and all three show symmetrical, low-stress growth.
🌞 End of Week (Day 7)
By Day 7, the pots were drying out completely after only two days a clear sign of a well-developed root system.
The Autopots were activated today to let the plants get used to consistent moisture levels before the next growth stage.
🚀 Radical Juice (Ripper Seeds) Note:
Between Day 5 and Day 7, she showed explosive vertical growth, pushing herself right into 650 µmol/m²/s PPFD resulting in slight tip burn on the top leaves.
Nothing serious, just a light stress mark from her incredible vigor.
The light intensity has since been adjusted down to 550 µmol/m²/s for all plants to maintain perfect balance and canopy health.
🌱 Summary:
Structure after topping looks perfect four strong mains on each.
All three cultivars are balanced, compact, and healthy.
Radical Juice shows top-tier growth potential; all plants are ready for the next phase.
A clean and productive week steady growth, solid recovery, and the Autopots now active to keep the rhythm flowing.
Next step: another topping and the first round of gentle LST to open up the canopy evenly 🌿✨


Likes
35
Share


@valiotoro
Follow
Hello everyone 😎
Week 3 of flower for the Gorilla Cookies auto from Fast Buds 💥🔭
She grew fast with a beautiful green color,for the nutrient 4ml/L terra bloom & 1ml/L power buds from Plagron
Spider Farmer SE-7000 70%
Have a nice day 😋
Likes
47
Share


@Master_weeda
Follow
Bonjour à tous les padawans et maîtres jedis
Franchement cette plante et vraiment agréable à cultiver sa génétique et forte et très tolérante aux éventuelles erreurs
Un joli Stretch de 36 centimètres
Jour 44 arrosage avec 2 litres d'eau ph6.3 à laquelle j'ajoute rqs tab
Jour 47 arrosage avec 2 litres d'eau ph6.3


Likes
9
Share


@Not_a_tutorial1990
Follow
Had major struggles with humidity due to cold front, but got it in somewhat better ranges.
My planet of the grapes started wilted/ drooping mid week [other strains were fine]. Did some research and it turned out they needed more water.[ I normally water every other day, feed every second feed and I top dressed before flipping].I fed them, got the humidity back in acceptable ranges. I also gave them some tea [molasses, banana peels, Gaia green bloom,all purpose and worm castings]
They seem to be happier.
Very eager to defoliate at end of this week been taking few leaves here and there but nothing crazy. Decided to build a suspended 2ply scrog net seems to be working great.
Thanks for viewing, appreciate any advice or comments.
Happy growing everyone 🌴


