
Likes
Comments
Share


@Stretch448
Follow
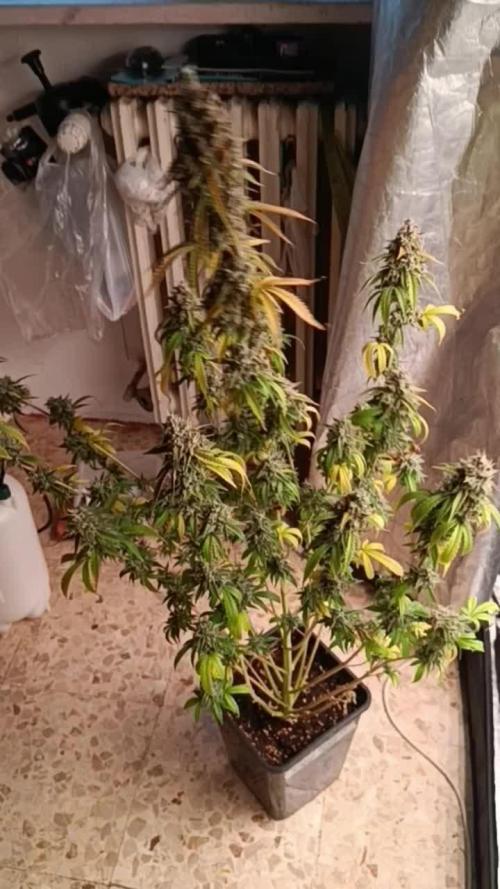
Not sure why the other seeds didn’t germinate. One of the other Bananacane’s started to but died off upon sprouting


Likes
7
Share


@Green_fingers
Follow
Just giving her water on the daily now won’t be long now hopefully till harvest👨🌾

Likes
51
Share


@DogDoctorOfficial
Follow
And the time to defoliate my freak tester as come, not that she needed that much but since i went in for the rest my giraffe went along with them all, she is lovely with her freaking weird leafs all over lets hope she likes defoliation hahahaha
cut my CaMag , figure if she is with a N block of some kind this will help, and she does not need it in flower any way so lets see
And a few days in to defoliation done and she is happy and never before, mb i should have done her sooner , she starting to put up with an amazing trichome production, this will be an amazing one for extraction mb lets see
And with the week coming to an end she is defiantly happier than she was before i spank her a bit , supper happy with this extra tall girl that aims to the moon
As always thank you all for stopping by for the love and support and for it all, i truly appreciate it all <3 <3 <3
Genetics - Fast Buds Tester 2308
Ligth - LUMATEK ZEUS 465 COMPACT PRO
Food - APTUS HOLLAND
#aptus #aptusplanttech #aptusgang #aptusfamily #aptustrueplantscience #inbalancewithnature #trueplantscience #fastbuds #dogdoctorofficial #growerslove
With true love comes happiness <3 <3 <3 Always believe in your self and always do things expecting nothing and with an open heart , be a giver and the universe will give back to you in ways you could not even imagine so <3 <3 <3
All info and full product details can be find in can find @
https://2fast4buds.com/ wen released
https://aptus-holland.com/
https://autopot.co.uk/
https://lumatek-lighting.com/
Have a few good more diaries going on fell free to drop by and say hi <3 <3 <3
<3 <3 <3 Growers love to you all <3 <3 <3
Likes
15
Share


@Messypies
Follow
And we are done!
Both plants have now been chopped after 48hours darkness. Now currently drying.
I will post some close up harvest shots once bud is dry :)


Likes
22
Share


@gottagrowsometime
Follow
Welcome to my Pink Rozay Diary, sponsored by Original Sensible Seeds.
Flower Days 71-80 'Ripening Phase'
Plant is doing really well. Has slowed down drinking. So, have cut her overall ppm by half. Will start winding her down this week. Her buds aren't gonna get any fatter. The stretch during pre flower thanks to me using my IR "FAR RED", with lights on, BIG MISTAKE. Stayed on a 600ish ppm feed for wk 11. Was lowered by half for this week. And will flip cut her off and will be on water for week 13. Buds have developed a lovely pink to them. And the leafs are also starting to turn. '95% of the time. I harvest before I get to that. Haven't had much luck with fade and such. But, hey, the bud did speaks for itself. And, this is also mainly down to the fact. I remove all those energy using fan leafs. Not mad about making pretty leafs, but lovely bud.
Thanks to my sponsors from MarsHydro & Original Sensible Seeds for their support and products.
COUPONS
CODE(S) Mars-Hydro "GGS" for 3% discount
Zamneisa "GROWITGD" 20% discount.

Likes
10
Share


@HerrnLubitz98
Follow
We’re done! Thanks a lot again to Zamnesia and Greenhouse, next big shoutout to Spiderfarmer and Biobizz.
For further updates and more stuff hit me up with a follow on IG @herrnlubitz88
Stay tuned for next run!


Likes
100
Share


@MadeInGermany
Follow
Hi everyone 🤗
This week the Orange Sherbert Phenotype # 1 and the Zkittlez Phenotype # 2 were harvested :-)
Now the Victory Kush 1 - 3, Zkittlez 1 - 2 and Orange Sherbert 1 are ready to dry.
All others except the gelato are rinsing
👍
Orange Sherbert 2 will be harvested next week :-)
Until then, I wish everyone a nice weekend, stay healthy and let it grow 🍀🌱👌


Likes
31
Share


@RFarm21
Follow
Alimentação: dia 7 e 11 Janeiro.
Acho que esta vai ser a última a sair da tenda.

Likes
11
Share


@TheThiccBud
Follow
sooooo... I have now harvested the plants and they looks so pretty 😍😌 I'm really proud of myself to have produced such THICC BUDS!!! 😅😍 and the smell is so awsome 😵 this strain is a 11 from 10 👌 a realy big Thanks to Royal Queen Seeds for this 2 awsome strains 💪 A detailed rating comes after drying with a detailed score board 😄
Likes
25
Share


@DrGanj
Follow
This plant was a dream to grow, wish I'd taken cuts. Halfway through dry at 7 days. Drying at 55 - 60 % RH and 17 - 19 degrees C. I anticipate she'll be done between 10 - 14 days total dry time and I'll then trim and update weights on this Harvest.
133.75g total after trim. She's a nice smoke, very happy.
Likes
19
Share


@adam_pawloski87
Follow
Let’s Go Day day 61 from seed !!! This week went real well! As you can see all these girls are starting to stack very well! Everything is pretty much the same, we have switched to fully bloom an these ladies are just Looking super healthy , we are getting a nice smell of grapes on these Ogreberrys ! Bruce Banner is packing crystals like a Mofo too an super stanky , all very happy about this run ! Still got a nice few more weeks of bloom to go let’s watch em stack ! Lets grow lil ladies let’s grow !! Hope you all enjoy an have an amazing productive day ! Peace love an positive vibes to all you Growmies out there Cheers 😶🌫️💨💨💨💨💨🤙🏻 If there’s any questions please just ask I’ll be glad to help !!

Likes
18
Share


@Borberad
Follow
Die Pflanzen haben deutlich mehr Durst. Eine halbe Stunde nach ihrem Sonnenaufgang sind sie zweimal in Folge sehr trocken gewesen. Die Spitzen der Stempel an einigen Blüten haben sich leicht braun gefärbt. Daher die Wassergabe jetzt auf 3,5l Täglich erhöht. 2,5l eine halbe Stunde nach "Sonnenaufgang" mit normaler Düngung und ca 5h später nochmals 1l jedoch mit halber Dünger Dosis.

Likes
5
Share


@JBOrganix
Follow
Super burnt lol. Ooops I'll still finish her off and hope for the best. Should still be some decent smoke 👌
One of my favorite testers from this run for sure. Will be popping more of this one real quick.
Likes
2
Share


@MistaOC
Follow
25.05. 🌿 Day 25 – Stretching Begins!
The plants have noticeably stretched since the last update — a clear sign that they’re moving deeper into the vegetative phase. The vertical growth is picking up pace, but they’re still looking strong and well-balanced.
Despite the rapid upward growth, structure remains solid, with thick stems and healthy leaf development. The 19L pots and BioGrow feeding seem to be doing their job — no signs of deficiencies or stress.
Light distance and environment are being carefully managed to control the stretch and keep the plants from getting too lanky. So far, they’re adapting really well.
💪 Overall: they’re thriving!
——————————————————————
27.05.
Likes
Comments
Share

@Beyond10gs
Follow
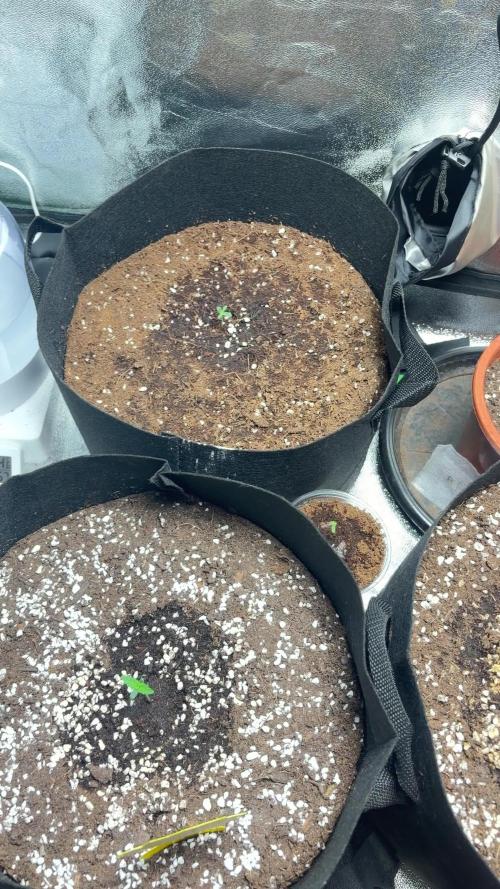
Bubblegum & Z AUTO both live 🔥
White fire og - Never sprouted 😤
* Instagram: @beyond10gs
* TikTok: @10gsbeyond
* YouTube: @10gsbeyond
* Snapchat: beyond10gs
* X (Twitter): @Beyond10gs


Processing
Likes
61
Share


@Dunk_Junk
Follow
6cm vertical growth this week but she threw out some nice side growth.
Apologies for the timelapse, it starts halfway through the week and finish/start are in the middle of the week 😳
Likes
18
Share


@Wrongholn519
Follow
I'm going to keep it short this week due to the fact that I am harvesting probably around Friday. I'm just waiting for some free space in my drying zone which has been taken up by the runtz and blackberry.. I added photos of some trimmed nugs to get them some exposure, I'm really proud of how they turned out.
Process/ Environment changes:
-I stopped giving any nutrients about 5 days ago
- humidity is at 60% to help dry the plants on the outside of my tent but inside my tent ROOM
- temps in tent have increased a bit due to less plants inside room
- I've turned off both my ts1000 lights, I don't need them anymore
Likes
16
Share


@RakonGrow
Follow
Tag 78 :
+ 2L Flaschenwasser
++ Dünger mit wenig CalMag
+ final PH 6.05
Ein Bild zum Vergleich Tag 66 und Tag 78 hinzugefühgt.
Tag 79:
Trichome an den äusseren buds aufgenommen . Das dauert noch bis zur Ernte.
Video hinzugefügt.
Tag 80 :
+ 2L Flaschenwasser (EC 0.325) (16:00 Uhr)
++ CalMag (final EC 0.456)
++ Dünger für Blüte
+ final PH 5.98
Tag 82:
+ 2L Flaschenwasser (EC 0.325) (13:00 Uhr)
++ CalMag (final EC 0.435)
++ Dünger für Blüte (PH 4.95)
+ final PH 6.10 (mit GreenHouse Feeding BioEnhancer als PH+ ) / EC 1.350
Tag 83:
Ein paar Bilder und ein Video. Die Dame hat jetzt das ganze Zelt für sich alleine und bekommt die satten 200Watt für sich . Heute hatte ich so geringe Luftfeuchtigkeit das ich ein nasses Handtuch vor den Luftansaugbereich stellen musste.
Tag 84:
+ 2L Flaschenwasser (EC 0.325) (10:00 Uhr)
++ CalMag (final EC 0.435)
++ Dünger für Blüte (Generative Phase III der Canna Dünger Tabelle) (PH 6.20)
+ final PH 6.0 (Plagron PH- (Phosphor basiert) )
Processing
Likes
2
Share


@DailyOklagrowman
Follow
Smells and tastes awesome. The 3 week veg + 1 gal pots resulted in small yield. Otherwise great first try.


