
Likes
Comments
Share


@Tropicannibis_Todd
Follow
👉Alrighty Then👈
This plant finished out just around 90 days from seed
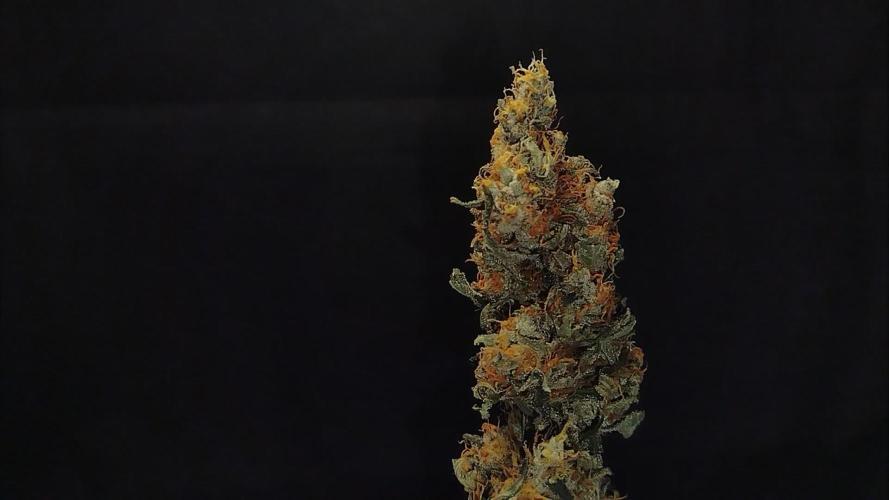
👉Puffed a bunch of it , and its fire and I mean fire , Grape Berry mixed with a little earthy undertone 👈 the buds are tight and smoothered in resin 👌
Would definitely grow this one again and would recommend 😳 Facts
Persian Pie from Greenhouseseeds
Full Gas from Greenhouseseeds
Babba Kush from Greenhouseseeds
Rainbow Melon from Fastbuds
Papaya Sherbet from Fastbuds
Weddingcheesecake FF From Fastbuds
Purple Oreoz F1 From Seedsman
Slurricane From Premium Cultivars
Soil by Promix
Nutrients by Cronks
This was a crap ton fun 🙃
Thanks to all my growmies out there for stopping by its much appreciated 👈
👉Happy Growing👈


Likes
2
Share

@xXx420xXx123
Follow
Ende 6. Blütewoche
Die Buds schwellen immer mehr.
Dieser Durchgang ist nicht mein schönster ( besonders die Special Kush) aber ich denke das ich trotzdem eine schöne hochwertige Ernte haben werde und verzichte jetzt auch auf großes entgegensteuern mit irgendwelchen Nährstoffen.
Ich denke wenn ich jetzt einfach so weiter fahre wie zuvor bring ich beide easy ans Ziel. :)

Likes
6
Share


@michigrower
Follow
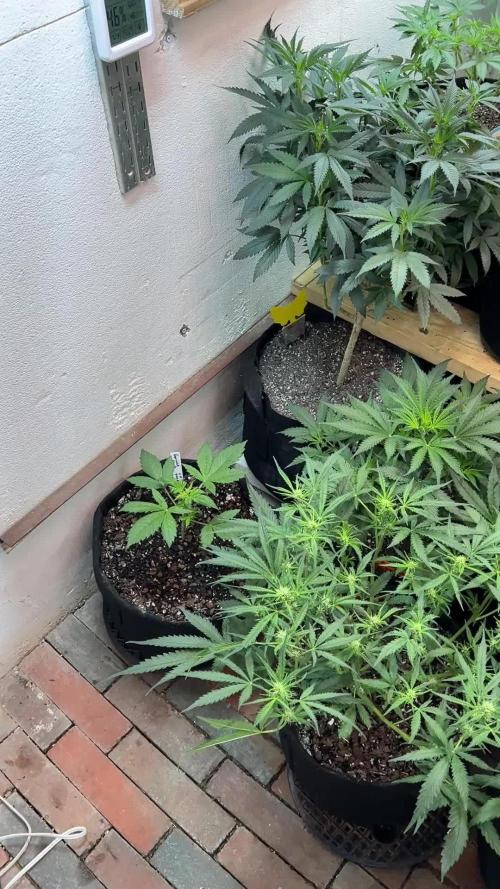
I'm very sorry. Everybody had a big move. This past couple weeks, everything settled in one of the plants did not make it unfortunately. This is the sour jealousy 2 weeks into flowering. Change the dose on the blue nutrient, up to fifteen milliliters per gallon, while dropping grow nutrients. Roots have more than filled the bucket and its space growing very well had a small p. H deficiency and stress from the move. Plant is recovering healthy.
Likes
9
Share


@Bakeryguy420
Follow
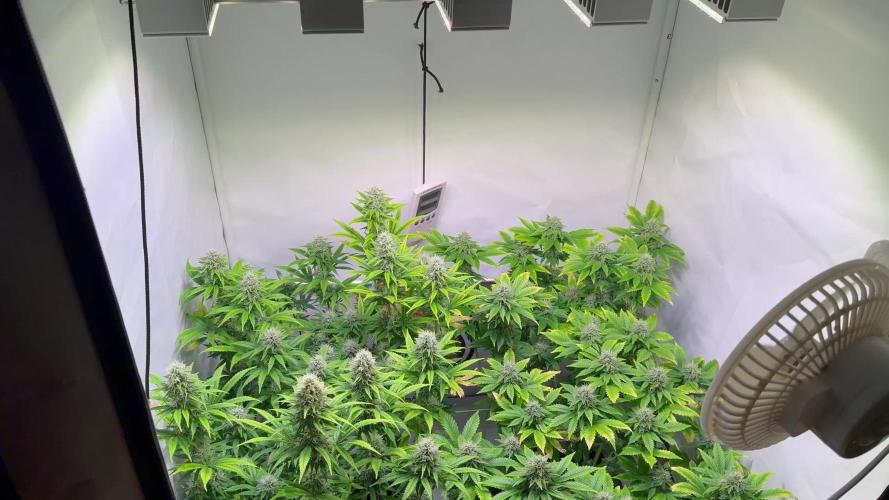
C4 week 6 of flowering letting to go to about 9 weeks then going chop. This will be my last week of feeding her then going flush down these next 2 weeks into harvest so freaking excited. My first c4 ever grown along with my first time growing in coco. Fucking back in the game.
Little update notice yesterday while watering c4 she throwing some pink hairs. So fuckig beautiful:)
Likes
3
Share

@MyWetPussy
Follow
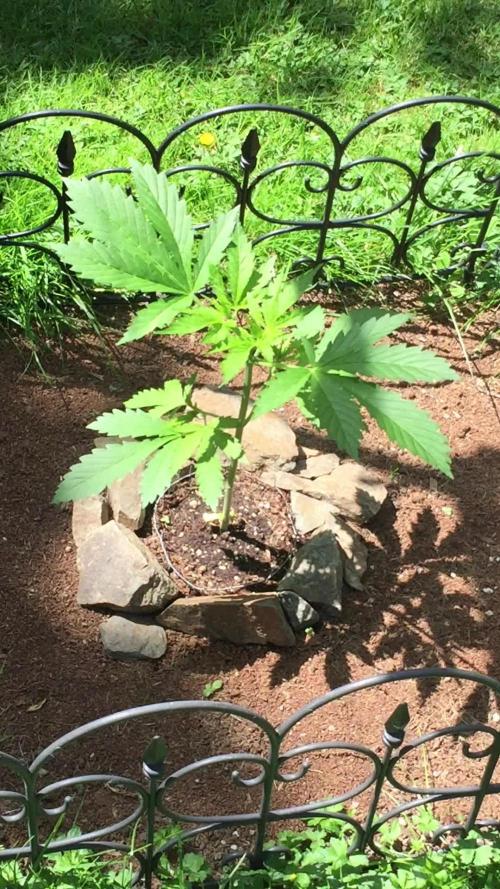
Day 29 Sunny
Day 30 Sunny
Day 31 Cloudy
Day 32 Cloudy
Day 33 Sunny
Day 34 Cloudy
Day 35 Sunny
Week review: The plant received a good watering on day 32 on the outside of the rock area keeping it away from the base of the plant. Day 35 I gave her 3 cups of water inside the rock area around the base of the plant. Weather temps still on the mild side.
😍
Likes
16
Share


@MadeInGermany
Follow
Info:
Unfortunately, I had to find out that my account is used for fake pages in social media.
I am only active here on growdiaries.
I am not on facebook instagram twitter etc All accounts except this one are fake.
Have fun with the update.
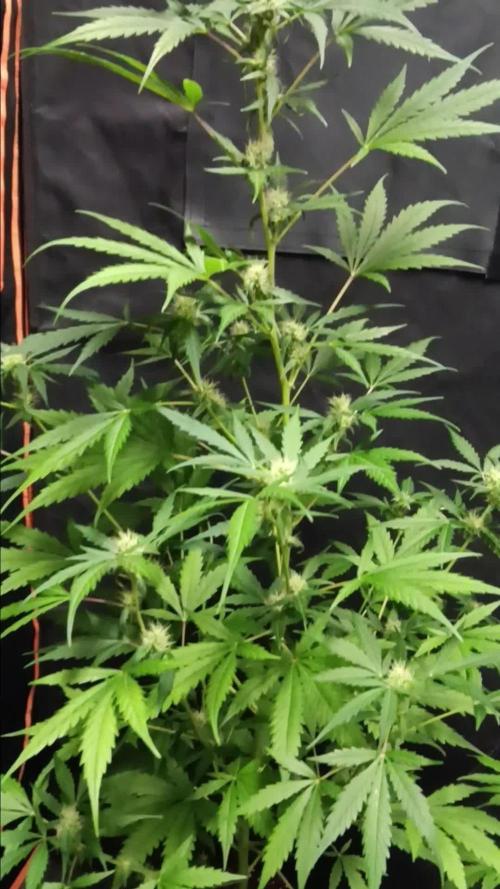
Hey everyone :-)
quick update today.
She was further trimmed with topping.
It was poured twice with 1 l each time.
Everything was cleaned and checked.
Stay healthy 🙏🏻
You can buy this Strain at
https://www.barneysfarm.com/blue-cheese-34
Type:
Blue Cheese
☝️🏼
Genetics:
Blueberry
X
Original Cheese
👍
Vega lamp:
2 x Todogrow Led
Quantum Board 100 W
💡
Bloom Lamp :
2 x Todogrow Led
Cxb 3590 COB 3500 K 205W
💡💡☝️🏼
Soil :
Bio Bizz Coco
☝️🏼
Fertilizer:
Green House Powder Feeding
☝️🏼🌱
Water:
Osmosis water mixed with normal water (24 hours stale that the chlorine evaporates) to 0.2 EC. Add Cal / Mag to 0.4 Ec Ph with Organic Ph - to 5.5 - 5.8

Likes
8
Share


@Jmaninthemidde420
Follow
Did some good slow pruning and defoliating taking off 2 leaves or 2 branches every other day. Gave it a locally made soil conditioner specifically made for cannabis plants in flower. For those of you in central NY check out green tree hydro store and check out there different bio soils. There bio all has given me almost 100% germination rate. The bio flower gave my autos a kickstart for flowering with an additional worm casting tea made of 2 gallons ph water, 2 handfuls worm casting, spoonful of alfalfa meal, spoonful kelp meal, 2 spoonfuls plain epsom salt, 2 spoonfuls unsulfured molasses(organic). Added an air stone and brewed it for 38 hours exactly. Got some good bubbles on it too. I don’t check the ppm or nutrient levels or whatever you super experts do. I just use dry ammendtments with either compost tea, molasses, or coconut water as a liquid nutrient. Keeps it more simple for me. Tbh I don’t even know what ppm stands for I’ll look it up after I write this lol


Likes
1
Share

@Cmftrblynmb
Follow
Flipped my lights this week so ready or not, here we go. I am afraid if I wait too much longer I will be totally out of room, and I have some Autos beginning to flower. I want to wrap this one up and move on to another grow where I can implement some of the things that I have learned.
Likes
17
Share


@420DeepGrow
Follow
Gracias al equipo de Seedsman Marshydro XpertNutrients y Trolmaster sin ellos esto no sería posible.
💐🍁 Tangerine Snow F1 Fast:
Esta gran cepa es un cruce de cuatro vías 75% sativa de (Boost x Tangelo) con (Lavender x Power Plant). Este híbrido Fast F1 proviene de la genética Cali y cuenta con excelentes terpenos cítricos, alta producción de resina para extractos, altos niveles de THC, muy buenos rendimientos y excelente resistencia al moho. Tangerine Snow F1 Fast se puede cultivar tanto en interior como en exterior. Los tiempos de floración en interiores son de entre 8 y 10 semanas, mientras que el tiempo de cosecha en las latitudes del norte es en septiembre, mientras que en el hemisferio sur los productores cosecharán durante marzo. Las regiones climáticas recomendadas son cálidas, secas, húmedas y cálidas. Se trata de plantas altas, semiramificadas, que superan los 200cm y que presentan un alto vigor con muy buena uniformidad. Al igual que muchas otras variedades con fuerte dominancia sativa, Tangerine Snow F1 Fast ofrece una excelente resistencia al moho, así como a las plagas y enfermedades de las plantas. La combinación de terpenos cítricos y mucha resina la convierten en una cepa de muy buen extracto, cuyo método de "lavado" produce muy buenos rendimientos de hachís. El perfil de terpenos cítricos recuerda a las mandarinas y mandarinas y también tiene notas dulces. La producción de THC ha sido verificada en laboratorio en un fuerte 24%, mientras que el CBD es bajo. El efecto es edificante y energizante, perfecto para usar durante el día y las primeras horas de la noche.
🌻🚀 Consigue aqui tus semillas:
💡TS-3000 + TS-1000: se usaran dos de las lámparas de la serie TS de Marshydro, para cubrir todas las necesidades de las plantas durante el ciclo de cultivo, uso las dos lámparas en floracion para llegar a toda la carpa de 1.50 x 1.50 x 1.80.
https://marshydro.eu/products/mars-hydro-ts-3000-led-grow-light/
🏠 : Marshydro 1.50 x 1.50 x 1.80, carpa 100% estanca con ventanas laterales para llegar a todos los lugares durante el grow
https://marshydro.eu/products/diy-150x150x200cm-grow-tent-kit
🌬️💨 Marshydro 6inch + filtro carbon para evitar olores indeseables.
https://marshydro.eu/products/ifresh-smart-6inch-filter-kits/
💻 Trolmaster Tent-X TCS-1 como controlador de luz, optimiza tu cultivo con la última tecnología del mercado, desde donde puedes controlar todos los parametros.
https://www.trolmaster.com/Products/Details/TCS-1
🍣🍦🌴 Xpert Nutrients es una empresa especializada en la producción y comercialización de fertilizantes líquidos y tierras, que garantizan excelentes cosechas y un crecimiento activo para sus plantas durante todas las fases de cultivo.
Consigue aqui tus Nutrientes:
https://xpertnutrients.com/es/shop/
📆 Semana 8:
Se aprecian unas lindas preflores hembra, comienza a estirar de forma acelerada.
Todo sigue su ritmo y ella come bien todos los nutrientes que se le aplican.
Agrego sugarshot, silica force y enzimas.


Likes
7
Share


@Solv7
Follow
** HARVEST DAY FOR PHENO2: 09-27-2022 **
Pictures are from weeks 11~17.
Flowering was a breeze, the girls were pretty much on cruise control, I only had to water and feed them every week or so.
Notes of spicy orange, really pungent smell. Both are very similar in that regard, one being more spicy and the other more fruity.
Likes
39
Share


@Silverback_Guerilla
Follow
9/5:
I hope to successfully germinate all 15 of the Fastbuds seeds that I bought along with the 2 freebie Blackberry beans I was given by the nice folks at Hipersemillas.com. I'm also germinating 4 x Sweet Seeds Dark Devils that will be managed in a separate diary.
I am keeping it really simple this run and am using my new DWC cloner to germinate. I made up 3 gallons of a de-chlorinated water in a strong solution of Endoboost Hydro and added 1/4 tsp of Superthrive per gallon. I adjusted the Ph to 6.0 and let the pump and aerator cycle the res for a few hours. I put rapid rooters into 1.25" net pots and ensured that the water level was high enough so as to just touch the bottoms of the rooters. About 10 minutes later the rooters were all nice and damp, so I planted and prayed.
I've just got a 9w pinkish grow light mounted about 5 inches above the rooters, but once they are rooted well, I'll move them into a 1020 tray with dome under 65w of mixed spectra lighting with supplemental blues. Once they've got a couple sets of leaves, I'll plant the rooters in some half-gallon biodegradable fabric bags and move them into my tiny tent under a pair of mixed spectrum QB's. They'll have to stay in there until my current run of photo clones is done in the closet. Once space opens up in the closet, I'll plant those biodegradable bags into 3 gallon pots and move them in. Hopefully in the next 2 weeks....🙏
9/7 (a.m.):
Thus far, I've just got one each of Wedding Cheesecake, Strawberry Pie, and Lemon Pie emerging...
9/9:
All but one Lemon Pie are up and growing. The problem child may yet fully emerge..her cotyledons are opening up, but they're just below the surface.
I caught some rainwater today and pre-watered all the 1/2 gallon degradable fabric starter pots with it. My photo clones still have a couple weeks left, so the timing should be right for me to move these seedlings into the tiny tent in a few days and plant them in the starter pots...and 12-15 days later I'll plant the starter pots into some new 3 gallon fabric pots I've already got filled and waiting. This batch of soil I'll be using has been cooking since late March, and the rhizosphere is fully rocking. I also treated all my soil this summer with Beauveria Bassiana, Metarhizium Anisopliae, and Azamax to ensure I have no pestilence to deal with, so I'm optimistic that this will be a successful grow.😁
9/0:
I planted up all but one Lemon Pie in 1/2 gallon degradable pots and moved them into the tiny tent under 240w of mixed spectra quantum boards.
Likes
27
Share


@Endriu
Follow
Here we are again Bros&Sis!
During my first indoor grow with Bubblegum XL I've had took some cuts to keep them alive and have some good plants to play with and exploring a little more the vaste world of growing cannabis...
Long story short, 5 of them has radicated (some with plain water technique, some in rockwool cube) and then I started to play with them and tested my chinese Meizhi R300W LED panel (real wattage is 136w) it was full of dust, so why not? 😎
Now, the plants. They are in good conditions, some are in the same pot by weeks now (soil and coco), and try to keep them alive, so maybe they shows sign of suffering. Except for the One:
In the video you will see my REALLY HIGH SCIENTIFIC METHOD (😂) wich I use to choose the best clones that will goes directly under a Scrog net (i am a DIYer) to fill the entire area lighten by the panel, it's a bit ambitious, but it will be fun for sure!
I choose that one because she is the only one that gives me really good vibes and shows me she is strong enough to pass through hst, crop, supercrop and so and so... even if my original intentions was to keep them as a bonsai mothers, I've decided that this project have priority!
10weeks old Bubblegum XL clone
Pot 11lt NetPot
Coco brick with mycos
Canna Coco A+B
Liquid silicon from Growth Technology- guys, this thing is magical, besides the great effects on the plants' roots and system, after a couple of apply the plants were much more flexible and resistant to mites (yes, they are still there, fu**inmotherfu**ers, but this time they will die. forever gone, bye!)- I will never stop to thank @Mr_Di for his precious tips😘Higly basic product, it will raise your solution's PH, so watch out!
Let me know what you think about, mates! CIAO! 😀
Likes
2
Share


@PatriciaGant
Follow
now time to harvest gets closer every day and time feels now as if she stands still, holy i cant wait to finaly taste this sweet buds. have a beautifull day.
Likes
92
Share


@DogDoctorOfficial
Follow
Harvest Notes ✂️
• Harvest Timing: Papaya Zoap was harvested at day 63, with select buds taken earlier at day 56 due to mold concerns.
• Drying: After careful trimming, the buds were dried for 12 days. The quality and aroma during drying hinted at the stellar smoke to come.
• Density & Yield: Buds were rock-solid, delivering an excellent yield with perfect density for storage and enjoyment.
Terpene Profile & Aromas 🍋
• Primary Aromas: A tropical explosion with sweet papaya upfront, complemented by creamy, soapy undertones that make her truly unique.
• Complexity: As the buds cure, a hint of citrus zest and exotic fruit emerges, creating a full-bodied terpene profile that’s simply irresistible.
Cultivation Experience 💡
• Highlights: Her uniform growth, heavy trichome production, and response to super cropping made her a delight to grow. She thrived under careful spectrum adjustments and defoliation, showcasing her adaptability and vigor.
• Challenges: The dense bud structure made her more prone to mold, especially in a high-humidity environment. However, proactive monitoring and swift action mitigated the spread.
Verdict: 🌟🌟🌟🌟🌟🌟🌟🌟🌟🌟 (9.8/10)
Papaya Zoap is a strain that commands attention with her beauty, aroma, and unstoppable growth. While her susceptibility to mold required extra care, her overall performance, yield, and quality were nothing short of exceptional. A grower’s dream and a frosty masterpiece!
Stay tuned for their individual harvest reports, smoke reviews, and more as we wrap up this epic series!
Discount Codes so you can save big on your next check out 💚💚💚
Kannabia - DOGDOCTOR 30% off
SeedsmanSeeds - DOGDOCTOR 10% off
CannaKan- DOGDOCTOR 15% off
terpyz.eu - DOCTOR 15% off
The Neutralizer - PORKIT5-DOG 15% off
Fast Buds - DOGDOCT 15% off
As always thank you all for stopping by, for the love and for it all , this journey of mine wold just not be the same without you guys, the love and support is very much appreciated and i fell honored and so joyful with you all in my life 🙏
With true love comes happiness 💚🙏 Always believe in your self and always do things expecting nothing and with an open heart , be a giver and the universe will give back to you in ways you could not even imagine so 💚
Friendly reminder all you see here is pure research and for educational purposes only
Growers Love to you all 💚💚💚


Likes
12
Share


@CheeRz
Follow
Almost Done. 💚💚💚 From now on the ladies just gettin' tab water. Wedding Cake and Cookies Kush #2 r ready to go in a few days. Cookies Kush #1is lookin'like she needs at least 1 maybe 2 weeks from now 😂.
Likes
5
Share


@Deli_Weed
Follow
Esta semana fue solamente de flush 🚿 en esta ocasión decidí usar florakleen para ver con cual obtengo mejor resultado si con este o con flawless finish, lo hice así, primero hice un lavado con pura agua con ph de 6.2 lo hice desde el ultimo día de la semana anterior, fue lavado doble, uno en cuanto se encendio la luz y otro justo antes de apagarse, luego empezando esta semana regué dos dias usando el florakleen y ph de 6.2, el tercer día no regué y al final de ese día le di corte ✂️ y la colgué, actualmente ya la tengo curando, la tuve 10 días secándose con una humedad de entre 50 y 60% para un secado lento.
Likes
4
Share

@JVKdopegrow
Follow
Fat little ladies. For a couple of plants that were very stunted by my failure at an outdoor grow, they are pushing out some sweet smelling snd good looking buds. Maybe another week or so to go!
Likes
41
Share


@TheBulldozerSicily
Follow
Giovedi 15 agosto 2024
Inizio controllo 3070 ec
Per livello acqua bassa Aggiungo 25 lt acqua osmosi inversa ottenendo 2770 ec
Sabato 17 agosto
Inizio controllo ec 2890
Per livello acqua bassa Aggiungo 25lt acqua osmosi inversa ottenendo ec 2170
Domenica 18 agost
Inizio controllo ec 2890 ph 6
Cambio acqua per scrupolosità,
Base 75 acqua demineralizzata ottengo ec 360 ph 8
Aggiungo tutti I nutrienti ottenendo ec 1965 ph 6.4
Martedì 20 agosto
Per livello acqua bassa Aggiungo 50 lt acqua osmosi inversa più i nutrienti

Likes
6
Share

@weedelicious
Follow
My three grow runs went great overall — except for the extreme heat. The new tent and accessories from Spider Farmer performed really well. Hesi nutrients were excellent, and the Biobizz soil was fantastic.
