Recommended
Likes
Comments
Share
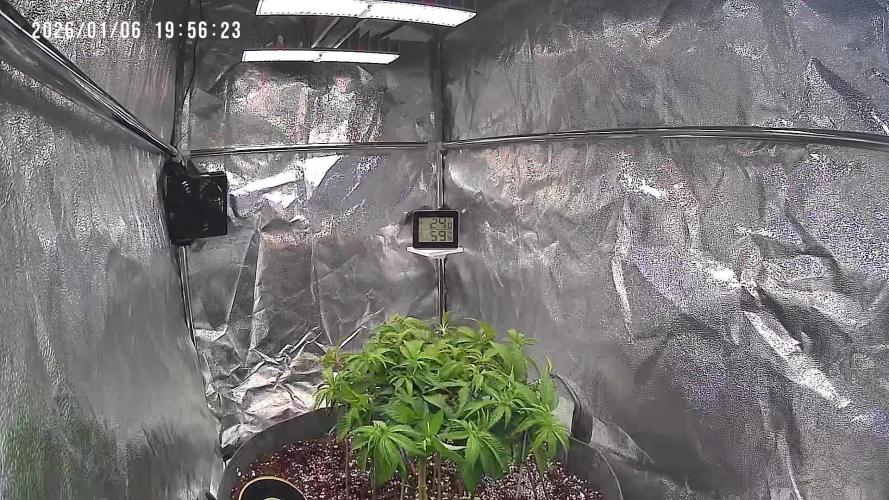
Hiiigh friends 🙌 Welcome to week 8. 😍 Due to too much unwanted stress, flowering is delayed. The big lady was unable to withstand the training. Her neck is broken. But she is far from giving up and will fight to the end.. 😊 See you next week. 👋 Arturo for KannaKullektiv 🙏
Likes
21
Share
Likes
83
Share
@MrJones
Follow
mrjones Gorilla Cookies === IN TENT DRYING PLEASE CHECK BACK IN A FEW WEEKS!=== 🔹🔹🔹🔹🔹🔹WEEKLY GOALS🔹🔹🔹🔹🔹🔹 PREHARVEST REPORT 🍃 Harvested 5 Gorilla Cookies from FastBuds today, the Buds looked amazing and put about 1500 grams into the Drying Tent! 🔹🔹🔹🔹🔹🔹🔹🔹🔹🔹🔹🔹🔹🔹🔹🔹🔹🔹 Rambling - Going to be shooting for a week to 10 days, the dry tent variables will be 55/60% RD and 65F Light Air Movement. 🔹🔹🔹🔹🔹🔹🔹🔹🔹🔹🔹🔹🔹🔹🔹🔹🔹🔹 ▶️Saturday 02.06.21 / Harvested today these buds are sticky, sweet, and just beautiful! 🔹🔹🔹🔹🔹🔹🔹🔹🔹🔹🔹🔹🔹🔹🔹🔹🔹🔹 SOIL MIX COCO - 70/30% Tupur Royal Gold 30 GALLON WORM CASTINGS 5 GALLON LOBSTER COMPOST 5 GALLON PERLITE 6 GALLON INSECT FRASS 2 CUP ORGANICALLY DONE GROW 5 CUPS BUILD A SOIL COCO MINERAL MIX 6 CUPS
Processing
Likes
39
Share
Started LSTing. We'll see what a few weeks does to them! Growth is vigorous in DWC. Noticed that the DinaMed's PH was dropping drastically over 24 hours. PPMs were way up at 1100. Diluted the solution by two thirds and re PHed her.
Likes
1
Share
@Kern420
Follow
Woche über haben sich die Blüten weiter entwickelt. Die Trichome wurden mehr und man fängt an erste Terpene zu riechen. Wir haben Donnerstag (BT 21) stark entlaubt und schauen jetzt wie die Pflanzen wachsen. Tropi fängt an erste Farbakzente zu entwickeln in den Buds.
Likes
56
Share
Bonjour à tous les padawans et les maîtres jedis Pour cette semaine 3 au jour 19 ma plante fais 21 centimètres et son septième noeud apparaît je décide donc de pratiquer un LST sur ma plante. Pour ce j'utilise du fil de fer galvanisé que je plante directement dans le substrat en faisant attention de ne pas endommagé les racines car n'oublions pas que ce qui pousse dessus pousse aussi dessous. Jour 17 je pulvérise du une solution composé d'une cuillère à café de savon noir mou (marque briochin) dilué dans un demi litre d'eau en prévention d'éventuels nuisibles. Pourquoi le savon noir mou ? Savon noir : quelle utilisation pour le jardin ? Le savon noir est un produit naturel dont les propriétés nettoyantes sont connues depuis l'Antiquité. Utilisé pour l'entretien de la maison et pour les soins corporels, ses vertus antibactériennes et insecticides en font un allié précieux pour le jardinier bio. Le savon noir est fabriqué à partir de potasse et d'un corps gras de type huils végétale comme l'huile d'olive, de lin ou de maïs. Produit naturel et biodégradable (s'il ne contient pas d'additifs, comme cela peut-être parfois le cas), c'est un très bon produit nettoyant, pour les sols, la cuisine, la vaisselle, le linge, etc... Très polyvalent, il est également économique, comparé aux multiples détergents classiques du commerce. Le savon noir se trouve sous forme de pâte molle et brune ou sous forme liquide, dilué avec de l'eau. C'est du savon noir liquide dont on se sert généralement au jardin, car son utilisation est plus simple. Il s'achète dans les magasins bio ainsi qu'en grandes surfaces ou jardineries. Attention : la recette du savon noir de ménage et celle du savon noir utilisé en cosmétique ne sont pas forcément les mêmes ; les savons noir de ménage (multi-usages) peuvent contenir davantage de potasse afin d'améliorer le pouvoir dégraissant (irritant ou desséchant pour la peau), voire même certains additifs chimiques. Au jardin, ce sont en priorité les propriétés antiseptiques et insecticides du savon noir qui sont utilisées. Le savon noir liquide est utilisé pour lutter contre les pucerons, les cochenilles, les araignées rouges, les aleurodes, les psylles et autres thrips. C'est un insecticide de contact ; il tue les larves et nettoie le miellat qui englue les feuilles. La recette de l'insecticide à base de savon noir (mou pour ma par marque briochin) est simple à réaliser : une ou deux cuillères à café de savon noir mou (briochin) diluées dans 1 demi litre d'eau tiède (dilution à 5 %) ; une fois la préparation refroidie, pulvérisez-la sur les plantes atteintes, en prenant soin de ne pas oublier l'envers des feuilles. À renouveler 1 à 2 fois si nécessaire, pour être totalement débarrassé des indésirables. Comme il est de mise pour la plupart des traitements, ne pulvérisez pas la solution à base de savon noir en pleine journée, sous le soleil (ni sous la pluie !) ; procédez le matin de bonne heure ou patientez jusqu'à la fin de journée, lorsque les températures sont en dessous de 20°C. Jour 18 Je corrige mon LST suivant la pousse de ma plante ... Pour ma par c'est la manière dont je procède mais petit rappel de la technique du LST Quand commencer à appliquer la technique LST ? De nombreux cultivateurs commencent la manipulation dés que les plantes possèdent entre 3 et 6 nœuds ou une paire de feuilles. Durant cette première étape de la croissance, le tronc encore flexible est pliable sans risque qu’il ne se casse, même si au fur et à mesure du développement de la plante il sera de plus en plus difficile de le plier. Nous pouvons continuer à guider la croissance des branches durant toute la culture, même durant la floraison, ce qui pour cette étape représente un grand avantage face à la taille, qui n’est pas du tout recommandé une fois que la formation des têtes commence, cela stressera en effet la plante, ce qui aura pour effet de retarder la récolte. Comment appliquer la technique de guidage LST Si nous sommes prudents, la flexibilité naturelle des fibres du cannabis permet de plier leur tronc et branches avec une relative facilitée, même durant la floraison des plantes. En utilisant une corde fine, nous pouvons accrocher la pointe de la plante à la base du pot par exemple ou à un tuteur que nous aurons planté dans le substrat. Nous plierons le tronc avec précaution et nous le fixerons avec la corde, à partir de là, nous pouvons augmenter progressivement la tension de la corde, chaque jour un peu plus, jusqu’à obtenir la position souhaitée. Soyez attentif à la réaction de la plante, essayez de ne pas appliquer trop de pression sur la corde et rappelez-vous que la flexibilité des branches peut varier d’une plante à l’autre. Pour obtenir de meilleurs résultats, il suffit de suivre quelques règles simples. Pour commencer, nous devons choisir une corde fine mais pas trop pour ne pas blesser les troncs au fur et à mesure qu’ils grandissent et qu’ils deviennent plus gros. Nous pouvons utiliser des crochets en plastique souple ou de n’importe quelle autre matière flexible pour éviter d’endommager les plantes. Spécialement en intérieur, utiliser des cordons en plastique de couleur (voir les diaries de @Silky) est très pratique pour voir facilement les accroches et faciliter le travail au milieu du réseau formés par les cordes, les tuteurs, les mailles ou les supports que nous aurons dans la culture. Bien entendu, en culture extérieure et surtout en guerilla nous ferons juste le contraire et nous utiliserons des matériaux de couleur qui n’attirent pas l’attention pour que notre jardin reste discret. Pour stresser les plantes au minimum, la mieux est de réaliser ces manipulations le soir ou juste après que les lampes en intérieur s’éteignent, ce qui leur permettra de se remettre durant la nuit. Normalement, le jour suivant nous pourrons observer comme les pointes des branches que nous avons pliées se dressent de nouveau vers le haut à la recherche d’une source de lumière. Que la force soit avec vous💪
Likes
27
Share
Today is day 72 from seed!! This week went real well , 2 of the Forbiddin Runtz have been getting flushed an the rest will also start flush through this next week, I can’t believe the smell of this combo strain,, super fruity smelling an all are super sticky!! Stay tuned for next week yall !
Likes
6
Share
July 6th @GbaGrow Update July 11th @GbaGrow Update July 12th. I discovered a pleasant surprised right. If done correct and effectively, I maybe introducing to the cannabis community a new Haze. Two days ago on July 10th, i transplanted them into a two gallon pots into a tent.
Likes
8
Share
LST is working wonders. I'm getting a really nice canopy. These are really squat plants which is allowing me to fill the space nicely. This week we've added a fermenting bottle of sugar water and an evening session of classical music. Samantha is still a bit pale but each new node is looking better than the earlier sets of leaves. Nerea is stretching the most which is allowing me to really spread her out using pegs from the garden centre. Ana has fully recovered from being dripped on by salty water (I'm really sorry about that Ana). I've put the inline fan in place and turned the humidifier off. The last week has been the most stable. Humidity has been in a tight range 42-57% and the temp too 22ºC in the day dropping to 18ºC at night each and every day without me fiddling with anything. Let's see how the room copes as we head into warmer weather.
Likes
39
Share
@J_diaz420
Follow
Realmente muy feliz con lo obtenido, 307g en 0.8me me parece genial, estas flores tienen un aroma genial entre el típico haze mezclado con cacao, un efecto muy agradable y confortable, rica al fumar y muy poco picante gracias al lavado de raíces con flawles finish 👌👨‍🌾🏻 Totalmente recomendable esta genética de royalqueenseeds muy agradecido por la oportunidad 👍👌👨‍🌾🏻
Likes
11
Share
Buds Densed up pretty nice this week and got a good amount of trickles. I’m Happy How This Week Went With The Girls.
Likes
8
Share
@Sinktip
Follow
It's bizarre how tall one of the four plants is getting. The other three are short - about 60 cm but the one is a good 30 cm taller. Fewer buds too. The entire plant just looks like a different strain. If it is, then I hope it's feminized - I don't want to have everything go to seed!
Processing
Likes
3
Share
Likes
3
Share
Esta semana se rego con te de compost. Se acomodo las plantas en la red. Se aplico Oil 85 de mamboreta como preventivo. Se realizo defoliacion a hojas grandes que tapen la luz a las de mas abajo. Esta semana no se aplica ningun fertilizante. El fertilizante que estoy utilizando es peletizado y se aplica cada 21 dias junto con humus de lombriz. Ya dan ganas de pasar a 12/12, pero lo voy a dejar una semana mas
Likes
59
Share
@Rap_a_cap
Follow
Great climate, ideal. After careful consideration, valued the considerable size of the plants, the flowering stage and the yellowing of the bottom canopy , I decided to feed one last time with veg nutes at half dose. This will be followed by 2 waterings of water only and then a boost of flowering nutrients. Here we are. It happened overnight, nothing the night before, the next morning there are pistils everywhere. Looking at the structure of the branches , I think they will be monstrous buds. Stay tuned for a monster crop. This beast is insanely hungry of nutes. For now absolutely pests-resistant. Thanks for following, I ❤️ you
Likes
28
Share
This little girl started her journey on April 4th with germination into a water glass and finished up on June 27/20 – Day 78 from germination. She was a fun grow and was very resilient through the whole run. She spent most of her grow time in a 20/4 light schedule. She formed nice frost levels and stayed to a very nice and manageable height of roughly 20” tall without topping or bending her main stem. She was not as fussy about nutrient levels and took them well. She does like her medium on the dryer side though. Small little auto bush of OG Kush crossed with Indica genes😃 She would make a nice a plant to run while you are vegging out some photos for 6 or 8 weeks as she is not very big in size but will swell up and yield decent weight👍 She was grown in a 3 gallon fabric pot with coco coir and maybe 15% perlite. She was fed salt based nutrients……..so sorry but they are flushed out and that is what I am more comfortable with. Focus on the early growth with microbes, fungi and kelp!! She was fed the normal pattern with pH being held around the 5.4 to 5.8 range in feeding. Then as flower approached, I gave the pots a more consistent look at the runoff numbers and she was running 7.8pH coming out of her!!!!! WTF. She stayed in her pot that she was planted in and fought this issue all through the rest of her grow. The pH issues started surfacing around week 3….as we headed into flower of course. Scratching my head for weeks, I ultimately didn’t change anything other than really low pH feeding going in…….below 4 idea. For weeks she had 3.9 water going in and still getting 7.8 running off. I initially felt it was related to cheap fabric bags so I cut slits in the very bottom of the bags that stayed and tried transplanting other girls into plastic pots, which it can be fabric pot issues but I am not as convinced anymore for this run that there was an issue there, wasn’t sure about giving her Magnesium on top of Magnesium and therefore did I mess her up good on the inside early on in week 2 idea, out of options I changed back to RO water and that seems to have solved my issues……I was using tap water that was not filtered this run🤬 The pH was high so that was adjusted but with the ppm being at 185 to 200 range I chose not to buy a filter and just dechlorinated the water only. I was tired of lugging 5 gallon water bottles in and out of the basement😃 That is a difference from all other grows…..silly for not catching this by week 4! So…….back to lugging bottles in and out of the basement😂😂😂 She really started to take shape around weeks 7 and 8 and formed a beautiful little cannabis plant and grew to 20” tall and roughly 18” wide. Main focus with her was to just perform LST on side branches and let the top go…….I wanted to just let her go and see what would happen to her main cola for size and height……plus I don’t do that…….I always bend over the tops on my grows so this was a little different for myself. She grew very nice leaves and a lot of them. This pheno had a lot of leaves to her and that is fine……its not really my first choice in characteristics of a plant though..…..so much more work at trim time……Green Poison XL Auto, SWS71, was a dream to trim👍 as a comparison!! She didn’t fox tail very much she firmed up her buds towards the end. The resin production was a little slower coming out in her but by week 7/8 she was getting pretty impressive😋😋😋 White and sticky!! She smelt of woods with citrus notes…..works for me👌 There were no issues at all retaliated to pests or bugs……I threw in a couple sticky traps but there weren’t any to catch. She handled the high humidity in this run great and there were no signs of any powdery mildew👍👍👍 She is a very stable strain from Sweet Seeds! Day 63 was last feeding, flushed for almost two weeks. Rezin and Liquid Weight still given for one of the weeks but the last week was plane water. In hind-site I think I should have hit her with some Flawless Finish to help get that last bit out of her. She did feed on most of her nutrients but some of the lower leaves were still more green that I would have liked. She was cut down on day 77…..11 weeks is about what I suspect looking at her in week 7…….this was roughly 8 weeks flower time……makes sense😃 She grew for 75 days and then I decided what the heck…….she needs a hole in her stem to stress her out😃 I didn’t try breaking a branch but rather drilled a hold into the base of her stem……something new to try out. I think I will try more holes next time….max 3 I think……then I want to run a couple with cracking their stems and see if there is a difference👍 I feel more in control of a drill and its accuracy vs bending branches and they snap where they want to…….anyway it was worth a try!!!! Worst case, it made it easy to hang her as a whole plant to dry😃 This girl battled pH issues all her life and as a result the buds were not where I would have liked them. There were not fluffy…..but here were not as hard as I would like for rolling joints, so the whole girl went to concentrates She dried for 7 day as a whole plant, 2 days more in smaller branches, then 1 day curing in jars before dry ice sift. She yielded 74g of dry cured buds, 2.65 ounces. Not bad…..I don’t think her buds would have gotten a lot bigger but they certainly would have had more weight if they firmed up…..grower issue, not genetics. So…..lets make some rosin from this girl🤩 The yields on this and making her hash a perfect colour are not what this process is about…..let’s get that out of the way right away……this is about another way to enjoy and consume my cannabis for my own relaxation and medicinal needs. Taking pictures of rosin is always a challenge…..it is always dark in the pictures unless you are using a nice DSLR to let more light in. Rather than making bubble hash with water, I just used the bags to make a dry ice kief from the buds. Unfortunately I couldn’t get a block of dry ice and had to use these cubes…….don’t like these as much because there are too many surfaces beating your green plant material and your kief goes green before long when shaking. Could have done it with out ice all together…..nicer hash but lots left on the plant afterwards that way so yield is low. Used two bags in this extraction, the 220 as the bag for edibles and the 120 as the bag for pressing rosin to smoke…..dry ice hash rosin!! The yield on this from the 74g of bud was 22.4g kief. 220 bag was 12.6g and the 120 bag was 9.8g. Not great I guess but I didn’t want to keep going for 4 and 5 minutes with the bags…..these were roughly 2 minutes with the 220 being 3 minutes on the high side. You can certainly see that the 120 product is more golden in colour than the 220 but since I didn’t crazy, the 220 is still a very nice colour. Last step on this journey was then to take the kief and make our rosin. I pressed product using 37um bags with the temp set at 160 degrees. All were done the same for the most part……roughly 4 gram presses, the same temperature, and the time. The first presses were 90 to 120 seconds. If a second press was done on the pouch, then it was at the same temp but for only 40 to 50 seconds. The yield on this was just shy of 7 grams…….6.77g…..roughly 30% yield from Kief???,…..roughly 9.2% from flower???…….would have likely done better right from flower😂 😂 😂 it was fun, regardless of the yield😃 Tasty rosin!!!! Can’t beat rosin for getting the true tastes of the plants. These numbers are absolutely due to my abilities with extraction.......sure don’t judge the genetics based on my returns......she is a frosty plant and will give great returns!!!👍👍 Several pictures show that, I hope!! So that will wrap up this diary for Sweet Seeds Killer Kush Auto, SWS56. Certainly give this girl some consideration if you like OG Kush and also have space concerns in your grow. She is beautiful frosty little girl with a punch. Certainly get the usual woody and citrus notes from her rosin and she has a lasting high. She helps to get get you going and willing to finally start cleaning that corner of the room you have been avoiding…….watch out though…..distractions😃……next thing you know 40 minutes go by and you are staring at a box of DVD’s wondering what happened to CD’s…….cassette tapes (the art of the “mix tape”), 8 tracks, vinyl……ALBUM COVER ART Baby!!!!!! Then its either back for another rip, or get your crap done because the next rip leads into even less work getting done😃😃 Great job as usual @Sweet_Seeds !!! Looking forward to the next one……Cream 47 photoperiod……actually, already done germination and a new diary coming👍👍…..compare a 3 gal pot to a 5 gal pot, or a fabric vs air pot, and see what my yield differences are?? Thanks for the read and greatly appreciate the comments Growmies!!!!! Love spending time on a forum for growers to help fellow growers. Much grower love and thanks again for your time, opinions, and suggestions🙏🙏🙏 Cheers!!
Likes
16
Share
@AutoCrazy
Follow
Week 10 Week 3 of Flower This plant has exploded over the course of a week. She is starting to crowd out her tent mate a little at this point lol. I had to do another round of defoliating because the fan leaves on this plant get so big! I am pretty impressed with the stretch and vigorous growth this week. I can’t wait to see this lady start stacking on some bud. Cooler Internals: 600 ppm 1.2 EC 5.9-61 pH (it swings a bit over 3 days) 65 F Solution Temp. Onward 😎🍻
Likes
3
Share
they seem great getting super frosty and the aroma is strong. the flowers are getting super dense seems like it's all going too work out. I love this cherry cola. I just stared the last bean of it and purple lemanade and BlackBerry I can't wait too see what they do outside
Likes
7
Share
@MrPott
Follow
She's surprisingly short compared to Selena (Super Auto Lemon Haze) but her buds are turning out to be nice, purple, and covered in trichomes so far. Had to cut down the lights to 12-12 cause one of the other plants turned out to be a photoperiod. Sucks but it definitely saves me the electricity bill. As usual, looking forward to next week!
Likes
Comments
Share