The Grow Awards 2026 🏆 


Likes
Comments
Share
@DeepRootsGrowTrees
Follow
PURPLE KUSH / KANNABIA SEEDS
WEEK #15 OVERALL
WEEK #3 FLOWER
This been another good week for this lady. No issues to report 👌. She's looking good buds are growing and you can see the trichomes!! Stay Growing!!
Thank you for stopping by and taking a look it's much appreciated !!
Kannabia.com PURPLE KUSH

Likes
32
Share
@Compassionate_Gardener
Follow
This cycle was all along a great pleasure. The plants developed MUCH BETTER THAN EXPECTED, the result under the Q6W-Gen. 2 LED lamps from SANlight is FANTASTIC. I have NEVER harvested more from plants of the same strain under HPS and the quality of the bud (trichomes, taste aroma) is MUCH BETTER when grown under LED, my decision is definitely made, I will continue to solemnly grow with LED-lights in the future. I harvested 2250 gram of Shiva Skunk and 3009 gram of Serious Kush, that a total amount of 5259 gram. In relation to the 3000 Watts (incl. dimmed part!) power of the LED-lights thats an AMAZING 1,753 gram per Watt.


Likes
13
Share
@Crusty_Juggler
Follow
Grown it many times, clear favorite.
Sweet baked gas, spicy, hashy, some have a subtle smooth lemon sherbet aftertaste.
Relaxing happy and mellow effect.
22-28% Rosin return

Likes
26
Share
@Susquihanna
Follow
Whew, I am a few days late in posting but I have been MIA. Glad to be back to my plants and gardening. My faithful follower @hindugod even reached out to me to see why I was late in posting my pictures. Thanks for keeping up with me, as we are growing our Gorilla Cookies at the same time so as to compare our results.
A Disney Vacation was good for me but not so much for my plants. I also left my husband and two livestock in charge of feeding and protecting my plants from the elements of nature. Gorilla Cookies continues to grow tall but her leaves are getting burned AND I have some very poor looking leaves. So I don't know if this is a feed problem or a Mother Nature problem or both????
Love taking pictures with my new magnifier. Love watching the flowering stage close up.
It has been quite hot this past week, but hopefully we will get a break in the weather. Please continue to enjoy my diary and let's chat it up friends.


Likes
23
Share
@Gromorethailand
Follow
So, the nutrient lock is fixed, the humidity is under control, and these ladies are looking super vigorous. We will flip very soon as the stretch will fill out any holes in the SCROG net. We will also clear the bottom of these plants in the next day or 2, taking lots of clones and making sure we have that SOG.
We have introduced some workers, 10 praying mantis to keep an eye on any pests.. the video of the mantis is from another grow, not the OG kush
Light is about 70% ATM and i will turn up to 80% today, Spiderfarmer have kindly sponsored us with a Light controller, that arrives imminently and as soon as it does, it's week 1 of flowering and the light will go to 80% - then 90, then 100....
We have had serious rain here, the relative humidity outside is 90% and the temp is 31 degrees.
We continue to feed with our own nutrient schedule. Slightly increasing the nitrogen for the last week or som of pure Veg.
Thoughts?
Lets Gromore,
Likes
44
Share
@rhodes68
Follow
10/22 Week 8 has arrived Day 52
Gave nuet heavy feeding for the last big push as they have to be out of the tent around the 31st.
So... Bio-Bloom 15ml - Bio-Grow 5ml - Big Bloom 15ml - CalMag 5ml - Recharge 0.25 tsp - Fish Sh!t 0.5 tsp / Gal @ 6.4 ph 0.5 gal each with a bit more for the big girls.
New Pics uploaded
Update: FYI I do not use the entire nuet list, if I use it at all at any time its there, feedings are detailed in the comments. Thanks :)
10/25 Day 55 Water and Karo Syrup 1tbs /gal (sugar for the bugs) is the way of it from here on, 0.5 gal at 6.4ph each
Tricones say they can be harvested at any time now but the drying tent wont be ready for another week so letting them enjoy the lights and bulk up as of course still getting new hairs.
Just finished a close examination of the buds, this is without a doubt the cleanest smelling and strongest terpines of any LSD-25 we have grown.
There is no harshness to it at all.
Now it will make your nose run and give an odd high if you keep your head in the tent too long but that's a good thing 😇
I am convinced this is due to the organics as even those I grown with mixed organic/mineral fertilizers smelled bad.
Processing
Likes
75
Share
@Dedon
Follow
Hi everyone ! 😀
Everything is ok, no disease, no carrency. but 2 ladies don't want to stretch a lot :/ ( the 2 on the corner, bottom left and Top right ) i don't know why. maybe it's the variety. i have 4 Skunk XL and 2 Critical. Maybe these 2 are the critical ( yes i lost them when i plant the seed 😩 ... )
No more pH fluctuation ( i love that )
EC is around 1.9/2.0 and increase to 2.1/2.2 when they drink a lot so i add water with 1.7 ec to decrease it to 1.9/2.0 again
I added 30L of water since i changed the water ( 2 tanks * 20L / i change it the 11/05/18 ) so i'm gonna change the whole solution during the week.
See you next week !

Likes
14
Share


Likes
12
Share
@VT__Homegrown_Fun
Follow
Just another week of vegging and feeding, waiting to make sure the last remaining plant I have is female. I think the male parts would have shown already if it was male, but you never really know until flip time. I’m planning on up-planting the remaining plant I have to a 7 gallon fabric pot and flipping it to 12-12 because I don’t have tent space for a massive beast of a photoperiod. Excited to see if this one is female (which I really think it is fingers crossed!).

Processing
Likes
12
Share
@HylianGrass
Follow
Week 12 . Tricomes are nicely starting to form everywhere. They are starting to look daam sexy! . The smell gets stronger and stronger and the leaves are getting real sticky to touch and when cut. Overall conditions are golden! And each time i change my water i get amazed by how clear it is!
Likes
17
Share
@jamjam887766
Follow
I cut down plant #2 last week, dried the bud and put it in jars for curing. Plant #1 still has a ways to go. It's starting to smell better (before there wasn't much of a smell), I haven't spotted any amber trichomes and the pistils are still mostly white and stretching. I'm only feeding it plain, tap water and will see what happens. I'll keep you posted!
Likes
7
Share
@hooolian
Follow
07/01/22: Pre Flower week - lights have been switched to 12/12 and are at 80% still. The plants are really showing their sativa genes with huge growth. plants are average 70cm although two are 90cm. bud sites have finally started to show growth and lightening of the green toward the end of the the week. humidity is low - the carbon bag seems to have done a good job also.

Likes
25
Share
@Kush_queen
Follow
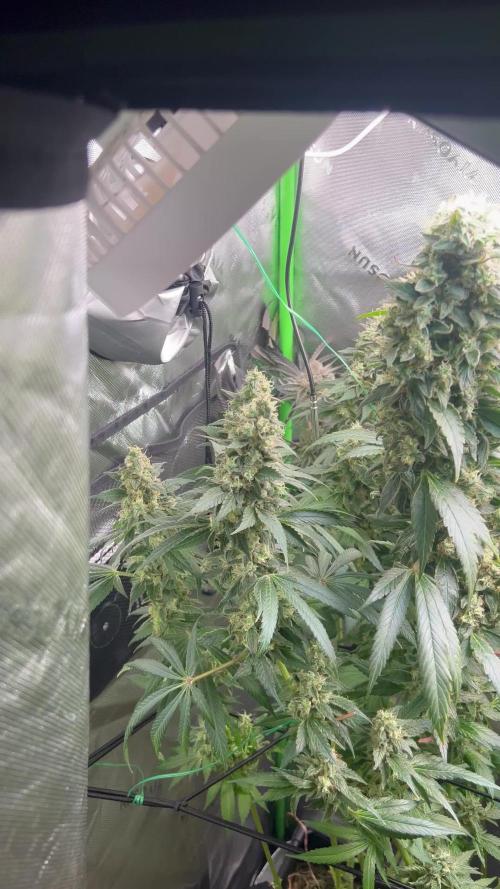
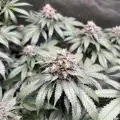
All is great with my ladies this week the buds are fattening up nicely I got alot of bud sites and they are all developing beautifully the 2 plants that were approximately a week behind are also now fully flowering thankfully
The extractors are working hard keeping the humidity low temps are around 28.5 lights on and humidity is 42 they are drinking more and they are getting the full recommended monkey nutrients and the Zues pro 600 is on 100% finally.
Let's hope the ladies keep improving
Stay blessed 💚


Likes
9
Share
@CrazyRussian
Follow
This is the last week I gave veg nutrients, from next week my little girls will get flowering nutrients for the first time. These girls are growing much faster than I was expecting, It’s good to see how healthy are they. :) By the way these plants smell incredibly strong! Usually during vegetation they don’t smell too much, but this plant is an exception. They smell as they are already producing buds for a couple of weeks.

Likes
1
Share
@frankensoil
Follow
Tag 66, eine Woche brauchen sie bestimmt noch, bis jetzt 40-60% milchig


Likes
13
Share
@OutdoorRebelGenetics
Follow
Well she need s bulb swapping but due to funds unavailable to do so but she is producing some very nice small nugs covered in tricomes can't wait to see the final results was a free seed from discreet seeds.com
Processing
Likes
5
Share

