
Likes
Comments
Share


@ISCA_Abi_In_Da_HOoD
Follow
hello we are in the second week of growth I have just planted them in new cups which are a little less than 1 l.
I started using root growth fertilizers and a little microbial.
For the moment they seem to like it so we will continue to fatten them once a week and in the meantime we will use the silicate from T.A. I thank sweet seed I thank everyone who has followed me since the beginning. thank you see you very soon kisses 🍋

Likes
8
Share


@AutoCrazy
Follow
This girl is really starting to thicken up! She smells so damn good!!! The buds have loads of trichomes. The buds almost look as good as ones grown indoor.
🤞 the weather stays nice. Although I built her a shelter that I can put poly over 😏
😎🍿

Likes
4
Share


@JDExotics1719
Follow
Honestly wish I would’ve kept up with the whole grow from seed to harvest because it was my officially first CopyCat grow. Very satisfied with these genetics!!

Processing
Likes
37
Share


@organically
Follow
Week 5 - Day 2 - 11.12.2017
-
Hay lovers of Green, i will give you a big update.
While trying to fix the PH and Humidity issues last week, i've already found some nice root developments and decided to transplant to support the regeneration - 6.12.2017 -.
The Plants were unhealthy and shocked.
After 2 Days they started to reviltalize and stable - 08.12.2017 - and i found a suprise, the adjoining Auto Dinamex's start to Preflower.
-
Today the sweetys are healthy,vital,bushy and got nice stems, in height arround 18 cm
The BCC'S internod distances are longer and the stems are thinner as the ICED G's.
-
■ Blueberry Cheesecake [ Cheese x Blueberry Multiple Hybrid ]
■ ICED Grapefruit [ ICE [Skunk Special x White Widow x Blueberry] X Grapefruit [ C99 x Cinderella x Sativa ]
-
■ Timeline ■
Germination start [ 04.11.2017 - 17:15]
Germinated / into Coir Pellets [ 06.11.2017 ]
PreVegetative start [ 07.11.2017 ]
Transplanted into 1L Airpots [ 19.11.2017 ]
Vegetative start [ 26.11.2017 ]
Transplanted into 7L TeKu [ 06.12.2017 ]
-
PreFlowering start [ xx.xx.xxxx ]
-
Flowering start [ xx.xx.xxxx ]
Harvesting Part 1 [ xx.xx.xxxx ]
Harvesting Part 2 [ xx.xx.xxxx ]
-
■ Growroom ■
Size » 90x90x170 ~ 0,8 m²
-
PreVegetative Lightning
» 24 ▪️ LED ~ 33W - daylight - 3700lm
Vegetative Lightning
» 24 - 20/4 ▪️ HID ~ 250W - 5600K - 18.000lm
Flowering Lightning
» 12/12 ▪️ HID ~ 400W - 2100K - 56.500lm
-
Supply air ▪️ mesh window - negative pressure
Exhaust air fan ~ max.420m³/h ]
Circulating air fans ~ 3x16W max.2250 rpm
-
Pots ▪️ Coir Pellets --> 1 L Airpots --> 7 Liter TeKu.
Medium ▪️ Organic Soils!
Composition ▪️ bark humus,wood fibers,coconut fibers,coconut husks,compost,guano,hornmeal,clay minerals,trace elements,calcium carbonate,perlite.
-
■ Supported by ■
» Female Seeds - so easy !
» Cellmax - Organic Growing.
//////////////////////////////////////////////////////////////////
👋 Greetings your organically
» tried and true, since simple is the best! 👍

Likes
13
Share


@EBPbyEVD
Follow
"Wow, what an amazing week in my grow room! My LSD auto is now 60 days old and in the second week of flowering. The buds are starting to take shape, and I can't wait to see them develop! I also decided to experiment and pollinate one of the plant's branches with pollen from Chronic Rider F1 by Dr. Choice. Exciting times ahead! Feeling like a true master, creating my own unique hybrids. Big plans for the future! 🌿🌸🔬💥"

Likes
6
Share


@I_Identify_As_A_Dan
Follow
Week 14 for Space Panda by Atlas seed,
They have finally 2 weeks later almost started to get some better growth after the topping. She will need atleast 2 more weeks of veg if not 3 before being flipped to flower.


Likes
14
Share


@BushDoctor740
Follow
Seeds germinated in room temperature water for 36 hours in the dark.Planted today in 3 gal pots with a mix of happy frog and ocean forest soil.Used recharge in the first watering and now I wait for these 9 girls to be born .)


Likes
16
Share


@Bendedknee
Follow
Most of my flowing plants are cut and hung, cpl taking their times getting nice and ripened just a few more days then everything comes down Making room for my autos


Likes
12
Share


@Fat_Olsh_Farms
Follow
Will definitely be running 420 fastbuds plants again soon.
Smoke is amazing. Tastes like strawberries and cream and nice energizing high. Would definitely recommend.
Likes
3
Share

@PhinolaGreen
Follow
10. Woche
Sieht soweit gut aus, Pheno 1 ist schon deutlich weiter in der Entwicklung als der 2, ich habe den ersten letzte Woche entlaubt mit der Schere, damit die Buds jetzt nomma schön Licht bekommen und anschwellen können. Denke die ist in 2 Wochen rdy to Harvest 😍
Pheno 2 braucht denke noch bisschen länger, 4 Wochen sind fjedenfall angesetzt und dann mal sehen, wie weit die Lady ist 😊

Likes
4
Share


@mr_smooke
Follow
Christmas update
she starting to put some holiday weight on it seems. next watering I will ad some molasses. the smell is amazing, full of fruit. here is day 49 of flovering
I wish you all a Merry Christmas

Likes
8
Share


@Dapper_Buds
Follow
Week 9 of the 7gal pot GMO cookie’s & w/7 for the 5gal GMO cookies
This week was the start of flower for all.
Same thing they got once a week feed of elemental 1/4tsp to 1gallon of water. 1/2 gal to the 7gal gmo girls an 60oz to the 5gal gmo girl them back to daily plain PH 6.3 R/O water daily for 7gal @1/4 gal an 5gal pot 40oz . All are thriving currently an growth rates are going smoothly an even. The 5gal gmo girl is untrained at 20in hight start of flower an GMO girls in 7gallon pot are at 17in high. Temps are 78 with 60-65% RH. Also readjusted ties downs for a bigger spread.

Likes
26
Share
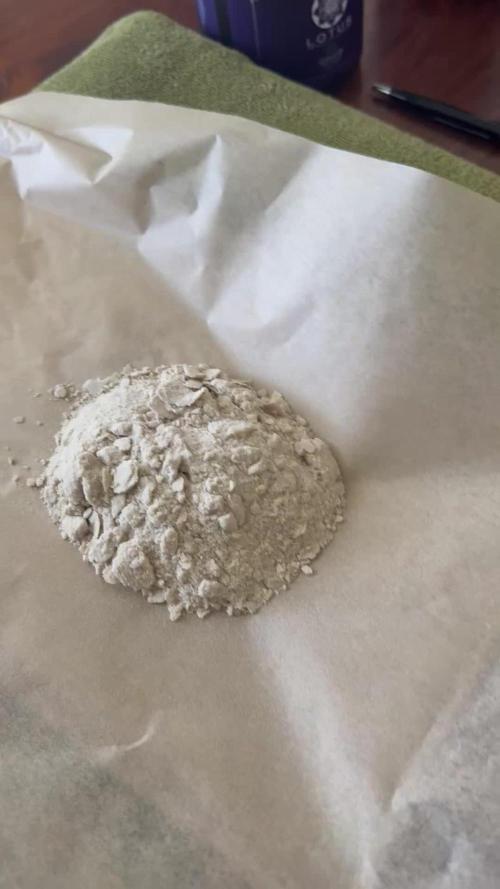

@MuckmanMelts
Follow
Really Babied these girls and shows the capability of some strains under optimal conditions. Especially throughout flower. Progress is becoming very noticeable. What a great experience making rosin!

Likes
58
Share


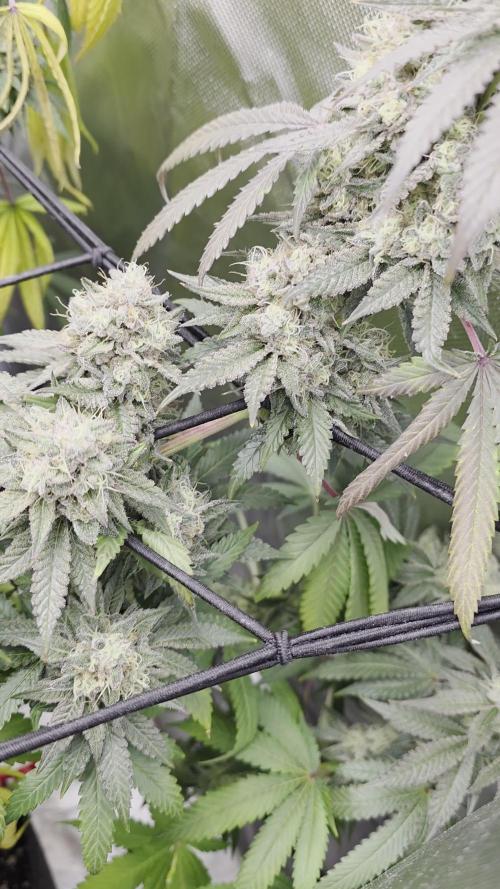
@Kmikaz420
Follow
La fin se rapproche pour la bannana x purple punch (je vien de lui donné sont premier rincage;)
C est une plante vraiment facile à faire pousser elle peut encaisser de gros EC
Et elle n à pas trop de feuille (facile à trimer ;) je pense donc que même un débutant peut avoir de très bon résultats avec cette souche il faudra juste la nourrir correctement (pas besoin de lst ou autre technique, juste lui laisser assez de place pour grandir (en hauteur comme pour les racines = big roots = big fruits ;)
Pour la WEST COAST OG c est pareil on dirais elle sont en pilot automatique (tellement je n ai rien a faire a part arroser )
J ai au début mis 2 anneaux (technique que j aime bien quand j fais pousser une plante la première fois, au cas où il faudrait écarté les branches etc) mais la on en aurait presque pas besoin pareil que pour ka bannana il faut juste lui laisser assez de place pour les racines et lui laisser assez de place (largeur hauteur ) et des bon nutriment à bonne dose et normalement vous devriez avoir le même résultat que moi ;)
Je doit dire que la west coast a une odeur magnifique et les photos pour toutes seul pour se qui est de la cristallisation :)
Voilà les amis je m arrêt ici pour cette semaine on se retrouve pour la recolte de la bannana (la west coast à besoin de bien 10 jours encore avant le rincage)


Likes
5
Share


@TGriner420
Follow
This week went by quickly. They're doin their Pre-Flower stretch and getting big quickly!! I added my Pre-Flower mix to them this week. My Nutrient Pre-Flower Mix consists of H20, Coconut, Bananas, Pineapple, Sweet Potatoes, Kelp, Alfalfa Meal, All Organic Non-Pasturized Whole Milk, Epsom Salts, Black Strap Molasses, and L.A.B. or Lactic Acid Bacteria. First, I boiled the coconut, pineapple, sweet potatoes, the bananas, and left the skins on as well except the coconut of course! That I had to split in half and make sure to keep the water inside to add to the boil. After boiling everything I then let it cool and then added it to a blender to blend little by little. After blending I left separate and placed into the fridge. Then I took 1 Tbsp of Alfalfa Meal and 2 Tbsp of Kelp, 500mL of the milk, 2 Tbsp of Epsom Salts, and mixed them in a 750 mL bottle. Then I took 1L of the mix and added 2 Tbsp of L.A.B. and 2 Tbsp of Black Strap Molasses and then shook the bottle well! Then I took the 750mL bottle and the 1L bottle and fed that to the plants adding 250 mL of pH H2O to the plant as well to flush the ingredients all into the plant with the H20. I wanted to also note that I choose to slowly defoliate so that the plant doesn't go into shock and also fan leaves collect light in all spectrums so taking too many off at a time could hurt or slow the growth of your plant! The amount of light your plant takes in daily is called DLI or Daily Light Index. Overall, they're really growing and have a ton of us sites developing!
Likes
55
Share


Likes
6
Share

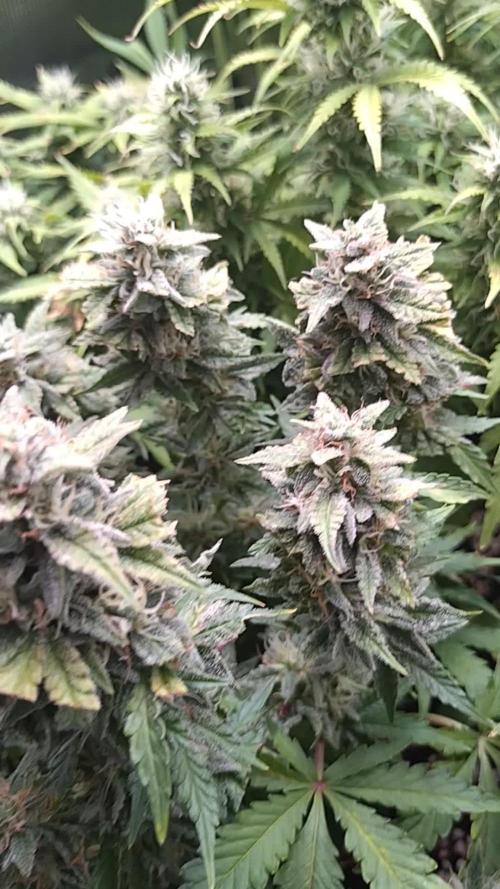
@CheeRz
Follow
Lemon Cherry Gelato will need a little more time before she is ready. However, the buds are already covered with trichomes and also very sticky. Buds smell very sweet and lemony, with the classic Gelato aroma. 🍋🍋🍋🍒🍒🍒