
Likes
Comments
Share


@Smithsgrow420
Follow
Plant is truly coming into flower now, is looking amazing growing so big!!! Can't wait for this girl to finished and find out want we get!!!! 😃😃😃😃


Likes
11
Share


Likes
11
Share


@Eddjack
Follow
Sta procedendo bene ma è molto lenta eppure è carica di nutrienti ma il giusto per non bruciarla. Speriamo aumenti di marcia ed esploda con bellissimi fiori.
Speriamo bene dajeforte growers.

Likes
13
Share


@Youngicons
Follow
Week 2 of flower and they have grown fast.
Incorporated flower fuel and calimagic into their watering. Definitely getting a bigger tent. They are about to explode I can tell.
I had one grow too tall and started to burn from the light so I'm trying to learn more about scrog and hst to help this grow flourish.
I also removed a few fan leaves that were dying and some others to allow more light to the bottom.
Likes
540
Share

@yan402
Follow
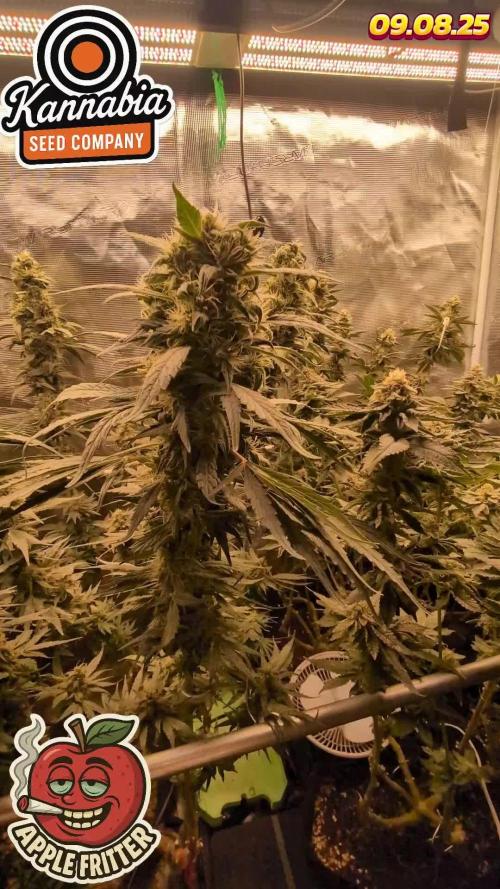
🌸🍏✨🍭🌸🍏✨🍭🌸🍏✨🍭🌸
Hi and welcome to another Kannabia grow!
This time I’m running their Apple Fritter (feminized photoperiod). She’s going to veg under 24hr light and be manifolded.
Still cleaning the rest of my Candy Cream GF (11.04.25) — going to sow the seed tomorrow (12.04.25)
*been lazy, sowed on 14.04.25
🌸🍏✨🍭🌸🍏✨🍭🌸🍏✨🍭🌸
---
💭❗💭❗💭❗💭❗💭❗💭❗💭
❗Events & thoughts worth noting❗
💭❗💭❗💭❗💭❗💭❗💭❗💭
12.04.25 (GW1) – Cleaning + flushing the old coco coir. Might need to add another brick. *No new brick needed ✅
This is how I recycle my coco coir — fast, cheap, no BS.
🌿 Harvest plant
✂️ Chop roots small — they stay in for structure (organic perlite)
💦 Hot water rinse — remove salts & dust
🍶 Pre-soak with light feed:
Micro 10ml
Bloom 0ml
GreenBuzz 10ml
Cal-Mag 60ml
FFJ/FPJ 10ml (new disgusting batch)
pH down (citric acid)
♻️ Media stays — Roots stay — Back in service.
14.04.25 (GW1) – Planted seed in final pot ✅
16.04.25 (GW1) – Did last tent clean up + setup ✅📸
17.04.25 (GW1) – Seed germinated 🎉📸 — roughly 48hrs in final pot. Solid start👌♥️
23.04.25 (VW1) – Minimal burnt tips 📸 — not progressing, not a concern.
26.04.25 (VW1) – Started using the new batch of FPJ/FFJ
https://growdiaries.com/diaries/266849-grow-journal-by-yan402
30.04.25 (VW2) – Increased TriPartMicro & GreenBuzzBloom 10ml → 15ml
03.05.25 (VW2) – Increased TriPartMicro again 15ml → 20ml, topped the plant, and added final layer of clay pebbles around the base, trimmed side branches and did LST in preparation for "manifold" 📸
08.05.25 VW3 finished manifold📸
13.05.25 VW4 Increased TriPartMicro to 30ml and GreenBuzzBloom to 20ml.
15.05.25 VW4 Done defoliation and LST 📸
18-19.05.25 VW5 pruned all the shoots bellow my "mains" and did a full defoliation📸
24.05.25 VW6 increased GreenBuzzBloom to 30ml
04.06.25 VW7 did a cleanup📸
11.06.25 VW8 increase TriPartMicro to 40ml
17.06.25 (VW9) – Final structure pass 💈🌿
Did a clean perimeter prune + removed weak shoots. Ended up with 12 tops, was aiming for less, but she made the call
Didn’t fight it, just shaped it the best I could
Airflow’s good, structure’s stable
🛑 No more cuts until post-stretch
Pics coming shortly 😘
Flip coming soon — we’ll see how she handles it.
20.06.25 VW9 Switched lighting to 12 hours, may the stretch begin 🤞
22.06.25 VW10 Did a good LST session,made some pics, and came to some conclusions and a small change of plans:
Originally planned for 8 mains — long, spaced colas and maybe a couple stronger “titans” if she wanted to go that way.
But she’s showing me something else, and I’m not here to fight her — just guide her.
Now after stretch, I’m keeping side shoots only if they: Fill real canopy gaps
Don’t crowd neighboring tops (minimum 15cm spacing)
Aren’t growing into walls or toward the next plant
Anything too close, too low, or heading into shade gets removed. No point forcing it.
Looks like I’ll finish with 14–16 solid tops, depending on how she settles.
I’m just trying to give each one enough light and space to stack properly.
No overcrowding, no larf — just letting her do her thing with a bit of structure.
Increased Tri Part Micro to 50ml as well.
28.06.25 VW11 one week since I flipped to 12/12 and she is stretching nicely, a bit shy in showing pistils compared to the Fantasy Feast regulars I have in the same tent.
29.06.25 VW11 increased GreenBuzzBloom 30→ 60ml
06.07.25 FW1 TriPart Micro: 50→ 30ml
TriPart Bloom: 0 → 20ml
Home-made FFJ/FPJ (Watermelon + Pumpkin): 10 → 30ml
12.07.25 FW1 GreenBuzzBloom 60 →40ml, TriPart Bloom: 20 → 60ml, fpj 30→60ml
19.07.25 FW3 Got some bleached tops, been out and about at job interviews and didn't notice a last minute stretch spurt 😭, should recover fine though plenty of time left 😁
22.07.25 FW3 TriPartMicro 30→20ml , TriPartBloom 60→80ml , GreenBuzzBloom 40→50ml
24.07.25 FW3 Cal-Mag 60→40ml
26.07.25 got thrips but handled them with extra airflow and defoliation.
29.07.25 FW4 GreenBuzzBloom 50→20ml, Home-made FFJ/FPJ (new batch) 60→120ml
31.07.25 FW4 Home-made FFJ/FPJ (new batch) 120→200ml
13.08.25 FW6 CalMag 40 →30ml, GreenBuzzBloom 20→0ml
🌱💦🌱💦🌱💦🌱💦🌱💦🌱
🌿 Day to day tasks & actions 🌿
🌱💦🌱💦🌱💦🌱💦🌱💦🌱
09.08.25 FW5 – Fed 5l of #1 at 50%→ 2l runoff
10.08.25 FW6 – Fed 5l of #1 at 25%→ 2l runoff
11.08.25 FW6 – Fed 5l of #1 at → 2l runoff
12.08.25 FW6 – Fed 5l of #1 at → 2l runoff
13.08.25 FW6 – Fed 5l of #1 at → 2l runoff
14.08.25 FW6 – Fed 5l of #1 at → 2l runoff
15.08.25 FW6 – Fed 5l of #1 at → 2l runoff
16.08.25 FW6 – Fed 5l of #1 at → 2l runoff
(*RUNOFF reused for tomato plants)
🍶💧🍶💧🍶💧🍶💧🍶
💧 Nutrients in 30L #1
🍶💧🍶💧🍶💧🍶💧🍶
TriPart Micro: 10 → 15 → 20 → 30 → 40 → 50 → 30 → 20 ml
= 0.67 ml/L
TriPart Grow: 0 ml
= 0.00 ml/L
TriPart Bloom: 0 → 20 → 60 → 80 ml
= 2.67 ml/L
GreenBuzz Bloom: 10 → 15 → 20 → 30 → 60 → 40 → 50 → 20 → 0 ml
= 0.00 ml/L
Cal-Mag: 60 → 40 → 30 ml
= 1.00 ml/L
Home-made FFJ/FPJ: 10 → 30 → 60 → 120 → 200 ml
= 6.67 ml/L
pH Down: Citric acid (BuxXtrade) — adjust to ~pH 6.0
📦 TOTAL: 330 ml per 30 L
🔬 11.00 ml/L
🍶💧🍶💧🍶💧🍶💧🍶
⚙️✂️⚙️✂️⚙️✂️⚙️✂️⚙️
✂️ Tools & equipment ✂️
⚙️✂️⚙️✂️⚙️✂️⚙️✂️⚙️
✂️ 2× MarsHydro SP3000
⚙️ MarsHydro 150mm ACF Ventilator
✂️ Trotec dehumidifier (big unit)
⚙️ Mini no-name dehumidifier
✂️ Kebab skewers (LST – stainless)
⚙️ Wire + roast skewers (LST assist)
✂️ Scissors (HST)
⚙️ Vacuum (for spills & cleanup)
✂️⚙️✂️⚙️✂️⚙️⚙️✂️⚙️✂️⚙️✂️⚙️
---
🍏🍪🌬️🍬🍏🍪🌬️🍬🍏🍪🌬️🍬
Apple Fritter (Kannabia Seeds)
🍏🍪🌬️🍬🍏🍪🌬️🍬🍏🍪🌬️🍬
Species: 50% Indica / 50% Sativa
Genetics: Sour Apple × Animal Cookies
THC: Up to 25%
Effect: Euphoric, relaxing, creative
Flavor: Sweet, fruity, pastry notes
Flowering: 56–63 days
Resistance: High
Indoor yield: 450–500g/m²
Outdoor yield: 600g/plant
Structure: Strong, bushy, dense buds

Likes
7
Share


@eldruida_lamota
Follow
Vamos familia, actualizamos la 4 semana de floración de estas Gelato Olandese de Dutchfem Seeds .
Y es que hasta aquí todo va correcto , están enormes, tienen un buen color, se ven sanas, y van progresando las flores adecuadamente.
La alimentación de Agrobeta la están aceptando muy bien , ya se las puede apreciar.
Agrobeta:
https://www.agrobeta.com/agrobetatiendaonline/36-abonos-canamo
Mars hydro:
Code discount: EL420
https://www.mars-hydro.com/
Las maximas de temperatura no superan los 26 grados y las mínimas no bajan 20, así que no me puedo quejar.
Los niveles de humedad también son los correctos van entre 50%/65% de humedad relativa.
Por supuesto el Ph lo estamos dejando alrededor de 6.
Hasta aquí es todo, buenos humos 💨💨💨.

Likes
5
Share


@GODAXE
Follow
25.08.2024
day 14 of flowering.
finally got somme sun after 6 day of rain, the camper berry look fine. showing nice grow and nice flower build up.
the blackberry just look like shooting star in the night sky.
fast berry have start to show dark coloration to, with the night temp getting colder as the summer slowly past by she should have a nice dress by end of september.
Likes
37
Share


@Ganja_Victoria_Aus
Follow
Hopefully another week. I got another house inspection line up. They selling the house. I hove to rent a new house soon. I may have to stop grow😭🧘♂️🏻🙏

Processing
Likes
19
Share


@Ferenc
Follow
Day 24: 600 W LED Light schedule 24/6, ventilation is the same +15 min after the lamp switches off. Water: 50ml per plant so 2x 25 ml per day per plant. Fertilization with bat guano and the same amount of water on Tuesday, Thursday, Saturday. They grow nicely! Someone commented that it looks more magnesium deficiency problem instead of burning so suggested me to add Epsom salt to the water. I ordered Epsom salt so I will give it a go! Thank you! I still believe that I put too close the lamp so it was related to it also but I can see spots on the lower leaves so there is magnesium problem here as well. By the way, they look now beautiful! Blue Sherbet S1 is slower a bit but it is Sativa. Day 25: They started growing rapidly. Day by day they are getting bushy and growing nicely. Day 26: Epsom salt has arrived. I will start feeding them with it. I will mix one tablespoon with 50 ml water 2x a day and I will do it on Monday, Wednesday, Friday. Day 27: As I mentioned in my other diary the last 3 days was crazy hot especially today in London 38 degrees. In my tent, there are 32-32.5 degrees. Luckily, I have direct ventilation on the plants so they won't feel that much heat, but it is crazy... anyways They are getting really bushy and keep growing. I can see some yellow pots but started feeding properly them with Epsom salt and bat guano. Day 29: I retrained (LST) they so tried to spread the sides and bend more the main stamp and also changed their position so I placed them to a different corner. Day 30: It looks like that the Epson salt is good they look better green also now I just damage some leaves as I retrained them. Tomorrow starts the 5th week where I will do some Topping to them except to the Blue Sherbet S1 because it is quite small for that. I will use only LST and FIMing for her.


Likes
21
Share


@KrautFabrik
Follow
Day 46: nutrients like plan
Pictures are taken on day 47
---------------------------------------------
Not much to say, she is growing good 👍
She still has her "discolouration", which she has since day 1. 😅
Happy growing 🕷️🌱

Likes
5
Share


@Misterindoor
Follow
Esta semana pasa a floracion y continua la estimulacion con delta 9 y mañana cambia el fotoperiodo a 12 /12


Likes
57
Share


@BudBoutique
Follow
! this is my current status, gonna upload my last veg weeks within the next week - got a bit busy around Spannabis - thank you for your understanding! 💚
Welcome to Bud Boutique Grow Diary - really appreciate all your love and support :)
Dont forget to check out my other current grows!
🗓️ This Week:
- both Phenos are super strong and transition (bud sight development) going great
- more than healthy
Thank you for still staying with me 💚
___________________________________________
--- 🌱 Strain (Sponsor) 🌱 ---
🏷️ PEACH GIRL by Art Genetix
https://www.artgenetix.world/product-page/peach-girl
--- 🥗 Nutrients and Feeding (sponsored by APTUS: APTUS Ambassador) ---
🍸 APTUS: full nutrient schedule extreme
-- Regulator, N-Boost, P-Boost, CaMg-Boost, K-Boost, Allin1 Liquid, Startbooster, Topbooster, Enzym+ every feeding
-- Fulvic-Blast, NutriSpray as Foliar each once a week
🔗 https://aptus-holland.com/
--- ♻️ Grow Control (Sponsor) ---
TROLMASTER: TENT-X + LM14 Light Adapter to dim/sunrise/sunset lights + Temp & rH Sensor all remote on App
🔗 https://www.trolmaster.eu/
--- 🏭 Grow Setup ---
💡LUMATEK Zeus Pro 600
* 🏠🌿 Indoor: Homebox 120x120x200cm (4x4)
* 📐🌀 PrimaKlima exhausting Fan 1180m3/h (running on 60-80%)
* 🌀 Can Light Filter 800m3/h & 1x Fanbox 1x Dyson fan for Air circulation
🔗 https://lumatek-lighting.com/zeus-600w-pro-29/
🔗 https://primaklima.com/de/shop/ventilatoren-de/ec-ventilatoren/pk160ec-tc/
🔗 https://canfilters.com/products/filters/
All Likes and comments are highly appreciated!!!
👨🌾 don't forget to check out my Instagram for daily educational content: budboutiquee
- Bud Boutique

Likes
16
Share


@NMGDOC
Follow
Semana del 1 al 7 de marzo.
Lo apunto aquí porque sino luego no sé ni en que semana vamos jaja 😂
Las primeras fotos y vídeo son del inicio de la semana. Hemos retrasado el cambio de una semana a otra, ya que por el lavado de raíces no las pudimos alimentar antes.
Luego cambiaremos el PH a 5,8-9 y el EC también lo aumentaremos.
Edito: al final no lo hemos aumentado porque respondían bien y estaban recuperándose.
Respecto a la semana anterior, se ven mucho mejor después del lavado de raíces. Algunas plantas están muy bajitas, así que la luz para las más bajas está a 65 cm.
Mañana o pasado aplicaré jabón potásico con aceite de neem a modo de prevención. La vez pasada, que era mi primera vez plantando, llegaron trips y al final resultó todo bien, pero si no llegan los bichos, mejor todavía

Likes
14
Share

@BlaKX
Follow
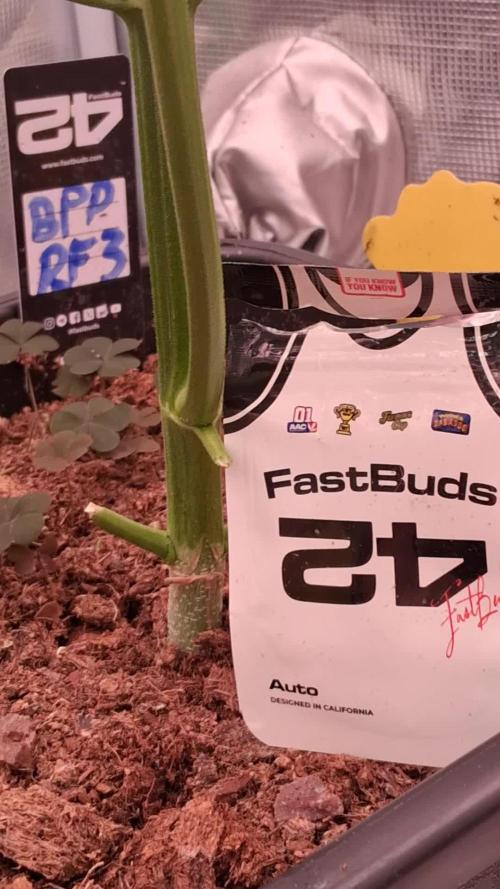
High Growmies das RF3 hält bis jetzt was es verspricht!
Es ist erstaunlich wie gut sich diese Pflanze entwickelt hat sie hat ihre Größe in diesen 7 Tagen exakt fast verdoppelt hat schon angefangen Haare zu entwickeln genau wie auch Blütenkelche die sogar schon Lila sind!!! Sie wird definitiv die 1m Marke knacken.
UV:40min IR:30min Deep Red:20std. 17% statt 10% Anteil.


Likes
13
Share


@CannaIGrow
Follow
Looks like the beginning of some white hairs. Not sure if the beginning of that is preflower or if it'll be a couple days.

Likes
10
Share


@Elcoquigrow
Follow
Debido al descontrol de estos días olvidamos subir la semana 4 y 5 - ya estamos en el día 63 de vida y semana 6 de floracion 😅
Likes
35
Share


@Compassionate_Gardener
Follow
All 18 CANNALOPE HAZE plants from DNA-GENETICS continued thru week 6 to develop their BEAUTIFUL flower crowns. The plants on the right under the Q6W-Gen. 2 LED-Lamps from SANlight are in general a little more uniform (all have almost the same height). The plants on the left side under the Lumatek PRO 600W are developing well, but some are smaller and some are taller. The production of flower seems to be on PAR now between the two sides, but thats hard to judge only by looking at them. In the end the weight will tell, who produced more flower. 😃 I still give only PURE tab-water, without any PH correction, since the BIOTABS nutrients are adjusting the ph-value and work for the FULL-CYCLE, its unbelievably easy and convenient, I LOVE IT! 😎 The Ambient Q240+ from HOMEBOX is now nicely filled by the plants and they continue to grow well. 😁 The Lumatek is still running at 100% at a distance of 50 cm from the top of the plants. The two SANlights at 60 cm distance were so strong (first signs of light bleaching) that I decreased the power by dimming them to 80% during week 6. I am curious to see how the test goes on further...


