The Grow Awards 2026 🏆 


Likes
Comments
Share
@Stone1land
Follow
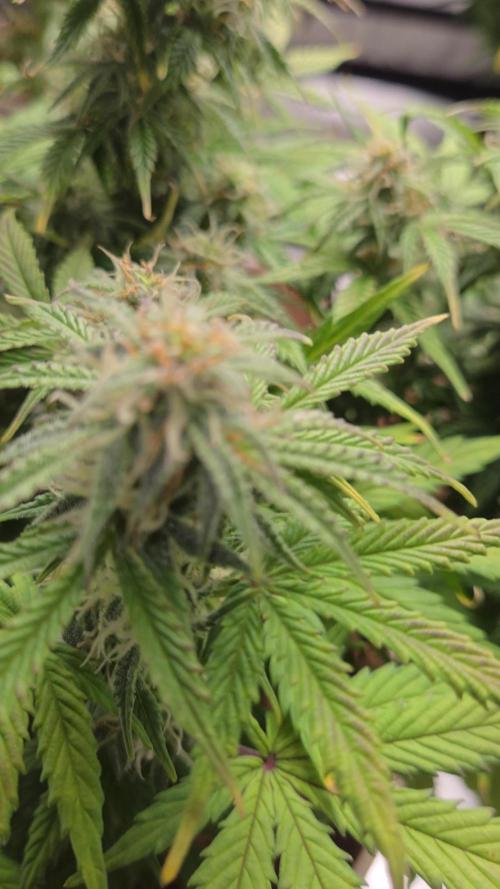
Пришлось повозится с капельным поливом,из-за того,что не менял предфильтр - забились капельницы,пришлось исправлять в неудобном положении тела,но всё сделал,полив снова в рабочем состоянии.
Всё так-же подвязываю проволокой шишки,начинают падать под своим весом,по листу свитч раз в 10 дней,патока+триходерма+аминокислоты раз в неделю под корень.
К слову,указал удобрения канна,на самом деле это мои удобрения из обычных солей,как кальциевая селитра,магниевая селитра и тд. замес делаю сам себе,нужно будет,покажу фото пофасованных сухих удобрений + ко всему магнитная мешалка,которой замешиваю.


Likes
15
Share
@Gorrilla420
Follow
This plant has been a joy to grow, she’s super frosty and fairly dense. I’ve trimmed and put in jars to cure. Not tried yet will give another week in jar then try a wake and bake with it.

Likes
8
Share
@JamaicanDream_420
Follow
Vamos terminando la semana 7 y esto parece que marcha,van cogiendo forma y color….


Likes
2
Share
@MrGrowDiarie
Follow
Day 56
She show sone sign of nutrients inbalanced,
So i fixed her position and the water ph

Likes
2
Share
@Dr_Zauberer
Follow
Good week folks always best week! Pudding them up for dry for around 10-12 days again.
Likes
6
Share
@RatmanJR
Follow
September 9th, 86 days post flip
Clones:
No major updates this week, plants continue to grow well. Leaves are starting to drop heavy at this point, calyxes are stacking the way a sativa should, stigmas are turning brown as new ones are forming.
Smells from last week continue to intensify. This weekend I plan on giving them a nice microbial tea too help break down some of the mites I have a few weeks back.
Parents:
Growing very well, needs a topping again.
God bless!

Processing
Likes
12
Share
@Silverback_Guerilla
Follow
2/10:
I watered today with about 3/4 gallon each, plus cal-mag, signal, bembe, armor si, a little open sesame, and their final dose of endoboost.
The shorter one is budding up quickly now.
2/11:
Wife home sick today....postponing construction project to raise the lights.
2/12:
Today, I tackled the project to raise my ceiling another foot. In addition to that project, I installed and hooked up my new AC Infinity 6" intake fan. It's pulling in fresh air from the soffit vent on the eave of the attic, and currently feeding the garden with 46f fresh air. I'm able to easily maintain daytime temps in the lower 70f's now. I am able to drive the nighttime temps as low as I want. The only issue is that the outdoor RH varies quite a bit, so I ordered a 30-pint dehumidifier to put in the top of the closet.
I sprayed everybody with boomboom spray to try and mitigate the light burn damage that is likely to ensue.
2/13:
The taller one is still stretching a little bit, but the 2-footer is just budding up.
2/14:
I fed them today with about 3/4 gallon each including grow big, big bloom, tiger bloom, cal-mag, signal, bembe, humic acid, and I switched over from Open Sesame to Beastie Bloomz. Raised the lights another couple of inches. I did some training on them and defo'd a little bit.
2/15:
Installed the new dehumidifier and rigged the continuous drain on it...works great.
2/16:
I rotated the edge plants and removed some old leaves. I added another 22w 3000k 4' bar light under the canopy.
2/17:
I rearranged the garden and defoliated a little bit. That's it for week 8-

Likes
120
Share
@DogDoctorOfficial
Follow
It's time for the thrilling second-week report on my Lego Ninja Tropical Tangie Run. This week has been smooth and steady, with our little ninja making progress at a pace that's just right. We're focusing on building strong roots, and that's a ninja skill we truly appreciate!
Picture this: our cute green sprout, guarded by two fearless Lego ninjas, is growing steadily. These guardians are not just for show, they protect and guide our plant with ninja precision, ensuring she becomes a force to be reckoned with.
Now, let's dive into the secret of her growth: the magical touch of Aptus Holland nutrients. I've been giving her the VIP treatment with Regulator, All-in-One Liquid, Camg, and Start Booster. These nutrients are like her secret training arsenal, providing the perfect nourishment for her to reach her full potential. She's becoming a ninja superhero, fueled by the nutrients of the gardening gods themselves!
But let's not forget about the dance of light that shapes her journey. With a PPFD of 350 (photosynthetic photon flux density), our Tangie is soaking up just the right amount of light energy. It's like a ninja training camp for photosynthesis, where each photon cheers her on, saying, "You've got this, grow strong and vibrant!"
Speaking of the environment, our ninja is enjoying a cozy temperature of 27/28 degrees Celsius. It's like a warm embrace that keeps her comfortable and content. With a relative humidity of 60/70%, she's surrounded by the perfect balance of moisture and freshness, creating an ideal tropical haven for her to thrive.
Now, let's take a moment to appreciate the joyous scenario we have here. A Lego Ninja Tropical Tangie Run, powered by Aptus nutrients, dancing under the perfect PPFD, and embracing the cozy environment. It's a celebration of the wonders of cannabis cultivation and a reminder of the magic that lies within our gardens.
Before we wrap up, let's give a shoutout to the master breeders at Dutch Passion. They've bestowed upon us the tropical delight that is the Tangie strain, igniting our taste buds and adventurous spirits. We salute their expertise and dedication in crafting such amazing genetics.
In conclusion, our Lego Ninja Tropical Tangie Run is off to an amazing start. With each passing day, she grows stronger, guided by her ninja guardians and fueled by Aptus nutrients. Let's continue this journey with love, embracing the joy of cultivating life.
Happy gardening, ninja-style! And a special shoutout to @DutchPassion_Official for their remarkable contributions to the cannabis world. Your seeds, genetics, and overall greatness are truly appreciated.
Remember, folks, stay stealthy, grow strong, and keep spreading the joy of cannabis cultivation. Until next time, may the ninja spirit guide your green adventures!
As always thank you all for stopping by, for the love and for it all , this journey of mine wold just not be the same without you guys, the love and support is very much appreciated and i fell honored and blessed with you all in my life<3 <3 <3
#aptus #aptusplanttech #aptusgang #aptusfamily #aptustrueplantscience #inbalancewithnature #trueplantscience #dutchpassion #dogdoctorofficial #legoninjago #growerslove
With true love comes happiness <3 <3 <3 Always believe in your self and always do things expecting nothing and with an open heart , be a giver and the universe will give back to you in ways you could not even imagine so <3 <3 <3
Friendly reminder all you see here is pure research and for educational purposes only
<3 <3 <3 Growers Love To you All <3 <3 <3

Likes
45
Share
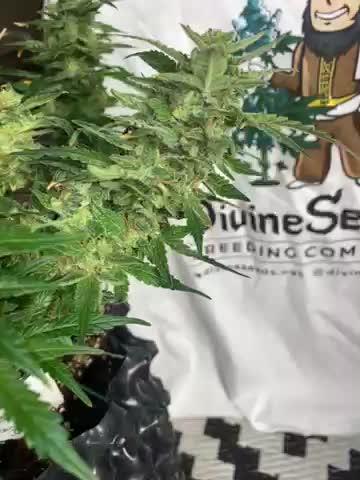
@BodyByVio
Follow
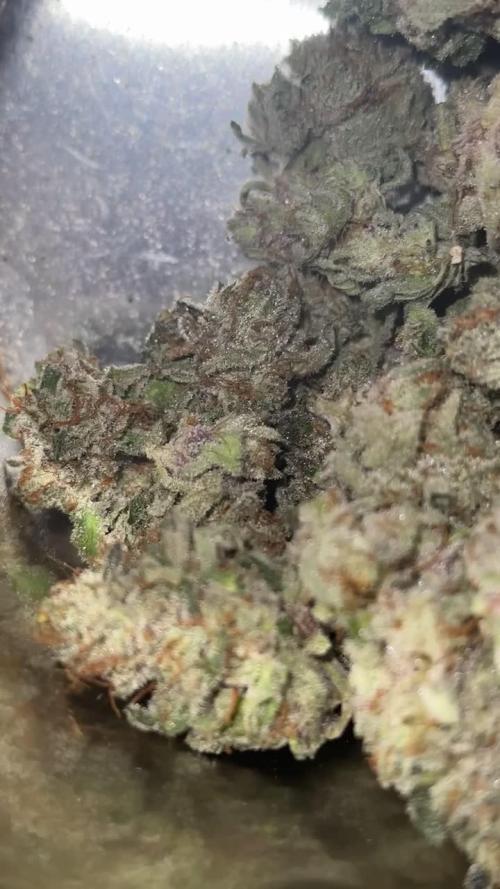
Beautiful flower full of trichomes. Smell and test fantastic. Very fast flowering. She was done on day 49 but I cut her down few days later.
I love the strain, the only thing that I will like this strain to have is a better yield. Beast quality buds I ever grew.
Likes
21
Share
@Brick_Bazuha
Follow
За эту неделю сильно ничего не произошло, кроме как засохли 3 ветки которые надломал еще на середине веги, реанимировал, но не прижились до харва жаль, грамм 15 потерял точно( на этой недели очень много пестиков ещё белых и трихом как то ещё мало

Likes
16
Share
@Costocano
Follow
Crecimiento lento, esta planta en tierra madre y en buenas condiciones suelta medio kilo fácil, se adapta bien y podría haber sido mucho mejor, pero es mi primer cultivo y es lo que hay, tiene un sabor afrutado y muy resinoso.

Likes
14
Share
@Bigbombbudz
Follow
Another week closer....
I know I said it before but these girls have been a pleasure to grow...they are 23 days into budding and pushing out like crazy blowing up and stacking up..going to be some full girls.
Nothing to really say everything is dialed in perfect, this week it was very hot out so my room got a little hotter... but no big deal the girls really didn't mind...
Until next week.... smoke a fatty, help out your fellow grower...

Likes
39
Share
@SamDo
Follow
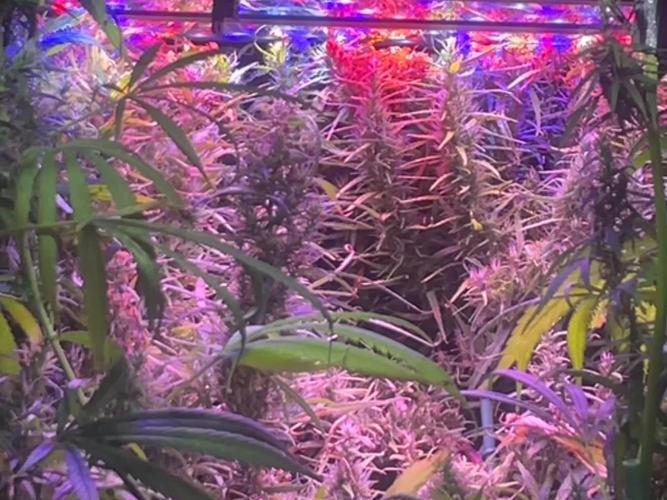
Slt, déjà la fin de la semaine 5. Les plantes ont très bien récupérées de leur topping et de leur défoliation. Les plantes semblent être en bonne santé.
Je viens juste de refaire une défoliation et du LST, pour avoir la structure voulu et donner toute l’énergie de la plante pour les tiges principales, en espérant que cela soit profitable aux plantes.
J’espère ne pas m’être trompé.🙏
En photos et vidéos je montre avant et après la défoliation et le LST, et le fonctionnement du sytème d’irrigation.
A la semaine prochaine...
Happy grow😎
Ps: le rendu des couleurs sur les vidéos et photos peu être bizarre à cause de la LED.

Likes
14
Share
@BOMbolenath
Follow
Last week and this week is too hot. Plants are suffering with the heat but doing well.
Flowers groing and getting bigger.

Likes
16
Share
@HegauHillsFarmers_M11
Follow
Tag 1 - Beginn der 1 Woche.
Die Pflanze wurde bisher nur mit Wasser besprüht und die Erde angefeuchtet.

Processing
Likes
11
Share
@ganjaman24
Follow
They’re looking extremely healthy..gave em their first nute feed with the last watering seem to be doing fairly well..fimmed the GG and LST. Did not touch the unkown as it looks smaller to be the same age. Running GHE base line with few extra supplements.
****UPDATE****
Both are LST’d..might rethink the way I tie them. Going for a “coil” type look, we’ll see though. They’re looking great! Hoping for females!


Likes
22
Share
@SouthGermanGrowGirl
Follow
Week11 now at our first Rapier auto.
He is already very sticky and strong.
Smell is intensive.. Some Lime---Some Candy---Some Gas.
Very hard to explain at the moment.
I will give him 2 more Weeks..
This Week he can do whatever he want.
Next Week i flush him with Amino/Vitamin Water ( PH= 5,7!)
Then comes the Harvest :-)
Likes
2
Share
@Albanymedicinalgarden
Follow
Everybody is looking happy and healthy. Applied cover crop to Glueberry OG and regret not doing the rest now. No signs of stress


