The Grow Awards 2026 🏆 


Likes
Comments
Share
@FatnastyzBudz
Follow
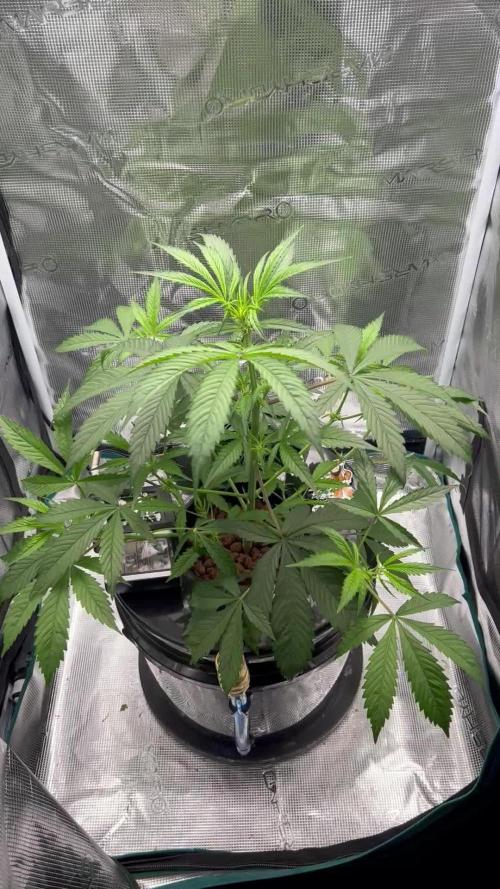
Week 2 flower
Day 1, Day 29 from seed.
Bent her head just a little and removed a few leaf blockers! She got a tent all by herself.
Smellin good now too, only one open stinking up the room! 🤤🤘
10-5
250ml
10-6
1/4 cup poo, 3 tbs buildaflower scoop of connect.
10-7
water, started a tea, 1/4 poo, kelp, yucca, cal/mag, recharge! Tried to keep it simple.
10-8
Day 34
Lovin her tea! Lst and defol, open her up a bit.
Slight defol and used some clips.
Fun with pictures! 😁🤘
10-9
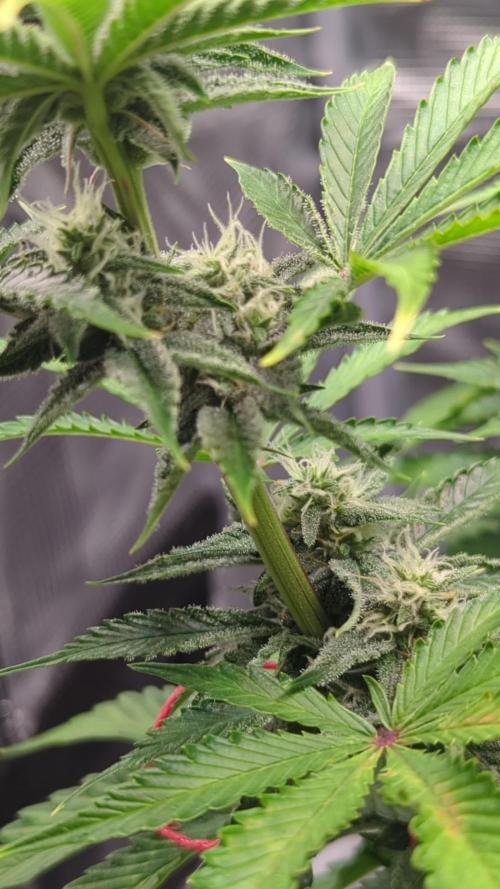
Last day of the week! Her head and another branch took off enough for me to bend it!
Was worried wasn't going to be able to. But we got her! Helped a ton!.
After spacing her out, had to play musical tents!
Water after she sleeps today!
See ya next week! 🤘
Heads pulling up after sleepy time!

Likes
14
Share
@BudXs
Follow
A gift from a special person. Growing in the name of Shawn. Fire like his spirit
Likes
12
Share
@Gdawg
Follow
They are an amazing plant to work with easy and robust they love the inviroment and are starting to smell amazing combined with the lights and climate control its a breeze don't have to do nothing the un topped one is a monster 3.5 ft hopefully fill right out thanks fast buds 💕


Likes
29
Share
@eldruida_lamota
Follow
Que pasa familia, aquí va la 3 semana de crecimiento de estas Titan f1 de RoyalQueenSeeds y espero que esta semana peguen buen estirón si no enanas se van a quedar.
Tener tienen muy buen color, y bueno si me preocupa en altura ya que no están estirando como me gustaría, los demás proyectos ya las han pillado, así que a ver cómo progresa esto.
Añadimos flash root, tucan ,gold Joker y la base de crecimiento de Agrobeta , (Blue line).
Aparte aplique tetra 9 de Agrobeta de manera foliar.
Agrobeta:
https://www.agrobeta.com/agrobetatiendaonline/36-abonos-canamo
Mars hydro:
Code discount: EL420
https://www.mars-hydro.com/
Hasta aquí es todo , espero que lo disfrutéis, buenos humos 💨💨.

Processing
Likes
65
Share
@ASCBOOGS
Follow
Everything seems fine but seems like things are starting to slow down so I decided to feed plain ph'd Water the last 2 feeds will be continuing with normal nutrients solution again I have 3x strawberry stardawg which all still have White pistols 2x critical jack which has 60% amber pistols 1x strawberry diesel 40% amber pistols and 1 somango all white will try post pictures soon p


Likes
5
Share
@pzwags420
Follow
The start of week 5 is going well. Blueberry is smelling nice and my seedlings should be showing preflowers soon.


Likes
5
Share
@JackDaniel
Follow
Diese Woche bekommen die Kleinen erstmals Plagron Power Roots.
An Tag 3 dieser Woche sind sie 7,5, 7 und 5cm hoch. Die Kleinste wurde etwas tiefer eingepflanzt, wächst aber auch etwas kompakter als die anderen. Weiß nicht ob es daran liegt.
In dieser Woche wird umgetopft und das erste Topping durchgeführt.
Es bleibt nur eine Pflanze im Zelt. Die Auserwählte kommt direkt in den finalen Topf.
An Tag 7 wurden die Pflanzen getoppt.
Der Plan war erst eine Pflanze auf 60x60 zu growen,
Demnächst werden die 3 aber in ein 80x80 Zelt umziehen.

Likes
12
Share
@SupremeJay
Follow
Loving watching them grow 😍 i lollipopped gigabud so she is a little late to start flowering. But she’ll catch up hopefully this week

Likes
19
Share
@Still_Smoq
Follow
Week 5, 5-11 September 2025
5-11 Sept - Observed and let the plant grow.
At last a fast week of growth. Whatever the issue was worked itself out and the plant is now thriving. I believe the main problem was the roots did not grow with the speed usually associated with an auto. This could have been my fault because the clay pebbles were rather shallow at the beginning of the grow, and the added expanded clay pebbles a couple of weeks back finally expanded the root system. In any case it is on track now and doing fine.
The end of this week I increased the light power 60%, DLI 37 canopy coverage at 18 hrs.
- 2 Sept changed nutrient solution
- 2 Sept updated feeding schedule
- Using reverse osmosis water with EC/TDS at 0
- Adjusting PH to 6.1 daily using GH up/down
- Nutrient solution EC 1.7 at 69 degrees F
- Light power at 60%, DLI 37 canopy coverage at 18hrs
- Using PYPABL, Air Pump, 400GPH
That is it for this week. Thanks for the look, read and stopping by.

Likes
8
Share
@DutchBarnacle
Follow
Week 7
She's still going strong, while Royal Queen Seeds has stated that this strain is ready in 8-9 weeks, I'm wondering whether this pheno will surpass that window. Imagining her not making it to the end of next week is hard, given she's going this strong and her budsites are still in full development.
Her smell has increased and her Cookies Auto genes are coming through. Although her sugarleaves still give off that citrusy scent when rubbed, her actual buds and pistils give this faint vanilla-like cookie smell. Whilst I forgot the exact parent strains she has, I was certain it had to be something 'cookie' like - which turned out to be the case.
I started occasionally feeding her with PH balanced Potassium + CalMag alone, to aid her flower development and to not overdo the amount of nitrogen that's in her regular feed. Also increased the amount of water, adding an extra liter of tapwater after normal feed - in hindsight perhaps it would have been better to pre-moisture with the extra water before adding nutes.
Come to think of it, this might have affected her more than was apparent in week 7.
Likes
2
Share
@Shefman93
Follow
This is the last week of veg. Scrog the plant and took clones from the lower growth. It was transplanted the week prior so after 3 days of recovery from the lollipoping and shaping to fit the scrog. Literally had no issues the veg cycle.

Likes
33
Share
@MrGrowDiarie
Follow
Day 120
The buds look dense and frosty, with swollen calyxes and visible trichome coverage-clear signs that the plant is nearing harvest. Some leaves are fading or curling slightly, which is normal at this stage as the plant directs its remaining energy into the buds. The environment appears stable, with reflective tent wo!!- controlled lighting, and monitoring equipment


Likes
8
Share
@Shellshocked
Follow
Well looked at the trics and I seen about 40% ambers so I put her in dark for 2 days before I harvested her pulled her out or the dark checked the trics. again and seen zero ambers while I was confused I knew she was not ready so I had a space in my veg. Tent so I threw her in there for her last week or 2. She looks so bad as I let her dry out big time and with the ph issues I had earlier in the grow there's not a leaf on her that's not got part of it dying off. Hopefully this is last week of flower as it's week start of week 10 and I really wanna try her out although most will go to concentrates as this grow was not ideal and the frost is minimal compared to other gg4 I got flowering right now.

Likes
61
Share
@Grey_Wolf
Follow
Sensi Seeds Jack Herer 6th week of veg completed 14th Jan 2020
Welcome back , Now even tho this girl isn't really all that impressive size wise , she is very very pretty with those Indica leaves and lush green colour.
You can see where I topped her awhile back has now developed into two gorgeous Tops. I gave her a feed of some of the Dr Greenthumbs High tea i brewed up and she
lapped it up as it contains everything your Soil needs to remain super healthy. That is all for this week I shall be back again next time same Bat channel 😄

Processing
Likes
6
Share


Likes
6
Share
@Gardengobblin
Follow
La strawberrie gorilla est une de leur strain les plus potentiels et elle ne semble pas vouloir faire mentir ses dire . Ouf elle est bouré de

