
Likes
Comments
Share


@Minuteman_Organics
Follow
Loud hashy, pepper, sulfur, rotten fruit, lemon, and Skittles terps.
The landraces got nice structure, terps and yield but resin is lacking. I think that's normal. Gonna have to cross these a few times till I find something great that is worth it.


Likes
18
Share


@Barcelona_Farmers710
Follow
La Runtz tiene toques leves de color rosado supongo que de la Gelato, tenemos dos phenos que pinta. Muy bien farmers Pcg de momento nunca me a fallado!💪🏻

Likes
16
Share


@Big_Rade_SCLA
Follow
Hi to everyone.
DAY 74 -- Happy to say I haven't had any major issues so far this year. Made a video to show the progress and the difference in how the plants look. Some are getting stretched/pulled; while others aren't. All are getting partial shade throughout the day to avoid the heat stress. Am considering full sun now that they are bigger.
Count: 50/50 male/female; 6 of each basically from the 12 seedlings.

Likes
80
Share


@OrganicNature420
Follow
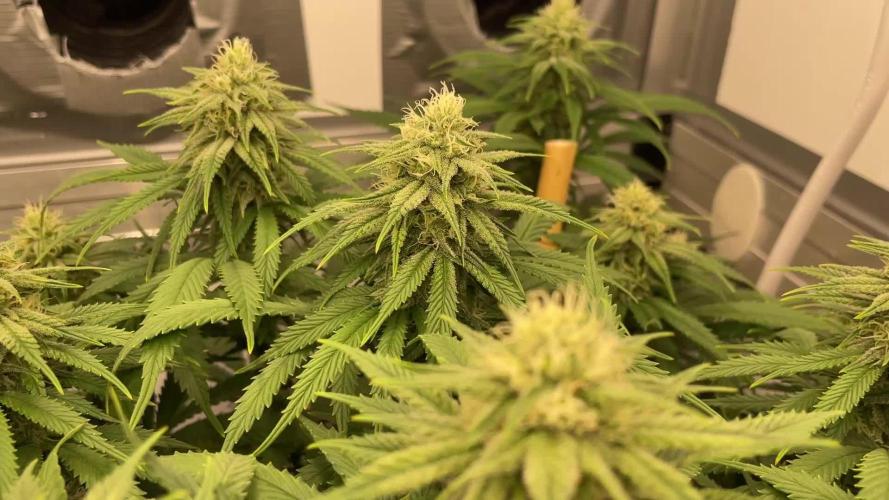
• Sugar Puss, Exotic Genetix
• Cheetahs piss x Bakers dozen (unreleased)
• 60 - 70 day flowering time
• Unknown Info nothing online
Nutrients • GreenBuzzNutrients
(DISCOUNT CODE • GD42025 ) %25
I use the whole product range and this stuff is a game changer. I've not had one bad grow with this company and it hasn't let me down once. Terps and taste are through the roof. No need for run off in coco only during flush week. Hands down the best nutrients on the market.
GREENBUZZ OUR NOW OFFEEING OUR FELLOW GROWERS A WHOOPING %25 OFF WHEN USING MY CODE ABOVE. BE AWARE IT HAS CHANGED 🌱💚 ENJOY
LIGHT/TENT • Mars Hydro FC-E6500 5x5 tent
❄️ ❄️❄️❄️❄️❄️❄️❄️❄️❄️❄️❄️❄️❄️❄️❄️❄️
Its hard to see past the green. How and why exoticgenetix won't release this strain and only give it out as freebies is beyond me. It stinks of pussy 🤤🤤🤤🤤🤤🤤🤣 .. i did send 1/3 seeds over to Germany so the other one I've got will go to my pals to mother and just hope and pray its like this one. Fuck yes winner winner 🏆

Likes
23
Share


@Canadian
Follow
Day 50 the plant has been growing at an incredible speed and has a very very large flowering stretch in fact I only have left 5 inches to raise up my light and then I'm going to have to do something to keep an eye on those branches so they don't stretch anymore or at least they can have enough light to proper development.
From all the plants I have grow indoors this one is the only one that has make my light stretched to the top of the tent I guess it's a good problem to have.
Other than the incredible stretch the plan seems to be healthy and doing pretty well the flower is development and I'm looking forward to see how this is going to turn out.
Day 52 I have rise my light to the top as high as I can and she still grow past the light towards the exhaust system I had to tie her down in order to create an arch and in that way make her receive enough light instead of growing over the top of the light where there is actually no sufficient light if this problem persist I will have no choice but to do super cropping on the tallest branches and see how they react to that I decide to take some cuttings I'm trying to clone this one to see if I can get her outside in the summer in another buddy house and see how she reacts to challenging Ontario weather.
Day 53 I have to Super crop several branches Unfortunately they were growing straight into the light becoming burned by the intense light I hope the plant doesn't react to bad to HST and still deliver awesome buds
thank you for reading I will continue to update have a happy grow.

Processing
Likes
13
Share


@Wollywinkah
Follow
*ADVISE NEEDED*
The day before yesterday I discovered a huge error in my system. I placed filter material in the feed-throughs of the breeding boxes. This is to prevent the roots from growing together over time.
However, what I caused with that is very difficult to explain. The bottom line is that the distribution of food and circulation was actually not good at all.
This also explained the differences in the water temperature, but also PH and EC values. That is now completely under control because it now runs stably for 2 days.
However, you can see that the records have had a bad start. I am thinking about starting over.
Week 3. Week 2 was looking for the correct settings for my system. I found out that the temperature in the bins is quite different. When I set the water chiller to 19 degrees, it all flows fine into the first container. There it rises about 0.5 degrees per bin. The margin of the chiller is about 1 degrees, causing too many fluctuations in the system, with tray 1 becoming too cold and the last one too cold.
I solved this by shielding the box at the inlet of the tent with heat-protective foil. I also put a fan on the water chiller. If that catches on, the entire loft heats up, whith more fluctiations.
However, I have enough space to measure very precisely and I am getting more and more control.
I think the brown leaves were the cause of much too hot water. Since I have the water temperature under control, I see that the new leaves are growing nicely. Moreover, since yesterday (13-5) I received the nutrition. 10 days late.
I just finish the root scheme I think. That is still 3 days a 70 mm per day combined with BioBizz Heaven.
I tried to take some pictures of the roots and some close ups.
I hold the lid with my left hand and with my right hand I try to take a picture zoomed in (max). While the wind makes the roots dance past my lens😵
Something different than usual ... Hope you like it.
If you see something that needs to be addressed, let us know. It is my first breeding so there will undoubtedly go wrong.
This week I also connected the water reservoir with which I can flush the entire system at once. With this I also control the Ph in the system. Will post photos soon.

Likes
1
Share


@Bakedgoldie420
Follow
I am very satisfied with the variety, it has good flowers with good effect. The yield is also very large for small time effort
Likes
Comments
Share


@BruWeed
Follow
☘️12/12 - Empezo su primera semana en etapa de crecimiento.
☘️Por el momento se encuentra perfecta, está cumpliendo 16 días de vida desde que brotó.
☘️Va a estar tres semanas en etapa de crecimiento para ya despues entrar en floración.
☘️Creció bastante rápido, ya se encuentra transplantada en una maceta de 10L.
☘️En estos dias voy a subir mas imágenes de como viene.
Podes seguirme en instagram para mas contenido @bruweed_arg ☘️🇦🇷😶🌫️

Likes
18
Share


@Canna96
Follow
Hey now, hope everyone is having a great weekend and staying safe. Another great week for the ladies, as they are now about 2 weeks into flower, and the stretch is winding down. I am still feeding them silica, cal mag, and flower nutrients maxi bloom by GHE. I will start to add a PK booster this week. I also will be switching to light from V1 to F1 sometime this week, and also integrating the UV/IR bar into the light cycle later this week. I will run the UV/IR bar for approximately 30 minutes prior to lights off to get started.
The 5X5 is really starting to fill up nicely, I am running two dehumidifiers outside of the tent and I am able to maintain around 50% RH in the tent during lights on, and around 55% RH with lights off.
Still very happy with the Spectrum X from Medic Grow. I am running her at 90% in the V1 cycle and will be transitioning to the F1 cycle later this week. Overall, the plants seem very happy and healthy. The temperature and humidity is significantly dropping so that helps keeping the tent cool and not overly humid. This is by far the best time of year to be flowering plants in my region.
I hope everyone has a great weekend, Thanks for stopping by, Stay Safe and Blaze On!!! 💪
Website: https://medicgrow.com/
https://growdiaries.com/grower/medicgrowled

Likes
3
Share

@LST420
Follow
Week 12 The buds are slowly fattening up. Dutch Passion issued a warning on their website that certain strains like this one can cause them to produce male flowers when exposed to too much stress. So I only do careful rounds of minimum defoliation in order to hopefully prevent this from happening.
Likes
38
Share


@Mastr
Follow
I chop her down and let her dry
Hi everyone this genetic is very very hard to grow I had 3 orange sherbat and 1 with very very small nugs and she produce 45g only
Second one was 90 nice dense buds was amazing 👏
And third plant which is very very big main colas are getting airy and foxtail ass well honestly guys after drying bud become very very very bad I use this one for make some hash so I never grow her anymore I'm done with this strain happy growing


Likes
20
Share


@JohnnyCash420
Follow
Day 56
alle 3 Pflanzen haben die letzte regnerische Woche sehr gut überstanden.
Apple Fritter ist 72cm hoch und bildet schöne Buds.
Runtz F1 ist 60cm hoch und hinkt ein wenig hinterher.
GG#4 ist immer noch in der Wachstumsphase und scheint ein Monster zu werden. Der Stamm ist sehr dick im Vergleich zu den anderen zwei.
Zusätzlich gieße ich die Babys seit 2 Tagen mit Canna Terra Flores.
Ich bin sehr zufrieden mit der Wachstumsphase und Übergang in die Blütephase.
Ohne Lampe zu dieser Jahreszeit ein gutes Ergebnis wie ich finde.


Likes
15
Share


@I_Identify_As_A_Dan
Follow
Week 13 for Gelato 41 by Seedstockers
What a monster she's becoming... cant believe she still has 2/3 months of veg to go😂😂 Hasn't been fed in 2 weeks only when nature rains on her😎 Still going to be pulling her side ways while i have room to do so & bending some branches in the middle to give her nice an even growth distribution. Have some ugly jumping spider friends keeping her clean from any unwanted buddies👊 Not going to defoliate at all this week i don't think just going to keep letting her do her own thing! Think its safe to say the roots are nicely settled in her big pot😂 The excitement for this girl to go into flower is REAL definitely going to be 64+ tops on her.
Likes
13
Share


@DonKrika
Follow
Really good week, with temperatures between, 23-27. Humidity was really good as well, always below 50%.
At the moment I'm on the 63rd day, according to Barney's website the plant should be ready to harvest between 60-65 days, and I have to say that information is spot on.
I'm just starting to see a few trichomes turning amber, and the top of the plant is starting to lose the dark green colour.
I will definitely harvest next week, I'm just not too sure if I should feed nutes one more time, or if I should flush straight away
DAY 146 -Molasses
PH - 5.85
PPM-700
Solution Temp - 19
Watering Volume - 4L
DAY 149 - Nutes
PH - 5.81
PPM- 2590
Solution Temp - 20
Watering Volume - 4L
Likes
29
Share


Likes
9
Share


@High_Grade_Dadli
Follow
Two males got pulled up and got around to transplanting so far so good......girls didn't even budge from transplanting they just turn to the sun n said thank u lol.....#happy growing
Likes
8
Share


@South79
Follow
Added net, did a bit more defoiliation. no signs of nute excess so added a small bit of pk booster
Likes
9
Share

@HowtoBubatz
Follow
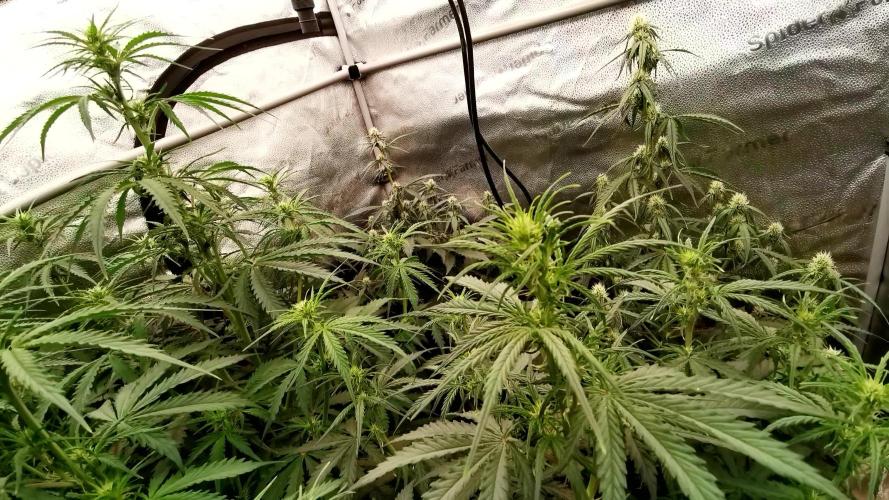
The Bruce Banner girls went wild this week! 💪
At the start of the week, all three were sitting on IFCO crates to even out the canopy, but #2 stretched so much that she had to be moved down to the floor. She’s officially the tallest now and really taking off.🚀
#1 started stretching more as well and keeps growing strong, while #3 is still a bit smaller but catching up nicely.🌿
All three look healthy and vibrant — deep green color, no signs of stress or deficiencies.💚
They got a light defoliation this week, just removing a few big fan leaves that were shading lower budsites.🍃
A proper defoliation will come once the stretch phase is over.
Environment:
Temp: 25–26 °C
RH: 55–60 %
PPFD: around 900–1000 µmol/m²/s under the Spider Farmer SE5000
Controlled by the AC Infinity AI system 🌡️
They’re drinking a lot #1 still the thirstiest one, taking about 4 L every 2 days, while #2 and #3 get the same amount roughly every 3 days.💧
Overall, they’re stretching beautifully, stacking up nicely, and looking more impressive each day. Can’t wait to see them finish the stretch and start focusing on those buds.✨🔥