
Likes
Comments
Share


@FatnastyzBudz
Follow
Day 44
10-8
Tea and slight defol. Shes got a tall branch!
Look at it go! 😱😁🤘
10-9
Water, leaf removal.
10-11
Water yucca cal/mag. Tea soon.
10-12
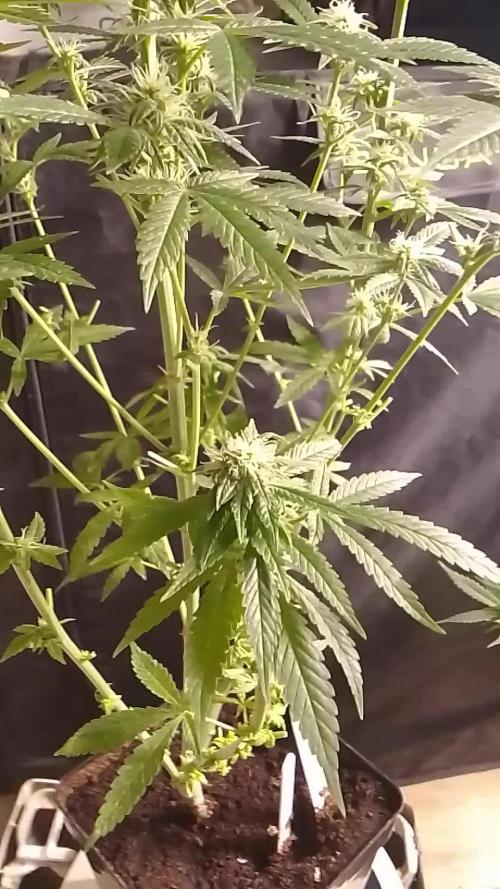
Day 48
Well her head was way above the rest, so she got bent down.
Personalsmokes talked me into. He said, go for it! So I did! 😂
Hopefully i didn't F her up. No clue how she got away from me, but this is something new for me. 😁🤘 Light is amazing on everything now!
.

Processing
Likes
13
Share


@GangbudsGenesgdl
Follow
28/12/20. inicio de semana, 39 cm de altura hoy se aplico un nutriente foliar marca mexicana Rootz kelper son un extracto algas y azucarez y se aplico por riego giga grow. este contiene guano de murcielago
todo organico.
30/12/20. hoy cuenta con 48cm de altura
algunas hojas bajas se quemaron con un insectisida que les puse pero todo se vemuy bien sigue criciendo a buen ritmo
hoy se uso un fertilizante organico rico en silicio con el al agua de riego
01/01/21. hoy se aplico un nutriente foliar marca mexicana Rootz💪 kelper son un extracto algas y azucarez y se aplico por riego giga grow. este contiene guano de murcielago
03/01/21. cierre de semana

Likes
4
Share

@Guerrilla_grower777
Follow
Strange hot week in the very end of Summer
I had to write something here to post this😄😄


Likes
7
Share

@Pompeyblue
Follow
All going great have them a trim so the light can get right through them added the plagron Green Sensation to their feed now so with in a week they should all start to put on weight and in the next week then the sweet sugar smalls will come from them

Likes
5
Share


@Renatissima
Follow
* Watering 2l every 3 days, no nutrients
* Always tuck in the leaves to expose lower tops
* Check the trichomes for amber
* When amber leave the plant 2 days in
darkness before harvest


Likes
6
Share


@DRO420
Follow
Just got their last feeding . Straight flushing from here on out . Flowers are looking nice a plump.

Likes
16
Share

@eldruida_lamota
Follow
Que pasa familia, vamos con la octava semana de floración de estas Mental Rainbow F1 de Sweetseeds.
Vamos al lío, las plantas se trasplantaron a macetas de 7 litros.
El ph se controla en 6.5, la temperatura la tenemos entre 24/21 grados y la humedad ronda el 50%.
El ciclo de crecimiento puse 12h de luz, el foco está al 50% de potencia.
Tengo visitantes, trips que combatiremos con control biológico.
Me gustaría estar más encima este cultivo pero la salud me está impidiendo un poco este 100% con el proyecto.
- os dejo por aquí un CÓDIGO: Eldruida
Descuento para la tienda de MARS HYDRO.
https://www.mars-hydro.com
Hasta aquí todo, Buenos humos 💨💨💨

Likes
2
Share


@Topshelf_only
Follow
Ended up giving 3 more feeds but have run out of time again. Still not really seeing any amber trichomes but starting flush and hope for the best. Pretty sure I am going to end up with about 3 ounces less then first run but the buds look heaps better.
Likes
60
Share


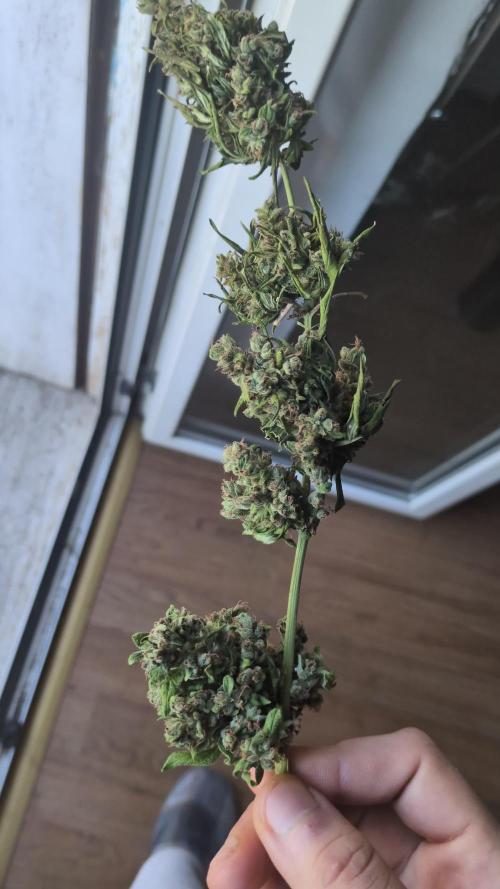
@Roberts
Follow
Well for how I messed up the early weeks of this plants life I was rather surprised by final weight. Buds are hard and dense with hidden colors all about in light. Just started curing. Gonna be making another attempt at this strain soon. Thanks again fast buds. Your team is the best. 5 stars. ⭐⭐⭐⭐⭐
If looking to purchase seeds follow the link please here.
https://myfastbuds.com/?a_aid=60910eaff2419
Likes
11
Share


@sanibelisl
Follow
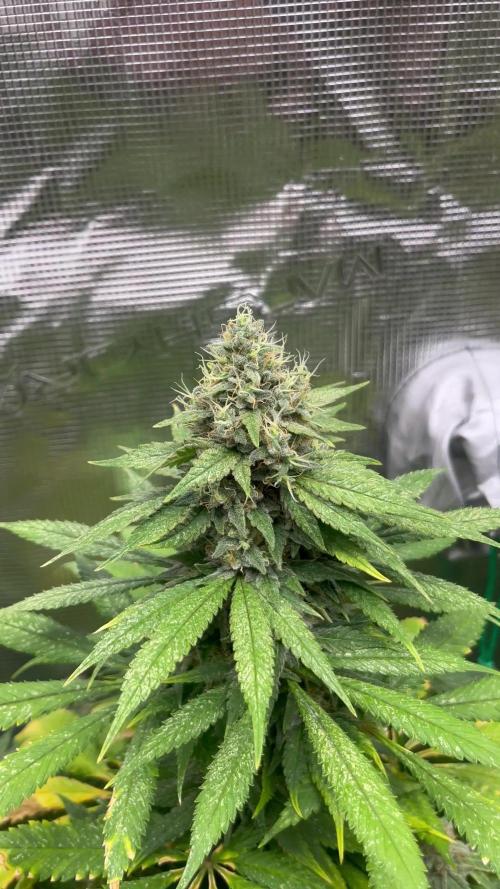
Day 56 for Chem91 and day 54 for the HighLux. Really excited to see the chem finally come around
A huge difference from a couple of weeks ago. She went through her stretch and now has some distance between nodes. At 16 inches she is structured much like an azalea bush
She looks nothing like the traditional Christmas tree shape they you associate with cannabis plants I am hoping she is able to handle the stronger light but we will see.
HighLux! Hello sweetie! Love this plant. So far no issues. She is coming out of stretch and is closing in on 32 inches tall. She has created a terrific canopy, all side branches ended up a couple of inches apart in height. Beautiful. Flowers are getting bigger every day and the early frost is just incredible, it covers fan leaves inches away from the flowers. Started feeding her with General Hydroponics CocoTek bloom A&B for the higher pl values of the Canna Coco A&B line. She seems to love it. She also received a 6 ml dose of King Kola and again she seems happy with the extra pk. I have been giving the a fresh ph’d water flush flush about once a week and again they seem happy with that regime. Will flush the chem91 tomorrow and begin the General Hydroponics CocoTek bloom A&B. There is a short video of the tent at the bottom of the updated ph


Likes
Comments
Share


Likes
18
Share


@BABS_Babies
Follow
I did a low wet trim, and saved the trimming for butter and oil. I dried in a mesh for 12 days, then kept in mason jars and burped them.


Likes
5
Share


@Mr_nugs_lover_David
Follow
Absolutely beautiful flowrs, ashamed that I had to flip her to flexor after a long time in veg period, I wish I had made her achieved a bigger size considering she's in a 25l pot, very sweet haze, you can really feel the blueberries in her flowrs, very special haze, I'm excited to taste her buds, killer seed, I'm gonna grow my last 2 beans as well which you'll be able to see here in my page, hope yo grow her many more times! Stay tuned to see how this flowrs develop on this 4th week! 👨🌾😋🍉🍍
Likes
16
Share


@DaddyPrime2
Follow
7/10/24
testing testing. can i post updates now?
beautiful buds. the leaves are changing into a blue color. it reminds me of some of the blue city diesel i got from a buddy back in the medical days.

Likes
7
Share


@Sabac
Follow
Fin de mis plantitas.
Recomiendo el banco greenhouseseeds primera Vez que cultivo ese banco y salieron excelentes...


Likes
2
Share


@CURATI_DA_SOLO
Follow
Profumatissime e cime da paura.....pianta che per problemi ho dovuto tenere fino alla fioritura in vaso da 1 litro e senza lampade alla luce del sole, appena entrata in fioritura cambiato vaso e messo in una tenda con 400w hps....si spera il meglio le gemme sono promettenti!
Likes
24
Share


@el_cultivito
Follow
Added yellow sticky fly traps to all cubes as a preventative measure to avoid infestation of fungus gnats. So far none have been spotted.
Defoliated and did a little more LST to all the plants to open up the center and give more light to lower shoots.
Blue Dream 3 and Chemdawg 3 started showing some discoloration on the leaves (yellowing around the veins) and also the leaf tips curling down.
Did some research and came up with this...
Possible diagnosis:
- Yellowing around leaf veins could be a sign of Magnesium or Iron deficiency
- Leaf tip curling down could be a sign of Nitrogen Toxicity.
- Both could be caused by improper ph balance in water
Possible solutions:
- Applied Botanicare CalMag+ as a foliar feed and added some to the reservoir. CalMag+ contains Calcium, Magnesium and Iron.
- Diluted nutrients in reservoir to lower amount of nitrogen being fed to plants. Was feeding them at 1300ppm, lowered it to 1050ppm
- Tested runoff and saw it was coming out at 5.4pH so I increased the pH in the reservoir to 6.0. Now the runnoff is testing at 5.7pH, meaning that my rootzone is in the optimal range of 5.5-5.8
Well wait and see how the plants react to these slight tweaks. Hopefully we start to see a nice healthy even green again.
