
Likes
Comments
Share


@Fibro_Witch
Follow
This strain went so much better than last year. A lot more resin production which I'm putting down to my good ol' gallon of Molasses. Seriously. Worked so much better than the $40 flowering nutes that I used last year. So honestly, I spent like $250 on nutes and sprays last year, yet I only spent around $125 this year, no mineral salts, natural everything and I ended up with better bud. Didn't have to spend time flushing or worrying about burning plants and trying to remember what I fed when and which product I need to use next, etc. Keepin' it simple.
I also had less mold thanks to the tomato roof and also I was more diligent about caterpillars. And of course I really like the tomato cages. I mean some of the branches do rub, and they don't look the greatest in the photos (maybe I need to paint them green for next year?) But the convenience factor is high. It work out a lot better than the staking and tying I was doing last year.
I had about 25% better harvest, since last year was 2.8 oz per plant and this is 3.72 oz of dry bud. So that's a big improvement! Not to mention better quality and not just raw numbers. And last year I harvested everything, whereas this year I didn't deal with a lot of the little popcorns and gave them to the livestock.
But I gotta say that the pictures don't do her justice. She absolutely glittered in the sunlight. And I don't think the other strains will get nearly as frosty. Not to mention that distinct aroma of guailol. So intoxicating!
Cut down most of the colas Wednesday and finished lower colas Saturday. Washed as always with 1/4 cup each of baking soda and lemon juice in 5 gallons of warm water and rinsed in 5 gallon plain cold water. Hung up to dry in the upstairs of the barn with the oscillating fan (Do pardon the mess, my mother in-law is a hoarder and we need to downsize her clutter since she's safely thousands of miles away). Storing in mason jars in cabinet with 58% Boveda humidity packs. The 62's I used last year were a little too humid for long term storage so I'm trying the 58's this year.
For some reason Growdiaries isn't letting me review this strain at the top or the Big Bloom and I'm wondering if that's because I've already reviewed both? But anyway, I've gotta say that this bud is higher quality than what I produced last year. It's stronger and you really feel like you're wrapped in a warm blanket with this strain. I also got a little bit of a headband with what I sampled, so we'll see what she's like after she cures a bit. It's a wonderful comfort at the end of a long day. About an hour of being happy and relaxed and then after that it's all you can do to keep your eyes open.
I really enjoy making caramels with this strain. It's so easy to just grab one out of the freezer, and that way I sleep all night😴
1 cup Cannabutter
2 cups brown sugar
1 can sweetened condensed milk
Melt butter with sugar on stovetop over low heat until combined. Add milk and gradually increase heat while stirring. You want to bring the mixture to 245F or 118C but you want to do so slowly so that your don't burn the mixture, and you want to shut it off immediately once you get there. You can pour it into molds, little paper cups or I pour it onto a parchment liked cookie sheet. Feel free to sprinkle a little finishing salt on top if you like salted caramels. Then I put them into the freezer to harden before wrapping. I wrap them on squares of parchment about 4"x4" and put them in a freezer bag. If cutting, I usually get 40 caramels that weigh 20-22 grams each. The most important thing is to be gentle and stir often. Don't scorch it! Otherwise this recipe is pretty darn easy, you just need a candy thermometer.

Likes
13
Share


@Vorghus
Follow
last week was very good, the plants grow a lot and all the colas are blooming as much as the main, this week ill apply neem oil again to prevent plagues, and experiment with the SCroG that last week didnt do.

Likes
5
Share

@FlowerForYou
Follow
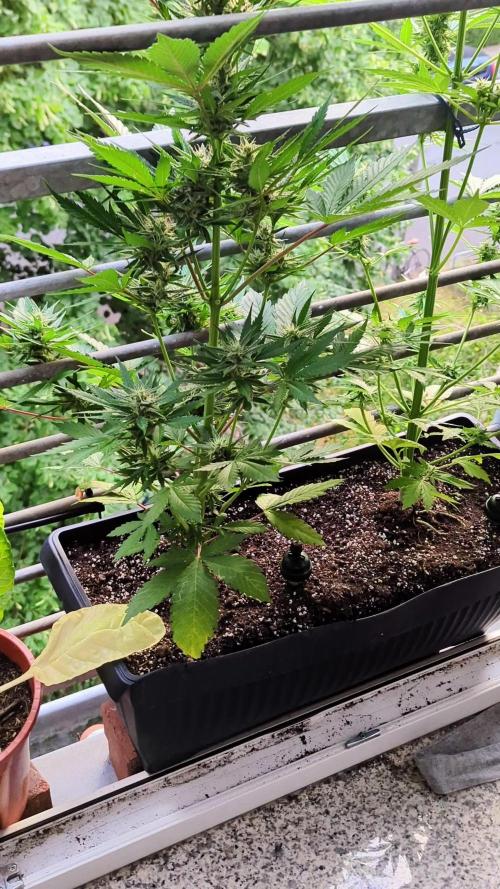
25/07/25: Another week in the books, and the ladies are progressing—slowly but surely. Bud development is moving along, though the cool and cloudy German "summer" isn't exactly speeding things up. Fingers crossed for a bit more sunshine in august to help ripen those buds and add some extra weight before harvest!🤞🏼☀️ Other than that, not much to report this week—no major changes or issues. Just letting nature do it's thing! 🌿
Likes
5
Share


@Cowboy
Follow
Everything is really going well this week not changing much at all just trying to keep an eye on the last few weeks

Likes
28
Share


@Bongman
Follow
For this week, since its second week of bloom, will give it a P boost to the 1st gen mother to make sure she knows it's time to switch gears and flower. So taking out Flora Bloom and added dry Koolbloom which is 1-42-22 450PPM and also added 100 PPM of Flora Grow and 100 of CaMg for my main macro/supplement. Will be doing silica every other week and Hydro guard every week (since I found brown slime) Will resume with Flora Bloom next week.
Been only doing Hydro for cloning and vegging so its my first time encountering brown Slime. Anyone know how I can get rid of it?
What I know...
- Need to lower PH to closer to 5-5.5 from 6.0
- Added Hydro Guard to fight slim
- Minimize Air Stone duration - Been having it on pretty long because I have one large pump and I use it to brew Compost tea for my organic grow.
- Need to minimize light penetration to resi - I have a perforated plastic cover laying around the house and I have been using that to cover the resi and sometime I even forget to put it on.
Anything else? I run totally chemical nutes from GH Flora Series. And I have been sharing the PH and PPM meter with my organic nuets which I brew for 36 hours before use. Maybe some of that got contaminated thru that? Cause I have been using the same bucket system (without res) to raise my mothers for almost 7 months already and never encounter any slim before.
I think I finally understand what tops are LOL:
So please correct me if I am wrong...
What I understand:
- All tops large or small will "stretch" at the first weeks of flowering
- Most of the "stretch" only occurs at the tops
- The "stretch" will determine the length of that bud
- The "stretch" should be as high as possible BUT with short distances between the NEW internodes that develop during that period. for a large and dense bud.
- Don't get confused with stretch that cannabis experience under low light.
Happy Grower Brothers and Sisters
BM
4TwenTee

Likes
1
Share


@CalGonJim
Follow
7/13 1:16 AM Monday I managed to kill Mendo Frost. I don’t know what happened. I tried to bring in some slaves to help me with the garden, but I found out they don’t allow that anymore. I don’t know when that law was passed, but it’s gonna be a lot of work for me now🤬
7/14 8am When to add Cal-Mag (and other nutes) Wait until the plants are noticeably bigger (2–4 true leaf sets, stronger stems, active growth) — usually 7–14 days from now depending on conditions.
Then start with a very light dose: ¼ strength Cal-Mag (e.g., ¼–½ tsp per gallon) + a very mild grow nutrient.
Coco growers often run 0.5–1.0 mL/gal Cal-Mag early on once feeding starts.
Keep an eye on pH after adding anything — Cal-Mag can shift it.
7/15 Sow Right Lavender Seeds???....more like Sow WRONG Seeds bitches...haha...Its a Lavender seed Joke!!! The only one of it's kind in the WORLD. Serene seeds and Oregano Republic Seeds for Lavender, the rest are about the same... Also Jar Jar is into Reva wearing Santa Hats now....total freak show!!!
Likes
25
Share


@420Germany
Follow
Sooo today on 04.04.2025 I harvested the 2 Plants that were left.
Runtz Automatic by Zamnesia
Plant 1:
~400 gram wet
1x Topping
2x Schwazzing
heavy LST though Scrog netting
The Bud structure pretty dense and big buds thoughout, almost zero small popcorn nuggets!
Smell is Citrus Bubbelgum
9/10
Plant 2:
~360 gram wet
NO Topping
2x Schwazzing
heavy LST though Scrog netting
The Bud structure is dense, it does have some very Big buds, but also a lot of small popcorn buds.
The smell is Citrus Buggelgum
8/10
And just remember guys, those plants were all grown in 5 Liter Pods (1,5 Gallon)!!!
I will post updates once Product is dry. Thanks for the love everyone!

Likes
Comments
Share

@eldruida_lamota
Follow
Vamos familia, actualizamos la sexta semana de floración de estas Fruit cake de Seedstockers, salieron las 3 de 3, 100% ratio éxito.
Aplicamos varios productos de Agrobeta, que son increíbles para aportar una buena alimentación a las plantas.
Temperatura y humedad dentro de los rangos correctos dentro de la etapa de floración.
La tierra utilizada es al mix top crop, por cambiar.
De 3 ejemplares seleccioné los 2 mejores para completar el indoor, también cambié el fotoperiodo a 12/12 y apliqué una buena poda de bajos, se ven bien sanas las plantas, tienen un buen color y progresan a muy buen tanto que se me fueron de altura un poco, la solución fue doblar un poco las plantas, también están formándose las flores y tienen una capa blanca de tricomas.
Agrobeta:
https://www.agrobeta.com/agrobetatiendaonline/36-abonos-canamo
Hasta aquí todo, Buenos humos 💨💨💨

Likes
4
Share


@AestheticGenetics
Follow
5/21/25 beautiful plant. Yellowing is starting. Thinking it may be a magnesium def from using new Nutrients.
Took some clones and should be putting her into flower soon
5/22/25 not sure whats going on with her but shes nooot happy at all.
Sprayed with spinosad.
Top dressed uprising foundation which is a calcium magnesium sulfur and iron amendment. Hoping that may be helpful
Likes
6
Share


@justloveweed
Follow
Hello guys!I m on 3rd week on this Dos si Dos Auto from Barneys and she looks very nice.I upload a video from my growroom and there are 5 girls in different stages.The big ones are Gorilla Zkittlez auto from Barneys and Nothern light xBig Bud.In the middle is Pineapple Express auto and the little ones are Dos si Dos auto.Hope you like it :)

Likes
4
Share

@GoodTimesOrganics
Follow
Hi liebe Community und Willkommen zurück im Sensi Seeds Wettbewerb!
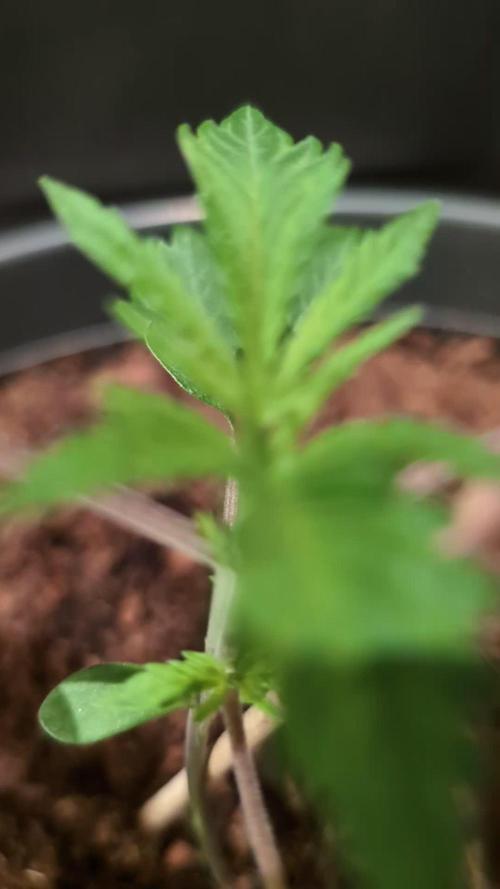
Nach der zweiten Wachstumswoche entwickelt sich ein kleiner gesunder Sprössling!
Die ersten Ansätze der Seitentriebe sind zu erkennen.
Die Höhe liegt bei 12cm und für den Grow habe ich das gesamte Bio Tabs NL Arsenal abgewendet!
Danke nochmals an dieser Stelle für das Sponsoring! 💚 Bio Tabs ist ein super zuverlässiges Düngesystem mit wenig Aufwand und top Ergebnissen!
Die Bedingungen im Growschrank sind für die Wachstumsphase top!
—————
🌡️ Temp: 26
🌚 Temp: 18°C bis 19°C
💧 RH: 64%
🌬️ VPD: 1,1 kPa
☀️ ppfd: 330 mpm
—————

Likes
16
Share


@MrNiceGuy69
Follow
Eine Dame war sich nicht sicher ob sie doch ein Männchen werden wollte 😅
Daher hab ich sie raus genommen!


Likes
13
Share


@JUNGLE_B4RNS
Follow
Underground Seeds Collective is a cannabis seed bank founded by Landrace marijuana genetics lovers, to share the best strains of its collection on regular seeds form.
USC is composed of different breeders, bringing each one its own philosophy of cannabis: pure Indica Afghani and Pakistani lines, elite clones such as Exodus Cheese and ECSD, landrace Sativa strains from Asia, South America and Africa, lost genetics as Ducks Foot...
Furthermore the creation of new varieties as Durgan Chitral or Cheestral, Underground Seeds also contributes since many years to select and reproduce marijuana lines such as Jamaican Lambsbread, to preserve these rare genetics and make it available for the whole cannabis community.
As usual I will follow The Grow Boss growing recommendations and I will use Cellmax Nutrients.
For more details, growing tips and technics, follow Barney’s Jumanji
[Week 10 Flowering]
The main colas is about 1ft tall , this genetic is impressive , it have only 5 week of Veg ...
(P.S: I’m looking for a job in the Cannabis industry as Master Grower, Mineralogist, Quality Control 🐞)
Likes
11
Share


@AustinAmnesia
Follow
Coming along well, Day 43 Flower, I've dimmed the lights 10% using a Kill*A*Watt meter. Nutrient wise I've changed it up for the final stretch,
to the gallon of 180ppm city tap water, I've reduced Maxibloom to 1/2 teaspoon, I've began adding 1/4 teaspoon KoolBloom powder and 2-3 teaspoons of Diamond Nectar Humic Acids. I don't need to add ph up or down as this mixture puts my ph @ 6.3, EC is currently 1.7. each plant receives a minimum of 1 gallon per day, more often they receive a gallon and a quarter or half, applied with a garden sprayer a quart or 1/2 gallon at a time throughout the day, usually about every 3 hours. I keep about an inch of water in the trays below the plants, roots have penetrated the bottoms of the pots and are in the nutrient solution below-I drain this off completely every 2-3 days to keep it fresh-I've followed this routine many times before with no ill effect, as a matter of fact the plants seem to thrive even more-so I stopped fighting it.
Likes
15
Share


@Venabr96
Follow
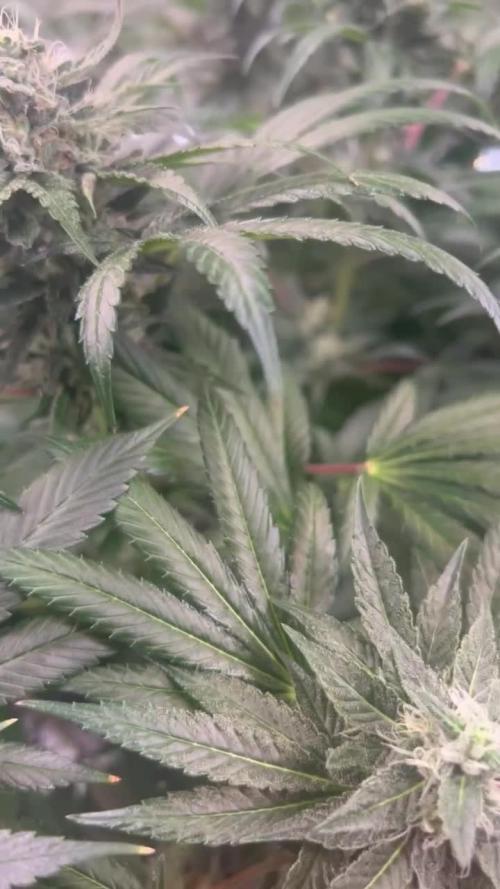
Planta linda, com buds com tons de laranja muitos lindos. Com muito polem, deve ser muito boa para fazer haxixe com dry-ice e sobre tudo muito resinosa. Tocar nela é ter certeza que ficara com a mao colando.
Pelo contrario sinto que os buds estao piquenos...
Nao sei se é por causa da minha lampada pois sinto que os tricomas estao ficando leitosos só que os buds nao engordaram...

Processing
Likes
3
Share


@Dico29
Follow
Day 101, been cutting off fan leaves on lower nodes, adding ice cubes and spraying cold water on buds.
Expecting about 5 more weeks till harvest but I don’t know just guessing
Also I don’t know how to change the question so I’m gonna put it here, has anyone tried to defoliate some smaller colas then tie them together will that be beneficial for bigger bud(promote one another) or is it better to leave oxygen to pass through, thanks


Likes
6
Share


@Felixdahousecat
Follow
I really loved the results about topping under 3 knot, we gotta punch muscles in the 2 firts stressing early this little beast.
Replanting new critical x orange punch.
Suck error burning leafs from gg4 x bp , burned by the sun.
Going straight , looking forward to the next.


Likes
4
Share


@Farmer_Plaps
Follow
The final week. I need to fill in some earlier weeks, but here it is.

Likes
74
Share

@Schnabeldino
Follow
📅 Week 10 | 🌼🌸🌺 Flower – Woche 4 🌼🌸🌺
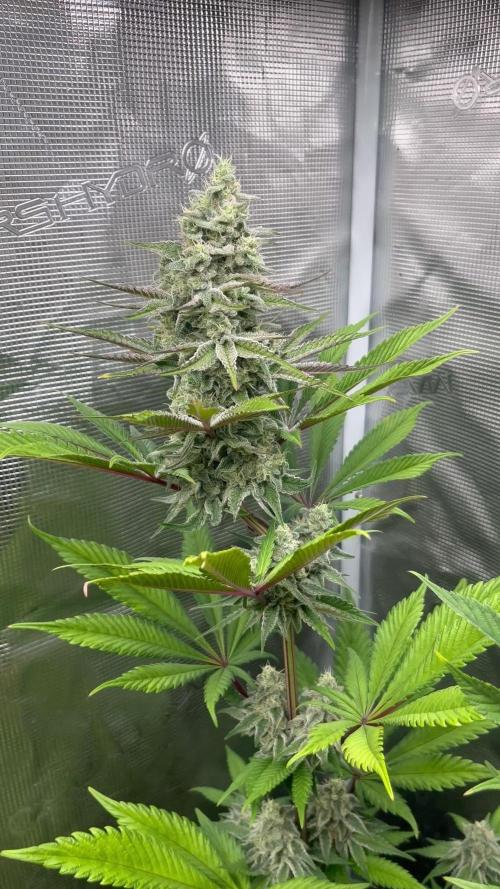
🔸Our Lady 💃 continues to dance through the flowering phase – and how! The buds have grown significantly in volume and now appear more compact and firm. The white pistils are slowly turning orange, a clear sign that ripening is progressing. The trichomes are now ubiquitous – a glittering carpet of resin covers the flowers and gives them that coveted “frosty look.” The sugar leaves are also covered with crystals and have an intense aroma – a foretaste of what is to come. 🍬✨
🔸The plant continues to receive Big Bud from Advanced Nutrients, which it acknowledges with a significantly increased thirst. I now water every two days.
📈 Current Conditions
🌡️🔆 = 27-28°C
🌡️🌜 = 21°C
💨 VPD = 1.4
💨 Humidity = 55%
🔦 PPFD = 900 µmol (12/12)
🔦⌚ DLI = ~38
🛠️ Setup (unchanged)
💡 Lights: 2 x Sanlight Evo 4-120 @ 90%
⛺ Tent: 120 x 120 x 180
🍯 Pot Size: 15 liters
🌱 Medium: Bio-Bizz Light Mix
💊 Nutrients: Advanced Nutrients
💧 Water: Tap water (EC 0.5)
