


Likes
Comments
Share


@SkunkyDog420
Follow
Hallo zusammen 🤙.
Sie wächst sehr schön und macht keine Probleme

Likes
1
Share


@Unfumadormas
Follow
Lavé raices, aprox 30 litros hasta que quedó 0.3 de ec en el sustrato, demoró 6 días en secarse la maceta, después regué durante una semana con flaweless finish (2 riegos) este fue el resultado de esta hermosa amnesia haze Autofloreciente, Su fuerte olor a café exquisito, ahora solo queda esparar secado y curado de tal.

Likes
9
Share


@pzwags420
Follow
On day 1 I transplanted 2 BB clones into 3 gal smart pots with coco coir. I watered them in with veg formula and set up my blumat watering system with week 1 flower nutes. I raised PPFD to 600-700.
On day 2 the reservoirs PH was adjusted from 6.4 to 6.0. The rez is 823 ppm. The tops are 16.5" from the grow light. The blumats have not started watering yet and I will monitor to ensure it goes smoothly. I have the blumats set at 1.25 carrots on left plant and 1 carrot on right plant. The average PPFD of my 16 tops is 703 PPFD. I increased temps to 85 day 81 night to get leaf surface around 80 f during day.
On day 3 the reservoirs PH is 6.2. The rez is 782 ppm. The blumats have started watering and I will monitor closely over the next few days.
On day 4 the reservoirs PH was adjusted from 6.3 to 6.1. The rez is 717ppm.
On day 5 the reservoirs PH is steady at 6.1. The rez is 706 ppm. The highest top is 15.25" from the light. I defoliated to bring in more air and light to deeper into the canopy. I increased the flow rate of blumat by .5 carrot on the right plant as it was a little to dry for my liking. The Clones are preforming well.
On day 6 the reservoir PH is going down so I adjusted up from 6.0 to 6.2. The rez is 730 ppm. The highest cola is 14.75" from the light. The left plant had a runaway so I reduced blumat by 1 carrot. I increased flow of blumat on right plant by .5 carrot as it is still drier than I would like.
On day 7 the reservoirs PH was adjusted from 6.3 to 6.0. The highest cola is 14.25". I reset rez with nutes.

Likes
17
Share


@HighZenBerg
Follow
Welcome back at week 2 of White Label White Skunk Automatic.
This week was not much going on. The plant is getting new leafs and so far, I can’t see any mutation according to newer leafs. But it’s still very tiny and grow speed is slow for an automatic strain. Maybe it’s still an issue with my setup ?
Growing progress is slow but steady. First leafs have a yellowish Color but the plant seem to be healthy.
Keep in touch !
Cheers,
HighZenBerg


Processing
Likes
42
Share


@MadeInGermany
Follow
Hey everyone :-).
This week they have grown super, but unfortunately they are getting lighter.
3 days ago I added another 1 g per liter of GHSC Powder Feeding Bio Grow substrate, as they still remain a bit in the veggie.
Hopefully it doesn't take too long to release the nutrients.
Whatever the reason, that still not all trips are elemened 🤬.
I've only seen some before, and treated directly with neem oil so that it finally has a rest ☺️.
I wish you lots of fun with the update, stay healthy and let it grow 🍀
You can buy this Strain at :
https://sweetseeds.es/de/cream-caramel/
Type:
Cream Caramel
☝️🏼
Genetics:
Blue Black
x
Maple Leaf Indica
x
White Rhino
👍
Vega lamp:
2 x Todogrow Led
Quantum Board 100 W
💡
Bloom Lamp :
2 x Todogrow Led
Cxb 3590 COB 3500 K 205W
💡💡☝️🏼
Soil :
Canna Coco Professional +
☝️🏼
Fertilizer:
Green House Powder Feeding
☝️🏼🌱
Water:
Osmosis water mixed with normal water (24 hours stale that the chlorine evaporates) to 0.2 EC. Add Cal / Mag to 0.4 Ec Ph with Organic Ph - to 5.5 - 5.8 .

Likes
3
Share


@frankterpenes
Follow
3 weeks into the vegetative stage. The pre-sex flowers start to show. I bend the main trunk to get nice side shoots for maximum budsites.
Lets hope she still has a week before getting in the flowering stage to max her size.


Likes
14
Share


@Phurlax
Follow
Day 29: smelling stronger every day just tucking leafs daily
Day 30: bent down more branches to 15"
Day 31: plant is focusing on budding for sure will need water soon going to do plain water ph'd I think shes showing some signs of nutrient burn.
Day 32: flushed with 2 gallons of ph water removed burned leafs
Day 33: nothing new keeping a close eye on her
Day 34: not growing much but seems to be budding still
Day 35: she got up to 15" now some orange spots on leaf edges from over feeding

Likes
207
Share


@DogDoctorOfficial
Follow
One more week up we go and boy do they look beautiful to my eyes 💚 reaisee the ppfd to 400 since they look happy af 😆 so time to start punching the game up, i took the humidifier out since they need to adapt to whatever conditions i have for them, for now it seems they didn’t mind at all , but never the less, wen lower humidity levels one need to be sharp on the watering department 💚 let me know what numbers you run on your grows, what is you temp, RH, Ppfd , i love to learn from about other experiences , thanks 🙏 💚💚💚 growers love to you all and happy week 💚💚💚
Looking at the footage from last week and didn’t like the new gopro angle, so today i change it again, stay tuned and let me know with of the angles you like more 💚🙏 Growers love 💚💚💚
You can check out last week timelapse here https://growdiaries.com/diaries/126067-grow-journal-by-dogdoctor and if you in to timelapse stuff i have just recently uploaded the Magnum auto Timelapse just for fun here https://growdiaries.com/diaries/105893-grow-journal-by-dogdoctor , hope you guys enjoy it 💚💚💚 growers love and one more week up we go 🙏🌱💚
And the time for pot changing arrived, they wore drying out every day meaning , in the way i grow, that its time to move 😅🌱 they are growing beautifully, i always use little help from Mother Nature and aptus technology, you guys can follow all the process in the photos , as for the products i use and how i use them 💚😁🙏 thank you guys for reading my diaries, truly appreciate the love you guys give me and my girls 🙏🙏🙏💚💚💚
Keeping my ppfd around 450 , i dont want to punch them with too many photons for now 😁💚
And with enormous honor and pleasure that i start collaborating with Zamnezia and Viparspectra
For this run i will have the pleasure of growing some Runtz genetics from Zamnezia seeds that they wore kind enough to send me for test and review 🙏🙏🙏💚💚💚🙏🙏🙏 and for the testing and reviewing i was blessed with the VIPARSPECTRA model P2000💚💚💚🙏🙏🙏 they wore amazing and send me this LED light for me to do some testing and some reviews. Special thanks to Zamnezia and to Viparspectra for this opportunity, lets make magic together 💚💚💚🙏🙏🙏
All i grow is medicine for myself, for me and for my best friend with is me 😆 nothing to sell, so don’t even ask 😅💚💚💚
All info and full product details can be find in can find @
https://viparspectra.eu/collections/grow-lights DISCOUNT CODE 5% - DOGDOCTOR ( all store )
https://www.zamnesia.com DISCOUNT CODE 10% - GROWITGD ( just for seeds )
https://aptus-holland.com/
More info and updates @
https://growdiaries.com/grower/dogdoctor
https://instagram.com/dogdoctorofficial
https://youtube.com/channel/UCR7ta4DKLFMg2xxTMr2cpIg
💚💚💚Growers love to you all 💚💚💚

Likes
229
Share


@OrganicNature420
Follow
Germination date 🌱 12/07/2021
Day 64 16/09/2021
Strain 🍁 SinCity seeds Frosted Biscotti
(Biscotti Sundae x Whitenightmare)
THC% • Unknown
💡 Mars Hydro FC4800
• Power draw 480W + 5%
• Max coverage 5 x 5
• LED 2070pcsSamsungLM30B1&Osram660nm
• Max Yield 2.5g / watt
• Noise level 0 DB
• Removable Driver +2m cable
• Daisy chain (multiple lights)
https://marshydroled.co.uk/products/mars-hydro-fc-4800-led-grow-light-samsunglm301b-commercial-greenhouse-medical-indoor-kit 🇬🇧
https://www.mars-hydro.com/buy-fc-4800-480w-4x4-energy-saving-full-spectrum-commercial-led-grow-light-mars-hydro-for-sale 🇺🇸
PROMO CODE • (ORG420) DISCOUNT 👍🏻 marshydroled.com
⛺ Mars Hydro 120 x 120 x 200cm
📤📥 AC infinity 6inch
💧 10lt dehumidifier
❄️ 3.1kw air con system
💉 Nutrients GreenBuzzLiquids
Organic Grow Liquid • 1-4ml until 2wk flower
Organic Bloom Liquid • 2-4ml flower stage
Organic More PK • 2-4ml +wk3 of flower
Organic Calmag • 1-2ml/lt whole grow
Fast Plants Spray • first 3days at night lights off
More Roots • 2-5ml veg +2wks flower
Fast Buds • 5ml +wk2 of veg until 1wk flower
Humic Acid Plus • 2-5ml whole grow
Growzyme • 2-5ml whole grow
Big Fruits • 2-5ml flower stage
Clean Fruits • 5ml flush 1wk
Ph powder
Root Gel
Living Organics
https://greenbuzzliquids.com/
PROMO CODE • organicnature420 15% off ✌️🏼
🥥 Growing Media • Coco Coir
Notes 📝
Just doing her thing 🌱💚 .. temps haven't been no more than 4degrees apart night and day. Thinking of introducing a inlet to help keep humidity down for last week's of flower as i can't get humidity under %40. Would ideally like it to be at %30 during that stage
Early frost signs ❄️❄️❄️❄️❄️❄️
Happy growing fam ❤️🌱🍁👍🏻
Discount codes in bio for Mars and GreenBuzzLiquids 👍🏻


Likes
79
Share


@bioaccessory
Follow
Привет друзья!
Мне уже сейчас очевидно, что не обошлось без генетических сбоев(см. фото), но растишки прут очень 😀бодро(лучше всех моих предидущих циклов), мне даже интересно, что будет дальше 😋
Спасибо, что заглянули, и будьте здоровы! 🙏
Продолжение следует ...😶
Processing
Likes
84
Share


@Undercoverbruva
Follow
Week 4 started some last and dropped my pH to try and stay to 5.5 ordered a spyder airstone and scroll net to scroll out this week growth has suddenly exploded since adding great white and lowering res just don't know about that leaf changing onto two more buckets Thursday hopefully that will sort it might have to trim a bit what u reck? This site has really helped me thankyou guys

Likes
17
Share


@GardenOfHerbs
Follow
* harvest: 8 weeks veg. 60 days flowering
* pot size: 10liter air-pot
* dry bud yield: 59gram
* Appearance: the most frosty buds i have ever seen in my life. Its shining like a diamond. I could look at them all day
* Bud density: 10/10
* Aroma : smelling like gas with a mix of ripe peaches
* Taste : damn the peach terps are insane on the inhale, a strong gas taste on the exhale
* Potency : 10/10
* Kind of high: next level strong, like you are smoking extracts
* Colour of thrichs at time of harvest: 20% amber 80% milky
* Drying time: 10 days in the dry tent, curing 10 days
* Good comments: This has to be the frostiest plant i have ever grown, the trichome/resin production on this plant is insane and never seen before. Also one of the prettiest plants i have grown, the leaves turned out completely dark purple/black at the end of flower. The terpenes on this plant are incredible. Im super impressed by this seedbank and i will definitly grow more from them.
* bad comments: this pheno wasnt a heavy yielder but thats ok, quality over quantity

Likes
17
Share


@VovaFarms
Follow
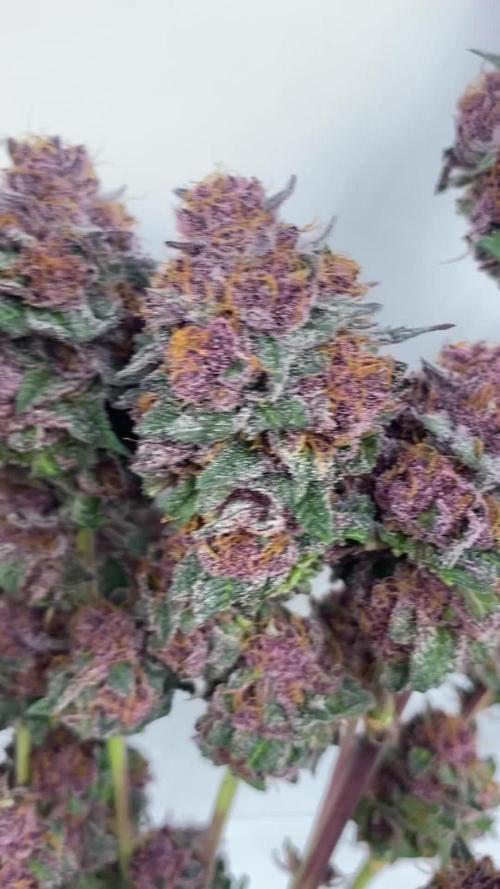
I'm very happy whit this strain. The plant didnt get very tall, i have 8 nice colas which yielded almost 80 g's of dry bud. The smell is very intense. I did tasted some of the buds and high is very good - euphoric and creative. I cant wait to see what happens after some curing in jars.
Likes
14
Share


Likes
5
Share


@PopsFarm
Follow
Nutrients: @xpertnutrients
Soil: Plagron
LED: powerlux_spain 720 Watt
Tent: secretjardin_ 120*120*200
She is 1 of 4 plants from the grow.
The LED only ran at half power = 400 watts 100 watt per plant
Reason: summer time - to counteract summer temperatures without additional devices.


Likes
32
Share


@Scandinavia
Follow
Its hard to see the progress at this time but i had to remove a plant cause of space issues, so now there is only 7 under the 600w Dualspectrum
Likes
8
Share


@Listening2thestatic
Follow
Welcome to week 2! .... We've had some issue with light stress and toppling. Hopefully corrected the problem with a taller bucket! Still watering every other day with 1-1/4 Oz.
