Processing
Likes
Comments
Share
@
Follow
Likes
27
Share
@Bluemels
Follow
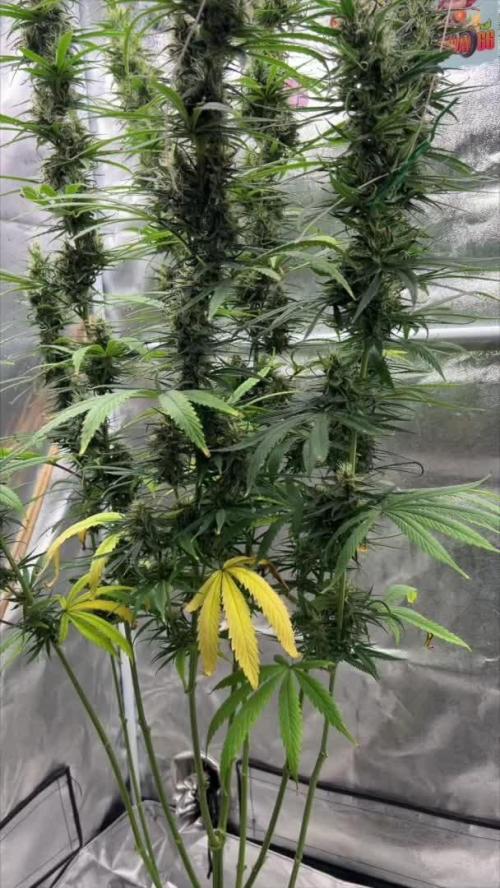
Die Woche war anstrengend, die Luftfeuchtigkeit ist stark gefallen so bin ich froh rechtzeitig wieder einen Befeuchter reingestellt zu haben. Zum Gießen muss ich aber immer alles ausbauen 😑 Die Arme der Pflanzen sind recht dünn und biegen sich jetzt schon enorm. Durch hochschieben des Netzes versuche ich mehr Stabilität herzustellen. Die Blüten sehen trotz allem sehr gut aus, und duften sehr süß, sind voll mit Harzdrüsen 😍
Likes
Comments
Share
a few white pistols still showing but i think she is done
Likes
14
Share
@Gingobeaz
Follow
Und Ende! 75 Tage nach Einsetzen in die Erde ich die Banana Purple Punch fertig. Die Terpene riechen sehr lecker. Wahnsinnig viel Ertrag kann ich nicht erwarten, um im Legalen Rahmen zu bleiben wirds trotzdem etwas zu viel sein. Insgesamt ein sehr schöner Strain den ich definitiv wieder anbauen würde! Auch die Greenhouse Feeding Bio line hat mich absolut überzeugt. Den nächsten Indoor grow werde ich allerdings auf Kokoserde mit Athena Pro line starten. Seid gespannt 🏼 ______________________________________ And the end! 75 days after planting in the ground, the Banana Purple Punch is ready. The terpenes smell very delicious. I can't expect an insanely high yield, but it will still be a bit too much to stay within the legal limits. All in all, a very nice strain that I would definitely grow again! The Greenhouse Feeding Bio line has also absolutely convinced me. However, I will start my next indoor grow on coco soil with Athena Pro line. Stay tuned 🏼 🍌💜🥊
Likes
18
Share
So guys we lost 5 early on into flower . But still produced 28.7 ounces off 5 plants so we'll impressed.. my next run is purple punch x lemmon drizzle hopefully no complications and I don't loose any all in all .. mimosa x orange punch 👊😍 terpines out of this world. Mouth waters when smoked .. happy growing guys
Likes
6
Share
@LAShugars
Follow
I'm so happy with this girl! I'm glad she got stuck in preflower. It gave her time to get nice a big. She's going to be a beautiful beast!! The down side is now my tent is on 12/12. I have all these autos I want to start. I guess I'll get some photos started. Going to clean her up today and top dress her with a new Greengro flowering nutrient I just received.
Likes
19
Share
This was a really easy strain to grow!!! I had some personal problems while I was doing this diary!!! So didn’t update as much!! But so far this is my best one yet and best strain I have grown and the best harvest and yield I’ve had to this day!!!!
Likes
12
Share
@Mr_BFL
Follow
Wonderful aroma in the tent. I do a little stress due to low temperatures at night. I took a small sample :D, everything is as it should.The trichomes are just milky, what will be scary at the finish line...
Likes
17
Share
@BLAZED
Follow
Week 5 (28-2 to 5-3) 28-2 Temperature: 24.3 degrees (lights on) 19.7 degrees (lights off) Humidity: 56% (highest) 46% (lowest) Watering: None. Today i set the exhaust to setting 3. 29-2 Temperature: 23.9 degrees (lights on) 19.4 degrees (lights off) Humidity: 65% (highest) 48% (lowest) Watering: None. 1-3 Temperature: 24.5 degrees (lights on) 19.3 degrees (lights off) Humidity: 66% (highest) 51% (lowest) Watering: None. No pictures. Today i set the light to 75% strenght. 2-3 Temperature: 25.4 degrees (lights on) 20.2 degrees (lights off) Humidity: 59% (highest) 45% (lowest) Watering: None. Today i removed some fanleaves. 3-3 Temperature: 25.3 degrees (lights on) 19.9 degrees (lights off) Humidity: 61% (highest) 47% (lowest) Watering: None. 4-3 Temperature: 23.6 degrees (lights on) 19.7 degrees (lights off) Humidity: 65% (highest) 46% (lowest) Watering: Both 1500 ml. No pictures. 5-3 Temperature: 25.5 degrees (lights on) 19.4 degrees (lights off) Humidity: 61% (highest) 49% (lowest) Watering: None.
Likes
148
Share
@BioBuds
Follow
Greetings my dear Jungletamers, So a major surprise came when @MarsHydroLED contacted us and asked if would like to try out their new SP 3000 light. Being a fan of Mars Hydro for years, we of course accepted their offer. We are totally in love with this light. I was when I saw it in another grower's setup and was in awe of its output and results. So with much pride and thankfulness for the presents the Universe bestowed on us, in the form of MarsHydroLEDS offer and the bountiful harvest of the last grow, (which I am thoroughly enjoying btw, such a great weed to have grown ourselves) we start out on a new adventure that we can't wait to share with you. With many lessons learned from the previous grow, a mighty producing strain in the form of Expert Seeds Gorilla Glue #4, a.k.a Expert Gorilla's and a tweaked super soil mixture, we are setting out to hopefully get over a gram per watt, preferably 1.5. The Setup A 4.5 (140 cm) x 2(70) x 6.2 (200) grow tent, giving me a .98 m2 workspace. This space is customized to my needs. A standing fan will provide airflow through the whole grow, a top fan will help guide cooler air past my lights onto the grow. 3 56 ltr pots will be the home for the plants when they are 2 weeks old, up to then in smaller jars. The Light The leading role and star of the show will be played by the Mars Hydro SP-3000, so kindly provided by MarsHydroLED, which we will test and review here and I might say, endorse. I'm very careful with who I endorse and support these days, but a company with that many wins in design, I'm talking ever since their first range came out in 2009 these guys have been raising the bar for the whole industry, I did not hesitate to support this leading brand. If you want to compete with these guys, you better bring some quality AND affordable pricing. Why do I endorse the SP-3000 without ANY hesitation? It is seriously THE BEST light on the market in this price range and size group. It has an enormously effective output in U/Mol and with 30% less energy waste comparing to older LED lights. Prove me wrong! And with a company holding a considerable market share selling thousands of units every month, competing on price and quality, one would think that customer service would suffer. Of course, also Mars Hydro is not perfect, but check the sheer amount of people that not only praise the light but also the service received, should the light somehow not perform up to par. It is this dedication to their customer base that made this company have a fanbase... Yes, a fanbase with a website and a wiki. So if you are looking to buy new lights, check out the END OF SUMMER OFFER at the Mars-Hydro Global Store on Aliexpress: https://marshydroled.aliexpress.com/ 👈 Check their offers but also their score, they ship from a warehouse near you so you don't have the extra import fees!! Cut out the middleman and have a deal on these lights!! At the moment I write this in August 2021, the lights are 408,20 euro when sent from Germany to the rest of Europe, that's 40 euro cheaper than the other Mars outlets, BUT EVEN 60 euros cheaper than ordering at a grow store!! The Strain: Experts Seeds - Expert Gorilla feminized regular. Don’t let the name fool you because Expert Gorilla is suitable for growers of any skill level. However, you do need to be an experienced smoker because Expert Gorilla is one of the most potent strains on the market. Lineage: Chem Sis x Chocolate Diesel x Sour Dubb Popularity: Extremely Popular Flavor/Aroma Profile: Chocolate, Earthy, Fuel Yield: 400 g/m2 Stress Tolerance: High resistance to disease Potency: 24% THC Flowering time: 58 - 63 days The Soil: Those who saw my Monstercropped Gelato #33 grow (you should see it if you didn't, I'm so proud of that grow), know about my super soil and organic nutrients/ permaculture tea combo that starred in my previous diary. Because of the great results, we are going to use the same recipe, adjusted some more with some new ingredients that will complete the mix and give an even more sustained super soil buffer. 20% Atami Bi-grow (very similar to ocean forest) 20% Atami worm castings 20% Atami Coco Coir 10% Hydrocorn 10% Peat powder 1 cup Fossil seaweed chalk 1 cup bonemeal 1 cup bloodmeal 1 cup Microlife 3-4 teaspoons of epsom salt 3 cups of activated biochar (activated with our own permaculture tea) I just made layers, starting with hydro corn on the bottom to aid airflow/run-off. On this I started layering the coco coir, Bi-grow, peat, castings, and amendments in a way that the more mature the plants get, the more phosphorous and less nitrogen they will find. Every time I made three layers, I would mix them by hand. This way we simulate natural soil, which consists of humic layers, composting plant waste, fungal and microbial life, and nutrients from fossilized sources. The Nutrients I will start with just adding 6.4 PH water, although this soil should buffer ph itself and regulate, after 4 weeks, I'll slowly be adding: - Biobizz Grow - Plagron Alga Grow - Biobizz CalMag - Biobizz Flower - Plagron Alga Flower - Biobizz Topmax - Melasses The Tea Some of you might remember the permaculture tea from my previous grow, I have a short video in my harvest page showing how we make it), it will star again in this grow. - (Rain)water - Comfrey (whole plants) - Dandelion leaves - Roots and leaves from the earlier grow - Minor periwinkle (Finca minor) is a plant we have in our garden, it contains an alkaloid that is associated with increased brain function but also is a light toxin for wee beasties and other unwanted guests like gnats (who hate it). - When flowering I add some wood ash to this mix Thank you for checking in on one of my grows again! Thanks for all the love on my previous grow, check it out if you haven't seen it!! Hug Bud
Likes
7
Share
@FrostyB
Follow
I experimented with this as it was a free seed and I wanted to see what would happen if I removed any additional nodes and just kept focus on the man node/ cola. She weighed in a solid ounce dry maybe less give or take a few days of curing/ drying. Smoked really nice and packed a punch which kinda made me regret using this beautiful strain in my experiment as I would have loved more from her but at the same time she taught me a lot with regards to nutrient levels and how plants react depending on which way they're trained or defoliated which has really helped me with future grows so for that I will certainly be running this strain again! Thanks Barneys ... Awesome genetics as per usual 👏
Likes
16
Share
@Ensign420
Follow
Introduction - Week 14|07 Summary - Ensign's log, stardate 9437.65, Great week of growing! Wow what a good week! Growth in the main tent has all around been incredible! Submitted my first submission to the Global Grow Cup! Filmed a video of the solo cup container (marked with the ticket/order number) that will be used for the competition. Also had to fill and prove the solo cup holds 2 cups of soil. Now I need to root a clone (for the first time), transplant her into this cup, and submit my 2nd entry before the 30th of this month. As far as my first attempt at cloning, have already begun the rooting process! Managed to take cuttings from 3 out of the 6 phenos in the main tent (the first cutting was also my first time topping). Soaked the cuttings for two days before planting them into Coco Coins. So far everything has gone surprisingly well! The clones are now rooting under the propagation dome with the vents fully closed. Will check for roots soon! At the end of the week, growth was just raging! Was planning on flipping to flower in a week, but decided to begin the first week of flower next week! Thus this is the last week of veg. Plan to flip to 12/12 next Monday! Onwards to next week! [START OF WEEK 14|07] ========================================================== Garlic Budder #1 - WEEK 14|07 - Full Veg Wk5 Garlic Budder #2 - WEEK 14|07 - Full Veg Wk2 Garlic Budder #3 - WEEK 07 - Full Veg Wk5 Garlic Budder #4 - WEEK 06 - Full Veg Wk4 06/03/24 → 06/09/24 This Week's Estimated Goals ---------------------------------------------------------------------------------------------- DLI: ~26 mol/m²/d PPFD: ~400 μmol/m²/s VPD: ~1.0 kPa This Week's Meter Readings & Averages [Lights On: 16:00 - 10:00] ---------------------------------------------------------------------------------------------- DLI: 24.56 mol/m²/d PPFD: 379 μmol/m²/s VPD: 0.91 kPa Soil %: [32.7, 37.6, 37.9, 34.1] ========================================================== Day 01 - Monday - 06/03/24 - Total Days: 098 ----------------------------------- Daily Averages [~23:00] - Temps: 80.7°F [27.1°C] - Humidity: 74.4% - VPD: 0.90 kPa - Soil %: [31, 34, 39, 35] ----------------------------------- - [09:57]: Quick morning check! --- #1 is looking a bit droopy, but almost lights off (at 10:00) so not concerned. --- Nice! Mainly wanted to check on #4 and she is looking great! She’s perked back up and looking good! - [23:08]: Evening check. --- Wow! It’s a jungle in here! --- #1 has gotten too big? Nah!? Keep on growing girl! --- #2 is growing and definitely getting bigger! Growth just looking really weird. --- #3 has continued to get larger and is looking quite uniform in growth! --- #4 is growing and looking perky again! --- Even the original #1 and #2 phenos (in the back) are looking good! --- Wow! #4 is really getting close to the light. - [23:14]: Checked down both fill tubes. --- Both reservoirs were completely dry! - [23:27]: Checked the Ecowitt soil moisture sensor data: --- 30% - [CH01 EB1 - Garlic Budder #1] --- 34% - [CH02 EB2 - Garlic Budder #2] --- 39% - [CH03 GFP - Garlic Budder #3] --- 32% - [CH04 FPT - Garlic Budder #4] - [23:32]: Poured 4 cups of distilled water down EB1’s fill tube. --- Poured 2 cups of distilled water down EB2’s fill tube. - [23:38]: Checked the humidifiers. --- Refilled the 4X4’s humidifier with distilled water. --- Tomorrow, plan to defoliate and start cloning for the first time! --- Going to take multiple cuttings from both #1 and #4 for sure, but still deciding on the rest. --- Getting hyped! Day 02 - Tuesday - 06/04/24 - Total Days: 099 ----------------------------------- Daily Averages [~23:00] - Temps: 81.4°F [27.4°C] - Humidity: 74.3% - VPD: 0.93 kPa - Soil %: [29, 35, 38, 32] ----------------------------------- - [11:59]: Time to film the first entry for the Global Grow Cup! --- Going to be using BuildASoil 3.0 potting soil. --- Filming the video using a stand and my phone. --- This video is mainly to establish the container that the plant will be grown in. Also to prove that the container is a 16oz container and that it can hold 2 cups of soil. --- The ticket (order) number also had to be written on the cup. - [12:36]: Done! --- The video had to be done in one continuous shot with no edits (my original submission does not have the logo). --- There was also a photo that needed to be shot which shows the cup filled with 2 cups of soil (just like the video, the original image submission did not have the logo). --- I think I did everything correctly, but also sent an email for verification of submission and validation. --- Getting hyped! --- [*smokes a bowl] --- Going to defoliate today along with for the first-time, going to take cuttings for clones! --- After a bit of online research, decided to split the cloning process into two days. --- Today going to take cuttings and will soak them in a solution of aloe for 24hrs. Afterwards will change the water out and use straight distilled water. --- Then in a couple days, plan to transplant into coco plugs (Coco Coins) for rooting. --- For optimal results, also be using a rooting hormone (Clonex). --- Well.. Here goes nothing! - [17:01]: Evening check. --- Wow! #1 is looking huge! Her main top is stretching above the lower canopy which is continuing to bush out. --- #2 is growing along. Growth is gnarly and a bit droopy, but she’s getting taller! --- #3 is looking great! Still a bit small, but she is continuing to get larger. --- #4 looks like she needs a watering. --- Both plants in the back are also looking surprisingly great as well! - [17:05]: Checked down both fill tubes. --- Both reservoirs were completely dry! --- As far as today's defoliation, going to leave #2 and #3 alone and will focus my defoliation and cloning on the rest of the plants. --- This will be my first attempt at cloning, also going to try topping for the first time today. --- No pressure Ensign. What can possibly go wrong right? - [17:27]: Time to start the cloning and defoliation process! --- Filled a measuring cup with 3 cups of distilled water. ------ Added 3/4tsp of Horticultural Aloe ------ Added 1 more cup of distilled water --- Mixed the solution and poured an even amount into three separate solo cups. --- Made sure to mark two of the cups (#1 and #4). The unmarked one will be for any other clones from amongst the 6 phenos (if any at all). - [17:43]: Time to top and defoliate #1! --- Using a pair of brand new trimmers (AC Infinity), --- Gently cut the main stalk to even out the canopy. --- Then trimmed and cleaned most of the nodes leaving the top node or two. --- Also trimmed the leaf fingers a bit before placing the top cutting into the cup of aloe solution. --- Now for the rest of the cuttings! --- [~45 minutes later] - [18:32]: Managed to finish defoliating and cutting the rest of the clones. --- Took two more lower cuttings from #1 (3 clones total). --- Took 3 lower cuttings from #4 --- While defoliating, decided to try and clone the original #2 pheno as well. Took 4 small cuttings. --- Similar to the top cutting, trimmed and cleaned each lower node for each cutting before placing them into the cups. --- Before finishing up the 2nd cutting, I noticed the first cutting (the top cut that was also trimmed) was drooping. --- So I did not trim and the leaf fingers for the other cuttings. --- In total there were 10 cuttings taken for potential clones. --- My main focus was to take cuttings and to clean up all the lower growth from both #1 and #4. --- Defoliated and cleaned up the back original phenos as well (also trimmed back the cover crop). - [18:35]: Temporarily placed the cuttings onto the floor of the 4x4 tent. --- Took the trimmings (about 3 cups) and spread them onto the top mulch of #1 and #2. --- Time to set the environmental controls for the 3x3 veg tent. - [18:43]: Within the AC Infinity App, --- For the Veg Tent [3x3] controller, --- Adjusted the 'Vegetative [18/6]' Schedule for the grow light. ------ Set the Mode to ‘On Mode’ ------ Set the START/END times to 04:00PM/10:00AM ------ Set the MAX to 1 --- The IonBoard S33 is now utilizing around 60.8W (at intensity 1 out of 10). --- Adjusted the 'Vegetative [18/6]' Schedule for the exhaust fan. ------ Increased the Humidity’s HIGH trigger value from 81% to 87% --- Adjusted the 'Vegetative [18/6]' Schedule for the humidifier. ------ Decreased the VPD target value from 1.5kPa to 0.8kPa - [18:52]: Moved the cuttings into the 3x3 veg tent. --- It begins! I think. --- Going to let these cutting drink some aloe for a day before switching to straight distilled water. --- Hmm. Could be the white floor of the 3x3 veg tent, but have noticed the S33 has a whiter spectrum whereas the FC-6500 seems to be warmer in color. --- Anyways, - [18:58]: Poured 4 cups of distilled water down EB1’s fill tube. --- Poured 2 cups of distilled water down EB2’s fill tube. - [19:06]: Filled a pump sprayer with 5 cups of distilled water. --- Focused mainly on the straw mulch of #4. --- But also misted the straw mulch for the rest of the plants a bit. - [19:12]: Checked the humidifiers. --- Refilled the humidifiers with distilled water. - [19:44]: Going to be using Clonex rooting gel before planting the cuttings into Coco Coins (pre-soaked with microbes and aloe). But before that begins, going to transfer the Clonex gel into a squeeze bottle. --- Gently peeled back the seal on the original Clonex bottle. Just enough make a tiny opening, --- Then slowly and carefully poured the gel into an empty squeeze bottle. --- Also removed the sticker from the original bottle and placed it onto the new one. - [19:54]: Perfect! --- Instead of applying the gel to the cutting, going to be applying the gel to the Coco Coin. --- This squeeze bottle will make applying the gel a lot easier. --- Will take PPFD readings tomorrow. --- Also will change out the aloe solution to distilled water. --- I really hope I didn’t screw things up before they could even begin. --- Don’t die on me ladies! --- Please. Day 03 - Wednesday - 06/05/24 - Total Days: 100 ----------------------------------- Daily Averages [~23:00] - Temps: 81.9°F [27.7°C] - Humidity: 75.5% - VPD: 0.90 kPa - Soil %: [29, 36, 38, 36] ----------------------------------- - [09:40]: Quick morning check! --- #1 is looking a bit droopy, but looking okay. Topping is a high stress technique so going to take some time to recover. Don’t plan on flipping the main 4x4 tent to flower for a good week or so which should be enough time. --- #4 looks great! The defoliation seems to have no effect on growth. Nice! - [09:41]: Also quickly checked on the 3x3 veg tent, --- Nice! The cuttings are looking great! --- No yellowing and they all seemed to have turned up towards the light. --- So far so good! - [22:53]: Evening check. --- #1 is continuing to dominate this grow! She has spread wide and looking incredible! --- #2 is looking gnarly, but getting there. --- #3 is getting larger! But still a runt. By far, her leaves are the darkest of the bunch, but she is still growing! --- #4 looks happy and growing along beautifully! Wow! - [22:55]: Checked down both fill tubes. --- Both reservoirs were completely dry! - [22:59]: Poured 5 cups of distilled water down EB1’s fill tube. --- Poured 2 cups of distilled water down EB2’s fill tube. - [23:05]: Checked on the 3x3 veg tent. --- Ooo yea! The cuttings are still green! Nice! - [23:07]: Took PPFD readings. --- The cuttings were around 121 μmol/m²/s which gives a DLI of 7.84 mol/m²/d --- Nice! These levels are on the lower range for seedlings (~100-300), perfect! I think. - [23:14]: Swapped the aloe water out to straight distilled water. --- Going to let these cuttings soak for one more day before planting. --- Please don’t die girls! - [23:15]: Checked the humidifiers. --- Refilled the humidifiers with distilled water. --- Ooo yea! --- Tomorrow is the big rooting day! Day 04 - Thursday - 06/06/24 - Total Days: 101 ----------------------------------- Daily Averages [~23:00] - Temps: 81.9°F [27.7°C] - Humidity: 75.2% - VPD: 0.91 kPa - Soil %: [32, 38, 38, 34] ----------------------------------- - [16:20]: Evening check. --- #1 is a bit droopy, but growth is looking green and healthy. --- #2 is looking bigger! She’s also looking sort of droopy. --- #3 is growing along nicely! Looking good girl! --- #4 is looking great! A bit droopy but plan to water today. - [16:23]: Checked down both fill tubes. --- EB1's reservoir still has some water. --- EB2's reservoir was completely dry! - [16:23]: Checked the Ecowitt soil moisture sensor data: --- 28% - [CH01 EB1 - Garlic Budder #1] --- 36% - [CH02 EB2 - Garlic Budder #2] --- 37% - [CH03 GFP - Garlic Budder #3] --- 30% - [CH04 FPT - Garlic Budder #4] - [16:30]: Using a pump sprayer, --- Misted the straw mulch of #4 with 6 cups of distilled water. --- Focused mainly on the straw mulch. --- Also misted the straw mulch of #3 (in the grassroots fabric pot) a bit. - [16:43]: Poured 5 cups of distilled water down EB1’s fill tube. --- Poured 3 cups of distilled water down EB2’s fill tube. - [16:52]: Checked the Ecowitt soil moisture sensor data: --- 56% - [CH01 EB1 - Garlic Budder #1] --- 44% - [CH02 EB2 - Garlic Budder #2] --- 40% - [CH03 GFP - Garlic Budder #3] --- 45% - [CH04 FPT - Garlic Budder #4] - [17:01]: Took general PPFD readings. --- #1 was around 379 μmol/m²/s which gives a DLI of 24.56 mol/m²/d --- #2 was around 333 μmol/m²/s which gives a DLI of 21.58 mol/m²/d --- #3 was around 293 μmol/m²/s which gives a DLI of 18.99 mol/m²/d --- #4 was around 378 μmol/m²/s which gives a DLI of 24.49 mol/m²/d - [17:09]: Took the weekly height and light distance measurements. --- #1 was about 21" tall. --- #2 was about 13.5" tall. --- #3 was about 9.5" tall. --- #4 was about 19.25" tall. --- Hmm.. - [17:19]: Adjusted the right oscillating fan a bit. --- Re-angled the CloudRay S6 oscillating fan upwards. Been noticing that the air has been hitting the tops of the plants so easing off a bit (#1 is still getting hit, but she’s huge so not too worried). - [17:23]: Back to the measurements! --- #1 was about 9.5" away from the grow light. --- #2 was about 17" away from the grow light. --- #3 was about 17.5" away from the grow light. --- #4 was about 11.5" away from the grow light. - [17:46]: Checked on the 3x3 veg tent. --- Cuttings are still green! They do look a bit droopy but no signs of yellowing. --- Okay! - [17:55]: Time to begin the rooting process! --- For my first attempt at rooting, going to be using Coco Coins pre-soaked in saponins, microbes and aloe. --- To further help with rooting, going to also be using Clonex rooting gel. --- Filled a measuring cup with 4 cups of distilled water. ------ Added half of 1/64tsp of Quillaja Saponaria Extract [60] ------ Added 1/16tsp of Horticultural Aloe ------ Added 1/8tsp of Mycrobe Complete --- Mixed the solution thoroughly. --- Time for the Coco Coins! --- 10 cuttings means 10 Coco Coins. - [18:09]: Dropped 10 Coco Coins into the measuring cup. --- The coins immediately started to expand. --- A bit too much.. Oops! --- Poured the solution and Coco Coins into a pitcher. --- Added 2 cups of distilled water to the solution (now at 6 cups). --- Great! The coins are pretty much fully expanded, but going to wait a bit longer to fully saturate each coin. --- [~20-30 minutes later] - [18:42]: Great! --- Took the seedling and flood tray from the AC Infinity propagation dome and placed all 10 Coco Coins into the slots. --- Gave each Coco Coin a quick shake to remove excess solution. The coins were not dripping with solution but still pretty saturated. --- Arranged them into 3 groups with the cuttings in mind. --- Also tried to keep the pre-made holes intact. --- Time to inoculate the Coco Coins! - [18:54]: Using a squeeze bottle, --- While keeping the nozzle from making contact with the coco, gently filled each pre-made hole with Clonex rooting gel. Just enough gel to fully cover the hole of each coco coin. - [19:00]: Time to plant the cuttings! --- Gave each cup a misting of distilled water. Focused on wetting the top growth with water. --- Okay! --- To avoid mixing cuttings up. - [19:01]: Starting with the original #2 pheno cup, --- For each cutting, --- Using a pair of clean trimmers, made a final 45° cut about 1/2" from a bottom node. --- Then stripped away and scared the protective membrane below the node before planting. --- Made sure the node was about 1/2" below the surface of the coco. --- To help with planting, while inserting each cutting, gave the Coco Coin a gentle squeeze to loosen the coco. This also helped to ensure the coco and gel was in good contact with the cutting. --- Once the cutting was planted into the Coco Coin, made sure to place back in the same spot (made sure to keep the cuttings in their groupings). --- Once a cup was complete, made sure to keep the label with the group. --- Re-misted the top growth as needed to keep it wet. --- Also wiped the trimmers with isopropyl alcohol in between cuttings (plan to use 10% bleach solution for next time). --- Repeated this process until all 10 cuttings were cut, planted, and in the tray. --- The coco coins fit perfectly into the tray and don’t reach the bottom. Nice! --- The bottom air gap is important. --- Poured a bit of distilled water through one of the empty slots into the bottom of the tray. Just enough to fill the bottom of the tray, but not enough to reach any of the Coco Coins (~1/4cup). - [19:35]: Placed the propagation tray with cuttings into the 3x3 veg tent. --- Placed the first layer of the propagation dome on before giving the sides a misting of distilled water. --- Also sprayed the top of the propagation dome before covering the cuttings. --- Vents are all fully closed. - [19:40]: Placed the bar lights onto the top of the dome before configuring the controller. ------ Set the START/END times to 04:00PM/10:00AM ------ Set the bar light’s intensity to 2 (out of 10). --- Also made sure the propagation light controller’s time was in sync with the Controller 69 Pro. - [19:47]: Took PPFD readings. --- The cuttings were around 136 μmol/m²/s which gives a DLI of 8.81 mol/m²/d --- The PPFD levels are similar to the floor. --- Perfect! --- Going leave the IonBoard S33 on during this rooting process. --- Will check back tomorrow to cycle the air under the dome. - [19:56]: Checked the humidifiers. --- Refilled the humidifiers with distilled water. - [20:17]: Quick night check! --- Ooo yea! Growth is raging and looking perky! --- Mainly checked on #1 and #4 which were looking incredible! --- Keep on growing ladies! Day 05 - Friday - 06/07/24 - Total Days: 102 ----------------------------------- Daily Averages [~23:00] - Temps: 82.7°F [28.2°C] - Humidity: 76.2% - VPD: 0.89 kPa - Soil %: [37, 40, 38, 35] ----------------------------------- - [10:03]: Decided to increase the ambient temp in the 3x3 veg tent. --- Within the AC Infinity App, --- For the Veg Tent [3x3] controller, --- Adjusted the 'Vegetative [18/6]' Schedule for the heater. ------ Increased the Temp target value from 78°F to 82°F --- Hopefully this will help to keep the veg tent at a more consistent temp. - [22:26]: Evening check. --- Ooo yea! The garden is looking incredible! --- #1 is looking perky and just bushing out! Wow! --- #2 is getting big! Growth is weird and leaf fingers are huge! Just going to let her grow. --- #4 is looking happy and growing along like a champ! Nodes are starting branch out and she is turning into a bush! - [10:28]: Checked down both fill tubes. --- Both reservoirs were completely dry! - [22:33]: Poured 5 cups of distilled water down EB1’s fill tube. --- Poured 3 cups of distilled water down EB2’s fill tube. - [22:40]: Checked on the propagation dome (inside the 3x3). --- Ah yea! Looking great ladies! --- Lifted the top of the dome to let some fresh air in for a bit. --- Wow! --- Leaves still look nice and green! --- So far everything looks great! --- Just going to continue on! - [22:53]: Checked the humidifiers. --- Refilled the humidifiers with distilled water. - [11:01]: Decided to adjust the humidifier for the 3x3. --- Within the AC Infinity App, --- For the Veg Tent [3x3] controller, --- Adjusted the 'Vegetative [18/6]' Schedule for the humidifier. ------ Increased the VPD target value from 0.8kPa to 1.5kPa --- The higher VPD level will essentially turn the humidifier off. --- I won’t be needing the humidifier for a good week so might as well save the water. Day 06 - Saturday - 06/08/24 - Total Days: 103 ----------------------------------- Daily Averages [~23:00] - Temps: 81.6°F [27.6°C] - Humidity: 74.9% - VPD: 0.91 kPa - Soil %: [35, 40, 37, 31] ----------------------------------- - [07:40]: Quick morning check! --- #1 and #4 are looking perky and happy! --- Also checked on the propagation dome, --- All cutting still look green! Hyped! - [20:02]: Evening check. --- Wow the garden is raging with growth! --- #1 has blown up! She has clearly recovered and growth is ramping up again! --- #2 is stretching upwards! --- #3 is now the smallest of the 4, but still getting larger! --- #4 is looking incredible! Wow! Growth looks perky and happy! - [20:05]: Checked down both fill tubes. --- Both reservoirs were completely dry! - [20:10]: Poured 6 cups of distilled water down EB1’s fill tube. --- Poured 2 cups of distilled water down EB2’s fill tube. - [20:16]: Checked the Ecowitt soil moisture sensor data: --- 35% - [CH01 EB1 - Garlic Budder #1] --- 40% - [CH02 EB2 - Garlic Budder #2] --- 36% - [CH03 GFP - Garlic Budder #3] --- 27% - [CH04 FPT - Garlic Budder #4] - [20:19]: Using a pump sprayer, --- Misted the straw mulch of #4 with 5 cups of distilled water. --- Focused mainly on the straw mulch. --- Also misted the mulch of #3 a bit (in the fabric pot). - [20:27]: Checked propagation dome (in the 3x3), --- To cycle the air under the dome, lifted the top off for a bit. --- Ooo yea! Everything is still green and looking great! --- Keep on rooting ladies! --- Oops! - [21:45]: Checked the humidifiers. --- Refilled the humidifiers with distilled water. Day 07 - Sunday - 06/09/24 - Total Days: 104 ----------------------------------- Daily Averages [~23:00] - Temps: 81.5°F [27.5°C] - Humidity: 74.8% - VPD: 0.91 kPa - Soil %: [36, 40, 37, 36] ----------------------------------- - [08:18]: Quick morning check! --- Nice! The main tent is looking great! #1 and #4 are both raging with growth! --- Checked on the propagation dome (inside the 3x3) and the clones are still looking green! --- Wow! Everything is going almost too well! Just keep on growing! - [19:08]: Evening check. --- Garden is just exploding with growth! Seems everyone has fully recovered from the defoliation and topping! --- Wow #1 is bushed out and looking incredible! --- #2 is growing really starting to get large! Growth still is funky, but stoked none-the-less. --- #3 is starting to fill in the pot! Getting larger! --- Wow! #4 is getting taller and looks healthy and green! - [19:12]: Checked down both fill tubes. --- Both reservoirs were completely dry! --- Wow the canopy is really starting to get taller and closer to the light. May need to raise it up soon. --- Absolutely surprised how low the light levels have been throughout this entire cycle. Barely moved the light and have not increased the intensity past 2 (out of 10). Less is really more. --- Anyways! - [19:18]: Checked the Ecowitt soil moisture sensor data: --- 36% - [CH01 EB1 - Garlic Budder #1] --- 41% - [CH02 EB2 - Garlic Budder #2] --- 37% - [CH03 GFP - Garlic Budder #3] --- 34% - [CH04 FPT - Garlic Budder #4] - [19:19]: Poured 6 cups of distilled water down EB1’s fill tube. --- Poured 3 cups of distilled water down EB2’s fill tube. - [19:24]: Checked propagation dome (in the 3x3), --- To refresh the air, lifted the top off for a bit. --- Sweet! Still green! Wow! --- Using a spray bottle, misted the top growth with distilled water. - [20:35]: Checked the humidifiers. --- Refilled the humidifiers with distilled water. --- Wow what a week! --- Growth has been just insane in the 4x4 tent! All plants have fully recovered and have just exploded with growth. --- I think it’s time to flip to flower! --- Also, I’m absolutely baffled about how well the cloning process has been going. --- So far no issues! --- Not complaining, but just surprised. Keep on growing ladies! --- If all goes well, should have fully rooted clones soon ready for transplanting (into solo cups of course). --- Absolutely hyped for next week! --- Maximum warp Ensign, Engage! [END OF WEEK 14|07]
Likes
9
Share
Growth Stage: Early Flower / Stretch Environment: Temperature: ~26 °C Humidity: ~60 % RH Light intensity: increased to ~850 PPFD. ☀️ Watering / Feeding: Watered every 2–3 days, based on pot weight, using RO water + CalMag. 💧 During this week, the plants received 1x BioTabs Bio PK. Observations: Stretch continued clearly during Week 5. Apricot #2 stretched even more and is now definitively the tallest plant in the tent. Apricot #1 stretched more moderately. To balance the canopy, #1 was placed on a crate so both plants now sit at roughly the same height. 🙂 The first pistils became clearly visible at the forming bud sites, marking the transition into proper flowering. 🌸 Both plants look vital and healthy overall. Leaf posture is mostly neutral, although #2 still shows slightly drooping tips, which remained stable. Notes: Week 5 represents the overlap between stretch and early bud initiation. With increased PPFD and the first Bio PK application, the plants are now fully entering the flowering phase. 🌱💪
Likes
15
Share
@Oldwied
Follow
I added 10mL LAB (lacto acid bacteria, diy with rice water and milk) per liter of irrigation water, twice a week. I installed a fan under the canopy to prevent mold. At the stage when the buds become denser. Its excellent flowering characteristics will make you forget the challenges of training it during the veggi phase. Light Power: 100% Day 87 Flower #35 Photoshooting
Likes
48
Share
@PapaNugs
Follow
This was a quiet week. The girls were recovering from their topping but were also flipping into flower. They have been getting water every two days and that seems to be an issue so I bought an auto watering drip system to install next week. This girl has the biggest comeback outta all of them. Has continued to do well and has responded very well to the topping. Excited for this one Dimmed to 60% Here are the lights details: Medic Grow Mini Sun-2 150W LED Model: MN150-022 Spectrum mode: V1 Efficacy: 2.8 umol/J Thanks for stopping by! You can find the light on Grow Diaries: https://growdiaries.com/grow-lights/medic-grow/mini-sun-2-150-watts You can find the light on Medic Grow's website: https://medicgrow.com/
Likes
4
Share
@Borberad
Follow
#1 Blütewoche 7/8 #2 Blütewoche 9/10 Blütewoche 2- 8: Die volle Blüte Die Blüte ist in vollem Gange! Die Pflanzen haben sich kräftig und leider diesmal zu unkontrolliert gestreckt. Wir sind der Sativa Genetik aufgrund mangelnder Zeit und schlechtem Lichtmanagment nicht so ganz Herr geworden. Wir haben versucht den DLI sukzessive durch höhenregultion auf 40-45 anzuheben jedoch wohl erst zu spät. Aufgrund der zu ungleichmäßigen ausleuchtung im für diebLampe zu großen "Zelt" wurde eine zweite GCX9 installiert. Der Düngeplan bleibt unverändert. * Zustand der Pflanze: Enorm kräftiger Blütestretch, Stiele kaum zu kontrollieren * Wichtige Ereignisse: Anhebung des DLI. * Düngung & Messwerte: * Gießwasser: pH ca. 6,3. Leitwert 1,4 bis 2 S. * Drain: Wir stellen sicher, dass der pH-Wert nicht unter 5,5 und nicht über 6,8 liegt und der Leitwert die +/- 500 S Abweichung einhält. * Anpassungen: Einsatz von Haltestangen, Einbau einer zweiten GCX9 zur besseren Ausleuchtung und Inbetriebnahme eines GC Signal zur Sonnen Auf- und Untergangssimulaion Blütewoche 9 bzw 10 Letzte Woche/n vor der Ernte: Das große Finale Das große Finale naht! Der Tangie Ghost Train nähert sich mit einer Blütezeit von 9-10 Wochen dem Erntefenster. Ab heute wird die Pflanze täglich nur noch mit Osmosewasser gespült, bis das Drainwasser klar durchläuft. Dies soll alle überschüssigen Nährstoffe enfernen und und für ein sauberes und geschmackvolles Endprodukt sorgen die Meinungen gehen dabei auch bei uns auseinander und das Endprodukt und auch der Ertrag sind nicht spürbar schlechter wenn man spült jedoch spart man Geld bzw. Rohstoffe also spricht aus unserer Sicht nichts dagegen. Die Trichome werden genau beobachtet, um den perfekten Erntezeitpunkt zu bestimmen. * Zustand der Pflanze: Ernte rückt näher. Die Trichome sind langsam zum großen Teil milchig. * Wichtige Ereignisse: Beginn der Spülung. * Düngung & Messwerte: Es wird nur noch mit reinem Osmosewasser gespült. * Anpassungen: Zur gleichmäßigeren Ausleuchtung wurde eine zweite Lampe installiert jedoch sind dabei an dieser Pflanze einge Köpfe gerollt. Collateralschäden sind bei umbaumaßnahmen leider nicht selten. 🙄
Likes
98
Share
I love growing its a big passion of mine , and the fact that GD exists makes everything so much better, one can interact with others and enjoy and learn from each others. Thank you all growers love and keep them green <3 <3 <3