
Likes
Comments
Share


@ButterfliesLittleFarm
Follow
Hello Diary,
White Widow has finished the first week of flowering.
The flowers are forming nicely all over the plant and it has been 28 days since the beginning of the vegetation.
White Widow has grown 20 cm this week and is now 50 cm tall.
The main cola has started to rise above the other branches, it has started to form its final shape.
Soon it will start to stagnate with growth and will direct all its energy into the flowers.
The leaves are a healthy dark green color and show no signs that the plant is missing anything.
Summer temperatures are slowly falling, nothing significant but every degree of lower temperature makes me happy.
This week the average was 28 degrees and rarely exceeded.
The humidity in the grow box is around 50% which is ok.
Watering is a little more frequent, every three days, and sometimes every other day.
They require significantly more water than has been usual on my little farm so far.
I still add CalMg but from this week I started adding BIO-BLOOM Fertiliser.
I prepare 9 liters of water, add the nutrients listed and lower the pH to 6.0.
I water all three plants on the Farm with this amount.
A few days before the end of the week, I cleaned the lower part of the plant to allow it better air flow and to make it easier for me to water.
I also increased the intensity of the LED lights to 80% at the very beginning of the week.
Here's what the past week looked like.
15/08/2024 - Day 22.
Watering.
The soil was very dry and the leaves were slightly drooping. I watered each plant with 3 liters of water. I put 1ml/liter CalMg and 1.5 ml/liter Bio-Bloom Fertilizer in the water.
18/08/2024 - Day 25.
Watering.
The soil is very dry again and the leaves are slightly drooping. I repeated the same procedure as three days earlier.
21/08/2024 - Day 28.
Official end of the first week of flowering. After taking photos, I watered all three plants at the Farm.
White Widow - Day 28. - 50 cm
That's all from me for this week. See you soon and thanks to everyone for the comments.


Processing
Likes
7
Share


Processing
Likes
4
Share


@DrewbieDoobieNoobie
Follow
Getting closer to being able to sex the plants week 5 or 6 I should have a definite answer on the 3 remaining healthy plants I can start to smell them a little I have a feeling these are gonna be pungent when they start to flower. I think they might be girls but still no preflowers got something that looks like it might be but I don't want to start my seed making process un till I am sure, and "when" I hope to get at least one lady I will clone up to my maximum of 6 plants. the Dry amendments seem to be doing there job do not let the photos fool you they are a healthy mint green. I have yet to apply the earth juice Transition one week before the flip I will add it to the feedings. hope you are all staying safe till next week. take one to the dome and stay at home.
Likes
105
Share


@BioBuds
Follow
This week I started feeding them, just some organic BAC Grow and Calmag 2.0 and added some molasses for feeding the micro-life.
I put the SP-3000 a little stronger until leaves started to pray a little.
Keeping the humidity and temps in the ideal zone. I see the plants really enjoy this and I was growing a bit on the dry side with my other grows.
I'm looking at my options for fimming or topping auto's, my experience is, don't mess with them too much.
This is also why I chose to not over-pot them. They started in a cup of seedling soil surrounded by super soil.
They have been growing though and are going faster by the day now.
Coming days I will make the decision to top / fim or just LST only...
Thank you for checking me out again.
Hug Bud

Likes
27
Share


@eldruida_lamota
Follow
Vamos familia, hora de cosechar estas Biscotti de RoyalQueenSeeds.
No veáis que pinta que tienen las flores están bien formadas y repletas de tricomas.
Después de 70 días de floración obtengo estas flores tan increíbles que huelen pfff.
Es una variedad un poco complicada de cultivar pero, que al final si da sus frutos.
Bastante contento con este primer cultivo de la temporada de indoor.
Dar las gracias a james por las genéticas dé RoyalQueenSeeds, y a todo el equipo de Agrobeta, que sin vosotros parte de estos proyectos no son posibles 🙏
Agrobeta:
https://www.agrobeta.com/agrobetatiendaonline/36-abonos-canamo
Mars hydro:
Code discount: EL420
https://www.mars-hydro.com/
Hasta aquí es todo , espero que lo disfrutéis, buenos humos 💨💨.
Likes
7
Share

@RealGrowDiary
Follow
Day 63
The Plant looks Yellow becuase of some Nutrient inbalanced, but shes growing good under 13/12 Light.
I will switch the last photo in the small tent because of the 12 hours light only

Likes
16
Share


Likes
16
Share


@CanadianFillmore
Follow
Welcome to my second grow of the Blue Dream strain. This girl was veg'd for 14 week in a small pot while my first grow of this strain is in the flowering room. She didn't gain much more in size, despite the extra veg time, probably due to lower levels of nutes and the smaller pot size. Still she's looking good after moving her to the big pot and giving her a trim.
Thanks for checking out my grows!
Likes
8
Share


@4leksz
Follow
This Week we are going through Flowering Week 1 and they doing so far nice.
Only one Big Bud is not happy about it he's not growing anymore and i don't know if he don't like the solution or Genetik from clone is weak.
Added water today around 70 Liters and split it into the 6 Water Tanks.
Ph 6.0
EC 1.4
On the bigger plants the ph is dropping on 5.1 so i added ph up to get him on 5.8.
A few leaves are going to show bad colour so i looked maybe it was underfeeding, i monitor them for the next days and tell you how is going.
Thanks for watching my report
Stay Green :)


Likes
117
Share


@FoTwenny
Follow
Fo' Twenny Back with another update on our Orange Sherbert from Barney's Farm!
She is looking really good this week. She did start to show some deficiencies after flushing Friday 8/28. Otherwise she looks super healthy with leaves "praying" to the canna-gods!
Now, on with the deets!
LIGHTING:
Increased lighting at dimmer last week with good results. Was about 70k LUX on average @ Canopy.
Turning it up a bit more this week.
8 Outer Boards @ 665.5w
6 Inner Boards @ 601w
LUX APP MAXES OUT READING 78750 LUX @ Canopy. Lets hope its not too much!
RHIZOSPHERE:
If you didn't tune into the last update, I had just flushed pots due to high PPM runoff. pH of runoff was at 6.3. PPM and pH are tested using 2 separate calibrated BlueLab meters.
All Water/Fertilizer is shared by 3.25 plants (.25 because autoflower gets less than a quarter the volume of the larger plants)
2 GAL PLAIN H20 w/fungicide prior to feed
PH to 6.0
1 tsp/gal of Southern AG Garden Friendly Fungicide - Bacillus bacteria known as Bacillus Amyloliquefaciens (OMRI Organic Bacterial Innocclant/compare to Hydroguard)
Waited 15 minutes after plain H2O and fungicide
5 gallon tap H20 through 2 KDF filters
START PH: 7.5 (taken from reservoir that contains impurities/residue from previous feeds)
START PPM: 500 (also taken from reservoir)
TEMP: 76°F
.125 tsp Ascorbic Acid added to help reduce chlorine/chloramine
WEEK 4 FEED SCHEDULE:
.5 tsp/gal Sledgehammer (Surfactant)
.125 tsp/gal Gringo Rasta Cal-Mag
1 tsp/gal BIG Bloom
.5 tsp/gal Grow Big
.5 tsp/gal Tiger Bloom
.25 tsp/gal Kelp Me Kelp You
.75 tsp/gal BEMBE
.25 tsp/gal Beastie Blooms (Increased due to low ppm of solution)
PPM: 1150
Added to Increase PPM
.5 tsp/gal Tiger Bloom
PPM: 1350
PH: 5.8
1 tsp/gal RECHARGE
.6 ml/gal MAMMOTH P
PH: 5.9
PPM: 1490
Thanks for checking out my diary. If you liked this diary, check out my other diaries and give me a follow!
Until next time...
Peace ☮️,
Love 💚,
And Frosty Nugs ❄️🌲!
-Fo'Twenny
Likes
11
Share


@40Plug
Follow
Wow. Look at these beauties! Really nice buds. Nice grading from green to purple. Smell is insane.
Likes
37
Share


@masterofsmeagol
Follow
8/19 Rained again last night. No damage but medium is drenched. The 9lb kush I've been struggling with seems to be improving. I spent a lot of time on her yesterday and at least an hour this morning defoliating and pruning her. New growth and flowers look promising. I'm cautiously optimistic. I defoliated what needed it. I needcto qpplyvorganocide again. I can see random signs of septoria leaf spot. I really have been off my fame lately. I'm back on it now. This week the garden will be rearranged and I'll pull that big GDP back and better support the blueberry for flower. That NYCSA is a beast. It's resilient as all hell and just continues getting bigger and fuller. Despite pr9blems in the garden this girl seems absolutely fine. At least I don't have that defeated feeling anymore. I've got flowers on a few different plants. I'll try to get a couple pictures. I may take rapacaps advice and add a cheap plastic roof for later flower. I'm not sure if the explosive flower growth is due to the liquid kool bloom but I think I'm going to switch back to tiger bloom as it works better with the other nutes. I'll jeep this updated but I've got work to do.
8/20 Well it Rained again last night. This is getting discouraging. Now my other 9lb kush has the bottom branch all droopy like there's a borer or something. Realistically with the temp swings and the weather I think it's a firm of root rot or pythiym damage which isn't good. I posted pictures of the stalks and would be grateful if anyone has any advice. I'm go8ng back down to look again for a borer hole but i didn't see one. What it looks like to me is that the petroleum jelly I put on the stalks (to battle ear wigs) seems to keep them moist or something inviting mold or fungus. I'm kind of at a loss. I don't really know where to go from here. I don't know if I should just replant the severely damaged plant away from the rest of the grow, bag it and get rid of it or leave it be and hope for the best. I certainly don't want anything spreading. I'm getting tigerbloom today as my plants still need to eat and I'm nervous about the liquid kool bloom. It's probably fine but still. I'll update after I put in more work and research more today. Any advice helps. UPDATE: No borer holes. The stalk looks fucking horrible. It's supposed to rain today. I'm going to give it one more day then I'll amputate that branch and get rid of the other plant if I don't see an improvement. Perhaps I'll plant it in the ground. Don't really know what to do. Family bar b que today so my options are limited.
8/21 FED TWO GALLONS TO THE GARDEN. ONLY USED .5TSP/GAL OF LIQUID KOOL BLOOM. Did not feed dieing plant. Back to super hot weather 80° at 9am. Did a lot of research last night. I also went to several commercial growers and asked advice. What I came up with was a fusarium infection of pythiym infection
(Crown rot). I looked at all my stalks and they all have bark and are darker where I applied the petroleum jelly. I'm also NEVER using DE again. It fucking ridiculous amounts of water. Everyone swears by it bit it's not going in my garden again. Since use I can just watch water sit right on the GD soil. I tried to get some examples of what I'm talking about with the stems. I amputated that lowest bottom branch I trained (which was huge). I didn't have time to dispose of the other plant before my wife's doctor's appointment. I'll update when I go back over. I'm sure this won't help and may hurt but I used Bee Safe 3 in 1 on the wound and around the stalks of the plants I saw discoloration on. I didn't touch the NYCSA even though I see some discoloration. I may just be seeing things. That plant I'd super healthy and I don't want to risk losing it. It doesn't seem to have the stem rot like the others. At least I'm not the only one having problems. I hears some pretty bad stories. Still. I'm heart broken. I'll keep this updated after I go back over. FUCK. I MAY just go back to indoor. UPDATE: Got back from the appointment and the rest of the plant was all droopy just like the other 9lb kush (and the branch amputated). I wondered about that because other branches looked worse. I got the totally dead 9lb kush out and found some root rot. AFTER wheeling the bag out I found earwigs and other insects where the bag had been. Awesome. I used h202 to try to wipe down anything that looked Fingal in the stem. It sucks because it seems like that liquid kool bloom pushed them over the edge into flower. Cotton balls where there was nothing. So that's both my 9lb kush plants and the largest plant of the year the GDP that have all bit the dust. If you grow cannabis you know how I'm feeling. I KEEP TRY8NGVTO UPLOAD THE MINUTE VIDEO I TOOK BUT I CLICK ON SOMETHING ELSE AND IT DISAPPEARS. WIFI SLOW. HAVE TO WAIT FOR 5G
8/22 What do I say? Fusarium? Pythium? Stem rot? I'm going to have to get a tent to do some indoor to get the medicine I need for me and my wife. I took the last 9lb kush out and disposed of it. Well it's still in the bag. I'm hoping maybe it might come out of it (beyond hope and far away from the others (but I'm going to toss it today). This blows so hard. Flowers are just starting to develop. I like the liquid kool bloom. It seems to make flowers explode when there was none before. At least on the plants I have left. Actually even the dieing ones started flowering. I'm really concerned considering that one plant (at least) has septoria and every plant has that petroleum jelly on it. Cautio to people that use that. It seems thats where the rot started or is. In spots I spread the petroleum jelly. Anyway my NYCSA has the smallest amount of "funky looking stuff on the stem" so I'm hoping it will make it. Cotton balls starting to appear. If I lose the whole fucking crop I'm gonna go ape shit. UPDATE: Spoke with a few others and did more research. I removed my braces on the bottom of all the plants. It looks like the pjelly and the brace allowed for some type of contaminate. Other growers think I'm being too bleak. They think things will turn out okay. They are more knowledgeable about cannabis than me but I'm with these particular plants everyday. They're probably right and my anxiety is just getting g to me. It's scary seeing a healthy plant completely die in such a short time. After removing the other 9lb kush I could easily see extreme rootbound roots still too the size of the 1 gallon they came in. The bag was PACKED FULL of tight roots so they definitely made it down. The plant however just fell over when I pushed it. I had roughed it up a big before. Anyway I'm praying to the cannabis gods to not take what I have left.
8/23 Fucking pouring again. This sucks. I've gotten loads of advice and made another friend on here. I forgot my phone so I couldn't take pictures this morning. My spirits are up a little seeing that others are at least attempting to help. I'm headed to the grow shop after a night of research to grab supplies to battle this. I'll update later. EDIT: I picked up plant doctor at the grow shop. It was 50% off and I couldn't find anything with trichodermia. However, I've heard good things about this plant doctor. It's systemic and can be used as a root drench and a foliar spray. BIGGEST selling point for me is that it SPECIFICALLY lists fusarium, grey mold. Pythiym crown rot, black mold and all kinds of other shit. The thing that sucks is it's raining and it's not supposed to stop for a few days. That's going to make application more difficult. Oh well. I think I may do a root drench on the one plant that has a wilted bottom branch. I'll keep this updated. Thank you everyone who reached out. Especially growing grannies and my commercial buddy who is always here for me. However he has no experience with this so I'm kinda on my own here. EDIT: I couldn't find trichodermia and I don't have time to wait around and order. I found plant doctor which literally lists it treats all the possibly pathogens my issue could be. Even has a section for medical Marijuana. I did a root drench on the plant up front in the middle AND I did a foliar spray. Might as well get the septoria too. It's systemic but it gets in faster through the leaves I guess. It started sprinkling and I want to test this stuff out before I go ham with it. I did give some to the to other plants bit left my best AND THE TWO SMALLER ONES alone for now. I'm not seeing those issues on the NYCSA and I don't want to risk damaging it. I chose tge root drench as it's raining and the instructions for fusarium WAS a root drench. Thank you all for your help. I will close out tge question once I know it's figured out. Wish me luck. DID A SHORT VIDEO BUT WIFI IS SUPER SLOW SO I NEED TO WAIT TO UPLOAD IT. Went back over. Finished foliar spraying the other two and left the NYCSA and two Littles alone. Hopefully this works. I did I short video. Who knows if it uploads. UPDATE: Went back over and finished foliar spraying. Took a bunch of pictures and did a video but it didn't upload. I'm hoping this will do it. Plants actually look good. And they're flowering nicely! It's too bad I had to do a foliar bug this us supposed to combat PM and septoria as well.
8/24 It Rained last night but hasn't Rained today yet. It's supposed to and uts overcast. I'm really considering putting a roof on my grow (like rapacap suggested) for flower to decrease mold chances. Plants looked happy. I saw no negative effects from the Plant Doctor. I even sprayed a branch of the NYCSA and the stem and a little around tge roots. I finally feel like I can take a breath. I've been working so hard and worrying about losing g everything. I may have been able to save that 9lbkush but I don't think bit was worth taking the chance. The sun is peaking out now. My buddy at the grow shop called and set a side general hydroponics armor si 0-0-4 silica supplement cause it was 90% off. I pad like a buck sixty lol. I'll incorporate that next feed or water. Whatever comes first but it will be good to get it in the regimen. I was worried plant doctor might hurt but the girls seemed to kike it and I went ham on the worst plant. I mixed according to medical Marijuana guidelines on the label
(Theres another label on the internet, it's not on this one, it's at the very bottom and just recommdations from commercial growers. I hope this stuff works. Things look better already though. That liquid kool bloom is the bees knees. That's making flowers pop up like crazy! I think I'll stick with it. I was going to use beastie bloom and cha ching later on (and still might) but I hate the lockout bullshit. I've done a bunch of videos but most don't get uploaded as i forget to upload when I leave and wifi is slow here. Anyway at least I've got a few good ones left and pleating the words of my commercial poll buddy, "barring anything catastrophic you should be fine. I know your anxiety gets the better of you sometimes." Couldn't be a truer statement. I'm still getting a tent and doing indoor though. I'm going to need to.
8/25 Did some slight defoliation. I think today I'm going to reorganize my grow space. Things are looking better though. Plants look healthier. Flower is on and they are going to beat hell. I'm glad I took a cutting from NY 9lb kush. I also took one from the NYCSA. THose are tge little ones. The 9lb kush is flowering pretty good. Too bad it's just on a 3 gal. The NYCSA us in a 10 gal grow bag though and is doing amazing. I still see septoria on the leaves. I'm sure I'll need to reapply plant doctor but thus far I'm impressed. Things LOOK better. I don't even remember the last time I watered. It Rained last night. Looks sunny today. I'm going to feed tomorrow. I want the soil to dry out though. We usually don't get consistent rain like this. It's a first for me. I'll update later if I get stuff done.still wondering if I should amputate that wilted branch or give it a bit. It's still attached right now. I'll get some sealant and do some more research.


Likes
4
Share


@DaddyPrime2
Follow
11/26/24
11/27/24 this plant is blowing all expectations. this was the least promising looking pheno. these buds are so fucking dense. the trichomes are visibily standing ontop of the buds. the plant is 75% bud with 15% stem and 10% leaf. she is visibly fattening daily. i cant get over how hard these buds are though. the nodes are all growing into eachother and turning into long fat colas. absolutely beautiful genetics and im excited to see what the other phenos

Likes
10
Share


@BudArt
Follow
Getting solid and developing a lot of orange pistils and the tricomes are lookings super frosty. About 2 weeks left then out to the moon we go!!! Hope its a good grade (quality high), I decided to make Velevet because the flowers looked beautiful to not try out. This will be the last feed then flushed for the next feed. Going to drench it until it reaches a desirable ppm level in the soil. That would make it start eating itself sucking out all the nutrients providing a smooth smoke and a great after taste. When you dont flush you get a better taste and why would you want to smoke nutrients? Gotta make the leave turn yellow then you know its good. This is almost the end and thankfully its been going good so far, see you soon!!!
Likes
15
Share

@BlackForestGrower
Follow
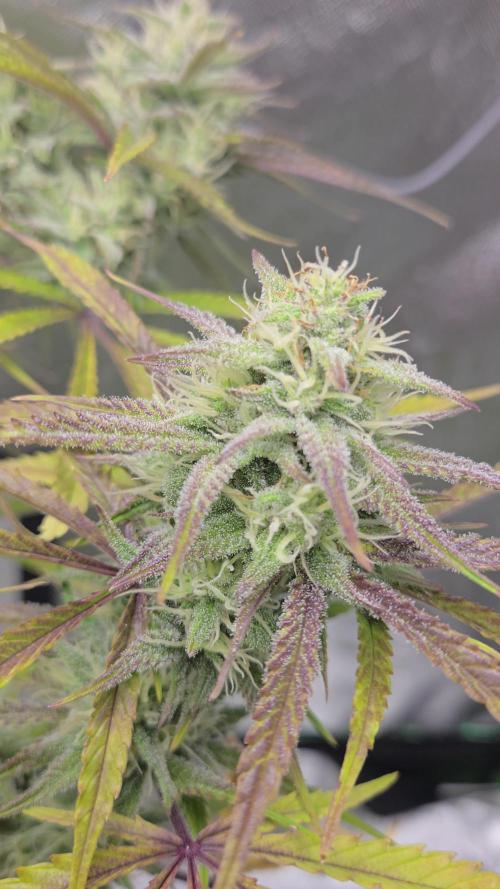
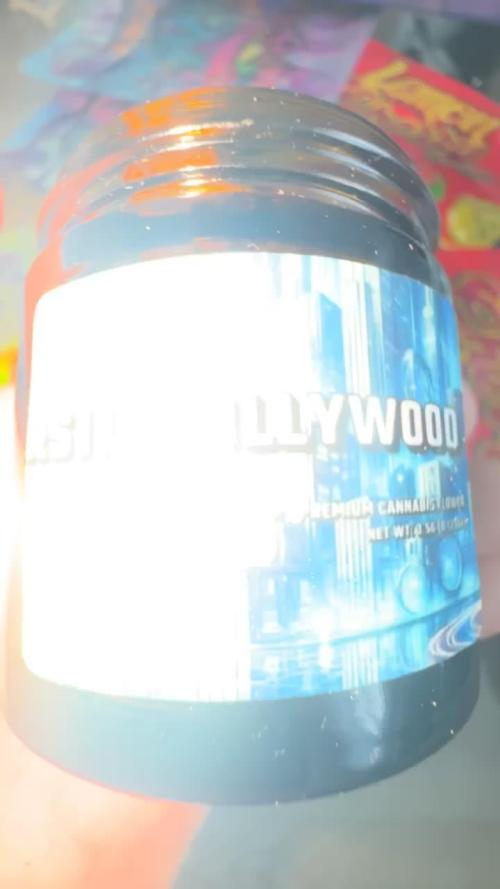
After 72 hours of darkness, the RS11 x HOLLYWOOD was hung in the drying tent at 55–60% humidity.

Likes
3
Share


@Weedyy
Follow
I'm writing these words to say goodbye soon. A passion, a run of time spent by your side, pampering you, I'll smoke you every day.

Likes
9
Share


@AutoflowersSucK
Follow
Plants are done, but the trichomes are not, so i will keep them going till i am satisfied with the ratios. Too bad, i wanted to trim them starting tomorrow but if i want peak potency, i have to wait and let the Trichomes be the indicator


Likes
10
Share


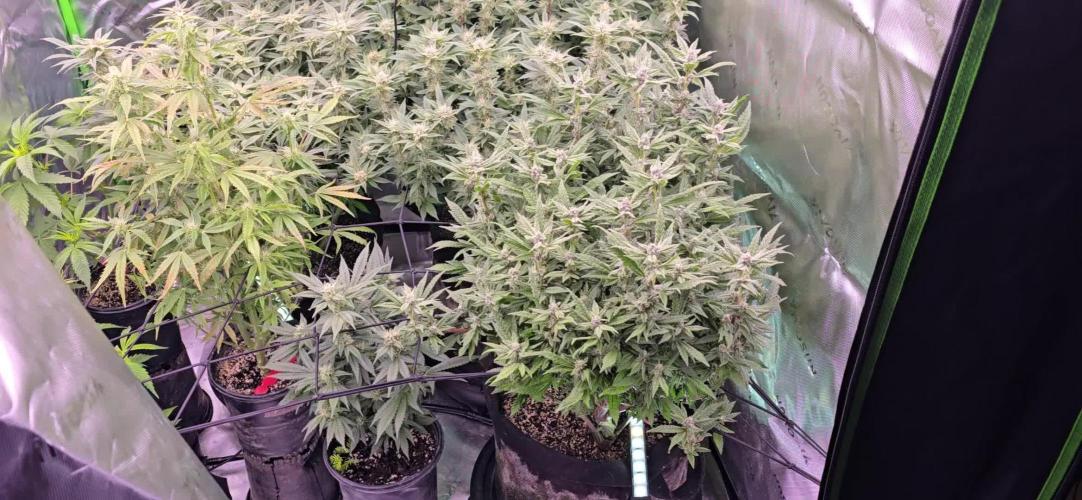
@SnoopyShaggy
Follow
Week is going super well, did notice trichomes are starting to develop more in the coming weeks. Still struggling with watering mainly because i have 3 different strains and i dont know the flow yet.
Watering schedule is thrice a week,
I nutrient feed on sundays, water on wednesday and compost tea on fridays 500ml each pot.
Will be monitoring the trichomes hereafter, today is day 90 from germination, super happy with the results no stunted growth or slow growth.
Will set my harvest day between day 120-150. I am targetting longer harvest time for the purple punch because they didnt fight for the light and bullied by 2 monstrous sativas. Since it is indica dominant, i am going to chop them once i see 70% amber