
Likes
Comments
Share


@jayizrollin
Follow
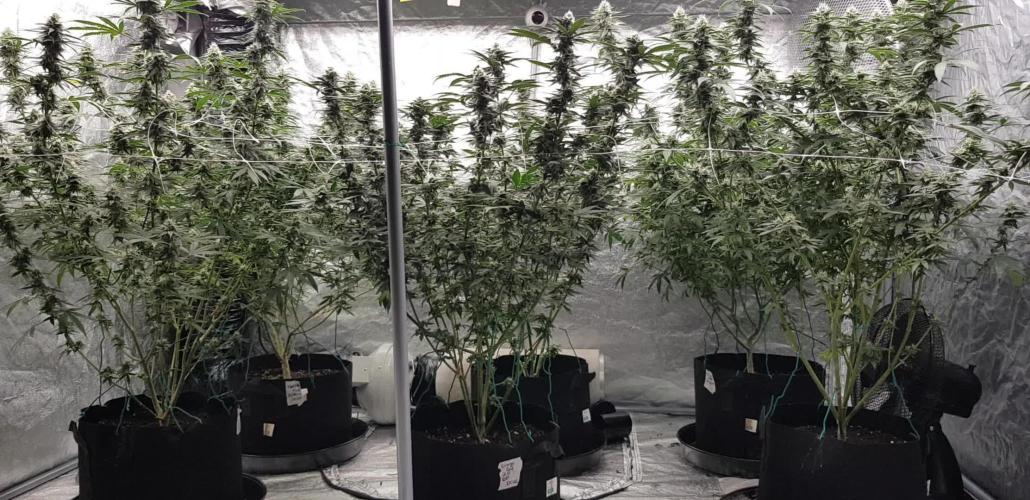
Day 70. Switching to 24/0 because the humidity is going above 70% in the night, only having the light on helps.
TG1 is getting super frosty, smelling like some kind of sweet cereal.
TG2 is smelling like straight diesel gas. I’m really excited to see these buds dense up. There were so many white hairs making up the buds it looked really cool.

Processing
Likes
61
Share


@Cariboo_OG
Follow
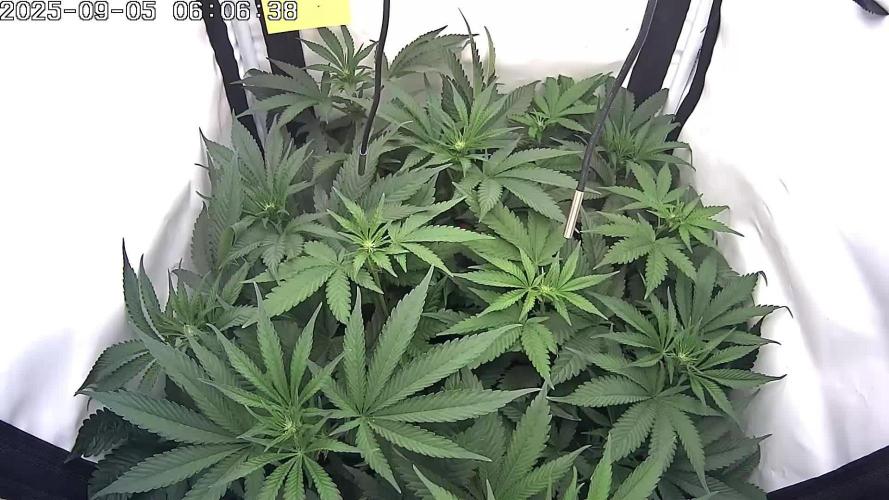
Welcome to Week 10, & 21 days into flower !
Feeling pretty under the weather today, not only because i seem to have picked up a head cold..( I've already been tested for covid.. negative..)
Pretty annoyed that no matter how much i interact on this site, try to build friendships that benefit both of us reading each others work.. none will even visit my diary, but what is the point in crying about it.., BUT at the same point, why bother writing.. none reads it lol
Enjoy your fucking Week.
ill see none next week


Likes
12
Share


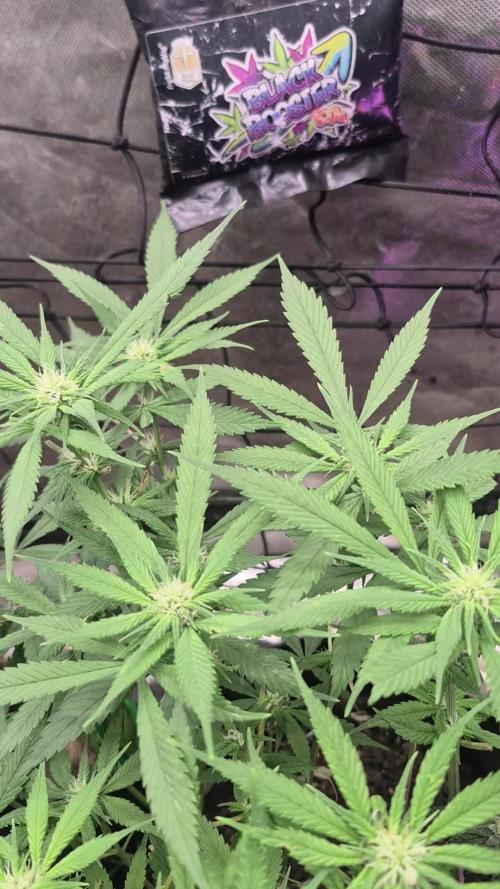
@Bleko
Follow
She seems to be a little finicky to low humidity and seems to be a nute whore. Her clone I took 3 or so weeks ago was exibiting same characteristics as this one with low humidity. In living soil but also use Fish Shit and HPK. She'll take as much as I want to give here while the others in the tent want me to back off a bit except Pink Kush she's a nute whore too. Overall happy with her, understandable for a "boutique" strain. Also decided to double down on lighting, running 2 250 true watt quantum boards in my 2x4. Currently turned up on both to 75%. Plan on cranking to full 500w last few weeks.


Likes
10
Share


@StickyFingah420
Follow
Planta hermosa, por problemas de respaldo no tengo sus fotos finales y es una pena :( pero puedo decirles que es una planta que rinde bien, entrega frutos de calidad y no es para nada exigente.

Likes
74
Share


@Sillyasswhitedude
Follow
The THC BOMB is really starting to flower and form its budz....they are all getting their own set of nutrients because they are all at different stages...I WILL GET PICS OF ALL THREE STRAINS UP NEXT WEEK....meanwhile I just wanted to add a quick update and some close up of the buds starting to form...nutes were given this morning and the next few days of perfectly ph'd water should make next week a good one...providing nothing goes wrong in the meantime...some of the fox farms nutes aren't in the drop down menus...im using the basic soil trio pack at half dosages...

Likes
44
Share

@GERGrowDesigns
Follow
Dear Growers, Welcome to my Dutch Passion Diaries Competition 2025 entry!
For this competition, I’ve chosen the Indoor Feminized strain: Orange Bud 2.0
Media from Week 15 or Flower week 4-5 After Moving into the New Tent for the flower weeks. Stage.
Here’s what I’m working with for the Final Tent after Moving for the Flower time in the Future :
• 🌱 Tent: 220x150x150
• 🧑🌾 Breeder Company: Dutch Passion
• 💧 Humidity Range: 50
• ⏳ Flowering Time: 8W-10W
• Strain Info: 20-25%THC, Sativa
• 🌡️ Temperature: 26
• 🍵 Pot Size: 0.5l
• Nutrient Brand: Narcos
• ⚡ Lights : 720W x 2
Dimmed to 400w Each at the Moment. Because of Heatwave ⭐
A huge thank you to Dutch Passion for allowing me to be a part of this amazing competition and for supporting the grower community worldwide! Your genetics and passion speak for themselves!
Curious to try these strains for yourself?
You can check them out and support me at the same time through my personal link:
https://dutch-passion.com/?a_aid=GGD
I would truly appreciate every bit of feedback, help, questions, or discussions – and of course, your likes and interactions mean the world to me as I try to stand out in this exciting competition!
Let’s grow together – and don’t forget to stop by again to see the latest updates!
Happy growing!
Stay lifted and stay curious!
Peace & Buds!

Processing
Likes
6
Share


@SniperFourTwenty
Follow
Oh well, not my (our) week 🙄
During the week the Ladys start to look a overwatered and I had no idea how this could happen ... Well, first I tried to rise temperature slightly and had the fans run more often to dry them out a bit quicker, did not work. Than I took them out of the System ... All together worked, at least it looked so ... for 1 day ... Yesterday I found the real reason. The Humidity Controller was broken ... During the night they had around 90% humidity and during the day only 25-30%, way to high and way to low. Replaced the Controller today, hope next week will start smoother 🙂
Beside of this they made huuugggeeee progress, some nearly tribbeld in size and are around 5-6 Nodes now, will top them all next week when they recovered a bit 🙂
Also added some Alfaboost to help them a bit.
In the Videos the Vanilla Ice are in the right 🙂
Thanks for your time, I hope you enjoyed this entry 🙂
See you next week 💚

Likes
17
Share


@Plantinator
Follow
The buds are fattening up, getting there…
Some colours appeared, the pistils are turning pink and the sugar leaves got a slight orange-ish tint on the edges.
The smell gets stronger, but nothing unpleasant at all.
I will change the watering schedule to 4L in every 3 days

Likes
5
Share

@AlpenZilla
Follow
🗓️ Week 7 complete – 3rd week of flowering
This week I had to slightly adjust the feeding schedule –
I was running at ~75%, but Seriotica started showing light tip burn.
Dialing it back a bit now to stay on the safe side 🌱
All three plants were lollipopped, so energy now goes straight into the top sites.
The stretch seems to be wrapping up – and the final height says it all:
📏 Final height after stretch – Seriotica: 77 cm
The tent’s definitely reaching its limits – lights are at max height, and there’s not much headroom left 😅

Likes
38
Share


@Green_Mountains
Follow
I took the tiny plant out of the tent due to state laws. She is happily sitting in a window... we'll see what happens with her!
Massive growth for both plants this week! They both doubled in size! I don't know whether to call my plants vegging, pre-flowering or flowering. I figured this was the last week of veg and next week is full on flowering!!
They both stink! Gassy for sure! I'll need to turn start using my carbon filter soon... I caught a few cool time lapse videos this week. Especially after feeding them last night!!
I fed them twice this week. The first time was at a third recommended dose and I jumped it to half yesterday. The leaves are clawing at the top of the plants... I think it is a lack of phosphorus due to me only watering them the last 2 weeks. Any thoughts out there?
I'd love advice about defoliating... I have a couple massive fan leaves I could remove to open the canopy for flowers... I just don't want to stunt the plant or rob the main cola of a major energy source... Thoughts are definitely welcome!
I tried my hand at LST... I think a few are working and a few aren't doing the job... Definitely need to figure this out! Again advice is welcome!
If you've made it this far... thanks!! Cheers!
Likes
7
Share

@SpunkyTerps4200
Follow
This plant os growing soo damn fast ots incredible.. I made sure to take like 4 clones off her cause I am definatly feeling this one.. guy Tropicana cookies from 420fastbuds is the shit woowww you guy check this out.. if yall need some seed from them https://2fast4buds.com/?af=281965. BAMm save u 15%on the packs.. thabk u all for checking out the girls!!! And thank u 420fastbuds for the packs i love your genetics!!! Keep up the great work!! Alsobhmu on Instagram @only_dankzz4200 and on YouTube https://youtube.com/@thedankzz420?si=brMw2mSIw-nOJkpb ill post more pics throut the week if not just go Instagram anf ull see them for sure
Likes
6
Share


@mikheil007
Follow
In my opinion it's last week for Girl Scout Cookies Auto and for Power Plant Auto tilll harvest, how do you think?? Vanilla Latte Auto is on it's 3rd week of flowering period and is very strong and beautifull plant

Likes
8
Share


@HeartStrong_Garden
Follow
Plant two is doing a little better color wise. Something is going on with the leaves of plant one mostly. Maybe it is because i was using overflow water straight from the air conditioning unit instead of the tap? I'm having to pull a lot of dead leaves off
Likes
Comments
Share


@AmancioW
Follow
they look amazing, i cannot believe its my first attempt but here we go


Likes
6
Share


@88kasanova
Follow
It’s actually week 5 I use advanced nutrients and g.o. Bud booster! Looks great! Also unsulphured molasses

