


Likes
Comments
Share


@Borberad
Follow
Woche drei der Blüte und alles Bestens! Aufgrund der dichten Struktur habe ich die Pflanze an Blütetag 19 großzügig ausgedünnt. Bei photoperiodischen warte ich damit bis mind. Blütetag 21. Die kleine Auto Blueberry Banana scheint aber schon recht weit, daher habe ich hier keine Bedenken. Seit Mitte der Woche scheinen die Blattspitzen etwas Überdüngung anzuzeigen. Der Drain mit Osmosewasser bei ph 6,4 und 20 microSiemens hat ph6,7 und 800microSiemens. Setze die Stickstoffgabe etwas herab indem ich Hesi Blüte reduziere und pk13/14 ergänzend zuführe. Erhöhe somit gleichzeitig Phosphor und Kalium.

Likes
Comments
Share


@bigsmoke42069
Follow
What a pleasure to grow such beautiful plants.
the buds are big and resinous, with strong gassy and fruity smell.

Likes
26
Share


@Bakeryguy420
Follow
Sorry guys havent updated in awile
Gg4 harvested
Tangiematic harvested
Ogesus #1,2 harvested
Gluebeerry just main cola harvested
White rrussian harvested
Sweet creme harvested
In.the run.left is rhino rryder, royal haze, amnesia gold , amensia haze , forgotten cookies and gluebeery and the new girls
Update on 3rd grow going Start a new diary for them today . My cat knocked down the seedlings 3 times zero stunt life which is shocking crazy crackhead ..
Quality is amazing for them all yield wasnt aa, much as I wanted believe emerald harvest is as garbage as foxfarm.

Glueberry Auto · Expert Seeds
Gorrila Glue #4 Auto (Expert Gorilla Auto) · Expert Seeds

Tangie Auto · Fast Buds
Sweet Cream Auto · Expert Seeds

Amnesia Haze Auto · Vision Seeds

Amnesia Gold · Pyramid Seeds
OGesus Auto · Expert Seeds

Royal Haze Automatic · Royal Queen Seeds

Caramella Auto · Custom Breeder & Strain
Rhino Ryder Auto · Fast Buds

Fugue State · Mephisto Genetics
Likes
12
Share


@NorthernChemist
Follow
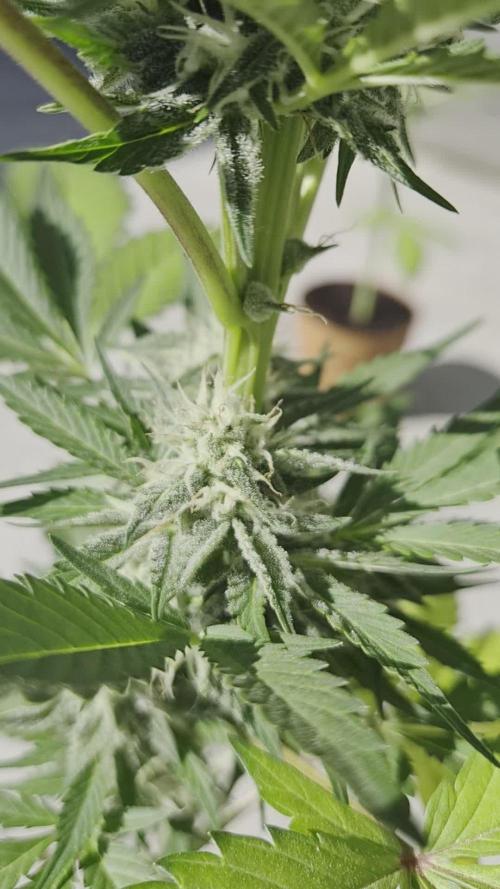
June 17: The garden area had just under 3 inches (75mm) of rain in the past week which was really needed. Temps have been mid teens to low 20s deg C. The wind has been relentless and the plants continue to take a beating. Overall pleased with the growth but some concern, because preflowers are showing, they may be stunted and flowering early (due to environmental stress).



Likes
1
Share

@Tropical_Grow
Follow
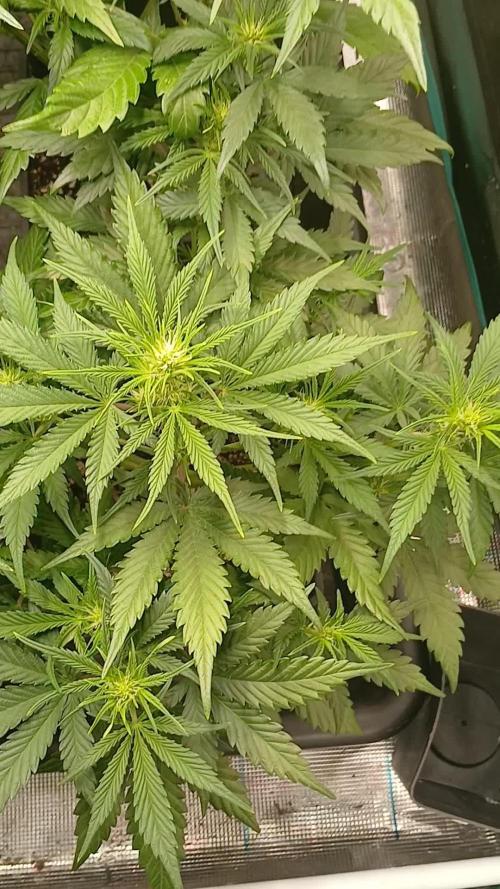
I've noticed the plants aren't getting enough space to grow. The space is full, but I'm losing quality. I'll pay closer attention to the PPFD (Plant Protection Factor) to get better results. Even if it means fewer plants, I'll end up with higher-quality buds. Quality is better than quantity.
Processing
Likes
3
Share


@Ogbangbang2981
Follow
this week I was a lil happy because I pollinate my C4matic with a Male pink kush the feminizing spray tiresias mist didn't work the way I thought it would. thank God I had a Male coming up in my outdoor garden...I can already see seeds a little more than I expected, for some reason I only wanted to pollinate 1 bud but got seeds on the main and a few lower buds still happy for that will update images .
Likes
7
Share


@cwgrows
Follow
Going off what other people say about 2x-3x growth during the preflower stretch I decided it's time to flip!


Likes
42
Share


@MrJoint
Follow
✂️ Defoliation time and LST adjustment.
🥦We stay training.
✌️🎃Thank you for checking my cultivation.


Likes
Comments
Share


@KannaGrowing
Follow
Esta semana, poca cosa a añadir, tan solo que continuamos como la semana pasada.
Riegos alternos entre abono y agua, según tabla de fertilización de JUJU Royal by BioBizz.
Hemos aumentado la potencia de extracción para evitar olores.
Processing
Likes
23
Share


@GrowGuy97
Follow
3 of the ladies are in flush will be cutting them down within the next or 2 & the other 2 probably have another month left! Fingers crossed for harvest!🤞🏼✌️🏼🌱
Likes
13
Share


@Dunk_Junk
Follow
Wow well she does look sorry for herself.
A couple of days ago I sprayed her with pesticide. This has damaged her leaves.
I hope she can bounce back from this as it's a critical time in her growth.
Likes
40
Share

@Sadhus
Follow
**Semaine 9 : Neuvième Semaine de Floraison – Phase Ripening Avancé (15-21 avril 2026)**
**Note :** Mise à jour hebdomadaire. On est maintenant en ripening avancé (semaine 9 sur 12). Les données GrowOps et TrolMaster montrent une descente progressive et maîtrisée. Pas de gros changement visible cette semaine, mais tout évolue dans le bon sens.
### Contexte et Objectifs de la Semaine
On poursuit tranquillement la phase **ripening**. L’objectif n’est plus la croissance, mais la maturation finale : densification des buds, développement des trichomes et concentration des terpènes/cannabinoïdes.
Steering : **génératif maintenu** (irrigations moins fréquentes, dryback nuit accentué 20-30 %, baisse progressive de tous les paramètres).
Changements appliqués :
- EC réduit à **1.3** (passage final sur Terra Aquatica seul, sans boosters lourds)
- Température, humidité et PPFD maintenus bas pour favoriser la maturation
- UV toujours à 90 min/jour pour continuer à booster la résine
**Petit tips éducatif : Lecture des trichomes en ripening**
À ce stade, on observe trois types de trichomes :
- **Translucides** : encore immatures (ils vont blanchir)
- **Laiteux / laiteux-opaques** : pic de THC et terpènes (c’est le moment idéal pour beaucoup de cultivateurs)
- **Ambrés** : THC qui commence à se dégrader en CBN (effet plus sédatif, mais perte de fraîcheur)
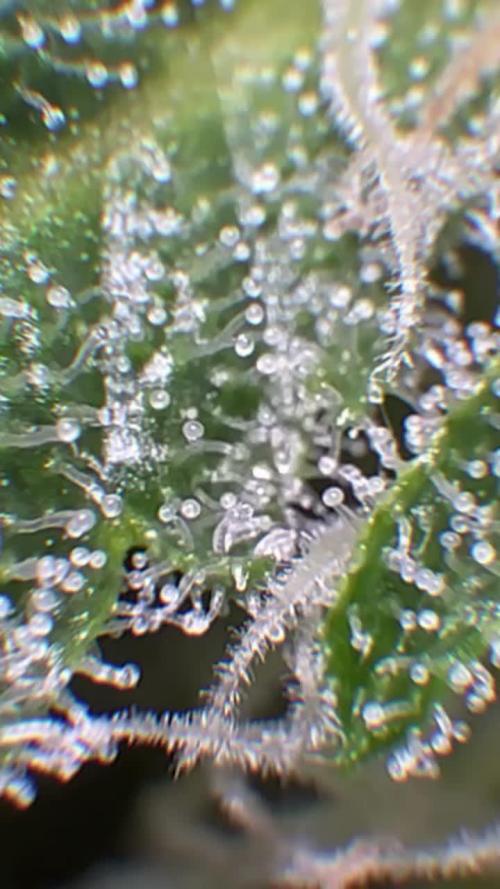
Ici, les trichomes sont **principalement laiteux avec encore quelques translucides** → c’est excellent. Cela indique que les buds sont en pleine maturation sans être trop avancés. La semaine prochaine, on surveillera l’évolution vers plus d’ambre pour décider du timing de flush/récolte. Astuce : regarde toujours les buds du haut et du milieu avec une loupe 30-60x, jamais seulement les sugar leaves.
### Observations des Plantes
La plante dominante reste stable à **150 cm** avec une structure imposante.
Les buds ont **très légèrement gonflé** cette semaine et gagnent en **compacité**. Ils deviennent bien denses, sans excès de foxtailing.
**Frosty** : les trichomes sont abondants, les buds et sugar leaves sont très blancs et collants. L’aspect résineux est impressionnant au toucher (très collant).
Odeur : **très agréable**, sucrée, épicée et florale, de plus en plus forte quand on touche les buds.
Santé générale : parfaite, pas de nouvelles feuilles jaunes, pas de stress, pas de pest. Les plantes sont propres et concentrées sur la finition.
### Paramètres Environnementaux (TrolMaster + GrowOps – synthèse semaine 9)
- **Température jour** : 19-21 °C
- **Température nuit** : 14-15 °C (basse pour ripening)
- **Humidité jour** : 48-58 %
- **Humidité nuit** : 29-39 %
- **VPD** : 0.9-1.3 kPa (stable et adapté)
- **PPFD** : 550 (DLI ~24)
- **UV Light** : 90 min/jour (maintenu)
- **Far Red Light** : 30 min en fin de cycle
- **CO₂** : setpoint 900 ppm jour
- **EC solution** : **1.3-1.5** mS/cm (passage sur Terra Aquatica seul)
- **pH solution** : 5.8-6.0
- **Runoff EC** : 2.5-3 mS/cm
- **Irrigation** : moins fréquente (génératif)
- **Runoff % daily** : 20-30 %
- **Night dryback** : 20-30 %
- **Steering** : génératif confirmé
### Nutrition et Irrigation
Cette semaine, on est passé à un régime plus simple : **Terra Aquatica seul** à EC 1.3.
Plus de boosters lourds (PK, Sugar Royal, Green Sensation, etc.), juste la base pour ne pas surcharger en fin de cycle.
Irrigation réduite pour accentuer le dryback nocturne et favoriser la concentration des buds.
### Problèmes et Ajustements
**RAS.**
Aucun problème, aucune alerte. La descente progressive se fait en douceur et les plantes réagissent bien. L’odeur et la résine compensent largement le gonflement plus modéré.
### Plans pour la Semaine 10
- Continuer à baisser tranquillement EC (vers 1.0), température nuit et humidité
- Maintenir UV à 90 min/jour
- Surveillance accrue des trichomes (loupe obligatoire)
- Préparer le flush (probablement à partir de la fin de semaine 10 ou début 11 selon évolution des têtes)
- Photos macro pour suivre le passage laiteux → ambré
Ce journal sera mis à jour hebdomadairement.
#GrowLegendary #Zamnesia #Plagron #EternityGrowCup2
Les buds sont de plus en plus frosty, collants et résineux, avec une odeur vraiment plaisante. Même si le gonflement reste modéré, la qualité trichomale est excellente. On continue la descente en douceur vers la ligne d’arrivée ! 🌱✨

Likes
42
Share


@xs8
Follow
Week 6 started with more growth and more LST 😁
🌱👍🏻
------
Day 38
Amazing how beautiful they are, and until now I'm really satisfied with my first grow 😁🍀🌱
Likes
1
Share


@MN-Frozen420
Follow
Day 49
about as high as its gonna get. starting to fill out buds. nice stacking.
Likes
81
Share


@UnorthadoxDude
Follow
Transplanted to 40l container on week 4 day 1. Container has approx 30l in it.
Also added a photo of the setup for size reference.
Let me explain my thinking behind the repotting strategy. Firstly I should say that I am quite an old school kind of grower, although I've never grown cannabis before I have grown hundreds of other plants. Due to my experience with other plants, I understand the value of well planned and executed transplants, they can have an absolutely transformative effect upon root systems when done properly, as far as I know it's the main reason why they are done at all. It is fair to say I have never grown any auto-flowering plant indoors before, and I have read all about how you should not transplant autos, and all the good reasons why not. Ultimately though, as I am not called UnorthadoxDude for nothing, I believe that I can make it work with an auto, and get the benefit of improved root growth pattern, without delaying or interrupting the growth. I want to have my cake and eat it, as it were.
So the strategy is to avoid transplant shock, which admittedly I have already failed in the first unplanned transplant, but in my hopeful naivety I still believe I can make the second one work! I'm using coco, and I have had the larger pot prepared and have been watering and feeding them as well as the plant. If I am careful not to disturb the plant at all, and move the entire contents of the pot gently into the larger pot (which is exactly the same medium in broadly the same state), then I may be able to avoid shocking the plant and just let it crack on. We will find out in a few days! If it stops growing or slows at all then I failed, otherwise it worked!
A note about my use of organic nutes with coco. I have read a lot about coco and nutes and microbes and PH and TDS and what have you, and I know that the overwhelming majority of people believe that you can't or at least shouldn't use organic nutes with coco. The thing is, I like organic gardening, I prefer to cultivate a beneficial microbiota and keep it healthy. I recycle, and reuse all my compost except where a plant is diseased and this has worked well for me for a long time. I've never grown with coco before though, I always used soil. I wanted to gain the benefits of coco (better drainage, more air to roots, lighter, less inviting to pests, etc) - but I wanted to use a method of nutrition that I was already familiar with. I think I've mentioned that I am not called UnorthadoxDude for nothing, so I am using BioBizz and coco. By adding bacterial, mycorrhizal, and trichoderma inoculants and having the unplanted coco in the tent being fed and watered I hope to have cultivated a nice microbiota which will feed my plant. That's the theory. However just in case, I have a trick up my sleeve.
Now, I do not know if you are aware of this, but there is a fiery debate raging on the internet about using BioBizz organic nutes with coco for cannabis. Some people try it, most people shout it down, and I have not found much in the way of solid evidence of it being a good idea. Except one! I found a commercial grower that has used biobizz nutes, and he said that as long as you are using "Acti-Vera" you can use anything from the BioBizz organic range. Apparently the enzymes in the mix break down nutes chemically in a similar way to what the theoretically missing microbes do.
So I have ordered a bottle of that, and if my microbial cultivation attempts don't work out, I at least know I have a fallback that should work.
Those are my thoughts on it, let's see how it pans out.
Oh I should also probably point out that I am growing some companion plants, specifically alfalfa (nitrogen fixing), basil (improved flavour), and German Chamomile (increased essential oil production).
Update week 4 day 2 dropped PH to 5.8 after advice from a grow question. Look! It's carried on growing... maybe there was no transplant shock?
Update week 4 day 3: Growth continues, interveinal chlorosis lessening. Plant is pushing out node five at the moment.
Update week 4 day 4: Growth continues, interveinal chlorosis further lessening. Apologies for the poor quality photos for the last few days, I was lazy and didn't want to move everything out to photograph. Today I have done that and the pic is better. I am declaring the second transplant a complete success. I do not believe that plant was in any way shocked.
Update week 4 say 5: I think I've finally managed to overwater. Going to skip watering today.
Update week 4 day 6: Photo taken just before lights on hence wilting. Growth continues to accelerate. I believe the alfalfa has been raising the PH so I've removed it. Today I will flush through with PH lowered water and then fertigate. The colour is still too pale but the growth and overall look and feel of the plant screams to me that it's happy and about to explode.
Day 27.5 flushed with 30l of PH lowered water then fertigated with 5l.
Day 28: Height 12cm Width: 28cm Nodes: 6
Weekly growth data:
From 5cm Height to 12cm +140%
From 12cm Width to 28cm +133%
From 4 primary nodes to 6 +50%
Summary: Wow, wow. Wow. What else can I say. What a crazy week, amazing and unexpected given the problems. I am really excited to see what happens over the next seven days!!
It looks like it has quite severe chlorosis, but otherwise seems robust and is seriously stretching. Almost unbelievable growth. Pre-flowers appeared a few days ago, so I guess this was the final week of veg. Let's see how the first week of flowering stretch goes!
Update 7/2/23: My instincts about this plant on week 4 day 6 were absolutely correct, she was happy and, she was about to explode. Since my early attempts at transplanting, I practiced multiple times with Citronella (a photoperiod plant) and then I did it again with an auto (Polly) - this one went flawlessly and further demonstrates that you can transplant an auto without shocking it. Time will tell, because I can compare Polly to both Misty and Nesia both of whom were sown directly in their final pots.

Likes
2
Share


@kanabise
Follow
De jolie couleur violette et la tête devienne très grosse mais pas beaucoup dense
Likes
62
Share


@OwlGang_Uk
Follow
Time Is Winding Down On The Girls Scout Cookies In The 3 Gal Pot It’s Starting To Show A Nice Purple Color On The Buds. All The Girls Are Highly Scented And Frosty. The Lemon OG Looks Like It’s Going To Be The Frostiest Of Them All. . .The Purple Power Is Still Drying But It Shrink Up Pretty Bad I’ll have An Update For You Next Grow.
Height Chart:
Girls Scout Cookies: 31 inches (3gal)
Stardawg: 35 inches
Girls Scout Cookies: 40 1/4 inches (5gal)
Gorilla Glue: 33 1/4
Lemon OG: 42 inches


Likes
2
Share


@eldruida_lamota
Follow
Que pasa familia, vamos con la sexta semana de floración de estas Gorilla Cookies Fast Flowering, de FastBuds.
Agradezco a Agrobeta todos los kits obtenidos de ellos 🙏.
Hasta aquí veis que llevan buen progreso y el color que se marcan es espectacular.
Vamos al lío, el ph se controla en 6.2 , la temperatura la tenemos entre 22/24 grados y la humedad ronda el 50%. El fotoperiodo a 12-12. Estás próximas semanas veremos cómo avanzan.
Agrobeta:
https://www.agrobeta.com/agrobetatiendaonline/36-abonos-canamo
Hasta aquí todo, Buenos humos 💨💨💨