
Likes
Comments
Share


@undermink
Follow
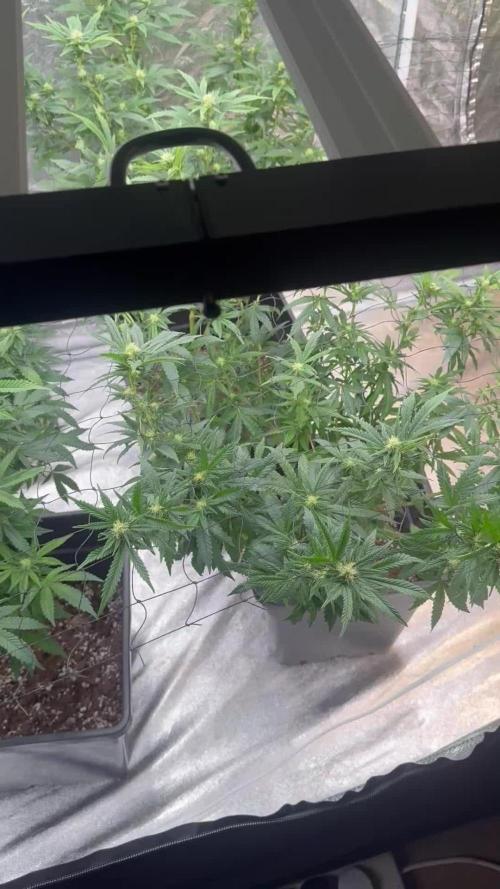
At the beginning of week 5 they all look a bit small and bushy to me. But let's see.. .Maybe they get a little kick and grow during the first weeks of the flowering phase, which we've now entered :) I cut a really small amount of leaves that were touching the ground on the auto bending one.And I started giving them two additional hours of light. Hope they like it.
UPDATE: I had to start defoliation because the leaves were so bushy that they were getting wet in between... Hope this helps : And hope they get a little taller...


Likes
9
Share


@StickyFingah420
Follow
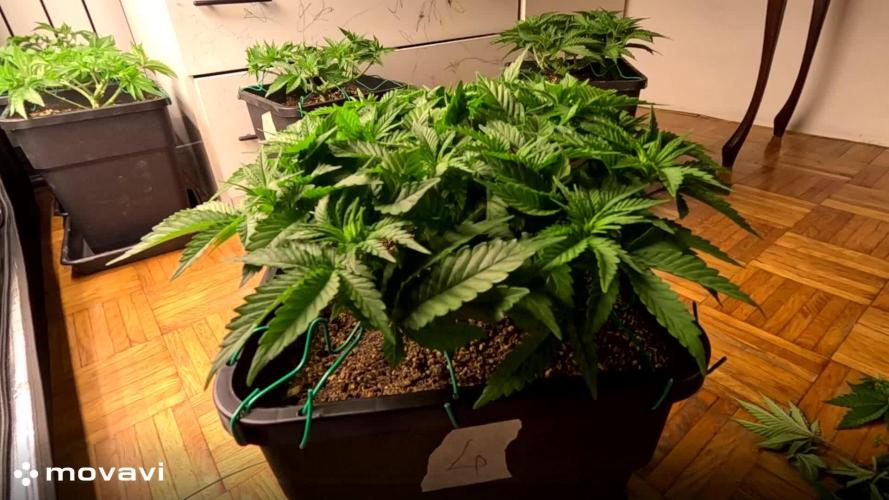
Día 34 y casi final de esta quinta semana de desarrollo.
Las plantas se ven bien sanas y fuertes, sobre todo esta Wedding Glue que desarrolló una estructura grande y fuerte.
Espero todo siga así de bien y estas bellas damas se expresen a su antojo!
Buenos Humos!

Likes
2
Share


@dubby_m
Follow
D101: harvested the plant! Very happy with the grow :) Wettrimmed all the buds and hung them for drying. i will report after drying and curing!

Likes
8
Share


@Mikeyc420
Follow
Week 5 off flowering
Buds have grow and are solid with the smell starting to get alot more potent the THC crystals are looking nice
Light 11cm from the top of bud
Humidity staying around 45-50%
Temp 23°c - 26°c
Ph 6-6.3
Over all I'm happy with my first grow so far
Likes
3
Share


@coolesrat
Follow
Leaves are starting to yellow / and pistils are burning - I believe I’ve overwatered them slightly trying to flush them the best I could with clean water - this or perhaps my last feeding was to high? The EC was 2.5 . But these signs were increasing for a few weeks . Let’s hope it clears up !


Likes
2
Share


@Franco123
Follow
the plants both critical kush and medical mass have sprouted quietly 8 seeds or planted and 8 are germinated i am happy and thank royal Queen seeds of warnings sent
Processing
Likes
19
Share


@CannabisAprendiz
Follow
Hola .
traemos un avance del seguimiento , no hemos tenido mucho tiempo para subir el contenido por un tema laboral pero ya empieza a relajar la cosa y podre estar mas activo con la subida de seguimientos .
dejamos algunas fotos diarias de como va la floración.-


Likes
7
Share


@Mr_nugs_lover_David
Follow
She's developing a thick fat sticky main cola, very beautiful strain, short distance between nodes, compact very dense flowrs, and very strange smell to me, had never ever tried something so citric like this. It's a very orange sweet juice smell, very pleasant, I can't wait to dry and cure a little this flowers to be able to feel the ultimate flavor and power from this genetic, stay tuned guys!! ❤️💚💛


Likes
15
Share


@deFharo
Follow
🖐️👨🌾 Bienvenidos entusiastas de la marihuana casera, clandestina y orgánica!
156 días después de lanzar la semilla al sustrato el milagro de la vida ha vuelto a hacerse realidad.
Esta mañana, después de pasar la última noche en la carpa de cultivo, he sacado la planta al exterior para disfrutar de la luz fría de febrero, unas pocas horas más de luz y libertad antes de entregarse al verdugo. Al atardecer el destino se cumplió y decapité a la Reina, porque es la manera más decente de matar a una Reina... Viva la Reina! 😁
Ahora los frutos prohibidos cuelgan delante del extractor de la carpa de cultivo, aire templado, seco y constante para hacer perder humedad lo más rápido posible, después de 3 días pasaré los cogollos a un secadero durante 4-5 días más para que continúe el secado de una manera natural, después guardaré los cogollos en frascos de cristal para que se vayan curando, y reservaré la hierba para fumarla este próximo verano.
HASTA LA PRÓXIMA...
SALUDOS Y SALUD A TODOS!
=========================
Purple Queen: Semilla femenina nacida en casa por un cruce espontaneo hace cuatro temporadas:
La mamá fue Queen Mother de Original Delicatessen Seeds (https://growdiaries.com/diaries/146971-grow-journal-by-defharo)
El papá fue una planta hermafrodita de Purple Shot: https://growdiaries.com/diaries/147509-grow-journal-by-defharo
=====================================================
👨🌾 AHORA UNOS DATOS EXTRA SOBRE EL CULTIVO QUEEN MOTHER (Estadísticas sacadas de mi seguimiento diario.)
- Peso húmedo: 656g
- Peso en seco: 177g.
- Altura: 84cm.
- Maceta old-school 12L.
🌍 Sustrato personalizado con minerales.
Días de cultivo: 156
Semanas de crecimiento: 10
Semanas de floración: 11
Total: 21 semanas de cultivo.
💦 Estadísticas de riegos:
- Número de riegos: 46
- 46 Mezclas de riego diferentes.
- Total de agua de riego: 50L
- Media de EC: 1.26
- Media de PH: 6.29
- 07 aplicaciones foliares en crecimiento vegetativo (EC: 1.0)
- 06 aportaciones al sustrato de mezclas de enmiendas secas (1g/litro de tierra)
🏛️ CONFIGURACIÓN DE LA CARPA DE CULTIVO:
- Carpa de cultivo SJ DS 120W: 60x120X178cm
- Número de plantas: 6
- Espacio en la carpa de cultivo: 60x120X178cm/6 (0,12m2)
Temperatura media 19°C
Nivel medio CO2: 373 ppm
🕐 Luz interior
- La planta ha recibido 2387 horas de luz artificial.
🌞 LUZ DOSEL: 500w
💡 LUZ LATERAL: 125w
🔄 Extractores y ventiladores x9 (120w).
📈 TOTAL VATIOS: 745w/6 plantas = 124w por planta.
🌾 DATOS DE PRODUCCIÓN:
💡💡 Por vatios reales (124w):1.42g/w
📏 Por altura (84cm): 2.11g por cada centímetro de altura.
🥛 Por capacidad de maceta (12l): 14.75g por cada litro de tierra.
Por metro cuadrado: 1475g/m2.
📅 Por tiempo de cultivo (21 semanas): 8.43g por semana.📆
🌼 Por semanas de floración (11 semanas): 16g por semana.🌺
💧 Por volumen de riego (50l): 3.54g por cada litro de riego.
🚿 Por riegos (46): 3.85g por cada riego realizado.
✋🤚 Por manos: 88.5g con cada mano
🍊 Aranceles por gramo: :text
Hasta el próximo cultivo...🖐️👨🌾
=====================================================
Likes
6
Share


@jkadabra
Follow
First week of flowering. Added a mixture of hydroponic nutrients, added a 50w lightbulb (for a total of 250w) and did some more and final defoliation; now she's ready to bloom at peace.

Likes
10
Share


@FlavoursUk
Follow
Last day of week 4 and the girls are looking well, growing and thickening up well. No problems so far. If you're following along make sure you follow my Instagram and YouTube for more in depth details on my grows. Both links can be found on my profile. Instagram.com/flavoursuk_v3
Likes
29
Share


@TheCannaProphet
Follow
----------------------------------
~SEEDSMAN PEYOTE FORUM~
----------------------------------
Characteristics
BREEDER/BRAND: Seedsman
GENETICS: GSC Forum Cut x Peyote Purple
VARIETY: Indica / Sativa
FLOWERING TYPE: Photoperiod
SEX: Feminized
THC CONTENT: 20%+
GROWS: Indoors, Outdoors
FLOWERING TIME: 65 days
MEDICAL CONDITIONS: Glaucoma, Headaches, Migraines, Stress
MEDICINAL PROPERTIES: Yes
EFFECT: Powerful
__________________________________________________________________________________________________________________________________________________________________________________________________________________________________________________________________________________________________________________________________________________________________________________________________________________________________________________
~🤩This run is part of a Seedsman Seeds sponsored PEYOTE FAMILY COOPERATIVE GROW, I'm also cultivating a Peyote Gorilla and Peyote Zkittles that each have their own diaries.💚~
'Peyote Forum is an Indica-sativa hybrid cross between the legendary taste sensation Forum Cookies, a pheno-type of GSC (Girl Scout Cookies), and the highly potent Peyote Purple cannabis strains. This is a must-have strain for your collection which produces very high THC content..
Forum Cookies is a 75% sativa strain which retains the qualities of the original Girl Scout Cookies while adding extra cerebral sativa effects. Despite the dominance of sativa the buds it produces are very dense and rich in resin-exuding trichomes which glisten against the forest green bud-leaves and orange pistils. Some plants may display purple colors in the buds and smaller leaves at maturity.
While yields aren't enormous they are certainly decent and the sheer quality more than makes up for this fact. Flowering takes 65 days give or take. Flavors are pungent and similar to the original GSC showing a pungent Skunk character with notes of nuts and sweet spices and suggestions of earth and pine. THC production will vary between 19 - 28% depending on conditions, lighting intensity and the skill of the grower. The effect is physically relaxing while offering a cerebral twist which is uplifting, relieving stress while also helping with the symptoms of glaucoma, migraines and headaches.
Peyote Purple, however, is an Indica-dominant strain with 90% Indica genetics. Its ancestry can be traced from a single purple phenotype which was back-crossed for several generations in order to stabilize its qualities. This plant takes 8 - 9 weeks of flowering before it is ready to harvest producing average yields of way-above-average weed. The THC content is very high with plants reaching between 18 - 28%. Its name is attributed to its headiness as this Indica offers some pronounced cerebral effects with a relaxing yet uplifting high which can leave smokers sleepy and somewhat unfocused with heavier use. Therapeutically it is recommended for the treatment of chronic pain, cramps, Insomnia, muscle spasms and stress.
Brought together in Peyote Forum growers can expect some very potent, tasty dank buds with high levels of THC and an uplifting high.'
*description credit to Seedsman Seeds
__________________________________________________________________________________________________________________________________________________________________________________________________________________________________________________________________________________________________________________________________________________________________________________________________________________________________________________
THE SETUP:
~Planted into Jiffy Peat Pellets that were hydrated with de-chlorinated water with SuperThrive added then ph'd to 6.0 @ 80℉
~Grown 100% organic in 10g fabric pots with Mother Earth 70/30 Coco/Perlite medium amended with 2tbs/g of Down To Earth 4-4-4 / 2 cups/g of Earthworm Castings / 1tbs/g of Dr. Earth Flower Girl 3-9-4, 1tbs/g of Dr. Earth Bat Guano, 3/4 cup of Down To Earth Azomite and 1 tsp/g Down To Earth Fish Bone Meal.
~24hr light cycle during Germination / 19/5 light cycle for Vegetation and 12/12 for Flower
~Straight water ph'd @ 6.2-6.8 when needed and weekly Compost Tea's.
__________________________________________________________________________________________________________________________________________________________________________________________________________________________________________________________________________________________________________________________________________________________________________________________________________________________________________________
WEEKLY UPDATES:9/20- 💥BOOM!💥 Week Six of flower is here and my girl's in high gear, stacking her flowers and pumping out trichomes!
Today I watered her with 1.5g de-chlorinated water with 5ml/g of Botanicare CalMag+ added, then ph'd to 6.2 @ 72℉. I turned her pot and plucked a couple of yellow shade leaves...the basic daily maintenance.
9/22- I didn't water her yesterday as she looked great and was 'praying' hard. Today she was given 1.5g of de-chlorinated water which was ph'd to 6.2 @ 72℉ which I gave her through her drip pan (bottom chuggin) and I also gave her pot a turn.
She continues to pile on the trichomes and is stacking weight onto her flowers! She is one healthy beautiful cultivar with flowers forming that will be enormous and she's looking lovelier by the day! 😍
9/24- We're getting close to wrapping up Week Six of flower in a couple of days and she'll be around four more weeks from finishing, with the most exciting weeks yet to come!
I didn't water yesterday and today I went ahead and Top Dressed her with 2 tbsp/g Dr. Earth Flower Girl 3-9-4, 1 tbsp/g Dr. Earth Gold Premium 4-4-4, 1/2 cup Down To Earth Bio-Fish, 1/3 cup Down To Earth High Phosphorus Bat Guano and 2 cups of Worm Castings.
I watered in the Top Dress with 1.5g of de-chlorinated water which was ph'd to 6.2 @ 72℉ and let her enjoy her meal! 😜
9/26- After her heavy watering on the 24th I didn't water yesterday and when I checked her today at 'lights on' and she still had some weight to her pot and her leaves were praying hard so I held off on watering today and will hit her tomorrow with her usual 1.5g watering.
~Thanks for stopping in! Things should be getting a lot more interesting in the coming weeks...Stay lifted and be Blessed! 😎🙏~

Likes
31
Share


@Canna96
Follow
Hey now, I hope everyone is having a great weekend. This week went pretty good for the Strawberry Banana Auto, I did go out of town for 4 days and my PH got too high in my reservoir so that set me back a couple days or so but the plants still look pretty healthy, I did notice a couple rust colored spots on the lower most leaves of this plant. She is topped and I did a light defolilation yesterday and some LST just to try and keep a level canopy. The tomatoes are looking great as well as enjoying the runoff from the cannabis, got my first flowerson them this week. In the tent I am still running the Spectrum X at 60% power in V1 mode which is the veg mode and it is keeping the plants very green, bushy, and with tight internodal spacing. I will continue LST and slowly make the change to flower nutes as soon as the stretch is about over. Thanks for stopping by, Stay Safe and Blaze On!!! 💪
Website: https://medicgrow.com/
https://growdiaries.com/grower/medicgrowled
Likes
2
Share


@DurbanPoison420
Follow
So I am halfway through my first harvest and I'm starting to feel like I may have been impatient! Would appreciate any advice or constructive criticism from any experienced growers out there! Do you think I harvest the rest of my plant now or leave it a while? Any tips/hints on the best way to maximize bud density? Thanks in advance

Processing
Likes
11
Share


@stickygrowz
Follow
was originally going to do scrog, I realised I'm not going to have quite enough room for a full scrog so I'm thinking about some sort of mix between scrog and sog. If anyone has any suggestions and ideas please let me know. Thanks.


Likes
33
Share

@AumShanti
Follow
ॐ
MOBY DICK from BARNEY'S FARM
"Bedroom setup"
5th week of vegetation from 27.10. to 2.11.2025.
Heavy training continues, foundation of plants is done,
a lot of wires included, heavy defoliation and pulling of branches very two days,
There is a 30sec video (10min video but accelerated) so ya can see how they like training :)
All branches are left for now,
let them rest from this week stress, next week is branch selection,
one more week of veg and they will be ready for 12/12
They started to show very strong growth,
also they started to drink 1.5L every two days.
All looking good, nice and healthy,
Take care and much love.
ॐ

Likes
1
Share


@KannaGrowing
Follow
Estamos en la primera semana de vegetativo, ya que a la anterior se la conoce como semana de germinación.
Las plantas empiezan a mostrar las primeras hojas reales por encima de los cotiledones.
Cuidado con que la humedad relativa del aire, no sea demasiado baja, lo ideal sería alrededor de un 65%.
En esta etapa solo regamos suavemente con agua cada 5 días aprox.

Likes
9
Share


@datrobspeoria
Follow
Was a Pleasant experience growing this plant and I would highly recommend for her ease and fast growth for a Indica, Still have more seeds from expert seeds of Banana Ice cream and I am going to grow her next... Ended up with 63 grams from one plant..


