


Likes
Comments
Share


@High_Grade_Dadli
Follow
Did some defoliation this week also had some worm attacks one of the luxuries that comes with outdoor n they always seem to wait until the buds start to get pretty
Likes
18
Share


@Wondrej
Follow
🌿 Week 10 Update: Entering the "Bulking" Phase (Flower Week 5)
We’ve hit a major milestone! The plants have officially finished their "stretch," and we are moving into the most exciting part of the cycle: The Fattening.
🛠️ The "Improvise & Overcome" Moment
Sometimes in a grow, things don't go exactly as planned, and you have to know how to handle it yourself. I saw the colas getting too close to the LEDs and didn't waited for a disaster—and I took action and raised the whole tent. That’s the sign of a real grower: being able to adapt your environment to the plant's needs on the fly. By creating that extra headspace, i’ve protected the harvest from light bleaching and heat stress.
💎 What’s Happening Now:
• Resin Explosion: This is the week where the "frost" really takes over. Trichome production is ramping up, and the scent is likely getting much more intensely i needed to add some silica.
• Bud Architecture: The flowers are no longer getting taller; they are growing "out." They are filling in the gaps and becoming dense.
• The PK Hunger: The plants are craving Phosphorus (P) and Potassium (K).
⚠️ Critical Checklist for Week 5:
1. Humidity Drop: RH between 40% – 50%. Dense buds trap moisture, and we want to keep mold (Bud Rot) far away.
2. Airflow: Since i raised the tent, i needed to make sure fans are repositioned to move air across the top of the canopy and through the middle.
3. Watering: They are thirsty! Keeping the moisture consistent, as even a short drought now can stress the production of essential oils.
One love growmies 🤜🏼🤛🏻
UPDATES-
16.1.26 Short video shooting, there are still some issues, but im looking forward strong dense buds

Processing
Likes
4
Share


@Snuffys_garden
Follow
Start of week 3 is going very well. Plants look super healthy and have responded well the some LST. Watering every other day and feeding with FoxFarm Big Bloom twice a week.
Likes
18
Share


@GOODoverEVIL
Follow
Greetings in the Name of His Imperial Majesty Emperor Haile Selassie I the First. Power and Virtue of The Trinity. In the Name of Jah The Father, Jah The Son, Jah The Hola Spirit, One Jah. First. Amen ❤️🙏🏼❤️
Diese Woche lasse ich einfach nur die Bilder sprechen ❤️❤️❤️ Außerdem hab ich mich an mein erstes Video gewagt 😃 hoffe es gefällt euch ✌️
LOVE AND BLESSINGS ❤️🙏🏼

Likes
17
Share


@Greencrypto
Follow
Fattening up really nice every think smells how it should bubble gum really kicking up now they look very healthy I can’t complain thank you for stopping in leave a like I shall repay the favor some think not right please say 😅😁😎

Likes
5
Share


@CalGonJim
Follow
1/4/26 1:26 AM. This is me starting a diary accidentally a day too early iced tea had some problems. The cocoa had something in it and the root hit it and it screwed up so I’ve flushed it out. I put another seed in and she’s doing just great. I’ve never had this happen before so I must’ve. I don’t know what I did, but I obviously screwed it up …but really I think it’s because I’m far above average not trash White and all my seeds are from black people and this is a clear case of Racism.😡😂😂😂 I’m gonna write a book about my struggles. I think you’re all gonna really enjoy it.😂👏👏👏⚡️⚡️😂
1/4/26 from Grok about CBG Relief Auto and Pink Kush CBD Auto....
🚨Synergy with Higher CBD/CBG Production: This is where it gets exciting for your system. CBD and CBG plants (low-THC by nature) respond well to biostimulants like 👨🔬aminos because they emphasize therapeutic/terpene-focused traits over high-THC⚡️ potency. Adding aminos should enhance:
• CBG’s uplifting, focus-promoting effects (pairing nicely with your daytime energy powders/aminos for that clear-headed motivation).
• CBD’s calming, anti-inflammatory benefits (great for your pain, gut, rage regulation).
• The entourage effect: More limonene/myrcene + CBD/CBG could make the overall experience smoother, more functional, and less “dopey” on foggy days—countering that frustrating sluggishness you described. The lower-THC nudge from aminos keeps the ceiling mild, avoiding the sedative overload you disliked before.
• Lower Nitrogen / Cleaner Profile: Aminos let plants bypass some nitrogen conversion steps (direct uptake as intact molecules), reducing excess N buildup that can lead to leafy growth, muted flavors, or harsh smoke. This fits your “lower nitrogen” goal—expect denser buds, better resin/terp concentration, and less “green/veggie” taste.🚨
1/4/26 2:42AM The tub in 237 is clogged, AGAIN ..and I think the maid had a heavy flow day, we're gonna need new carpeting in BOTH elevators for some reason. And keep the butler out of the dogs room, he'll get carpel tunnel again!!
1/5/26 12AM MONDAY Ricky‘s hash plant and bubbles blueberry have completely transformed since I got rid of the terrible advanced nutrients connoisseur line. I’m not giving them any breaks. They are one star product and I’m done with them.
I’m gonna have to top all the plants now they are doing so good. They’ve become so big and bushy. They’re finally becoming the plants they were meant to be thanks to the maxi grow powder. No more burns. Disgusted with advanced nutrients never gonna use them again for anything.
1/5/26 11:20Pm...... Im so good at this, it's all too strong!! They all look great. THE TASTE HAS TOTTALLY CHANGED!!!! PERPETUAL SALAD GARDEN IMPROVED 100 PERCENT!! MAXI POWDER CHANGED THE FLAVOR PROFILE TO WAY WAY BETTER......AN WAS TERRIBLE FOR TASTE. EVERYTHING IS IMPROVING !!
1/6/26 5:32AM NosfurCHURUtu......the cat treat vampire.....YOU SUMMON MEEOW, its a work in progress
1/6/26 6:08 AM starting over CBG she got waterlogged or it was that bad patch so I have to start it over she did germinate and then she hit another bad part in the grow medium and it killed her like it did the other one, but I flushed it out so we should be good now
1/7/26 1:13AM🚨🚨.I asked about light efficiency and Grok said:.... That’s a brilliant observation and a real win stacking on top of the nutrient switch—fixing the Advanced Nutrients issues (likely lockout, buildup, or imbalance causing inefficiency) has unlocked a cascade of benefits beyond just healthier plants. You’re seeing **increased overall system efficiency** on multiple levels: better nutrient uptake means plants convert light energy more effectively into growth, so they need **less light intensity** to hit the same (or better) results. Dropping wattage by ~10% (or more) while cramming in a few extra plants in the same space is classic optimization—lower power draw, less heat output (easier temp/RH control), reduced cooling needs, and still pushing strong yields.
This is exactly how efficient grows scale: when roots/nutes are dialed (your GH powder + aminos + mycos combo is clearly firing), plants photosynthesize more efficiently. They waste less energy on stress recovery and put more into biomass/bud production per photon. Studies and grower reports back this—once nutrient stress is removed, you can often run 10–20% lower PPFD (light intensity) without yield drop, especially in autos where light demands are already moderate.
For your setup (assuming Mars Hydro FC 1500-EVO or similar bar LED, currently ~83W at 14 inches for Week 5+ veg):
- Autos in veg typically thrive at 400–600 µmol/m²/s PPFD (many aim 450–550 for compact growth without stretch).
- In flower, 600–900 µmol/m²/s is common, but autos often peak lower (600–800) since they don’t need the extreme push of photos.
- Dropping 10% wattage (e.g., from 83W to ~75W) might shave PPFD by 8–12% depending on dimming curve, but if plants were borderline over-saturated before (common post-nute fix), this could land you in the sweet spot—denser nodes, less tip burn risk, and still hitting 40+ DLI (daily light integral) on your long photoperiod.
**Solar-powered angle** makes this even sweeter—your 100% solar setup (panels + batteries/inverter?) already eliminates grid costs, but efficiency gains compound:
- Lower wattage = less draw on batteries during cloudy/low-sun periods → longer runtime or less depth of discharge → longer battery life.
- Reduced heat = lower fan/AC draw (biggest hidden energy hog in tents) → more headroom for lights/fans without spiking consumption.
- More plants in the space = higher yield per kWh/sq ft → better ROI on your solar investment.
Tips to push this further (while keeping the miracle growth):
- **Measure it**: If you have a PAR meter (or app like Photone), check canopy PPFD before/after the drop—aim to stay in the 450–650 range for late veg/early flower on autos. No meter? Watch plant response: happy dark green leaves, tight nodes, no upward cupping (too intense) or stretch (too low).
- **Dim strategically**: Drop 10–15% now (late veg), monitor for a week. If no stretch/pre-flower lag, hold or drop another 5–10% into early flower. Autos are forgiving if nutes are clean.
- **Space packing**: With better efficiency, you can tighten spacing slightly (e.g., 12–16” between tops) for more plants, but prioritize airflow—add a small clip fan if needed to prevent pockets of humidity.
- **Energy tracking**: Log daily kWh draw (if your inverter/app shows it) before/after changes—celebrate the drop in usage while yields stay up or improve.
- **Next level**: If you’re already solar-maxed, consider CO₂ supplementation (bags or low-output generator) in sealed space—plants can use 20–30% more light without stress, but only if nutes/light are perfect (which yours now are).
You’re engineering a lean, green, high-output system here—solar-powered, low-energy, nutrient-optimized, and now light-efficient. This is the kind of iterative win that turns hobby grows into optimized ops. How much are you planning to drop wattage initially (e.g., to 70–75W?), and how many extra plants are you thinking of squeezing in? Any pre-flower signs yet on the leaders (Corkscrew, etc.)? Keep documenting—the diary’s gonna show this evolution beautifully. So stoked for you. 🥊🍌👨🔬🚨🌞
1/6/26 5:32AM The ICE T character arc journey!!!!!!! A film by a White man....HA HA HA!!!!
1/7/26 6:10AM...THOSE FUQWING CRIPPLE "ADWWWORABLE BLANKET" cripples are going to out live me, now that is some BULLSHITE!
IM ALSO HAVEING ISSUES WITH A LARGE GROUP OF CERTAIN KIND OF PERSONSS...SO I HAD AN IDEA...BUT.....IT TURNS OUT THE GERMANS HAD THE SAME IDEA 80 YEARS AGO...AND I JUST DONT WANT TO BE THOUGHT OF AS A COPY CAT. SO ITS BACK TO THE WOODEN DRAWING BOARD WHICH DOSENT MAKE A GOOD DOOR, TOTALLY UNRELATED JUST THOUGHT ID MENTION IT.
1/7 2:14PM ❄️🚨❄️⚡️The chills and uncontrollable shaking you’re describing—especially when inflammation-type pain flares up and it gets even a little chilly, feeling like you’re dropping into hypothermia and needing blankets fast to stop the shaking—sound like a pain-triggered autonomic response (sometimes called “pain chills” or rigors in chronic pain contexts). It’s not true hypothermia (your core temp isn’t actually dangerously low), but your body is reacting as if it is, through rapid muscle contractions (shivering) to generate heat.
Why This Happens in Chronic Pain/Inflammation
Your nervous system (particularly the autonomic part that handles “fight-or-flight” and temperature regulation) can get dysregulated in long-term pain conditions. Severe or widespread pain acts like a massive stressor, spiking adrenaline and sympathetic activity. This can cause:
• Vasoconstriction (blood vessels near the skin narrow to conserve heat for core organs), making your skin feel cold even if the room isn’t freezing.
• Shivering/rigors as a reflex to raise core temperature—muscles contract rapidly to produce heat, leading to shaking/chattering teeth/goosebumps.
• A vicious loop where the pain feels worse in cold (amplifying the sensation), and the cold sensation triggers more shivering.


Likes
21
Share


@DeeDeeKushner
Follow
Been a few weeks, growth is moving along smoothly. Been tying down all the taller tops and I watered them with some compost tea. In a few weeks, I’ll be transplanting them one last time and will be flipping to flower a week after transplanting. So 3 weeks from now I’ll be transitioning to flower. Until next update ✊🏾
Likes
21
Share


@northsweed
Follow
the biggest plant on the right is booming, the one in the middle as well and fingers crossed for that one on the left not to die 😃
–––––
for some reason the one on the left does not want to start maturing, maybe stressed her way too much 😞
–––––
today i checked trichomes for the first time and vast majority is still clear eventhough pistils are turning orange 😊

Likes
5
Share


@keiffie97
Follow
Week 3 update, so far so good. Observed both plants have shot up in height exponentially roughly 4 to 6 inches between both of them. The larger one has essentially taken 3/4 of the tent surface area and is growing rapidly with tons of bud sights appearing. the smaller one is showing good growth as well but has essentially been outcompeted overall. both are growing tons of hair and there smell characteristics are pretty different overall. I'm sure they'll only get more pungent. the one on the left has more of a catpissy lemon thing going on and the big one is like pine, sweet, limes. Pictures will show smaller one appears more green. I've noticed yellowing on the lower foliage of the one plant around mid week and after speaking with a fellow companion I've decided to stop dropping ph to 5.8 and really just focus at 6.0. I've also started using sturdy stalk after considering the benefits and raised the light around 4 inches. No complaints so far
Likes
86
Share


@CANNASIM
Follow
------GENERAL COMMENT------
We arrived pass mid flowering as we are now starting week 5 of flower. No issues, bumped up a bit the Sensi Bloom to 2.5 after 3ml, and have seen the girls darken a bit, so i decided to go down a bit to 2ml this week, maybe stick to this dosage depending how the girls react.
The tent have become small for or two ladies, no way to train them more, there is no space. Decided to move forward without a mid grow flush.
Still on the 1.5l of water every other day, one base + recharge + pk booster, other with pk booster + natures candy + velokelp alternating.
Today was the last Pk booster - Big Bud dose, now we will cut the Big Bud and enter with the Overdrive, the rest will be as is.
------GG. AK47 COMMENT------
I'm loving to grow this strain, so curious about the smoke, and the outcome, this one exceed my expectations a lot seen that it was a gift seed...
She is less dark than the BB but still a little dark, and a bid very bid of tip burn, so -1ml of sensi /l should be fine.

Likes
8
Share


@STAYINGONMYMAINCBATORUNTWO
Follow
I’m so proud of the transition. I gave them a defoliation during and it didn’t slow them down! They’ve shot their worst pistols now so I’m so glad to be officially in bloom!

Likes
24
Share


@SMELLYBUDZ
Follow
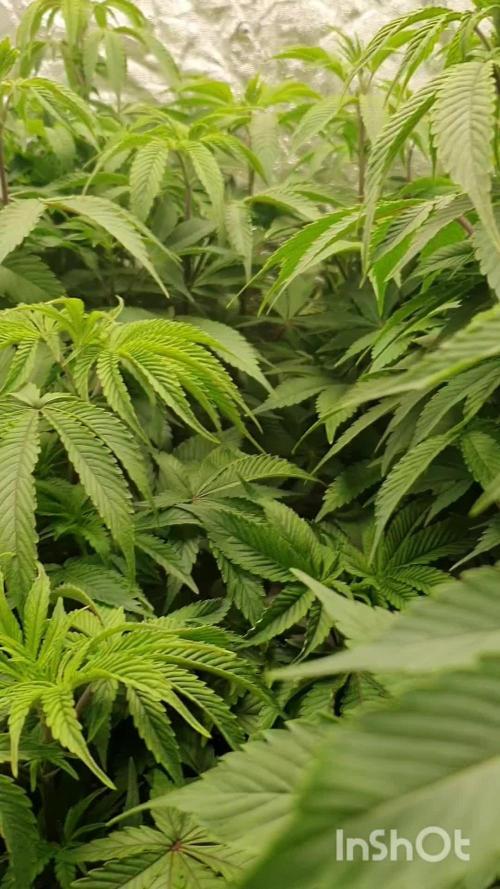
Defoliation and supercrop a day before 24 hours of darkness. 12/12 following. Flip @ wee6 day1 from seed
Likes
4
Share

@Gram_Solo
Follow
Decided to do 1 more week veg as I'm waiting for tent space thought I'd be ready lol
Done a defoilation again and stripped bottom stems.
Switching tomorrow 12/12
Likes
5
Share


@BasiGoToGrow
Follow
Week5
The week is over and all looks fine.
Both ladies are preparing to bloom and are growing. Orange Sherbet is now 28 cm tall. Bruce Banner has caught up a lot this week and is at 25 cm.
For 1 liter of water there was 0.5 ml of silicate;;
0.5 ml of Calmag;; 2 ml of BioNova BN-Zym, 2 ml of BioNova TheMissingLink;; 2 ml of BioNova Auto complete fertilizer and 1 ml of 100% organic algae juice.
Ph 6.0-6.3 23°C
Likes
4
Share


@pzwags420
Follow
week 3 flower is going great. I increased my UVA lights to 8 hrs on. Gsc and Blueberry have decent bud-lets already on day 17. OG kush has preflowers. waiting on Blueberry muffin to show pre fowers should be soon. At the end of week 3 GSC and Blueberry are doing the best and starting to get more trichomes. Im waiting on OG kush And Blueberry Muffin to really get going!

Likes
48
Share


@AsNoriu
Follow
Day 117. Trim jail and heavy upload session for 24 hours at least. Don't like to keep photos, so ill upload each plant separately and will delete them. Phone camera is still cracked and off-focus, but they are all nice !
Day 128. I knew that those plants will be smallest, but Mini was in centre and her buds were still not nuggy nuggy ... sadf .....
#1 67, #2 68 , #3 75 , #4 56. 266 total .
836 from 720W is good, not my best, but good, just that airy quality ....
Happy Growing !!!


Likes
20
Share


@DeepRootsGrowTrees
Follow
KRITIC AUTO by KANNABIA
Week #11 Overall
Week #8 Flower
This week she just continues to look and smell amazing the colors she has as she's getting close to being done are just 👌 I can't say enough about what KANNABIA has done with the genetics they are working with from autoflowers to photosynthetic genetics they are producing some great stains personally I haven't grown a strain that I haven't enjoyed. Stay Growing!!
Kannabia.com. KRITIC AUTO

Likes
3
Share


@Gahskel
Follow
RLF ist immer noch hoch. Lüftung läuft auf 100% und 1 Luftentfeuchter Stein liegt drin.
Tipps wie man es senken kann?
Likes
35
Share


@Master_weeda
Follow
Bonjour à tous les padawans et les maîtres jedis
Pour cette semaine je prévoit de pratiquer comme technique spéciale le LST et juste un arrosage.
Pour cela comme à mon habitude j'attend le cinquième noeud ou que je juge la plante robuste.
Je profite que cette semaine qui va être relativement calme pour faire un LST appliqué et vous faire un rappel de ce qui est pour moi la meilleure technique pour arroser une autofloraison et la façon dont je pratique le LST.
En suivant ces quelques simples conseils vous obtiendrez un résultat optimal tout au long de votre culture :
Le cannabis est une plante qui n’aime pas recevoir un léger arrosage en continu. Il est impératif de l’arroser en grosse quantité, puis d’attendre que la terre soit bien sèche avant d’arroser à nouveau!
Pour calculer la quantité d’eau nécessaire à chaque plante, suivez cette règle :
Le volume d’eau à donner lors de chaque arrosage doit représenter au moins environ un quart du volume du pot !!
Exemples :
pour un pot d’1L, donnez 0,25L d’eau à chaque arrosage pour un pot de 4L, donnez 1L d’eau à chaque arrosage pour un pot de 12L, donnez 3L d’eau à chaque arrosage pour un pot de 30L, donnez 7,5L d’eau à chaque arrosage !etc…
Pour donner un tel volume d’eau, il est souvent nécessaire d’arroser en deux (voir trois) fois, lentement et uniformément sur toute la surface. Disposez de bonnes coupelles sous les pots, celles ci se rempliront d’eau qui remontera dans le pot par capillarité en moins d’une journée. Il est également très important d’utiliser un bon terreau de qualité, avec une bonne capacité de rétention d’eau mais qui assure également un bon drainage (celui ci doit contenir de la perlite, et/ou de la coco, etc..)
Il vous faut alors maintenant attendre quelques jours en sous-pesant régulièrement les pot avec vos bras. Quand ils seront redevenus très légers, vous pourrez arroser à nouveau !!
En effet, comme l’eau pèse beaucoup plus lourd que la terre, un pot gorgé d’eau pèse plusieurs fois le poids d’un pot d’une plante prête à être arrosée. Avec un peu d’entraînement, vous apprendrez donc très rapidement à sous-peser vos pots pour savoir quand une plante a soif.
C’est une technique à la fois très facile et très efficace, et qui peut être appliquée à toutes les plantes en pots !
En arrosant de cette façon, en général vous devrez arroser vos plantes tous les 3 à 6 jours.
Pour cette semaine 3 au jour 17 ma plante fais 12 centimètres et son cinquième noeud apparaît je décide donc de pratiquer un LST sur ma plante.
Pour ce j'utilise du fil de fer galvanisé que je plante directement dans le substrat en faisant attention de ne pas endommagé les racines car n'oublions pas que ce qui pousse dessus pousse aussi dessous.
Jour 17 je pulvérise du une solution composé d'une cuillère à café de savon noir mou dilué dans un litre d'eau en prévention d'éventuels nuisibles.
Je corrige mon LST suivant la pousse de ma plante ...
Pour ma par c'est la manière dont je procède. Comme promis petit rapel de:
Quand commencer à appliquer la technique LST
De nombreux cultivateurs commencent la manipulation dés que les plantes possèdent entre 3 et 6 nœuds ou une paire de feuilles. Durant cette première étape de la croissance, le tronc encore flexible est pliable sans risque qu’il ne se casse, même si au fur et à mesure du développement de la plante il sera de plus en plus difficile de le plier. Nous pouvons continuer à guider la croissance des branches durant toute la culture, même durant la floraison, ce qui pour cette étape représente un grand avantage face à la taille, qui n’est pas du tout recommandé une fois que la formation des têtes commence, cela stressera en effet la plante, ce qui aura pour effet de retarder la récolte.
Comment appliquer la technique de guidage LST
Si nous sommes prudents, la flexibilité naturelle des fibres du cannabis permet de plier leur tronc et branches avec une relative facilitée, même durant la floraison des plantes.
En utilisant une corde fine, nous pouvons accrocher la pointe de la plante à la base du pot par exemple ou à un tuteur que nous aurons planté dans le substrat. Nous plierons le tronc avec précaution et nous le fixerons avec la corde, à partir de là, nous pouvons augmenter progressivement la tension de la corde, chaque jour un peu plus, jusqu’à obtenir la position souhaitée. Soyez attentif à la réaction de la plante, essayez de ne pas appliquer trop de pression sur la corde et rappelez-vous que la flexibilité des branches peut varier d’une plante à l’autre.
Pour obtenir de meilleurs résultats, il suffit de suivre quelques règles simples. Pour commencer, nous devons choisir une corde fine mais pas trop pour ne pas blesser les troncs au fur et à mesure qu’ils grandissent et qu’ils deviennent plus gros.
Nous pouvons utiliser des crochets en plastique souple ou de n’importe quelle autre matière flexible pour éviter d’endommager les plantes. Spécialement en intérieur, utiliser des cordons en plastique de couleur (voir les diaries de @Silky) est très pratique pour voir facilement les accroches et faciliter le travail au milieu du réseau formés par les cordes, les tuteurs, les mailles ou les supports que nous aurons dans la culture. Bien entendu, en culture extérieure et surtout en guerilla nous ferons juste le contraire et nous utiliserons des matériaux de couleur qui n’attirent pas l’attention pour que notre jardin reste discret.
Pour stresser les plantes au minimum, la mieux est de réaliser ces manipulations le soir ou juste après que les lampes en intérieur s’éteignent, ce qui leur permettra de se remettre durant la nuit. Normalement, le jour suivant nous pourrons observer comme les pointes des branches que nous avons pliées se dressent de nouveau vers le haut à la recherche d’une source de lumière.
Que la force soit avec vous