
Likes
Comments
Share


@I_Identify_As_A_Dan
Follow
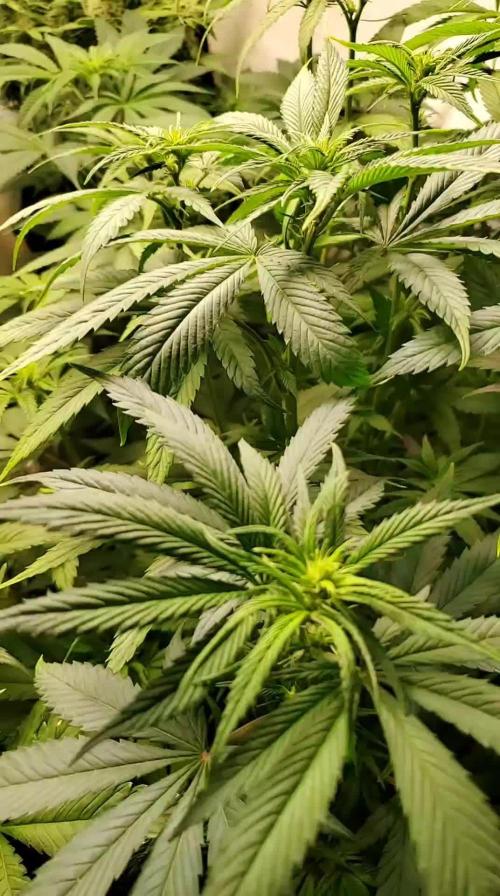
Day 70...
Shes actually not changed very much from last week, was thinking of harvesting her but dont want to jump the gun😂
Going to start feeding her Cake from crop salt likely in 2 days time.
Still almost no odour off her :(

Likes
25
Share


@XperencdGmanXG
Follow
finally they are in flower! Yay final foliar spray applied. They are still smelling like chocolate and peanut butter. Did not get 1 drop of rain this week. It is getting so frustrating plants are 1/4 what they should be this year.


Processing
Likes
6
Share


@LeylaGrowFantasy
Follow
She Is a beautiful babyyy. Growing so fast, and She love lst and topping. I think, She will give me some beautiful flowers 😍

Likes
3
Share


@Chubbs
Follow
420Fastbuds-Greenhouse Grow 2025
The feminized strains RainbowMelon, GorillaMelon, LemonPaya, PapayaSherbet, LemonMandarin, the FastFlowering GG4/Sherbet from Fastbuds are doing amazing for there first full week in the greenhouse. The heat in SoCal is warming up with temps in the low 90's in the daytime and 60's for nighttime. Over all they're starting to reach for the stars after being topped. Besides a couple of yellow leafs I snipped at the soil level, I'm seeing growth almost daily. I'll start feeding this week Grow A & B as well as Calmag from AthenaBlendedLine. Since being transplanted into the 5gal fabric pots they've only got well water.
Happy Growing

Likes
252
Share


@Tropicannibis_Todd
Follow
Well folks we chopped the Last of the Strawberry Blast 😁 The Strawberry Banana 🍌
Strawberry Blast Series 🍓 🍓 🍓 🍓 was a real blast , ive now done 5 Strawberry Cultivars and I'm extremely happy with all the results 😀 Killer Stuff 😀
I want to thank all my growmies for stopping in and showing your support 🙏 it's been much appreciated 🙏
Well my friends that's it for me for awhile😌
So until next time my friends 👉 Happy Growing and of course 🙂 Happy Smoking ........ Later Growmies 👊👊 be well 👌
FC4800 from MarsHydro Lights being readjusted and chart updated .........I've added a RU45 to the mix
www.marshydro.ca
👉I am using Agrogardens for nutrients for my grows and welcome anyone to give them a try .👈
👉 www.agrogardens.com 👈
Agrogardens Cal MAG
Agrogardens Grow A B
Agrogardens Bloom A B
Agrogardens Bud Booster
Agrogardens PK13/14
I GOT MULTIPLE DIARIES ON THE GO 😱 please check them out 😎
👉THANKS FOR TAKING THE TIME TO GO OVER MY DIARIES 👈
Would you like to hang with the growdiary community 👉 https://discord.gg/gr4cHGDpdb 👈

Processing
Likes
14
Share


@goeser
Follow
08.11.2020 | Finally it looks like the ladies are starting to grow
_________
10.11.2020
Maybe a bit to „early“ but because they are autos i prefer them to be as early as possible in the big pots. 11Liter pots.
______________
14.11.2020
girls starting to grow nice. also started with biobizz bio grow 2ml/l.

Processing
Likes
1
Share


@DocChronic420
Follow
I hope you guys enjoy the videos I have been putting together. You can also find me on YouTube.
Likes
2
Share


@WeedNerd_DWC
Follow
on week 6-7 nute recipe since w5, 950w main and undercanopy lights + 192w of lil sidelights. smelling nice now
Likes
43
Share


@Ju_Bps
Follow
Hello my friend,
Plant is ending, I've checked a bit in late the trychromes, as we can see on the movie plant is almost ready to harvest,
But I'm just flushing few days, I'm in late, so I'll check trychromes all the days, and I'll try to wait one week to harvest,
I like harvest when 75/25 milky/amber.
Next week, will be the harvest 😃😃.
See you next week for the result,
Have a good week


Likes
23
Share


@Athos_GD
Follow
D20. I got rid of the plant in front right. The plant wasn’t growing fast or getting much light because the other two plants stretched a lot. I am actually running out of room and had to already lower my tray.


Likes
1
Share


@CaliZA
Follow
This lady has gone through many changes this week.. Firstly I tightened the scrog net and she was stripped of her fan leaves and the lower future bud sites have reacted well to the light. She has grown immensely in the last 2 weeks and I have now stopped tucking her under the net. She is starting to shoot out her Pistils and beginning to form tricomes on her leaves. Exited too see what she does this coming week!!!! =D

Likes
7
Share


@CanadianFillmore
Follow
Week 8, the last feed! Defoliated to let more air flow and light penetrate down into the lowers of the plant. Bud's are insanely sticky, plant is covered in frost, the pics don't do it justice.

Likes
8
Share


@THC_Hazeman
Follow
Day 22
Yo I'm expecting big growth next week, tucked some huge fan leaves under the new nodes, as advised from a question.
Temperature sweet 25.5°C all day.
Need more humidity though cause it drops at 30%.
Day 23
Started using LST. Trying to spread the new branches so they all get the light they need.
Temperature 25°C/22°C night.
Humidity 40%.
Day 24
Bro has reached 25cm high, so I started bending the top branch.
Temperature 25°C/22°C night.
Humidity 40%.
Day 25
Temperature 26°C day/22°C night.
Humidity 50°C.
Day 26
Temperature 25°C day/22°C night.
Humidity 40%.
Day 27
Still tucking her leaves, so she gets an even canopy. Counting 11 branches.
Temperature 27°C day/24° night.
Humidity 50%.
Day 28
Temperatures 28°C day/24 night.
Humidity 40%.


Likes
51
Share


@felixthegrower
Follow
Well, it was my first diary here, and I'm really happy to had found this amazing community that is so eager to help!
It gave me the opportunity to win the first giveaway in my life 😂 And it was from RQS! These seeds are in my new grow diary, and I really thankful for all the gift received! A special thank to Pol from the RQS staff!
A special thanks to everyone who watched me grow here, and I hope to contribute with the community more and more!