Likes
Comments
Share
100% germination rate, they popped really quick. Threw them in the tent 1st December - Light is currently on ~70% as they would be getting too cold if I get lower. 4.12 : 5/6 broke the surface one Zerberry is missing but will surely follow the next days. 7.12 : all on surface right on track. Stay tuned!
Likes
92
Share
I'm still waiting for the buds to dry so i cant put the numbers :D great experience. Next time i will pay way more attention to the last part of the grow....unfortunately i've been so busy and i coudn't take care of them as i wish. I am absolutely Happy with the results...I'm conscious I've made some mistake and neglect them for a while...but I'm still happy with my first grow...I've got a lot to learn and it's just the beginning. Happy grow to everyone. Thanks to everyone who helped me with many suggestions...and thank you to those who tried to help me but I still did it my way (sometimes doing it good and sometimes doing it wrong). Se you soon Growmies
Processing
Likes
35
Share
@Kingseeds
Follow
-the week of two in bloom and Only was fed with empty water. -the frist defoliation in flowering stage
Likes
8
Share
Everything is going good. Plants a little small. Small buds. Just made a video. It's actually week 9 flower today. They will get chopped at 10 or 11 weeks. Had to harvest flosee x red runtz couple days ago. Really fast finish. She was done at week 8 but I let it ride till 9. Red runtz strains are usually fast.
Likes
1
Share
@JRand
Follow
This is the end of Day five week one of flower. I topped dress with a Gaia Green, 284 power Bloom at the beginning of the week and have been alternating waterings of silica in fish shit
Likes
31
Share
@Ganjin
Follow
☀️ // Day 28 🌱 Damn, this plant made unreal progress in the last week. Kinda ridiculous, considering her rough start. I topped her last thursday, on day 24 of veg. She responded very, very well with an instant boost of the side branches. Her illness is also gone, all leafs are looking more healthy than I have ever seen in person. Now the soil seems to have stabilized itself and the BioTabs nutrients are kicking in. Beautiful to look at. Her fan leafs are also the biggest ones ever for me and with no signs of any nutrient related stress. I still removed them to boost light penetration to the side branches. This time it really broke my heart tho, because they were just the most beautiful leafs ever. Really loved the last week and I am excited again for the future of this beautiful plant. This time, I gave her 2 more branches. So I topped one node higher and try to lollipop pretty nicely to just have 8 main branches with no more sides what so ever. Just 8 branches of big buds, that's the goal. I watered her with another 2L on day 24, too. But she hasn't gotten anything since then because I pre-watered her on that day. The soil was not dry from the watering on day 22 but I was on vacation for 2 days. I wanted to make sure that she does not dry out. I will wait now one more day and feed her tomorrow, on day 29 with 3L. That makes a total of 5L since last weekly update. 💦 Watering: 5 L with pH = 6.5 💊 Fertilizer: Just water with epsom salt 💡 Light: 450 PPFD at 70%
Likes
19
Share
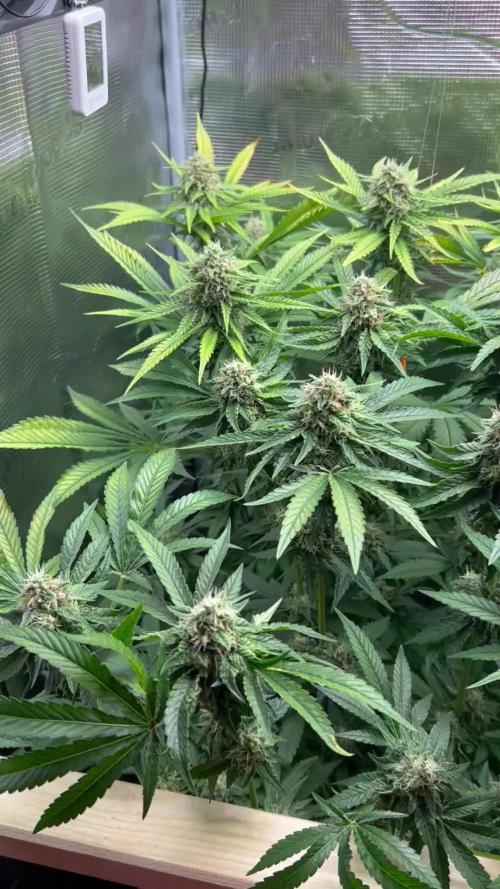
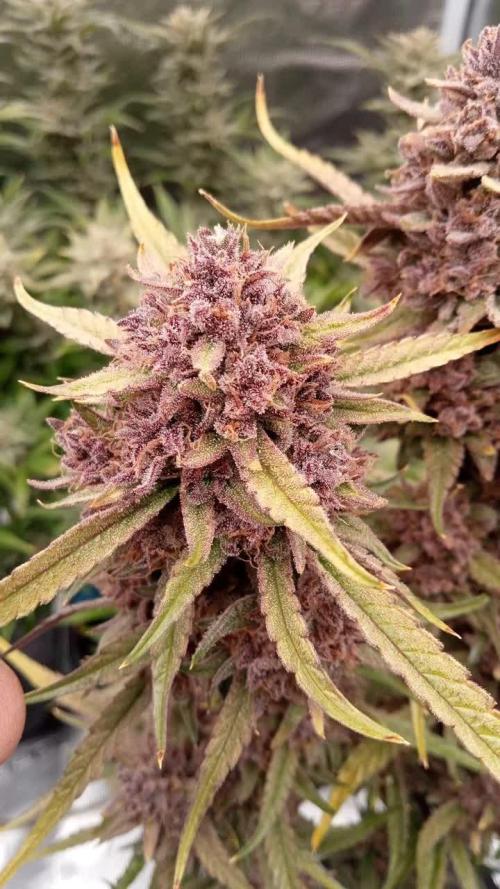
Flush is on. A week or so I reckon. 90% of trichomes are already cloudy. The smell is so complex! The colors amazing! Can’t wait!
Likes
10
Share
@byte_me
Follow
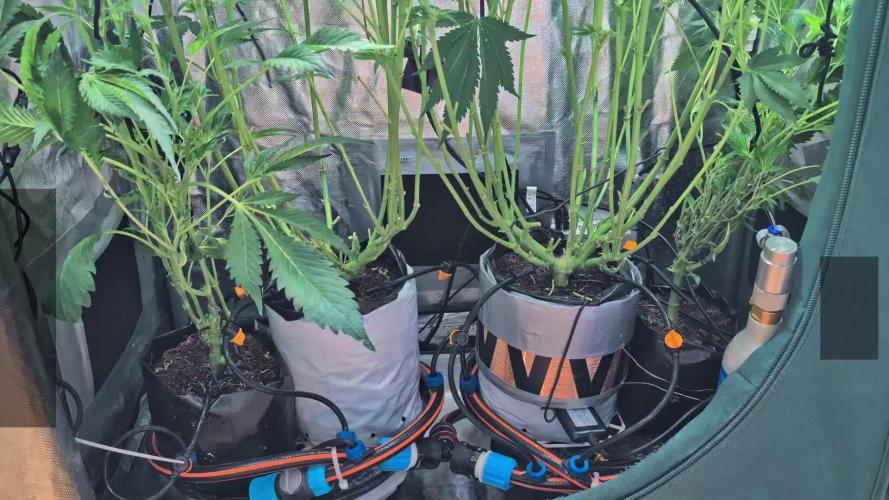
Today marks a significant milestone in the journey of my cannabis plants as I have successfully set up the irrigation system. This new development will ensure an efficient and consistent supply of water for the plants, fostering a conducive environment for their growth. Up until now, I've been diligently top feeding the plants since their germination, laying a solid foundation for their root system. As a result, I anticipate that the plants will be well-equipped to adapt to this change and will continue to flourish. The plants have been thriving spectacularly and have demonstrated a clear preference for being dispersed over a larger surface area. I attribute this positive response to the method of main lining, a technique that has proven to be one of the most straightforward and effective approaches I've tried. The anticipation of seeing the final canopy and colas is immense, and I am eager to see how this technique will enhance the overall yield of my cannabis plants.
Processing
Likes
21
Share
@rhodes68
Follow
8/24 Week 6 Flower Reducing Grow nuets will Increase Bloom as we go. Want a lower EC with lots of runoff for tonight, been pretty high and its going up from here. Looking good what to say? Stretch has started but its very reasonable 8/25 Nuets changed to all Bloom 8ml/gal A&B and Koolbloom 1ml/gal EC at 1500 see if we can keep this until ripening 8/26 Resuming twice a day feeds 8/27 Giving a dose of Kangaroots for their early flower root building this is the last of that. Defoliated lowers removing all under growth Tent is getting pretty full ... maybe they are like goldfish... 8/28 Growing @ 1/2 - 1 inch per day still
Likes
Comments
Share
Chegando ao final desta colheita como comentei na última semana, por conta das pragas. Elas já estão em um nível quase incontrolável e eu já sabia que perderia alguma parte para mofo, já que tomou muita chuva e os buds estão densos. Colhi 71g, descartei talvez uns 2g logo de cara. Ficou secando em condições um pouco ruins, pois os dias muito quentes e úmidos continuaram. No final, a planta ficou bonita e densa, mesmo que pequena. Acabei ficando com 13g secos, sendo que 4g foram para o lixo com mofo. A quantidade foi super baixa, mas fiz um teste no vape e gostei muito. Mesmo com todas as desgraças que ela passou, o produto final ainda ficou bem legal, o que já me motiva para fazer novamente mas agora com um cuidado diferente e no indoor.
Likes
7
Share
3/28/23 Keep finding pm in different places and having to spray it down. Added a few more fans just in case and it’s just everywhere. I think I’ll need to do a full tent clean before the next run to get everything clean. I trellised the ackbar twins. They’re huge and putting out so much bud. Took awhile to get it all right and ended up bending a few branches but I have a feeling it’s gonna be great when it’s finally done. Blueberry got topped and is starting to grow exponentially. Hoping it will have some stretch to it when it gets its chance to be the canopy but I don’t think it’s gonna be the plant that ackbar is because it hasn’t gotten proper light. White widow is flowering as well but it’s so minimal because the plant is also getting no light. Going to let it run its course but it’s just not getting what it needs at the bottom of the canopy. I should’ve known better but putting too many plants in one box but I didn’t know they would get this big.
Likes
3
Share
I think it’s time to have these girls in a bigger pot… so far so good.
Likes
38
Share
Utopia Haze is a rare heavily sativa dominant hybrid (90% sativa/10% indica) strain created through back crossing Brazilian Sativa strains. This tasty little bud took home 1st Place for Best Sativa in the 2008 High Times’ Cannabis Cup and for good reason – with its potent 18-22% average THC level and long lasting cerebral effects, Utopia Haze is one powerhouse smoke. The Utopia Haze high comes on soon after you finish your first toke, hitting you with a strong cerebral lift that infuses you with a sense of hazy relaxation. Type: Feminised/Photoperiod Cultivation: Indoor/Outdoor Flowering Time (days): 70-75 Indoor Yield (g): Up to 650 Feminised Outdoor Harvest Month: October Feminised Outdoor Harvest Month Week: 3rd-4th week Aroma: Citrus, Woody, Pungent, Mint Effect: Cerebral Lift, Hazy Relaxation, Sleepy Welcome Everyone to the Final Entry of my Utopia Haze Grow ! There is so much to discuss ! I have been extremely busy as of late trying to get this Harvest together, but i am happy to have it here for you now ! I Seriously under estimated the amount of time, help from others, and my own necessary skills to pull this off.. and i still kind of screwed it up lol ! But its worth noting i have never actually done this before and trying to document it during....was extremely hard. It is next to impossible to work an iPhone with rubber gloves on ! First I want to discuss everything step by step so before you jump straight into the comments on how the end product is so small in "quantity" Rest assured i am happy with its"quality"...and thats all that matters to me because Life is a journey not a destination! and i have learned so much from this grow that I couldn't be any happy even if i messed some things up :) But at the very least I hope you read through this entry in its entirety with an open mind and focus more on the process, rather than just the outcome! I ran out of Ice & i was only able to wash three times..(normally I've heard you should go sometimes 5-6 washes) Preparation is Key & things will be much better next round :) Photos 1-22 These are pretty self explanatory but for those of you just tuning in now.. this is what happens to a very happy plant when you don't have the necessary tools to monitor key components of growing cannabis.. Ph, as well as EC levels play a very key role in the outcome of your grow lol that being said I was just able to save this plant by purchasing both tools but that doesn't mean the plant didn't suffer because of the prior events.. This was a Huge reason behind me choosing to turn this harvest into what i would consider "Solventless Hash Rosin" from "Ice water extracted Bubble hash". Pictures 23 The idea here is the process of using "fresh Frozen Cannabis" this has been discussed many a time online on such sites as instagram and here on grow diaries as well.. I personally have Never tried the process so i decided to try it out and make a judgement for myself.. Video 24 The Cannabis has now been in the freezer for 72 hours making it very well frozen.. as you can tell i struggled getting it all into the 25u Screen Wash Bag. One thing of note i would do differently is i will de-stem my next batch as i also believe this played a part in the amount of plant matter that escaped through the sieves. Photo/Video's 25-28 The idea here is "ice water Seiving" & especially with the bags that I am using here that are only have screen material on the bottom portion of the bag it is very important to have spaces in-between the screens to allow the water to pass directly through the screens into the bottom bucket with the least amount of resistance.. because the hash is so extremely temperature dependant if it gets warm on the side of the bag.. it will stick there and not make it to the bottom to become use able product.. 29 You do not need to use as much Ice as i used here lol... the idea is to keep everything very cold..i certainly achieved that but at the sacrifice of using so much that i ended up grinding product and producing "contaminants" but in the end they are just plant matter that i would be smoking when i rolled up my joint either way so.. I'm not super disappointed.. But it should be noted that what you want to achieve here is a Layering effect where you have the wash bag between two small layers of ice while the "water current" washes the Trichomes away allowing them to be separated by the screens setup below :) Before Starting the machine you should allow some time (i.e.;10-12minutes pre soak to allow the product to become saturated) before the first cycle. By video 32 I have just ran out of ice lol.. Video 33-34 Here I have a tip for you.. to separate the screens that you sieve through.. cut 5 gallon buckets to stretch them across nice and tight.. it'll make scooping your Bubble that much easier ! i learned this from the many "Frenchy" videos I have watched :) Picture 35 Here in lays the problem for most people.. drying your hash without loosing vast amounts of "Terpenes" whilst also stay ever vigilant against mold ! Thanks to all those videos I've watched on youtube.. id like to think this was one of my most successful parts of this process.. Things to Note; Terpenes start to seriously evaporate at temperatures 68F or 20C you need to stay as cold as possible whilst bringing the Relative Humidity in the space down into the 40-30% to stay away from that nasty mold ! I used my cold storage room in the basement.. with a dehumidifier running to keep the space at 45% RH & staying at a constant 15c. All while spreading the hash as thin as possible across parchment paper, on top of the white screens with a fan moving air across both sides of the paper. Pictures 36-38 These are some macros i took in the middle of my drying session I fell in love with the colour. Yes i know the black spots are plant material but they will get caught when i bag the hash & squish the oil out. Thing to Note; at this stage it is important to ensure you 'micro plane" the hash down as fine as you can whilst staying weary of the temperature... any "chunks" will hold pockets of moisture.. that lead to potential problems..ie; mold ... Picture/Video 39-41 Successfully planed bubble hash ready to be bagged and Squished ! Picture 42 Ive decided to follow Pedro.. from Pedros Grow Room and double bag to be on the safe side so i don't have any blow outs. So thats One 25u bag inside one 160u bag ! :) Pictures 43 This is almost 3 grams of the bubble hash from above, already melting in the bag.. this is where i ran into trouble again lol things started getting to warm in the house and i was only able to get one of the three squish's i did on video :( things started getting sticky. Picture 44 This is basically just a photo of the equipment I'm using; 3x5 LowTemp Cage in the frame I built myself, with a 20Ton bottle jack. Something to note here is this is an older Lowtemp model with only a single heating zone which is which i have it closed here heating Both sides of the press :) As well as the importance of having adequate pressure on your plates.. my rig is very overkill for the size of hash bags..lol Video 45 Here is the lovely press video.. its didn't quite work the way i wanted either lol my directional folding wasn't quite tight enough for a big "drip" :) &the Press was set to 65°c Photo's 46-50 are pretty self explanatory :) I had a blow out.. but still managed to pull an 80% return from the hash once squished...& yes it tasted amazing :) Was it worth it in the end... that could be debated.. for some..i understand..its not your thing, but for those of us that are interested in making our own concentrates.. free from Solvents... I wouldn't make it any other way :) If even ONE of you reading this diary finds it helpful to reference for ANYTHING.....even if its "what not to do" ill consider it a success ! Thanks again for tagging along on this garden adventure.. its been one heck of a journey ! Much Love from B.C. Canada, Until Next time, Cariboo
Likes
5
Share
6/12 day 56 she's finishing pretty quickly. I'm going to push her another week or so and aim for 9 weeks total
Likes
18
Share
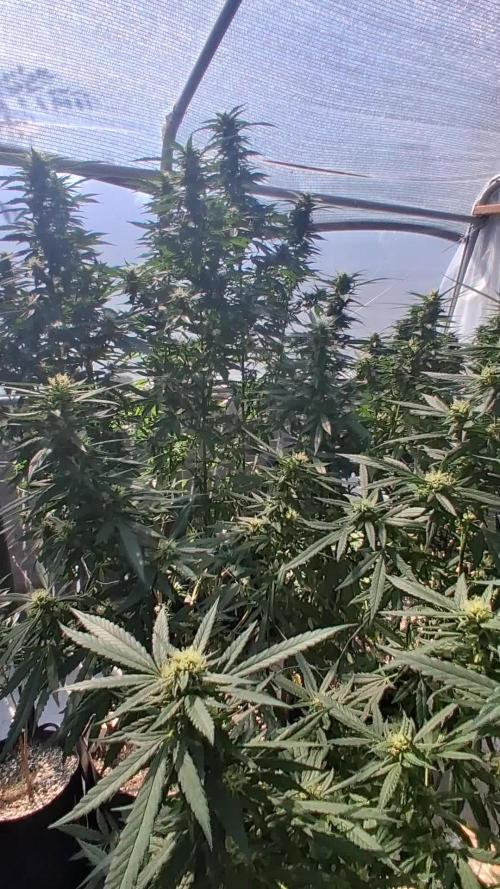
Hella Jelly F49 The strain is finally coming to an end and will be harvested next week. The buds are super heavy and have started bending the branches. Smell is very much grapes and strawberries at this point!
Likes
41
Share
15 Day dry then trimmed using the Trim Bin. Curing with Grove bags, first harvest filled 3, 1/4lb grove bags. *Updating with clone pictures of this pheno in late flower labeled in diary as you look through, If I pop a new seed of this strain Ill start another diary
Processing
Likes
3
Share
Likes
29
Share
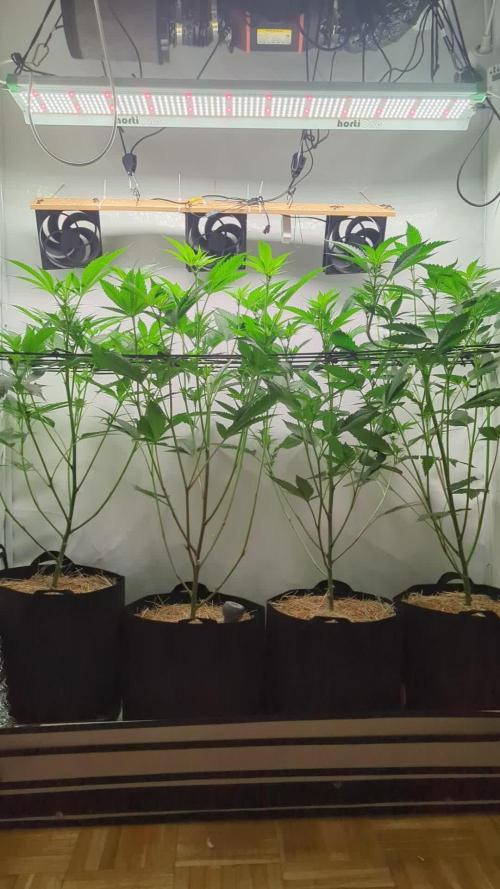
Del 20 al 26 de julio Cambio de sala y todo tira bien (un poco de calor). Ayer quitamos alguna hoja y los brotecillos bajeros más pequeños. Ahora mismo está en un armario de 0.8×0.8 m, 3 tiras led Grow the jungle de 15w, un deshumificador VDL y un ventilador. Tenemos puesto el extractor VRK para la salida y ahora mismo la intraccion es pasiva. En principio la dejaremos ahi una semana más hasta que coja más altura pero bueno, ya se verá. jejeje 21 de julio Realizamos riego en tierra con 1l. 1 vitamax + 2.5 Bud fuel pro + 2 bloom fuel + 0.16 Mammoth P + 0.3 silica power PH : 5.7 Th20 : 24.5°C Ec 1ms 22 de julio A este paso tal vez la semana que viene pasemos a flora, los brotes están entre 10 y 20 cm. Buscamos que el brote más corto este entre los 20 o 25cm para pasar a flora. Las temperaturas siguen bastante altas a pesar de que estamos a unos 28°C de media, esperemos que llueva pronto Jajajaja 23 de julio Riego foliar con tierra de diatomeas como preventivo. 24 de julio Por un lado, se nos han quedado restos blancos de la tierra de diatomeas pero nada grave, la retiramos con un pincel y dejamos que el resto haga su función. Hoy realizamos riego , probamos los pollitos azules Riego con 1,5l aprox de agua + 0,08g de vegetative growth booster de grotek. PH 5,6 EC 0,2ms Th20: 23,5°C Dicen que estos polvos tiran muy bien, veremos que tal. 26 de julio Hoy ponemos el quemador de azufre a funcionar por unas 5h como preventivo. Seguimos en las mismas de siempre, quería pasarla a florecer mañana pero visto lo visto le daremos una ulimta semana para que obtener un buen tamaño. Eliminamos algunos sumideros y hacemos un riego foliar con Delta nueve usando 4,5ml•l. Temperaturas sobre los 27°C y humedades entre 55/65% Hemos visto algunas marcas de carencia de calcio Asique esta semana iremos subiendo los nutrientes.