The Grow Awards 2026 🏆 


Likes
Comments
Share
@XanHalen
Follow
Dec 12:
Growth has been good, leafs started yellowing as I tried a regular watering as opposed to a feed, and they did not take well to it. I’ve read that it’s good to incorporate waterings between feeds, but 24hr later noticed a bit of yellowing on the lower section, 48hr post watering even more yellowing.
Dec 18:
Going with feed only and yellowing has halted, stretching has officially begun. No adverse effects from the short term nitrogen deficiency (that’s what I narrowed it down to). Playing with budsites to maintain an even canopy, and as soon as I see stretching halt, and fattening begin, I will up the bloom nutes.
Dec 20:

Likes
23
Share
@Chi_K24
Follow
This strain of Kings kush is a smelly one, I still can put my finger on the terp profile yet. Almost a kushy herby dank is all I can describe atm.
Growing these plants, I would suggest pruning every second node once you get her into flower since the bugs tend to push up against each other and may cause bud rot. Say ontop of defoliation and try to qork on them on a daily basis rather than lolipoping.
Another key thing is to keep rH in range during flower, I will recomend to set it to 40-50rh in flower. Also if you are growing outdoors, Be sure to cover them up during rain when in flowering, I uses a transparent tarp for the last 5 weeks of flower. Save my plants from 9 huge rain events during the last 5 weeks, my plants would of died from br.
This strain had some decent cold resistance also! She stay alive with with few events of temps getting down to 4 deg c.
Likes
44
Share
@Buffynuffy
Follow
I’m actually Super happy they sprouted on the 1st it just makes keeping track of what day your on so much smoother l think, but I think one was having a hard time getting the shell
Off so I helped just I tiny bit!

Likes
Comments
Share
@MumboJump
Follow
They now geht 4l of water every 2 days. The left Lemon Og Candy has a very heavy citrus flavor and the right one more Like Candy. The left one has more orange/red pistils than the right one


Processing
Likes
1
Share
@Greenzfingerz
Follow
Looking ok stretched alot so had to add some caines to support the buds. Done quite alot of defolatin as ther were just many leaves covering bud sites and only using 1 600w so have spaced closer together for more light. Still feeding them doff tomatoe feed and had no signs stress. Goin to add some pk next feed.Had some fkin heat so plants have alittle heat burn so had to higher light alittle also alittle wind burn Owell updates to follow
Likes
14
Share
@ScouseCityLX
Follow
Apologies that this took me so long to update!
This harvest was probably my second favorite, after my Choc Mint OG. Even tho the yeild was low due to only having 1 plant after a season on downs.

Likes
5
Share
@LeedsCityFarmz
Follow
Plants exploded this week once put into the Scrog. All tops topped once this week to help promote all tops below the main canopy to catch up with the rest.
Likes
44
Share
@Zorachus
Follow
Finally, 25 weeks i believe...
Mold, mildew, bud rot, rain, humidity, crazy wind, frost.
Somehow these girls turned out just fine and I am so proud of the end result. I am late posting, everything is pretty much all cured up and ready to smoke. Just finished making some stocking-stuffer jars for friends and family for Christmas.
It was interesting to see the different phenotypes from each plant. One was named Average Girl, medium size, medium height. Then there was Big Bitch. She was the tallest and had the skinniest nugs. Next was Dolly.. She had the fattest cones of the 4.. a little shorter than Average Girl. And last was Runt... She was about 2 weeks behind her sisters and about a foot shorter, but she did not get any mold or mildew, and her buds were ginormous. I let her go an extra 2-3 weeks later than her sisters, bringing her into the garage every night at 7 pm, and then waking up at 7 am to put her outside.
By far, my favorite plant was Runty. She finished up so nice.
Overall smell is Kushy blueberry diesel cat piss with a hint of citrus.
Wouldn't grow this strain again just because it did not handle the weather well, and I like a kushier final product, on the taste and nose.
That being said, I am a very happy guy right now.
Over and out.

Likes
6
Share
@StarSkream
Follow
Week 1 24 hours ethos popped and began to stretch
Temp 76 humidity domes on top 5 of 5 out going directly into pots and 24 hour lighting on day 3! gonna run 24/7 for 30 then switch over hopefully. Nothing added but FishShit and rootdrench to pop

Likes
19
Share
@adam_pawloski87
Follow
Let’s go day 72 from seed!!! Another great week it’s been , 2 Ogreberrys an brucy b been flushing for a week, an the 3 others will continue to get there normal feed of nutrients, they are just not quite ready so they will start getting flushed around next week!! Sweet sweet smell of Grapes And gooey frosty nugs is all I can really say, photos do no justice, some of the craziest fruitiest smelling buds I’ve ever had, Real High quality meds !! Hope you all enjoy an have an amazing productive day as well as a great week!! Peace love an positive vibes to all y’all Cheers 😶🌫️💨💨💨💨💨🤙🏻If there’s any questions, please ask!! 💚🙏🏻💯

Likes
12
Share
@cboyaki
Follow
Another great strain by fastbuds my favourite so far , the flower structure the look the colours and the smell what more could you ask for ! I’m sure it’s going to taste amazing if the smell is Anything to go by ! And the trichromes glistening oh Lord
Can’t wait for the dryNcure to smoke this bad boy
Sorry for lack of updates life’s crazy atm wasn’t able to weigh it wet I will update once dried maybe a couple Zs I’d say
Couldn’t upload more then 3 kept on crashing


Likes
107
Share
@Afterglow
Follow
Ну вот и закончился наш короткий путь выращивания сатива-доминантного сорта. К сожалению, размер бокса не позволил полноценно включить лампу, так как растение сильно вытянулось и стало получать световые ожоги, плюс еще сыграл недостаток кальция. Изначально хотел 8 больших, толстых и симметричных колл, но пришлось гнуть дополнительно. На фотографии видно, что все ветки закручены по спирали - это пытался решить проблему сильно низкого освещения. Давно не растил сативный сорт и забыл, что в начале цветения растение ну очень сильно вытягивается. В итоге, из-за LST во время цветения, нижние этажи тоже вытянулись и вместо 8 колл получилось в 3 раза больше. Все-таки мне мой метод больше нравится, чем ML, так как времени уходить меньше, стресса меньше, а результат такой же.
Снял 607 грамм больших веток и около 100 грам всякой мелочевки.
Немножечко пересушил. Так бы вышло грамм 200 чистых шишек. Придется чуток их увлажнить.
Вцелом очень доволен собой и результатом.
Спасибо что заглянули и порадовались вместе со мной.


Likes
5
Share
@Mr_nugs_lover_David
Follow
She's looking very healthy and ready to give all of her, looks beautiful,let's see how she performs the rest of the way! 💚🌱💎🔝

Likes
28
Share
@Brujha77
Follow
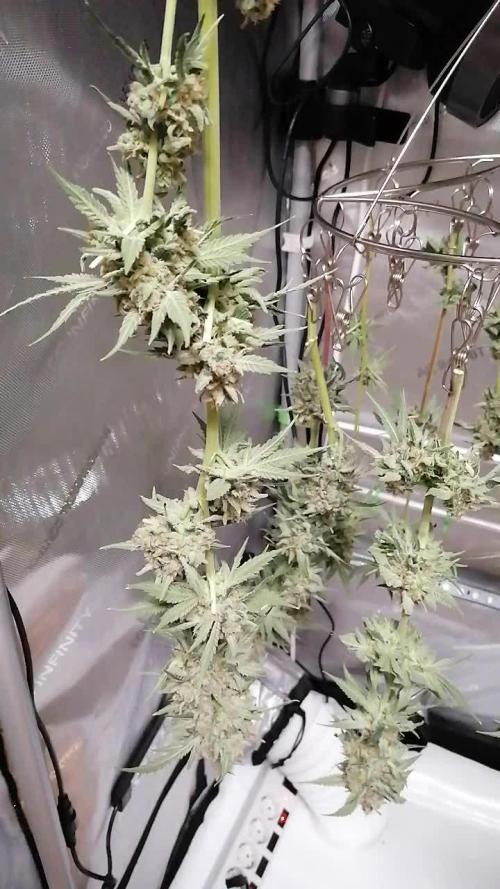
Sooo,
Die beiden haben es nun auch geschafft. Punktlandung, genau 9 Wochen Blüte.
Muss sagen der Run war absolut entspannt. Gerade in Verbindung mit dem Blumat...
Gewogen wurde nicht...
Hängen nun zum Trocknen im Zelt bei ca. 21°C und ca. 48-55% Rlf.
Processing
Likes
6
Share
@mRJ519
Follow
Watering/ feeding every 4 day's... Alternating feed and water... Keeping it simple

Likes
17
Share
@AfroBlooming420
Follow
First medical marijuana grow ever.
I have gardened most of my life but marijuana is a whole different animal. I have organic bone and blood meal and tomato fertilizer (npk 4-3-8) that I was planning on using but my grow tent kit came with BioBizz Indoor Try Pack with Grow, Bloom and Top Max fertilizers. I think I may use my fertilizer on one and BioBizz on another to see which works best.
Wish me luck!

Likes
8
Share
@TheFairyBudMother
Follow
Nice big fan leaves. I am continuing to open the two branches created after topping and defoliate to get more light onto the perpendicular branches. Just watering, mycorrhizae and microbes as I just transplanted. 12” diameter airpots.


