Processing
Likes
Comments
Share
@A1420
Follow
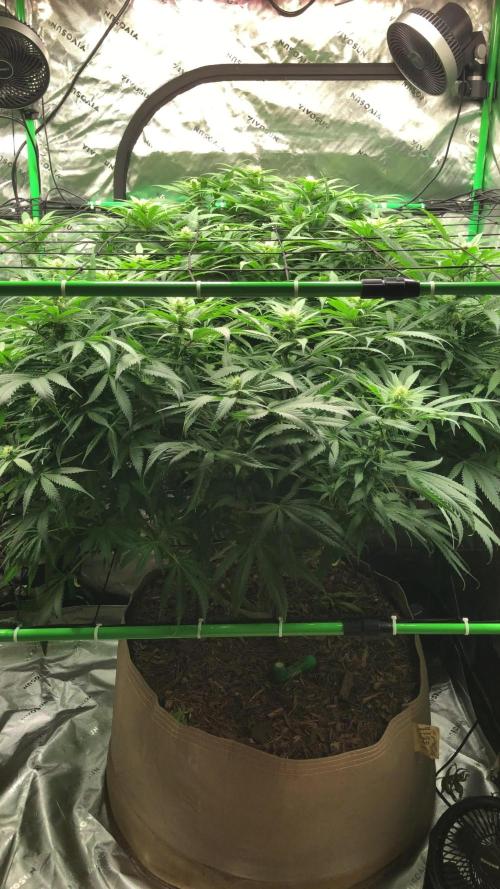
Really bulking out now and look like a lot of these colas will be filled out completely by finish looking at the rate they are growing and the fact they have 4-5 weeks left estimate. Cheesy smell is getting stronger but only within the tent when working in there and disturbing and moving the buds, once zipped up the filter handles everything fine. Crazy trichome production going on so early in flower , these are going to be some very frosty nugs.
Likes
1
Share
Likes
6
Share
@Kannamar
Follow
Well that was a special day, it always make me sad in a way, but this time, I enjoyed the moment a lot. As I wrote in a reply to a comment, things can always be better, and they are with good decisions at the right time. These are the smallest and the biggesr plant, one seed didn't germenated and that's why I had to put a Red Gorilla. Not sure I will try a main mlinning on auto flowering strains any more.... but I think I did it wrong, first I took the one that seemed less strong for the experiment, and having 2 other plants to compete for lights. FIM is definetly a technique I will reuse if needed. It's so nice to have these genetic contrasts, colors, aromas, shapes. Many thanks for all the help you gave, precious. 19/04/2024 lower popcorn buds seems dried already! But still branches don't crack on bends. Will check again on Monday. I finally have received, lately a portable microscope, will be more ususeful next year! But this confirms that lower buds might have need more maturity but did the choice to not over complicate by harvesting in 2 times, my indoor tent is also my drying tent, and I wouldn't have any other place to dry the upper buds separetly while allowing the remaining to harvvest with more maturity. In general I think I might have began the Final part too early. BTW, we smoked the popcorn bud, and it's very promissing, we liked it.
Likes
7
Share
Diese Woche hat sich einiges getan, die Blueberry hatte kurzzeitig starken Kalzium,Mangel der aber gut behoben werden konnte mit Canna Mono Kalzium und zusƤtzlich Bittersalz. Sie ist ein richtiges Monster geworden ā¤ļøā¤ļøā¤ļø Das BewƤsserungssystem arbeitet hervorragend und funktioniert auch zusƤtzlich sehr gut, um gewisse MƤngel auszugleichen, wie zum Beispiel den Kalzium Mangel.
Likes
100
Share
Hi everyone šŸ¤— This week the Orange Sherbert Phenotype # 1 and the Zkittlez Phenotype # 2 were harvested :-) Now the Victory Kush 1 - 3, Zkittlez 1 - 2 and Orange Sherbert 1 are ready to dry. All others except the gelato are rinsing šŸ‘ Orange Sherbert 2 will be harvested next week :-) Until then, I wish everyone a nice weekend, stay healthy and let it grow šŸ€šŸŒ±šŸ‘Œ
Likes
13
Share
Likes
Comments
Share
@Shooey
Follow
Looks classic and easy to grow. Good old skool kush aromas. Just a bit small on the yield. I've seen some indoor diaries on here where guys have got bigger buds but in general it's the same for others too.
Likes
6
Share
I did not grow these two plants to their potential. Hit with high temps as seedlings and fungus gnats in flower, I decided to harvest them probably 7-9 days too early. Nonetheless, after 4-5 days drying, they've been trimmed and jarred and tested. Smoke is very complex and honestly have never smelled such a strong incense like smoke rolling off the pipe before. Very clear and relaxing so far. Delicious grapey spiced beer flavor. Very white ash. So happy to have a larger lady of this being finished properly right now.
Likes
15
Share
Well here she is. My first Barney’s auto and I’m very impressed. Grew well, easy, lollipoped, with a great little yield. Expecting 2.5 oz but happy with 2 due to the short timing. Smells like fruity pebbles cereal. Excited to cure and will update with smoke report
Likes
128
Share
So this was my first ever Tiny Pot šŸ‘ˆ wasn't sure if I could even do it šŸ¤” But instead it was a blast , she grew even better then expected , so much so I may do another šŸ‘ She was a hungry plant the hole cycle, figuring out her feeding became a great learning tool , I gained alot of experience growing this one šŸ˜€ I used rain water the hole grow , to which she required feeding daily , some day twice šŸ‘ˆ šŸ‘‰I added 4 straws in week 4 to help with air flow to the roots and it worked šŸ’Ŗ So check week 4 to see what I did šŸ˜€ šŸ‘‰ Big thanks to all my Growmies out there in GD land šŸ‘ˆ Much appreciated šŸ™ Thanks To MarsHydro for the TS1000 šŸ‘‰I used NutriNPK for nutrients for my grows and welcome anyone to give them a try .šŸ‘ˆ šŸ‘‰ www.nutrinpk.com šŸ‘ˆ NutriNPK Cal MAG 14-0-14šŸ‘‰ Every Week NutriNPK Grow 28-14-14šŸ‘‰ Weeks 2 & 3 NutriNPK Bloom 8-20-30šŸ‘‰ Weeks 4 to 8 NutriNPK Bloom Booster 0-52-34šŸ‘‰ Weeks 4 & 9
Likes
11
Share
Well I've done a final tie down going to give them 5 days to a week and then flip them into flower, they react to training so well and are so flexible, think these are going to be one of the best looking ones the training on the bigger plant looks ace, roll on next week, flower time
Likes
18
Share
@dalemac
Follow
October 1 > Harvest morning. New trick... get up before dawn... cut your plant down and hang her upside down... then go back to bed. Hehe... I like this retirement stuff. We get smarter as we age. šŸ˜Ž I did a fair job of plucking fan leaves before harvest morning so there wasn't that much work for me to do anyway on this girl compared to some of the other monsters she grew up with. Took me only about 90 minutes to complete my normal processing and washing. She developed into a wonderful purple color at the end there. The unique feature of this grow for me was that I never topped this girl. Subsequently she developed a huge single top cola that grew about a foot taller than the rest of the plant. Served as a demonstration of why we top plants in general. Hard for me to imagine what a bunch of these in the wild looks like but this is what WILD looks like. Diary note > I'll come back later and add weights and things. I threw in a weight of 100 grams as a marker to appease the gods. Total guess. ======================================================================== October 7 > Guess I underestimated my yield a tad... love when that happens. 😁 Ended up coming in at 212 grams buds and 181 grams trim. Woohoo. Another growing season officially comes to a close today. šŸ‘ŒāœŠ Initially I wasn't sure I wanted to use the Trimbag on this baby... because she was my last plant to harvest this year and I had plenty of time to hand trim her... and I harbored various possibly incorrect assumptions about the Trimbag originally which I have now shed. More on that later. Let me lay out my personal Trimbag history here as a learning experience for the community... ======================================================================== Originally I won this tool as part of my September 2018 diary winnings... and I looked at it strictly as a tool for fairly large scale growers.. of which I did not consider myself at that time. I grew an amazingingly oversized Durban Poison for a 5 gallon pot and I got lucky I thought. ... Then I took a look at how much herb I processed this summer and I said THANK YOU Trimbag! It saved me more than enough hours of hand trimming to demonstrate it’s usefulness. (October 12) >> Already slowing down in post-harvest mode hehe... so it looks like I did the same thing as last year diary-wise. Now I have another Trimbag on my hands but all I need is another magnet actually (hehe)... the zippers show no signs of sticking up at this point after me throwing about 2-3 pounds of herb threw the mill, and the overall bag has only lightly been used at this point IMHO. I'm a little surprised I lost that magnet and it's not a great sign for the longevity of the embroidery - so to speak, but other than that it's solid construction. And simple. I’ll be contacting Trimbag to see if I can acquire a new magnet and we’ll see how that goes. Back to my expectations... I only used this device on stuff I grew outdoors... of which I had enough... more than twice what I grew last summer - but that was by design. If I was to set out a general rule… I would say that I expect the weight of buds to be roughly equal to the weight of trim. This is AFTER I have thrown away any fan leaves plucked on the morning of harvest which are not saved as trim. I stop plucking when buds start to get ripped up if I don’t. Round 1 >> The first go was the early Amnesia 7 batch (Little Girl flowered early), and honestly, I was unimpressed. I looked at it as maybe I didn't let it dry long enough. I have a ritual of washing all my outdoor grown herb which has generally tended to cause things to dry a tad quicker than what one would expect in the field. I walked away from this initial experience like boy I hope I screwed that up and it works better on round 2. Round 2 >> Cream & Cheese CBD ... I think this girl did more to confuse me than anything else. The buds were not oversized but she seemed to take forever to dry. Part of this is probably attributable to excess humidity in the first few days - a weird week - we actually had some rain which is very unusual. But even after a week of drying I only managed 63g of shake on this batch (via the Trimbag). I'm going WTF? Ahem.... I ended up with 269 grams of buds for my Cream & Cheese. After that 63 g shake by bag I added 165 g trim by hand... and I was seriously wondering why this bag thang existed. Turns out C&C was not a good example.... so don't let the bad things weigh you down. Round 3 >> Next came Northern Lights - and my attitude changed completely. I harvested 319g buds, but the initial run with Trimbag generated 144g trim which I followed with 186g hand trim. NL had very dense buds and large internodal spacing which made trimming EZ. She was a monster… but at the same time I had her trimmed in under 4 hours. Of all the beasties I grew outdoors this summer, this was the largest yield for a single plant - but trimming her was a relative breeze, and it felt like it. I thought I hit the sweet spot for maybe how dry the herb needed to be for the product to work well… but probably only partially correct. Plant structure is significant. Round 4 >> Next came round 2 with Amnesia. As I noted in my diary I knew I was going to end up with a pound of herb on this particular strain so I tried to beat this particular batch up to minimize my hand trimming and see what the effect was. The end result of this was that I generated a smaller amount of buds from the larger sized pot (Little Girl was in a 10 gallon container and generated 235g buds/ 360g trim and Big Girl was in a 15 gallon container that generated 223g buds/ 493g trim). Round 5 >> Next came where we’re at in this here diary…Purple Berry Kush. Now originally I wasn’t sure I wanted to run this baby thru the mill. I THOUGHT that maybe because I hadn’t topped this girl and I didn’t put her in a pot bigger than 7 gallons which put her at a direct disadvantage vs my other outdoor girls that the yield would be substantially smaller, but I’ll be damned she ended up with 212g buds. Very satisfied there… and this stuff smells great when I let her get some air. The key here on trimming for this round was twofold. I let the buds dry longer than I normally would have by a few days… because I had nothing pushing me to make space for reason A… and because stuff was intervening for reason B… golf tournament… Hardly Strictly Bluegrass in SF (Robert Plant was awesome - we share the same birthday and he was 71 in August - I can only hope I’m still rockin’ that hard in 9 years)…you know - stuff. PBK ended up working out the best of all. 212g buds vs 181g trim. That’s the ONLY variant that ended up with more buds than trim. Part of that was how easy PBK was to maintain. I only did ONE major pruning of internal growth - probably later than I should have - I was trying hard to let her grow as wild as possible. But she was very easy to prune fan leaves off when that purple time came. It’s seems clear at this point that indica’s are easier to trim than sativa’s with a Trimbag…. but I’m not sure that’s going to be a revelation to anyone. As far as I’m concerned, anything that grows with an inter-nodal spacing that allows you to neatly separate your buds will work better with the Trimbag. DRY is a necessary ingredient for using this device. Probably drier than I am accustomed to… but that’s why somebody invented Boveda packs right? Anyway… I’m a VERY SATISFIED Trimbag customer at this point. It takes a little work to determine how dry your herb needs to be but even if you have to experiment, the number of hours you save from hand trimming will eventually make it worth your while… and as a newly minted senior citizen I can say that while my time might be free - anything that helps reduce pain - including time spent trimming - becomes quite significant. NOW —> The other side of this coin is that I will probably NOT use the Trimbag when I get back to indoor growing in early December… because I expect to be growing much smaller plants. Most of the things I’ve grown indoors top out at less than a couple ounces so it’s not clear to me that Trimbag is necessary with a yield that small… but I can test that theory later this winter. ================================================= hehe… I kinda promised myself ā€œno more winter cropsā€ after last summers bounty but I found that making edibles consumes a significant quantity of herb, and I really like my brownies. So now that I’ve stocked up to solve that problem, I plan to get back to some indoor growing (because growing is FUN)… mainly autoflowers. I actually have better control of temperature for things that I grow in winter as opposed to summer… but I have to add the heat to make that happen. That compares with the difficulty of adequate cooling if I run my lights during daytime in summer - even with night lights summer temps can be a problem with no AC. I don’t have AC in my house. It’s a function of California microclimates. If I lived 15 miles east of here - we’d BAKE with no AC (air conditioning). If it weren’t for coastal fog - this whole place would be a desert. With climate change - we’re heading that way even WITH the fog. We roll the dice here every winter and hope we get enough snow in the Sierra to hold off the firestorms that will come in the fall. We went thru a period of ā€œdroughtā€ here in California a relatively short while back but even though we are officially out of our drought phase the fall firestorm intensity seems to be getting worse every year. But this is a clear sign I’ve consumed too much indica for one evening and I’m starting to lose track of.... just about everything. Anyhow… I think I’m about diaried out for this year. I have a pretty freaking serious vacation planned to celebrate my retirement for late next month… Las Vegas golf > Joshua Tree National Park camping > Palm Desert resort golf > Beach camping South Carlsbad > Torrey Pines golf > Laguna Beach > Pismo Beach camping > Monterey. It’s been about 30 years since I did anything this crazy (and that was a Grateful Dead tour in 1987 thru Arizona/Utah/California for my 30th birthday). Big difference this time around? Cannabis is LEGAL for the entire trip. I will be well stocked enough to sedate anything that gets near me. See y’all in December. šŸ˜Ž
Likes
21
Share
@Rollex420
Follow
The girls are recovering well.. They certainly haven't given up! So they have a lot to give on the next few remaining weeks, flowers daily increase their volume.. šŸ™ŒšŸ»šŸ“Š
Likes
3
Share
@CheeeRz
Follow
The ladies have almost reached 40 cm in height, so we are switching to the flowering stage. For the next two weeks, they will receive fish mix before I switch to Biobizz Bio Grow. šŸ’ššŸ’š
Likes
4
Share
Plant starts to change colours , trichomes start changing from clear to cloudy . I am checking the development every 3 Days , looking in top , middle and bottom , to get a good avg. result . Overall I want like 5-10% Clear ones , 70-90% cloudy ones and around 5-10% amber ones , this wont be achieved perfectly in every layer , but gives me a little more variety in the effect later on. I do sort them when I put them in jars or curing bags. I flush with around 2-3l with a little top max acti vera and heaven like 1-2ml per l on the first flush with like 10 % runoff , after like 2 Days i went with clear water aiming for very little run off . Also cleaning my pot with a pump sprayer to get salts and used fertilizer out of it . I think the plant has another 1-2 weeks to go .
Likes
12
Share
This week I had to remove my red light (sad because red leds are the most efficient one in terms of pffd per wattage) the reason for that is bleaching of the tips. Scientists found out that cultivars start bleaching if u hit 600 umol/m2/s red light (just red photons and not every strain bleaches). Besides that I did nothing to them. From now on I will try to keep the temps low but with a pretty small day/night temp difference. Now preservation of terps and maturing are my points of interests. Some nice colours are getting through … that was supported by some nitrogen deficiency. This was Not on purpose but better than burning them with nutrients. (Nitrogen is required to produce chlorophyll, which is Green. If u reduce the nitrogen towards the end you can support other pigments to come through.) Conditions of the Grow: šŸ’” PPFD: 1000 umol/m2/s ā˜€ļø DLI: 43 mol/day šŸŒ“ Lightcycle: 12/12 h šŸ’Ø Humidity: 45-50 % šŸŒ”ļø šŸŒžDaytime Temp.: 23-24*C šŸŒ”ļø šŸŒ™Nighttime Temp.: 21-22 *C šŸŒ”ļøšŸŒ±Leaf Temperature: 21 *C šŸŒ”ļøšŸ’§Water Temperature: 19-21 *C Water TDS: 1000ppm | EC: 2000us/cm 🚰Watersource: Rainwater (TDS: 15ppm | EC: 0.03 us/cm Flowering Equipment: šŸ”¦ Lamp: Mars Hydro FC-E6500 šŸ“¤Container: 3x DIY 63L Euro-Box with lid Pot: Netpot 2 inch šŸ’¦Pump: M.R.S. Ultimate Whisper Powerpump 22 bar 🚿Nozzles: 12x 0.3mm 🫧Waterfilter: 150 microns šŸŒ¬ļøFan: 3x Clipfan šŸŒŖļøDuct-Fan: AC Infinity 200 mm with Controller and Carbon Filter šŸ¶Nutrient Brand: Terra Aquatica šŸ”¬Sensors: Waterstation (EC, TDS, Temp, PH, Salt), CO2, Air Temp. & Humidity (VPD), Temperature-Sensor Root Container
Likes
9
Share
🌱 Animal Mints — Week 5 from Seed (12/12) Special Report: Mixed Timelines – Pre-Flower & Flower Quick recap for new readers This run is a 12/12 from seed project, designed to observe structure, resilience, and expression without extended veg. This week is special because two different timelines are happening in the same room, offering a clear comparison of development paths. āø» Plant Timelines Overview 🌿 Plant A — ā€œ12/12 from Seedā€ • Timeline: 12/12 from seed • Stage: Entering pre-flower • Training: Light leaf bending & tucking only • Condition: • Extremely lush, deep healthy green • Calm posture, no stress signals • Very balanced structure when viewed from above This plant is transitioning gently and naturally, exactly what we want to see at this stage. āø» 🌸 Plant B — Short Veg → Flower • Timeline: ~15 days under 16h light, then flipped • Stage: Early flower, clearly more advanced • Training: No training at all • Structure: • Classic Christmas / pine tree form • Strong apical dominance • Already showing clear calyx formation and bud building Despite no training, the structure is beautiful and symmetrical. From above, both plants resemble a compact bush — a great illustration of how genetics express across timelines. āø» šŸŒ”ļø Environmental Conditions (Week 5) This was a tricky environmental week due to cold external conditions: • Outside: ~4°C with ~98% RH • Inside tent: • Temperature: ~21°C • RH: ~58% (stable and acceptable) • COā‚‚: ~666 ppm • Plant response: Calm, steady, resilient — no signs of stress The plants are handling the cold remarkably well so far. āø» šŸ’” Lighting Strategy • Top lighting: • 100% power • PPFD: 700–850, depending on plant height • Under-canopy lighting: • Being introduced by the end of this week • Starting at 30% power, intentionally low The goal is not intensity yet — just to signal photon availability from below while maintaining strong top-down light. šŸ™ Thanks to Lumiflora for the under-canopy lights being tested šŸ™ Thanks to Future of Growth for the main fixtures āø» šŸ’§ Watering, Nutrition & Philosophy Water source • Rainwater + dehumidifier water mix • This is why Cal-Mag Pro has been added preventively • Not due to deficiency • But to ensure stability during early flower with low-mineral water This is explained intentionally to avoid future issues, not to correct current ones. āø» Feeding structure Autopots (6 plants – mineral only) • EC: 2.29 • pH: ~6.0 • Reservoir = mineral only (organic mixes don’t behave well in tanks) Hand-fed plants (including some Autopot plants) • EC: 1.43 • pH: 5.9 • Organic + mineral mix • Autopot plants receive top feeding once per week This approach requires more work — but it allows: • Individual plant observation • Weight checks before watering • Natural dry-backs • A deeper connection with each plant’s drinking behavior Dry-outs are intentional and combined with enzyme applications, helping recycle dead root matter into available nutrients and encouraging active root exploration. āø» Genetics & General Impression I’m genuinely impressed by Animal Mints genetics: • Consistent structure across timelines • Strong health signals • Calm, resilient behavior under less-than-ideal external conditions Both plants are showing real promise, each in their own way. šŸ™ Thanks to Zamnesia šŸ™ Thanks to Plagron And thanks to everyone following along — supporters, skeptics, haters, lovers — everyone has a place here. āø» šŸ”® What to Expect Next Week Expect: • Clear flower progression on the vegged plant • Pre-flower stacking on the 12/12 plant • Plants responding to under-canopy photons • Increased differentiation between timelines Don’t expect: • Heavy defoliation • Aggressive feeding changes • Forced development This run is about listening, not pushing. āø» Final note This week is officially marked as Week 5 Flower in GrowDiaries, but in reality it’s a blend of pre-flower and flower stages — and that’s exactly why this report matters. šŸ‘½ New team member Meet Mr. Baggy Our new fluffy alien/beaver/whatever-he-is friend, won through a Grow Diaries contest. Expect to see him around — he’s officially part of the grow now. Week 5 Veg/pre-flower | 8Ɨ8 Tent | Master Conditions šŸŒ External Environment (Context) • Outside temperature: ~5 °C • Outside RH: 92–96% (very high humidity) • Strong seasonal pressure influencing internal stability āø» šŸŒ”ļø Internal Tent Conditions • Tent temperature: ~21.8 °C (noted drop due to cold external temps) • Tent RH: ~58% → Very good considering outside conditions āø» šŸ’Ø Airflow & Circulation • Primary airflow: Bottom → top → wall return • Pattern: Full-room vortex circulation • Additional fans: Central airflow to break blind spots and mix layers • Goal: No stagnant pockets, uniform VPD across canopy āø» šŸ’§ Water Source & Rationale • Water: Dehumidifier water + rainwater • Base EC: force • Systems designed to support plant intelligence, not override it FOR DISCOUNT CODES AND MORE JUST FOLLOW THE LINK https://website.beacons.ai/dogdoctorofficial šŸ“² Don’t forget to Subscribe and follow me on Instagram and YouTube @DogDoctorOfficial for exclusive content, real-time updates, and behind-the-scenes magic. We’ve got so much more coming, including transplanting and all the amazing techniques that go along with it. You won’t want to miss it.GrowDiaries Journal: https://growdiaries.com/grower/dogdoctorofficial Instagram: https://www.instagram.com/dogdoctorofficial/ YouTube: https://www.youtube.com/@dogdoctorofficial āø» Explore the Gear that Powers My Grow If you’re curious about the tech I’m using, check out these links: šŸ”† Lighting & Environmental Control • Future of Grow — Advanced LED lighting technology https://www.futureofgrow.com/ DISCOUNT CODE: DOG20 • Lumiflora — Under-canopy LED lighting https://lumiflorade.com/ • TrollMaster — Environmental controllers and automation gear (past collaboration) āø» Genetics • Zamnesia Seeds — Genetics used in this project https://www.zamnesia.com/ āø» 🌱 Soil, Substrates, Boosters & Root Support • Plagron — Substrates, bio mixes, and supportive products https://plagron.com/en/ āø» šŸŽ’ Storage, Curing & Preservation • Grove Bags — Curing and storage solutions https://grovebags.com/ āø» šŸ“ø Photography Equipment & Tools (Not sponsors, but part of my creative toolkit) • Sony A6700 • Sony full-frame macro lens + few more • Stacking photography workflow - learning • iPhone (for behind-the-scenes shots) We’ve got much more coming as we move through the grow cycles. Trust me, you won’t want to miss the next steps, let’s push the boundaries of indoor horticulture together! As always, this is shared for educational purposes, aiming to spread understanding and appreciation for this plant. Let’s celebrate it responsibly and continue to learn and grow together. With true love comes happiness. Always believe in yourself, and always do things expecting nothing and with an open heart. Be a giver, and the universe will give back in ways you could never imagine. šŸ’š Growers love to all šŸ’š šŸ“ø P.S. – The Eye Behind the Lens All photos in this diary (for now — except for the ones showing the camera, which I took with an iPhone) are taken with a Sony A6700 paired with a Sony full-frame macro lens and a few more. Photography is part of the story — it’s how we share the fine textures, the glow, and the quiet details that words can’t always capture. I’ve also started experimenting with photo stacking — a technique where multiple images, each taken at a slightly different focus point, are layered together to create one perfectly sharp image from front to back. It’s not digital enhancement or AI; it’s pure photography — a way to reveal the plant’s beauty in microscopic depth, from trichome to petal. You’ll even see a few shots of "ghost me" capturing the shots — camera, lens, setup — because every grow deserves not just to be cultivated, but documented like art. FOR DISCOUNT CODES AND MORE JUST FOLLOW THE LINK https://website.beacons.ai/dogdoctorofficial NEW DISCORD - Official Server Invite Link : https://discord.gg/ksjAkA5T74
Likes
43
Share
Bonjour Ơ tous les padawans et maƮtres jedis Jour92 arrosage avec 2 litres d'eau ph6.3