
Likes
Comments
Share


@Organic473
Follow
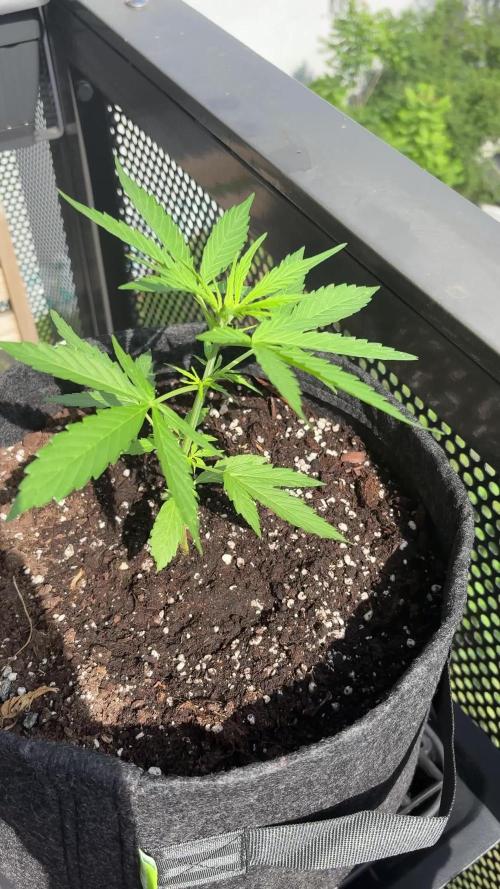
Two things I learned this week…I fed her too much possibly or the white label seeds are really no good. She got burned badly but she is recovered

Likes
8
Share


@DaLawry
Follow
Cherry Punch just got her last feed this past week. The next 2 weeks will be full flushing for them. Garlic cookies, watermelon Skittlez, Mint cookies, cookies and cream, and wedding cake are going to be fed up to weeks 7-8. All the plants are finishing nicely! smells are getting a little more dank forsure!😎


Likes
10
Share


@Backwood_scientist
Follow
For my first run I am happy with my results even though the yield was very low . The banana cake is frosty and has a great nose on it . The bud has white ash and overall it tastes great . I will be doing another grow soon and Im going switch it up . Going to be a great next grow so don’t miss it .

Likes
4
Share

@ojulhao
Follow
We had a very rainy week, which increased the average humidity to 76%. Consequently, I didn't water her that much. The plant is already 19 cm tall and seems to be growing nicely so far :)

Likes
63
Share


@Roberts
Follow
Strawberry Amnesia is growing well. She is looking like she will be a shorter plant in the long run. I did some light defoliation on her. Beside that I have not done nothing to her this last week. Everything is looking good. Thank you Herbies seeds, Athena, and Spider Farmer. 🤜🏻🤛🏻🌱🌱🌱
Thank you grow diaries community for the 👇likes👇, follows, comments, and subscriptions on my YouTube channel👇.
❄️🌱🍻 Happy Growing 🌱🌱🌱
https://youtube.com/channel/UCAhN7yRzWLpcaRHhMIQ7X4g.

Likes
46
Share


@Ju_Bps
Follow
Hello my friendly growers,
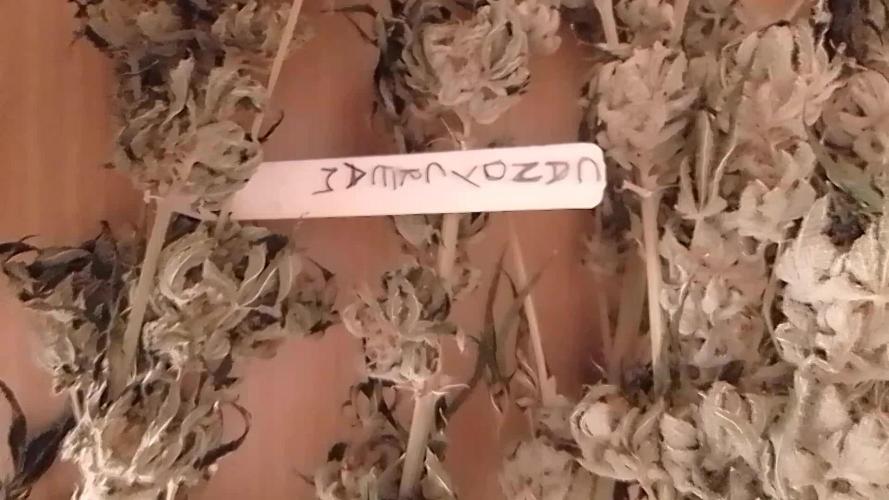
This end of week, smeel the end of the plant,
Trychromes of today look plant ready to harvest so I ll harvest tomorrow.
See you in few day for the result of harvest.
Thanks to follow and like me,
Nice community 😍🤩
Have a good week
Processing
Likes
22
Share


@ChronicRyno
Follow
Hi all another week down almost .
I’ve recorded a couple of videos (beginning or week and back end ) as you cannot see the big girl properly with a photo .
She has soo much going on ,I’m not only proud of myself but super pleased with this girl . Having germinated only 2 seeds and got 2 plants granted one was weak from the start , that easily could have been my doing as a newby , I really cannot fault GHSc .
Feed has been easy to work with and without dramas .
Shouldn’t be long now before I start flushing ready for harvest .
Thanks for being here with me , I don’t feel I’ve got any hope regarding the compition but that wasn’t my hopes anyhow , I wanted to see how I did as a newby growing same as some veterans . Happy considering .
Stay safe and happy growing guys


Likes
152
Share


@PEAKYPLANTERS
Follow
I can not believe.😲
We have reached the end of another magnificent journey made together on this splendid platform which gives ease and opportunity to learn and perform in the best crops
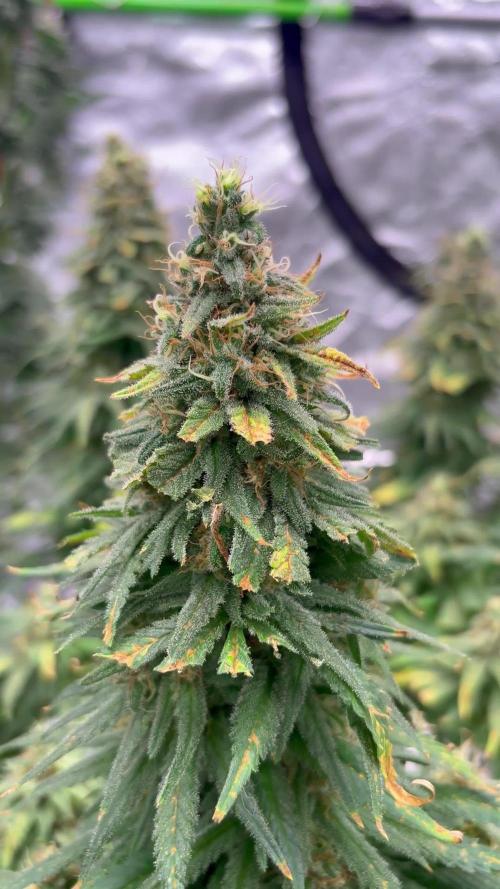
I can already tell you that this baked tent is one of the best weeds I have ever grown so far!
But this can also be seen from the contents. Spectacular colors, solid gems....and resin in rivers
Stay updated for the white smoke 😋😎

Likes
4
Share


@Growin_Ish
Follow
Day 56
Adjusting the trellis, I broke a branch, right at the stem. It was under the main and not receiving much light anyway, so...
Also did a deep defoliation on NYD3. Got rid of anything that won't produce keepers. Trying to finish strong (14 days left).💪🏾💪🏾
Day 58
One leaf on each plant was discolored. No major fade yet. Each have a distinct smell. #2 smells like old school refer. It gives a real nostalgic 80s vibe. #3 smells like pine and Bengal. Watered top and bottom, with just a bit of CalMag.
Day 60
48oz of pH 6.8 water. 1 or 2 leaves showing small amount of yellow, but nothing resembling fade. The canopy is green green, like she can go another month. A few of the nugs are impressive, but could be better if I had defoliated better. 60% of the bud sites are small and roughly 40 to 50% dense (assuming 100% is rock hard).
Water, tucking, and plucking for the remainder.
Day 62
It's a 70 day strain and with 8 days to go, there is no fade. Frustrating since I am over cooking my other plant for the sake of these two. They haven't done anything in over a week. Maybe that last heavy defoliation stunted them. So sad. Buying a jewelers loop tomorrow to check trichomes. The only other thing that could be delaying the fade is that I top dressed them both with Terp Tea Bloom. Maybe that top per gallon is hot and takes more than 2 weeks to be used up. I'm going to flush it tonight. Not even sure I should care about pH because I want it locked out from nutrient uptake. They just shouldn't be this dark green at this stage.🙄☹️😕😤
Ok so I pulled off the trellis net and LST ties, defoliated some more, and flushed both with 1 gallon each of distilled water. Added a little 3% peroxide to NYD3.
Day 63
I figured it out. I made compost tea for NYD#1 to address a suspected deficiency. I gave these two some of it, and they didn't need it. It was half way thru flower. I followed that by top dressing with the new nutes. Lesson learned. What's good for the goose is NOT good for the gander.
Likes
7
Share

@Ninjabuds
Follow
Definitely some old school genetics with huge stacked nugs and a high leaf to calx ratio. The plant was a heavy feeder like a super beaver feeder. No matter what I threw at it the plant still wanted more. I saw others with the same problem with the same strain so it must be common. I think this plant would be a great outdoor plant it would have some 3-4 foot long solid nugs


Processing
Likes
12
Share


@eldruida_lamota
Follow
Que pasa familia.
Noticias buenas y malas, de 3 ejemplares, uno nos salió hermafrodita. Empezó a formar plátanos esta semana y al estar tirándolos en ramas distintas, cortamos por lo sano y ADIÓS.
Quedan 2 subimos cantidad de comida, pegaron buen estirón, y las flores están formando sin problema alguno.
Dejo muchas imágenes y vídeos de esta semana, y ya deducen ustedes.


Likes
53
Share


@Still_Smoq
Follow
10 September Harvest - see pictures. While some growers leave the plant whole when they cut, I do not. It is a personal preference and situational convenience if your a home grower. I chose to cut large, long branches, and remove any whole water leaves, as long as it doesn’t interfere with the bud formation. I don’t trim yet. This is done for a few of reasons: 1) It’s my last good close-up look at her until another 5 days or more, 2) I don’t want wet leaves drying on my buds if I can help it, and 3) I occasionally like being able to shine a small LED flashlight on the flowers while its drying. Mold is our greatest problem as growers, it can destroy a beautiful grow right up until the end process. Then I hang it in a dark closet, provide circulation and ventilation. Light and heat, anything above 80 degrees F, will start a break down in cannabinoids during the dry, it is ideal to stay away from both. I’m fortunate that a humidity level of 50- 55% and temperature of 65-70 degrees F is fairly consistent and easy to maintain. Anything below 60 degree F will prevent the adequate drying out of chlorophyll. Almost all my flower routinely take 5-7 days, some a little longer, to properly dry out.
15 September Trim - see pictures. First you’ll notice the buds have shrunk up to half their original size. This is just a fact that we growers have to deal with. Due to evaporation without uptake of water, it takes about 3 days for the chlorophyll to dry up, then slowly go through a chemical change. Along with the leaves, cannabinoids also begin a chemical change after 3 days called decarboxylation. A slow process where the THC level increases while curing. You want the leaf to be dry so they can be hand trimmed easily, but you do not want that bud so dry that it starts to fall apart in your hand. Try to handle carefully by the main stem to avoid touching the bud all together. A lot of these cut leaves will be covered with trichomes, good for making oils, or other products, it’s an option worth looking into keeping it. After trimming, I do separate a few premium flowers for my first smoq. Then loosely fill wide mouth quart mason jars with about 1 oz/28 gr of product per jar. I seal the lids for a few hours to determine what relative humidity they are at, see hygrometer pic, before making a decision to put in a 62% humidity control pack of my choice or to wait, then place in secure in a cool dark place with stable humidity and temperature. It is very important to then observe/burp or exchange the air as needed, up to several times a day, until 62% rh is achieved. Once your close to to your mark, put in your desired RH level control terpene shield. If you have a problem getting there: 1) it has dried out too much, no real solution, try to put several large cut stems left over from harvest into the jars with the buds to try and increase humidty, 2) it has not dried out enough, in this case no problem, just remove and dry out a little more. This is also a personal choice, some people like it drier in the 50% plus range. Whatever you do, research and preserve. At that time burping is no longer required. Cannabis will reach its peak potency potential at about 40 or so days into the cure.
The finished product should be a perfect grind when cured correctly without clogging up your grinder, this could take a month. Now that I’ve said that, I’m sure someone has grown something that they have not been able to grind. It can remain in this state for an easy 6 months with little change, locking in all the terpenes and potencies. All you need to do is occasionally check the product to ensure there are no molds. If your grow/harvest/cure techniques are good this should not be an issue. It would not be uncommon to find many cannabis strains will last, with small degradable change, for up to one year after being stored this way. Using an airtight glass container, controlled relative humidity, maintained low temperature, and kept in darkness will equal maximum shelf life. Always avoid direct sunlight and temperatures above 80 degrees F.
The reasons I’ve ultimately chosen Deep Water Culture as a grow medium. Each has their own pros and cons indeed. I found the most efficient, less maintenance and ideal solution for my situation was DWC. Burdens to overcome depend on size up set-up; initial equipment cost, size of containers, ph monitors, air pumps, type of water to use-reverse osmosis, RO cost/set-up/maintenance, ways to transfer/change water and nutrients, what nutrients to use and schedules, takes several grows to learn and understand, a 1 year learning curv, easy to nutrient burn. The Benefits of growing in water; no dirt, no bugs, no diseases, rare nutrient deficiencies/toxicities, steady and rapid growth that enables the plant to reach its genetic potential. After harvest, there is about a 1 hour equipment cleanup, sterilization and turn around process before replanting. Cannabis will perform in so many different ways and mediums, no one way is the best and the best way is the one you are using, right. Chose what works for you in the long run. There will always be an initial cost in set-up. My advice if one were in need to cut corners, I would not recommend cheap lights. This single factor is the most critical, afford for the best. The notion that organic and water has a different taste, flavor and potency effect is absolutely debatable. The more we learn the better we grow and experience is always the best teacher.
This is what works for me and my methods of growing in general from beginning to end. A BIG “Thank You” to everyone who stopped by to take a look. My next diary will start at the beginning of October 2023 with a Forbidden Runtz Auto. There will be minor differences during the grow. I enjoy Auto strains simply by what can be achieved in a short time. No matter the strain they will unveil one thing in common, the demand for attention. Many times over it is the anecdotal gardener that surmount plant scientist. Last should I mention, do not forget to stop and enjoy the fruits of your labour...

Likes
11
Share

@eldruida_lamota
Follow
Que pasa familia, vamos con la sexta semana de floración de estas Gorilla cookies Auto de FastBuds.
Por el momento todo va bien tienen buen color, van madurando esas flores.
Alimentamos la última semana nuestras plantas con Agrobeta.
Por supuesto el ph se mide en cada riego y se mantiene en 6.2 y riego en intervalos de 48h.
La temperatura está entorno al 22/24 grados y la humedad anda sobre el 50%.
Las plantas en si ya están bien sanas, tutore la rama principal para que no se fuese de madre, y así controlaré la altura.
Yo creo que en 1 o 2 semanas podré darles machetazo, pero ya vamos viendo estas semanas.
Mars hydro:
Code discount: EL420
https://www.mars-hydro.com/
Agrobeta:
https://www.agrobeta.com/agrobetatiendaonline/36-abonos-canamo
Hasta aquí todo, Buenos humos 💨💨💨

Likes
50
Share


@DogDoctorOfficial
Follow
Week 6 Veg Report – Runtz We Meet Again!
Another week, another step forward in our Eternity Grow Cup 2025 journey, and oh boy, do we have a lot to unpack! These Runtz girls are showing their potential, and we’re dialing in every little detail to ensure they thrive. Let’s dive deep into everything that happened this week!
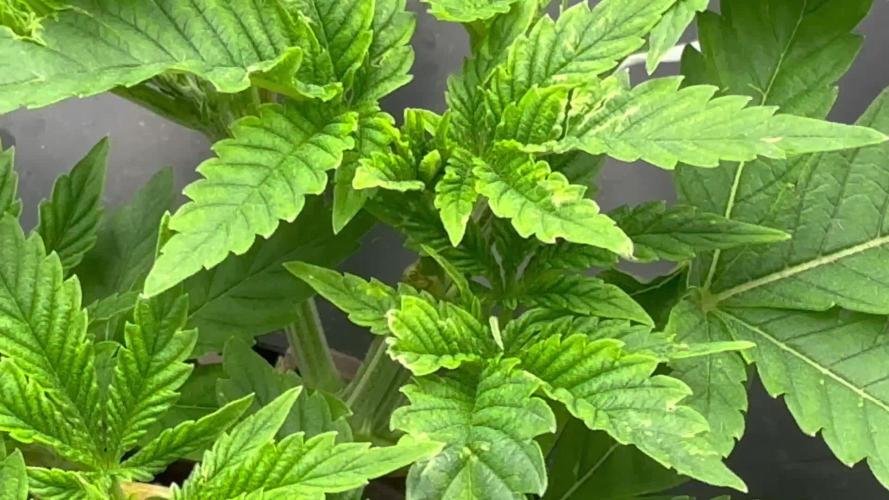
Cal-Mag Deficiency Adjustment – Pheno #5’s Special Needs
This week started with a close inspection of our phenos, and we noticed that Pheno #5 was showing early signs of a calcium/magnesium deficiency. Whether it was slightly off VPD levels or this particular plant being more demanding, we decided to correct it by increasing the dose of RO Water Conditioner. Now, while this isn’t a direct substitute for Cal-Mag, it does contain trace amounts that can help stabilize the situation.
🔬 Understanding Cal-Mag Deficiency:
Calcium and magnesium are essential secondary nutrients. Calcium strengthens cell walls, preventing issues like tip burn and weak stems, while magnesium plays a critical role in chlorophyll production, allowing plants to efficiently absorb light energy.
💡 Signs of Deficiency:
• Yellowing between veins (Magnesium)
• Rust spots on leaves (Calcium)
• Slow growth and weak stems
⚡ How We Address It:
• Slightly increasing RO Water Conditioner to see if trace minerals help
• Keeping an eye on overall nutrient uptake to ensure no lockout
• Monitoring VPD (Vapor Pressure Deficit) closely to optimize nutrient absorption
Let’s see how she reacts next week!
Branching Development – Pheno #2 Leading the Race
All five phenos are thriving, but Pheno #2 is showing the most aggressive branching, pushing outward faster than her sisters. However, overall, we’re seeing very uniform growth, which speaks volumes about the stability of these genetics.
🌱 What is Branching & Why It Matters?
Branching is the plant’s way of expanding its canopy, increasing surface area for photosynthesis, and maximizing potential bud sites. Well-structured branches allow better airflow, light penetration, and more even growth—key for a successful high-yield harvest.
⚖️ Topping vs. Leaf Bending – The Training Choice
Instead of topping, I’ve decided to go with leaf bending for now. This method allows for gentle manipulation of the plant’s growth without causing major stress. Once we introduce the SCROG (Screen of Green) net, this training will help maximize the canopy spread.
Moving to the TrolMaster Ecosystem – A Game Changer
Big move this week—our Runtz girls officially transitioned into the TrolMaster Ecosystem, and let me tell you, they are absolutely loving it! Under the ThinkGrow Model 1 LEDs, they’re thriving, leaves praying upward, soaking in that optimized spectrum.
💡 ThinkGrow Model 1 LEDs – Why They Work
• PPFD of ~400 µmol/m²/s at their level, running only on Channel One
• Full-spectrum lighting tailored for optimal vegetative growth
• Passive cooling design, keeping temps stable while saving energy
Environmental Conditions (Measured on the TrolMaster Tent-X and the AMP-3)
• Temp Max: 26.6°C | Min: 16.2°C
• RH Max: 77% | Min: 52%
• VPD Max: 1.65 kPa | Min: 0.43 kPa
• Solution pH: 5.8
• EC: 0.96
• Water Temp: 16.3°C
Why These Numbers Matter:
• Keeping VPD in check ensures efficient nutrient uptake
• pH and EC levels fine-tuned for maximum root absorption
• Water temp stable to avoid root shock and slow growth
Autopot System Prep – Getting Ready for the Next Phase
The week wraps up with us cleaning and preparing the Autopots for their next phase. These self-watering systems will allow the Runtz girls to access water and nutrients at their own pace, optimizing growth as we head into pre-flower soon!
A huge THANK YOU to Zamnesia, Plagron, and GrowDiaries for making this incredible Eternity Grow Cup 2025 possible! Also, a big shoutout to my main sponsors, thank you for keeping this journey running:
🔥 Aptus Holland – Precision nutrients for peak plant health
⚡ TrolMaster – Bringing automation and accuracy to the grow
🌱 Pro-Mix – The foundation of strong roots and healthy plants
💨 The CannaKan – Premium solutions for top-tier results
Grove Bags – Revolutionizing post-harvest storage & terpene preservation
📜 Ziggi Papers – The ultimate rolling experience
And of course, a massive thank you to the community—followers, supporters, lovers, and even the haters. You ALL fuel this journey, and I appreciate every single one of you!
🚀 Good luck to all fellow competitors—watching everyone’s grows is inspiring, and the competition is fierce!
📢 Join the journey on YouTube & Instagram for exclusive content, behind-the-scenes action, and more insights into this epic run!
👊 Let’s keep pushing, learning, and making history—see you all next week for another deep dive into the Runtz We Meet Again grow! 🌿🔥
💚 growers love to all 💚
Genetics - Runtz https://www.zamnesia.com/6000-zamnesia-seeds-runtz-feminized.html
Nutrients - Plagron https://plagron.com/en/hobby
- Aptus Holland https://aptus-holland.com/
Controls - Trol MAster https://www.trolmaster.eu/
LED - https://www.futureofgrow.com/en
LED - https://www.thinkgrowled.com
Soil - https://www.promixgardening.com/en
Germination - Cannakan https://cannakan.com/?srsltid=AfmBOopXr-inLXajXu3QFgKXCXXos4F1oEvScjMKIB5MR5dk8-GJ-F49
DOGDOCTOR 15% off
Smoking Papers - https://ziggioriginal.com/
Terpene saver - https://grovebags.com/
As always thank you all for stopping by, for the love and for it all , this journey of mine wold just not be the same without you guys, the love and support is very much appreciloved and i fell honored with you all in my life
With true love comes happiness Always believe in your self and always do things expecting nothing and with an open heart , be a giver and the universe will give back to you in ways you could not even imagine so
As always, this is shared for educational purposes, aiming to spread understanding and appreciation for this plant. The journey with nature is one of discovery, creativity, and respect. Let’s celebrate it responsibly and continue to learn and grow together!
Growers Love To you All 💚
#EternityGrowCup #RuntzHunt #GrowersLove #CannabisCommunity #AptusHolland #ProMixSoil #TrolMaster #Zamnesia #Plagron #ZiggiPapers #Grovebags
Likes
15
Share


Likes
12
Share


@Growing_Spartan
Follow
This week I watered with recharge and split a gallon of water between the 3 plants and they seemed perfect, little to no run off, pots still moist and I’m watering maybe once to twice a week the most.
Plants seem happy and cheerful, hopefully we can keep them that way till finish 🤘 but till then keep the peace and smoke a fat one! 🙏
Likes
25
Share


@Sators
Follow
Day 64. Watering with nutrient Mix.
Day 67. Flushing with 10L water.
Day 69. Watering with nutrient Mix.