Likes
Comments
Share
@yun23
Follow
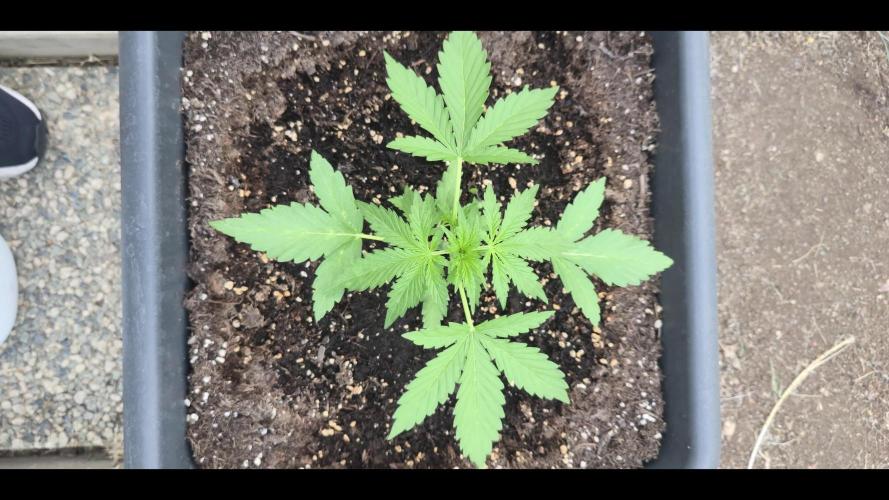
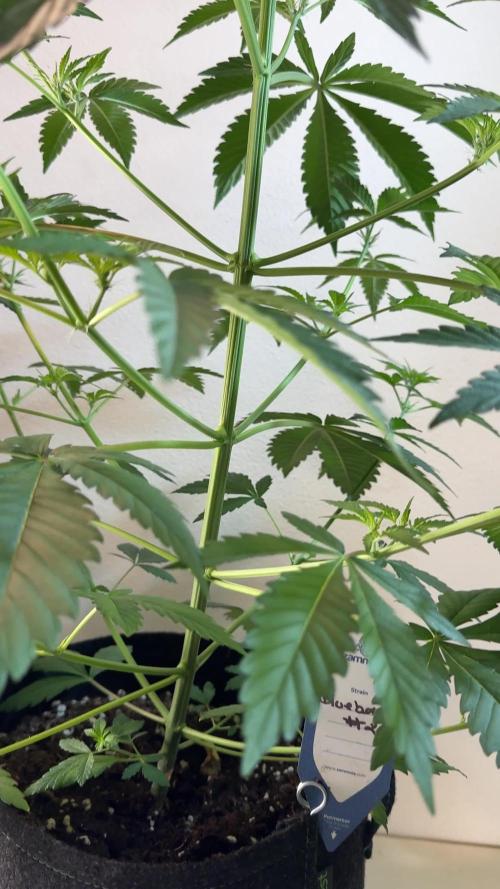
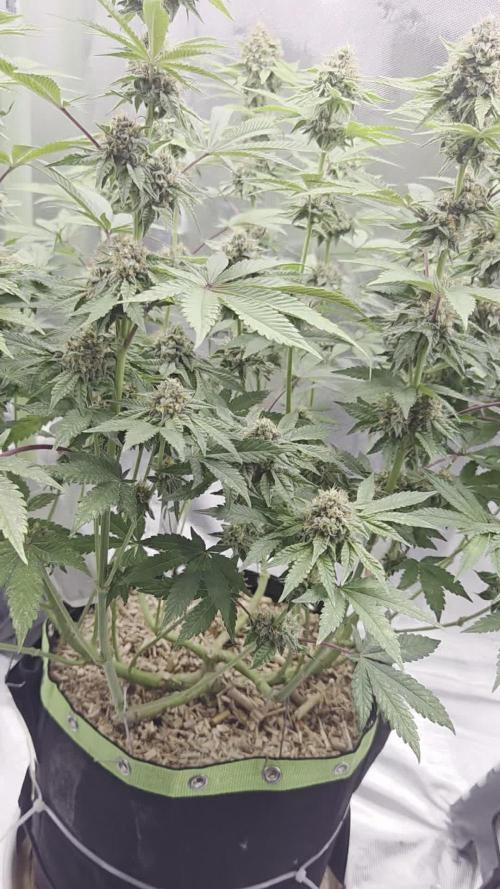
This strain is just GREAT!!! Sticky, smells amazing, grows big and you have more buds than leaves! ORIGINAL GLUE AUTO IS REALLY GOOD 👍🏻 👌🏻
Likes
56
Share
🍩 🌸 Nuestras Jelly Donutz siguen escribiendo una historia bastante bonita.🌿✨ Después de la semana pasada, el cambio vuelve a ser evidente. Las flores continúan engordando y ganando presencia, la cantidad de resina sigue aumentando y el armario empieza a tener ese aspecto de plena floración que tanto estábamos esperando. En general, las tres están sanas y todo está evolucionando bien, sin grandes sobresaltos esta semana. Después de todas las pequeñas aventuras del principio, se agradece una semana en la que simplemente podemos mirar las plantas y pensar: sí, esto va por buen camino. 😂 🍓 Sprinkles continúa siendo una de las que más destaca. Comparándola con la semana 5, se aprecia más volumen en prácticamente todas las flores, que siguen compactándose y ganando estructura. También se empieza a notar cada vez más la resina sobre las flores y hojas cercanas a los cogollos. Mantiene una estructura muy cargada de puntas y está aprovechando muy bien esta fase de floración. 🍁 Maple ha mejorado respecto a la semana pasada. Después de haber detectado aquella ligera falta de nitrógeno, esta semana la vemos más equilibrada y con las flores siguiendo su desarrollo con normalidad. Los cogollos continúan engordando y la resina empieza a hacerse cada vez más evidente. Comparada con la semana 5, se nota que ha ganado bastante presencia floral y que poco a poco está alcanzando ese aspecto más maduro de floración. La que la semana pasada nos tenía haciendo de nutricionistas improvisados ahora parece bastante más tranquila. Una pequeña victoria para la humanidad. 😂🍁 🍰 Glaze sigue siendo la más lenta de las tres, pero también está avanzando. No queremos medirla con el mismo reloj que a Sprinkles o Maple porque cada una está siguiendo su propio ritmo. • Respecto a la semana pasada, las flores han ganado tamaño y definición y continúa acumulando resina. El desarrollo es algo más pausado, pero la vemos sana y sin nada que nos haga pensar que haya un problema importante. La evolución general nos deja muy buenas sensaciones: - 🌸 Los cogollos siguen engordando. - ✨ La resina es cada vez más visible. - 🌿 Las tres mantienen un buen estado general. - 🔥 El conjunto empieza a mostrar claramente el avance hacia una floración más madura. 🌡️ Parámetros Temperatura: 24 °C Humedad: 50 % EC: 1.8 Foco: 70 % a 70 cm Esta semana no hay grandes dramas ni experimentos raros, y sinceramente, se agradece. 😂 Las tres están sanas, las flores siguen creciendo y la resina aumenta poco a poco. Ya estamos entrando en una parte de la floración donde cada actualización empieza a ser más interesante porque los cambios de una semana a otra son cada vez más visibles. Seguimos observando, manteniendo todo estable y disfrutando de cómo nuestras Jelly Donutz van transformando poco a poco ese crecimiento inicial en auténticos cogollos. Semana 6 completada. 🍩🌸💚
Processing
Likes
7
Share
**Encontrarás la traducción a español al final de la descripción** From/Desde: 12/04/19 || To/Hasta: 18/04/19 From day/Desde día: 50 || To day/Hasta día: 56 You can find the Gorillas Diary here: ** Podéis encontrar el diario de las Gorilla aquí:** https://growdiaries.com/diaries/25675-makingmoney-with-gorilla-mm-vs-gorilla -----IMAGES & VIDEOS----- I'm sorry for not having a tlapse video this week, i slaved the cam onto my 60x60 tent to record the first growing week of another plants, next week i will return with more tlapse videos. -----WEEK SUMMARY----- To have a visual size of the plants take into consideration that the SCROG net it's fixed 24 cm abobe the top part of the soil. Remarking what i've told last week, i must say the SCROG is not a true SCROG, as some colas begin below others, and also colas are of different heights among all plants. Anyway i'm very happy on how everything is going. And insisting again, I have very very few experience growing cannabis, this is my 3rd grow, 2nd indoor, and first time with photo-period at indoors, and of course is the first time too i'm trying to apply growing technics on a serious way. I really don't know if i'm doing things right or wrong. -----WATERING CALENDAR----- 13/04/19 - 1.250 ml with all week nutrients -(Sensizym, bloom stimulator, bloom nutrition & amino complex) @ PH6.4 & 1.3 E.C. 17/04/19 - 1.250 ml with Silica Power, Pro Active, Bloom Stimulator, Bloom Nutrition, Sensizym & 5 drops of Amino Complex @ PH6.5 & 1.3 E.C. *****ESPAÑOL***** -----IMÁGENES Y VÍDEOS----- Siento no tener vídeos timelapse esta semana, he esclavizado la cámara en el armario de 60x60 para grabar la primera semana de crecimiento con otras plantas que tengo en el. -----SUMARIO SEMANAL----- Para tener una idea más o menos certera del tamaño de las partes de las plantas, tened en cuenta que la red está fija a 24 cm de la parte superior de la tierra de los tiestos. Remarcando lo que dije durante la última semana, he de decir que el SCROG no es un SCROG real, ya que las colas no empiezan desde la misma altura ni son de la misma altura, ni las plantas son de la misma altura. Pero yo estoy muy contento con como va la cosa, vuelvo a insistir que es mi primera vez con foto-dependientes indoor, mi segundo armario indoor y el tercer cultivo de mi vida, y por supuesto la primera vez que aplico o intento aplicar las técnicas de cultivo. Lo estoy intentando realizar bien y de manera eficaz, pero realmente no se si lo estoy haciendo bien o mal, yo simplemente me lio y veo como responden las plantas. -----CALENDARIO DE RIEGO----- 13/04/19 - 1.250 ml con todos los nutrientes semanales -(Sensizym, bloom stimulator, bloom nutrition & amino complex) @ PH6.4 & 1.3 E.C. 17/04/19 - 1.250 ml con Silica Power, Pro Active, Bloom Stimulator, Bloom Nutrition, Sensizym & 5 gotas de Amino Complex @ PH6.5 & 1.3 E.C.
Processing
Likes
58
Share
She's coming on nicely buds coming all the way up the branches she's gonna be short an stocky still no frost but loads of nodes closely stacking with buds not much else to report just bud watching thanks for reading happy growing
Likes
5
Share
As you can see they are still growing. No nutrients added yet. We let the soil dry out and leave it dry for a full day before re watering. We do not want any root rot. The plants will tell you what they need.
Likes
9
Share
@ertaverd
Follow
El dia 70 empecé a regar solo con agua, el dia 77 he empezado el lavado de raíces, voy a cortar a medianos de la semana que viene. The day 70 i've began to water her with water withowt nutrients. On the day 77 i began to wash the roots, will harvest the next week
Likes
57
Share
2 Girls 1 Cup week 10! Fuck yeah, the end is near. Can't wait to reset and put the new system in. Day 70- today marks the girls 10wk from breaking surface. Having the windows open on a rainy day is cranking up the RH. I just turned the A/C on shortly after snapping pics. Closing the windows and turning on A/C should bring humidity down. I may take GC (depending on tricomes) and make bubble out of it. Stabbing her multiple times got her hormones flowing. Still don't think it'll be mature enough at chopping day, but I'm trying to think positive. WG tricomes looking good. Up top we have a few amber, mid section they're 90% cloudy. I will try and take a pic with my scope. Tried once and i need another hand or two to make it easier. Picked a sample bud off WG's mid section. Mostly cloudy, few clear, few amber. It'll help with air flow right?? 🤣 *edit* A/C is on the fritz.. need to bring home a multimeter and diagnose. ======================================================================================================== Day 71- anything else want to break on me this week? Today my inline fan took a shit.. next day air a replacement, and hope the smell doesn't escape between now and then. Burning a little Nag Champa here and there for the time being. ======================================================================================================== Day 72- keep forgetting my DMM from work to diagnose the A/C. I'll remember one day, prob after WG is cut and hanging lol. Camera went offline for a period on day 71, so there's no timelapse of it. Have been thinking about ending it since there's no big changes daily like before. Didnt even set one for today. New inline fan installed at 6am this morning. I can tell ya after using two cheap ass fans that vivosun is louder than ipower. Both rated at 195cfm, but the new vivosun pushes MORE air from the outlet on the lowest setting compared to the ipower on high... going to have to figure out something for the noise though.. sounds like a jet engine. Lowered Temps during day and night is bringing back the terps! Both of the girls smell AMAZING. only checking tricomes daily on WG though. She determines chopping day. Mostly cloudy with equal number of clear/amber. Shooting for 50/50 cloudy/amber. Heady buds don't have any medicinal/psychoactive effect on me. Love the taste, but does nothing for my pain or insomnia. *edit* they're eating and drinking less by the day. Figure it's time to drill the girls. A few hours before lights out, late in their day. #7 drill bit right through their hearts 🤣. It sure did make GC ramp up when I stabbed it each of the 5 times. Bro Science may be onto something here... ======================================================================================================== Day 73- took another "sample" off WG. right side, if you scroll from 72/73 you'll see which one is missing. ======================================================================================================== Day 74- combination of cooler outside temps and the new inline fan have helped bring temps in the tent down. Daytime high 77F, night time low 66F. Nice swing and cool enough will hopefully bring out some purples, but not really pressed if it doesn't. The SMELL is what I wanted back, and I got it!! Not baking the girls in the low to mid 80's anymore is really helping. Dropped the TDS from 950's to 750's since TDS was slightly rising and PH dropping. Indicating too many nutes. I hung the "sample" in the outlet duct to speed dry it yesterday. Still damp, but tried anyway. This is gonna be some good bud, if I don't fuck it up that is.. need to grab a tricome pic for the diary. ======================================================================================================== Day 75- EC still rising and PH dropping.. took 8L out and added 8L bubbled/PHd TAP. Dropped RES from 668 to 365 @ 5.9. WG is looking great. Can't say the same for GC 🤣. I can't let my mistakes ruin GC rep though. It's my fault she's not making it to the finish line smiling. ======================================================================================================== Day 76- EC still climbing slightly and PH still dropping slightly as well. Went ahead and drained the RES, and flushed the WaterFarm with bubbled PHd TAP @ 132ppm. Tried to rinse some of the excessive salt buildup accumulated over the duration of the grow. Filled RES with PHd RO. Haven't been able to completely drain the WaterFarm since before the side RES was installed. So there's always a bit left over. Only took 4.2gal to fill her up. Can't wait to take a pic of the root mass below. Currently sitting at 80ppm @ 5.91. Days are numbered... watching tricomes up top, in mid, and down low for maturing. Tops 5-10% amber, mids 1-5% amber, down low still 10% clear. Smelling good ASF! ======================================================================================================== As always, thanks for stopping by and checking out my current grow. Link to the up to date timelapse https://youtu.be/N5MbUBjJCYM
Likes
3
Share
Suivre les conseils semaine 1. Une fois que les plantes ont colonisées le pot de 1L, les rempoter dans des pots de 3L (qu'on va arroser avec 3L). Cela doit prendre 4 à 7 jours en moyenne. Surveiller l'aspect des plantes, les pointes des feuilles. Observer le haut et le bas. La couleur de la plante doit être uniforme entre chaque partie sinon c'est qu'elle a un manque ou un excès. Le plus souvent étant donné les engrais complet que nous utilisons il s'agit d'un excès. Dans ce cas il suffira simplement de faire un arrosage à l'eau au lieu de l'engrais et de reprendre les engrais à plus faible dose. Les tiges sont un bonne indicateur de la santé des plantes, hors génétique spécifique, elles doivent être verte et tendre, pas dur. On continue la FIM et la taille de certaines feuilles qui peuvent être gênante.
Likes
11
Share
I forgot to setup the cam for week two after adjusting the height. Oh well maybe next week. Ghetto lights again, full spectrum with some FL. LED has a 2400RPM fan on a 5LBs heat-sink it gets hot AF like 400 watts all lights from the wall. Three Types of White Light-emitting Diodes on same grow warm, neutral, and cool, with 11%, 19%, and 28% blue light, respectively. Overall, the low blue light from warm white LEDs increased stem elongation and leaf expansion, whereas the high blue light from cool white LEDs resulted in more compact plants. Initial growth under cool white LEDs should promote the growth of short, sturdy hypocotyls. Subsequent transition to warm white LEDs should promote leaf expansion. Finally, after canopy closure, cool white LEDs should be used again to prevent excessive stem elongation. These effects could also be obtained by modulating the electrical current to red and blue monochromatic LEDs, achieving different blue ratios without the requirement for two sets of LEDs. Cool white LEDs may be the light source of choice because their high percentage of blue light (25%) means that they can meet the blue light requirements for normal development, even at low PPFs. Furthermore, measurements indicate that cool white LEDs are more electrically efficient than the neutral and warm white LEDs. The efficiency of LEDs is rapidly increasing and is approaching the efficiency of HPS lamps.
Likes
13
Share
Week 3 veg... The Upgrade is Official: From the Floor to the Throne. ​Finally got the girls into the tent and under the new light getting dialed/settled in. ​After roughing it on the bedroom floor for a while, I’ll be honest—they’re looking a little beat up and battle-worn right now. But the "dark days" are officially over. We’re in recovery mode now, giving them the space and tech they deserve to thrive. ​The Game Plan: ​Light Acclimation: I’ve got the new LEDs cranked to the top of the tent. I’m letting them adjust to the new spectrum and intensity without the stress of being blasted too soon. ​The One-Week Buffer: I'm giving them a solid week to find their legs, find their rhythm, and start reaching for that light. ​I’m not sweating the current look these girls have absolute beast genetics, If any plants can bounce back and explode, it’s these ones. Now that the environment is locked in, it’s time to see what they can really do. Watch this space 👀 Thanks for dropping by Peace and love. Grow on ✌️💚
Likes
4
Share
the time is finally here, super OG was harvested (during a tornado warning at that😂) and she's currently drying in a 2x4 tent waiting to be cured. this is so surreal and we couldn't be happier over here! didn't get a wet weight but will get a dry one eventually.
Likes
1
Share
@kdifiori_
Follow
The sixth week is over! This girl is taking it easy, while becoming more and more beautiful. Pistils, pistils everywhere, as Buzz would say. The prospects are really excellent. This week she grew to 83 cm and drank a total of 3.5 L, 2.5 with nutrients and 1 L of water only. The lamp is now fixed at 30 cm at 100%. Week seven is coming! Show us some calyxes, girl!
Likes
4
Share
This week has been troublesome.. had a plant show severe wilt/droop one morning and despite being proactive in trying to revive it.. I am losing the battle. I have isolated that plant and another that is looking similar thinking some possible root pathogen issue to blame.. however I ended up floating one out and examining the roots and can’t see or smell any sign of rot.. it’s got me puzzled, for now they are isolated in plant hospital.
Likes
2
Share
@EtnoGrow
Follow
bueno se hizo una por primera vez una cosecha por partes, como indicamos en el post anterior, se cosecho los cogollos donde la luz pegaba mas al parecer y estaban mas desarrollados, la cosecha fue con tricomas blancos tendiendo a transparentes con pocos ambar, en opinion ya luego de una semanas y una segunda cosecha, es que cosechamos pronto por temor al pasarnos al ser primera vez, entonces posiblemente nos apresuramos un poco ligeramente o confundimos los tricomas tendiendo a ser transparente por los blancos que es lo que indica la teoria el punto de corte, pero no nso quejamos quedo genial! subiremos el segundo punto de corte luego de 2 semanas . LAS ULTIMAS FOTOS LAS DE LAS 2 SEMANAS MAS 2DO CORTE.
Likes
117
Share
@BigDaddyK
Follow
Ok this is my Full guide with pictures on how to setup a Deep Water Culture grow, items you will need for this grow - Firstly a TENT or ROOM i use a tent REMEMBER stuff you buy NUTRIENTS off eBay and Amazon could be decanted (watered down) , or cheap chinese fakes (Ph Meters, PPM meters) you should really buy these things from you local hydroponics store,as they are guaranteed , i ve dropped a few into the bucket and they are fked,its been a sunday night with a bank holiday monday and i m fked, 1) Ph Down - makes the ph of water LOWER - this is VERY STRONG SHIT , wear gloves and googles if you are messing with it, i drop a bit into my main reservoir Ph 6.9 ( maybe 10ml per 200L) 2) Ph up - makes the Ph go higher - also STRONG SHIT -only needed in Emergencies 3) Ph meter 4) PPM Meter or EC meter 5) 20L Bucket + moulded lid netpot 6) Air Pump ,air hose 3m ,air stone x2, 7) Pebbles to fill to top of netpot, 8) ROOT IT cubes , i use these and ONLY these, by that brand,i know why,and so im telling you, 9) Seeds - I prefer Fast_Buds ,autos ready in 10 weeks of 18/6 - top quality 10) Nutrients, I use Canna as they are the easiest, they have a way of filling the one side , if you take the top off you can squeeze into the measuring side - I would also recommend Advanced Nutrients,but they are more expensive - so you will need 1L Canna Aqua Vega A+B ( it comes as two parts that you cannot mix together , when you put this into the water you MUST stir it well before putting each one in seperately otherwise you will get salts formed and crystals floating around,10 ml per 10L week 1-2 ,15ml per 10L week 3, 20ml per 10L in week 4) 1L Canna Aqua Flores A+B (as above) 25ml per 10L week 5, 30ml per 10L week 6 ,30 ml per 10L week 7 , 25ml per 10L week 8,15ml per 10L week 9, 0 per 10L week 10 250 ml Canna Rhizotonic (roots love this use this from start 20 ml per 10L and cut down after 4 weeks to 5ml per 10L up until week 9 250 ml Canna Cannazym ( breaks down dead roots, enzyme of some sort) 15ml per 10L from week 3 through to week 9 250 ml CannaBoost - (quite expensive but worth it, DWC will show you why) 15ml per 10L week 3 to 4 , 25ml per 10L week 5-9 250 ml Canna PK 13/14 (bud booster) this is optional because you only add it once,personally i add 15 ml per 10L in week 7 so its stays in for 10 days I leave my water for at least 24 hrs before using it, in a big old olive container i bought , i think its 225 L i might be wrong, but it was cheap , solid and had a top :) I check my water levels ,my PH and PPM daily 11) Jubilee clips x3 - to secure the fan ,filter and outlet.( 5 clips if using air cooled hood ) 12) Fans - i have 2 little fans and 1 big one = think about it, outside there is always good air flow - 13) Extractor fan -mine is 6 inch 14) Carbon Filter - mine is 6 inch im not overly impressed with any brand. 15) Ducting- 5m of 6 inch easy enough,well for me... 16) Ballast - LUMATEK -i found this one amazing and switchable. 17) Lightbulb -600w HPS ALL THE WAY but i would use 1000w HPS if i could keep the heat down, they both fit in same fitting 18) Air hood - i have a MAGNUM superXXXL it has screw in holders for glass , they are quite tight 19) Timer for lights , must be good quality , I do 17 hrs on 7 off as it's more natural 20) Syringes for measuring accurately 21) Bucket to mix solutions THE GOLDEN RULE - you can always put in but never take out - never put in too much or undiluted into the reservoir unless you really know what you are doing, less is better than too much . Ppm v EC - you may well buy an EC meter instead of ppm meter there is an easy way to convert between the two ~ 1.0 ec = 500 ppm EC multiply by 1000 then divide by 2 to get ppm This diary will start shortly but as so many people ask me how to setup HERE YOU GO :)