Processing
Likes
Comments
Share
Likes
33
Share
@Joni2017
Follow
The big day is here! šŸ˜Ž Today, March 28th, 104 days (15 weeks) after germination, I have harvested my first indoor photoperiod plant. It has been an incredible challenge, especially managing it in the middle of a winter environment, but the results speak for themselves. šŸ“ Harvest Data (Wet Weight) -Total Wet Weight: 56.5 grams (15.7g + 40.8g). -Final Height: 40 cm of pure density. -Status: Rock-hard buds and an impressive resin layer. -Dry Estimate: I estimate that after water loss (60-70% less), the final dry weight will be between 14 and 17 grams, given how dense the buds are and the cold conditions we’ve faced. šŸŒ”ļø Process Summary -Managing a grow with lows of 12°C for my first indoor photoperiod experience has been difficult. I am aware that a climate control system would have been ideal, but the budget is what it is šŸ˜†. Despite the limitations, using lukewarm water for irrigation and controlling the lamp height were vital. This plant has been a great learning experience, and I am sure the next one will be much better, applying everything I’ve discovered during these 15 weeks. Now, on to a slow and controlled dry so the flavor is as spectacular as its look! I want to wrap up this diary by thanking everyone who has joined me during these 15 weeks. Your likes, and comments have been an extra motivation to pull this Critical through despite the cold challenges. It has been an incredible learning journey, and I couldn't be happier with the outcome of my first indoor photoperiod plant. See you all very soon with the Cream Caramel and that Main-Lining I have planned! Happy growing and happy smoking to everyone! šŸŒæšŸ’Ø
Likes
5
Share
@MrFriday
Follow
26.08.2024 1. RDWC: I run a DIY system made of 4 Buckets 17L+separated control/tank bucket (12L operational water per bucket used) fallponic plus underwater current. I don't know why I have made such system I just wanted to be sure that I have included every possible option. I'm not sure but maybe I'll upgrade it to rainponic it's not that hard of a job. I'm not using my 100L reservoir this run becose it needs replacement old one made a small flood in my garden. 2. TENT AC Infinity 5x5 3. Airpump Hailea ACO 388 D 70L/min. 4. Water chiller: hailea water chiller hc-150a. 5. LED GROW light Grand Master Level Tarantula voyager 1500W 2 chanel's plus controller (it will be my first run with this monster it just arrived). 6. INLINE FAN: AC Infinity cloudline S6 carbon filter. 7. CLIP FAN: AC infinity Cloudray S6 3 pcs. For low middle and over the LED air movement. 8. Humidifier AC INFINITY T3 (I don't need stronger one naturally the humidity here is around 65-70%) 9. TENT CONTROLLERS: controller 69 PROX2 10. Germination/humidity dom by AC infinity with germination lamps 40W Ionabeam S11 only for the first 2 weeks before VEG. DAY 1 Closed in a box hiden in a dark boiler room. Room temperature 25C EC 850 RH 90% Instruments used for measuring: AC Infinity Hydroponic Meter PRO AC infinity VPD thermometer DAY 2 5/6 seeds have start to crack open I guess tomorrow or the day after they will be all ready for the cubes. DAY 3 ROOM TEMPERATURE 26 C Relative Humidity 83% 5/6 seeds are showing signs of life. The 6th one is a little bit slower it's cracked as it can be seen on the picture but it refuses to show it's tale. I believe tomorrow it will be ready. On day 4 I'll put them in the "Root Riot" cubes and after that I'll just monitor the RH and RT until I see the sprouts. DAY4 ROOM TEMPERATURE 24.5 RH 94% 6/6 seeds have germinated so far. Today I'll move them in the Humidity dom where they will stay until they become seedlings and I'll keep them there until they are ready to be moved in the RDWC system and coco coir. In the video I have show my method of preparing the cubes for the seeds next update will be tomorrow probably only for temperature and humidity. DAY 5 ROOM TEMPERATURE 25-27. RH 89-95 I can't believe that I'm seeing first sprout today. Maybe this strain is one who can take a little push 🤣🤣🤣 I'll keep in mind and I'll se how much I can push it. Unfortunately I still don't have CO2 for veg and flower but I can try other different little tricks. I'm happy with this seeds obviously 42 Fast Buds are giving a really quality seeds. Let's see what kind of buds will come out of this seeds. I hope tomorrow everything will be sprout out and i will turn on the lamps. DAY 6 PPFD 120 ROOM TEMPERATURE 24.5 RH 92.1 It's day six 4/5 seeds are successfully germinated. Maybe the next two will pop out but for one of them I'm not so sure. Anyway I have one spare seed that I can pop out for the coco project plus I have one Papaya Cookies Auto for the fifth bucket so that's no problem. The seeds ar under the light AC Infinity Ionabeam S11 on level 3 equal to 115 ppfd plus the DOM extension. DAY 7 ROOM TEMPERATURE 25C RH 82% I have 4/6 successfully germinated seedlings. Tomorrow I'll open up the humidity dom a little bit. It's good to have spare seeds. Now I'll have to plant my spare peace of gorilla cookies and probably one Papaya Cookies Auto (gift) becose my plans were for 6 plants. Anyway this 4 soon will be transplanted in the RDWC flowering pot. Let's see what tomorrow have to say. DAY 8 ROOM TEMPERATURE 25C RH 82% Amazing root development, I wasn't expecting this kind of speed but obviously tomorrow I'll transplant them in the RDWC even before the VEG state. Maybe I'll keep them a few more days when the first set of leaves is all out. DAY9 ROOM TEMPERATURE 24.1 RH 58% Today is the last day in the humidity Dom. I delayed the move becose i wanted to have a longer stems and becose my fertilizers got lost in the depo so ill receive them tomorrow. We have very healthy baby's with a lot of tiny roots so it will be perfect to start then from day 10. DAY 10 ROOM TEMPERATURE 26-27C RH 70% EC 115 pH 7 This is the fastest seeds I ever see. I have never transferred seedlings in to RDWC so far, usually I make this procedure around day 17-20. While I was transferring them one of the seedlings accidently snapped a little bit but I hope it was not fatal enough and maybe it will survive, only the time will show, anyway I have another one in coco so I can always transfer it in to RDWC if needed. EC is only 115 for today becose of the little bit of ATHENA BALANCE I dropped in the water, so far the roots are not touching the water so i can add the fertilizers tomorrow while I'm fresh. DAY 11 Water Temperature 18C Room temperature 28C EC 120 pH 7 PPFD 200 RH 70% They look nice and healthy still not enough signs of roots for picture but so far the seedlings look fresh. One more day in the Formulex+tap water and they will go in the Athena by day 13. DAY 12 Water temperature 18C Room temperature 27C pH 7 PPFD 220 RH 70 AC 240 Everything is going g quick and perfect. So far this run is going smooth as never. I never had root development that quick as this with this seeds. I'm almost in love with them. After a quick summary with my previous runs I decided to double the AC before tomorrow when I'll change the water and I'll replace it with 6.0 pH RO water and the full athena program for the RDWC. So far so good let's see what the Athena nutrients will show after one week. DAY 13 RH 70 Room temperature 27-28 EC 290 pH 6.1 Water Temperature 20C PPFD 300 Light cicle 20/4 I couldn't resist to flip the fertilizer to athena. After all as soon as I teach em what its better. Full water change of the tank and new suplements. Formulex is amazing suplement for the first two weeks maybe it can carry most people to whole VEG if it's in soil or coco, but I want the real food in RDWC. So far all the plants have amazing small roots so that means the system work well. Let's see the progress tomorrow, but I beleave in the middle of the week this plants will be already in official VEG period. DAY 14 RH 70 Room temperature 26C EC 290 pH 6.0 Water temperature 19.5-20C PPFD 350-400 Light cicle 20/4 I needed a little bit more light. I don't know how to explain it but its a grower thing and now my seedlings are looking better than the morning. They were looking a little bit "dizzy" if I can use this terminology. So basically in perfect water temperature, perfect fertilizer level and good aeration, there was nothing left beside the light. As I'm saying you can't feed a lot if you don't have enough light. I added the spider farmer SF 1000 EVO over the water container, becose the big fixture is too far from them, but I can't put them under the Voyager, becose my previous grow is in the final week. So now they are on a separate light 🤣🤣 🤣 370-400 PPFD is a little bit much but I beleave they will manage it. After all the plan of this run is to reach 1000 PPFD in the final days. DAY 15 RH 70 Room temperature 26C EC 290 pH 6.0 Water temperature 19.5-20C PPFD 350-400 Light cicle 20/4 So far the progress is mainly on roots and some new leafes are coming out. Probably next set of leafes is going to be the first that will mark the veg stage. I have added a little bit of ATHENA clense today and by far notging ha e changed since yesterday. DAY 16 RH 70 Room temperature day 26C Room temperature night 23C EC 290 pH 6.1 Water temperature 19.5-20C PPFD 350-400 Light cicle 20/4 As I was expecting most of the job is pre-veg, what I mean is that the results we can see are mostly in root development and ohh boy this is a crazy root spike in just 24 hours. I don't know is it becose of the Athena or just the genetics of the seedling but Im really amazed. In just 11 days from first seedling until today and I'm seeing some crazy root development. I truly beleave that the next set of leaves will be marking the vegetative stage and then we can start the game. DAY 17 RH 55-60 Room temperature day 26C Room temperature night 21-23C EC 320 pH 6.18 Water temperature 19.5-20C PPFD 350-400 Light cicle 20/4 I decided to add a little bit more Athena Ca-mag. It feels like that my little ladies are struggling for it. I'll see the results tomorrow. DAY 17 RH 55-60 Room temperature day 26C Room temperature night 21-23C EC 320 pH 6.18 Water temperature 19.5-20C PPFD 350-400 Light cicle 20/4 I decided to add a little bit more Athena Ca-mag. It feels like that my little ladies are struggling for it. I'll see the results tomorrow. DAY 17 RH 55-60 Room temperature day 26C Room temperature night 21-23C EC 320 pH 6.18 Water temperature 19.5-20C PPFD 350-400 Light cicle 20/4 I decided to add a little bit more Athena Ca-mag. It feels like that my little ladies are struggling for it. I'll see the results tomorrow. DAY 18 RH 55-60 Room temperature day 26C Room temperature night 21-23C EC 320 pH 6.18 Water temperature 19.5-20C PPFD 350-400 Light cicle 20/4 Okay two more days and we will be in veg. It's Not like we are not in veg today I just want to keep the update from Sunday to Sunday. DAY 19 RH 55-60 Room temperature day 26C Room temperature night 21-23C EC 320 pH 6.18 Water temperature 19.5-20C PPFD 350-400 Light cicle 20/4 We are in veg tomorrow so today we change nothing. Tomorrow will be great day.
Likes
25
Share
@EBxAH
Follow
Well week 3 started on Monday, I'm late to the party, lol. Everything is going pretty decent so far. One surprise though...they have a smell. They didn't at this stage last time. Weird, lol. I gave them a slight trim and will be done with that until flowering. They seem very happy! āœŒļøā¤ļøšŸ˜šŸ€šŸŽ¶ EB
Likes
8
Share
Likes
22
Share
I have a new light with a bloom setting hopefully that will make a nice flowering. Got a new fan for air circulation. The new light has cooling fans. Haven't noticed any burns so im happy with my order. If you look at the last few pictures my tent is home made and cheap very cheap. The lights not an expensive one but I think its fine for now.
Likes
9
Share
Day 28: On day 21 until day 24 i switched the light schedule to 7-1 and i did not give them water at all. On day 24 i topped the soil with dr jimz organic nuts along with watering with dr jimz soup for the soil mix. i put a trellis net up however i have not actually used it yet. Also on day 24 i changed the lights back to a 6-2 schedule. I am letting them kind of do there own thing trying not to bother them much unless needed and I am however having problems with one of the plants a pic of it up top. It is growing however its just clawing the whole time and i dont know what to do or how to fix it so any advice would help because i really dont want to toss it. Thank you for checking my grow out and as always if you have any pointers or questions feel free to ask. Thanks again and happy growing. PS: I didnt take any photos for week one sorry in regards to that I was a bit nervous starting a grow diary and finally decided to do it end of week 2. Thank you for viewing and leave any tips or tricks if you see necessary. Thanks again and happy growing. šŸ˜€
Likes
13
Share
@JoeyGonz
Follow
Defoliated the heck out of them for the last time.. 2 weeks into flowering, now I’ll just clip stuff here and there that interferes with light.. But that’s it they both look healthy.. Crazy happy with the Red Diesels come back from death to 18ā€ tall so far and multiple colas. For a backup the Cinderella grew great.. Caught up to the diesel with a decent height and still growing.. Both strong plants I may try one re-veg, I’m in between that or mini field of green with Orange Creamsicle seeds I have.. The nutrient calculations are off.. I give them 5ml of mantis per liter every feeding, and 15 ml Bembe per gallon once a week now during flowering.
Likes
43
Share
~ GG4 SHERBET FAST FLOWER by FastBuds ~ Well fam, here we go again with another epic strain from FastBuds Fast Flowering stable. After having such tremendous success growing their Gorilla Cookies Fast Flower outdoors last year, I've decided to run another of their fast flowering strains outdoors this year... GG4 Sherbet Fast Flower! The best description of this awesome cultivar comes directly from my friends at FastBuds which is as follows: "Bred from extremely potent and flavorful Gorilla Glue and Orange Sherbet genetics, GG4 Sherbet FF (Fast-Flowering) takes all the best traits to the next level, offering a high-yielding strain that can produce up to 600 g/m2 in a 7-week flowering time. This super resilient Indica-leaning hybrid thrives indoors and outdoors, and in all types of climates while producing mouth-watering sweet, fruity, spicy and earthy terps that translate into a delicious sugary hazelnut aroma. Expect an extremely relaxing and overall happy effect that’ll leave you with a huge smile from ear to ear. It’s the perfect strain for growers of all levels of experience seeking low-maintenance yet highly productive photoperiod varieties that deliver quality and quantity without extra effort. GG4 Sherbet FF grows chunky buds with long dark orange hairs and spade-shaped calyxes that get encrusted with trichomes by harvest time, giving them a gorgeous silvery-white appearance. This medium-sized photoperiod can reach up to 200 cm in height and yields up to 650 g/m2 while developing that typical hybrid structure. GG4 Sherbet FF grows with a stocky, bushy appearance, developing one sturdy main cola and fat side branches that support huge yields without much effort. This super-fast variety produces distinctive light-green buds with a high bud-to-leaf ratio, making your trimming sessions a breeze. It’s a top-notch resin producer that doesn’t need much maintenance and will thrive in almost every climate, rewarding growers of all levels with extremely flavorful resin that makes for outstanding hash end extracts." ________________________________________________________________________________________________________________________________________________________________________________________________________________________________________________________________________________________________________________________ The Setup: This is going to be an outdoor grow, but I have started the GG4 Sherbet Fast Flower indoors as our weather is still too cold to put her outside (nighttime temp's dipping regularly into the 30's℉). The plan is simple... let her grow inside under a 19/5 light schedule until the nighttime temperatures stay above the mid 40's℉, at which point she'll be moved outside and transplanted into the soil which I have already setup and inoculated with beneficial microbes, and then let the fun begin!šŸ¤ŖšŸ’š ________________________________________________________________________________________________________________________________________________________________________________________________________________________________________________________________________________________________________________________ Weekly Updates: 4/18- Here we go into Week Three for the FastBuds GG4 Sherbet Fast Flower. She's fully acclimated to her outdoor location now and all I'm waiting for is the weather to warm up! 4/20- šŸƒHAPPY 420 FAM!šŸƒ 4/22- The GG4 Sherbet FF continues to do well with good color and vigor, considering the cooler weather we're having right now, adding another set of leaves. 4/24- I gave her a good watering today and am getting ready to get some straw to spread over her soil mound to help keep the soil moist and reduce watering frequency. There's another week for the little GG4 Sherbet FF. I'm really anticipating seeing her take off once our weather gets a bit warmer! Hope to see you next week... šŸ˜Ž
Likes
7
Share
Welcome to Flower week 5 of Sweet Seeds Mental Rainbow F1 I'm excited to share my grow journey with you from my Sweet Seeds Project . It's going to be an incredible ride, full of learning, growing, and connecting with fellow growers from all around the world! For this Project , I’ve chosen the Feminized Photo strain Mental Rainbow F1 : Here’s what I’m working with: • 🌱 Tent: 120x60x80 • šŸ§‘ā€šŸŒ¾ Breeder Company: Sweet Seeds • šŸ’§ Humidity Range: 50 • ā³ Flowering Time: 7-8weeks • Strain Info: 22-30%THC • šŸŒ”ļø Temperature: 26 • šŸµ Pot Size: 16 • Nutrient Brand: Narcos • ⚔ Lights : 600W x 2 A huge thank you to Sweet Seeds for allowing me to try my Best with this amazing collection from Photo Strains they managed to Sponsore . Big thanks for supporting the grower community worldwide! Your genetics and passion speak for themselves! I would truly appreciate every bit of feedback, help, questions, or discussions – and of course, your likes and interactions mean the world to me as I try to stand out in this exciting competition! Let’s grow together – and don’t forget to stop by again to see the latest updates! Happy growing! Stay lifted and stay curious! Peace & Buds!
Likes
2
Share
@Jabbamo
Follow
_______________________________________________________ Mo. 16.2. - Pflanzenhƶhe 40cm - Lichtzyklus 12/12 _______________________________________________________ Di. 17.2. - 2,3 Liter pro Pflanze gegossen (ca. 50ml Drain) 0,3 ml / Liter "Calmag" 1,0 ml / Liter "Bio Grow" 1,0 ml / Liter "Bio Bloom" 1,0 ml / Liter "Top Max" Ph 6,5 / 430 qqm - Toplight Abstand auf 60cm verringert - Toplight Leistung auf 75% erhƶht - Luftbefeuchter deinstalliert - under canopy lights (UCL) installiert - Abluft Leistung auf stufe 4 erhƶht _______________________________________________________ Mi. 18.2. - Pflanzenhƶhe 45cm - Netz gespannt (1.Ebene) _______________________________________________________ Sa. 21.2. - Pflanzenhƶhe 53cm - 3,0 Liter pro Pflanze gegossen (ca. 100ml Drain) 0,5 ml / Liter "Calmag" 1,0 ml / Liter "Bio Grow" 1,0 ml / Liter "Bio Bloom" 1,0 ml / Liter "Top Max" Ph 6,4 / 420 qqm _______________________________________________________
Likes
6
Share
20 mls a gal of finish. slightly heavier watering then usual for flush. wet trimmed plants over last 3 days of life day 63-66 while giving total darkness to plants not being trimmed. runoff was basically pure ro by end of flushing
Likes
3
Share
The video is probably the quickest update šŸ˜„ My next run; i plan to be less of a Variety King and finally use my SCROG net. The beans I'll be running to scrog are Royal Cookies and El Patron (both RQS), if anyone has any experience with those strains? I'll be running a smaller Apple Fritter and Blue Cheese auto too... hey, I have very discerning terp-buds, ok?!
Likes
15
Share
Man kann schon die Terps riechen, wenn man die Trichome berührt
Likes
3
Share
@JoExotic
Follow
Week 11 - Strawberry Gorilla Auto what a beautiful plant. This has to some of the best flower I’ve ever smelled in my life hands down. The smell is exactly like a Strawberry Donut. To be able to mix a strain to make it smell like this is truly mind blowing. My first grow is growing better than ever ! I’m going to let the pot dry another day. Then it will sit in 48hrs of darkness before I karate chop them. Happy growing everyone and good luck !
Likes
9
Share
@HighKing
Follow
What's up guys? This week was very nice. They gained a lot of trichomes and the smell became extremely strong. Smells like a very sweet perfume. I love it and I can't wait to have a taste. I fed them the last time today. From now on they will get pure water only. See you next week!
Likes
11
Share
@CalGonJim
Follow
1/2/23 she’s doing great I moved a leaf and noticed that she has tan lines. That is amazing. This lights incredible I took the two bottom branches that I usually trim off. I’m glad I didn’t because I got 1.83 ounces and 1.78 ounces wet. This plant has been the best strongest plant I’ve ever grown it’s really nice and it smells great. I’m gonna give the rest of her, maybe another couple weeks it’s just exciting to watch her grow. I’m not in a hurry to harvest. I do partial harvest as I go along. 1/3 I turned the viper spectra XS1500 light down to halfway which is 82.3 W. And the amount of energy still is more than two of my old spider farmer lights. I had no idea how important brand new LEDs are this is just fantastic. I bet I can grow an entire plant for probably 90 W. 1/4 yum yum omg smells gooooooood.. FYI, Just because a Gamorrean pledges their loyalty doesn't mean they wont eat your weed, lesson learned. 1/4 Just smoked some that had been drying for only 2 days. The smell was so strong like no auto I have ever smelled. This is like top shelf photo from the dispensary. I am totally impressed. 1/6 i’m going to set up a new tent. It starts with the power source. It looked really ugly, so I wanted to try something nicer. I got one of the TP Link power strips three individual outlet controls for the smaller tent that I will germinate in my use one to monitor the power of the light and I keep switching them around. It’s really nice to have. 1/8 I’m going to plant some seeds today. It’s Elvis’s birthday. I threw away a liter of Purpinator today. I’ve been having nutrient troubles, and I noticed a little that I had mixed up in a small spray bottle had started to congeale. And after I tried 6 mL of it in a gallon twice I noticed some plant damage. I don’t know if it’s that stuff or not but when I add something new it seems to cause damage. So I will never use that again. it’s taking me a month to set up a small 24 x 24ā€œ tent I don’t know what’s wrong with me so I have two 27ā€œ x 27ā€œ and one 24 x 24ā€œ. The small tent will be for photoperiod also for germination, the other two are going to be for autos only. I’ve discovered auto flowers need their own tent and their own space, especially the way I train them. I top them after the 3rd node then wait until a couple weeks into flower and I soften the branches pressing them between my thumb & index finger to keep them limber then spread them out so they kind a look like a giant crab, but they grow up very strong and they don’t need support I was going to go with 5 gallon but I think it would be just too heavy so I’ll stick with 3 gallons. I’ll be starting to gorilla cookies this coming week probably tonight, but I’ll start the diary tomorrow. If you hold the phone up to the TV, it types out the dialogue . I’m gonna d mad max later don’t you wish you were like me easily amused? You get a lot less brains on your wall that way.
Likes
2
Share
Sep 9th flipped to flower
Likes
1
Share
🌱 Veg Week 5 – Erholung & Vorbereitung auf den Flip Veg Woche 5 war etwas holprig. WƤhrend ein paar Tagen Abwesenheit standen die Pflanzen zu trocken, kombiniert mit 24h LED-Licht, was zu leichtem Stress und CalMag-Mangel geführt hat (unruhige Blattfarbe, viele kleine Budsites). Nach Anpassungen: Umstellung auf 18/6 Licht etwas entschƤrft CalMag-Gabe leichtes Lollipopping & Defolieren Bereits nach wenigen Tagen zeigen die Pflanzen eine deutliche Erholung: neues Wachstum ist vital, Triebe werden krƤftiger und die Pflanzen wirken insgesamt entspannter. Das Zelt ist gut gefüllt, weitere Trainingsmassnahmen sind nicht geplant. Der Stretch soll den Rest erledigen. Der Flip in die Blüte ist in den nƤchsten Tagen geplant, sobald die Erholung vollstƤndig abgeschlossen ist.
Likes
26
Share
@Growin_it
Follow
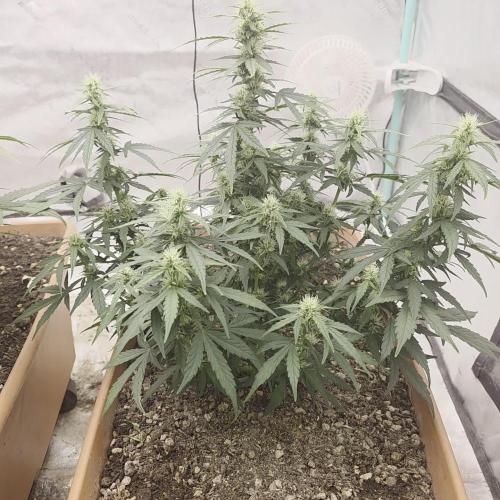
Defoliation on lower branches to improve air flow and future larf. Going into 12/12 for flowering, next week.