


Likes
Comments
Share


@ZalySk
Follow
D42: She looks like she was responding to the switch to the hps tent by going into flower, but I pulled out my last flowering plant and switched the bulb to MH so it'll be interesting to see if she revegs now of if she keeps trying to flower. I had a plant do this before and I ended up chucking it because it got confused and stopped growing.
She's got tonnes of nodes now though, pulled four fan leaves from the main stem to open up the insides to light and due the half attempt at mainlining at a young age she's got weird posture and lots of branches.
Gave her a feed of organic grow.
D47: another feed of organic grow and humid acids. Some more lst, and picked four leaves off that were blocking nodes.
D48: looked like she took almost the whole week to look like she recovered from the transplant shock. The lst yesterday made everything real nice and even. I think I'll keep tying her down and when all the branches reach the same height I'll change the tent to flower.

Likes
57
Share


@MadeInGermany
Follow
Hey everyone ☺️.
This week they have made great progress 👍.
So that next week they can be put in their 11 liter pots and get their Green House Company Powder Feeding 😋.
Otherwise there is nothing more to say for this week, except have fun with the update 😛 stay healthy 🙏🏻 and let it grow 🌱👌
You can buy this Strain at :
https://sweetseeds.es/de/red-mandarine-f1-fast-version/
Type:
Red Mandarine F1 Fast Version
☝️🏼
Genetics:
Red Poison Auto®️ (SWS39)
X
Tangie (California Orange x Hybrid Skunk)
👍
Vega lamp:
2 x Todogrow Led
Quantum Board 100 W
💡
Bloom Lamp :
2 x Todogrow Led
Cxb 3590 COB 3500 K 205W
💡💡☝️🏼
Soil :
Canna Coco Professional +
☝️🏼
Fertilizer:
Green House Powder Feeding
☝️🏼🌱
Water:
Osmosis water mixed with normal water (24 hours stale that the chlorine evaporates) to 0.2 EC. Add Cal / Mag to 0.4 Ec Ph with Organic Ph - to 5.5 - 5.8 .

Processing
Likes
81
Share


@NugLife420
Follow
Things are going pretty well. 🙂 I am just about to start flushing. Buds are swelling up and getting denser every day. Getting close to the finish line. 😎 I'll update throughout the week.

Likes
2
Share

@IslandTerps
Follow
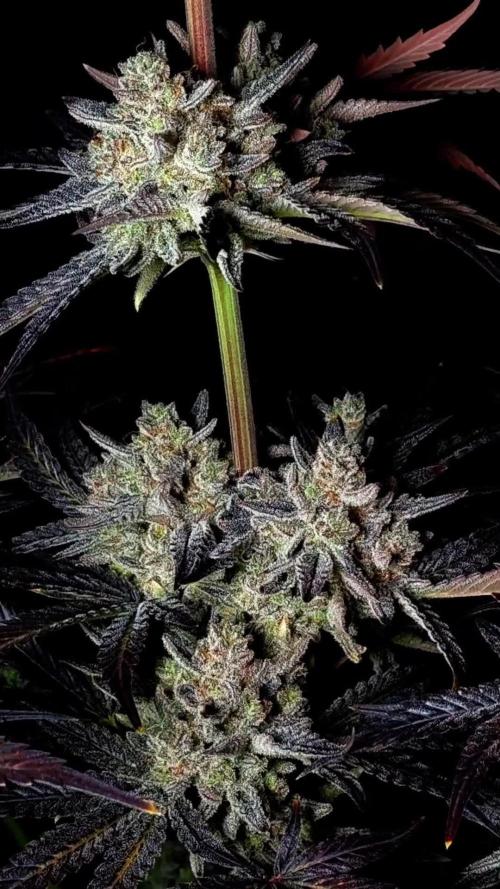
Strain: Fast Buds – Mendo Frost Auto (5 Plants)
Grow Type: Indoor
Pot Size: 3–5 Gallon Pots
Medium: Peat Moss & Perlite
Nutrient Line: Athena
Week 11 Update
Harvest has officially begun! 🌿✂️
This week, two of the Mendo Frost girls were chopped, and I couldn't be happier with how they turned out. They produced some absolutely beautiful buds, and seeing them finally come down after all these weeks has been really rewarding.
There's one more girl that's just about ready, and she'll be coming down by the end of this week. Once all of the plants have been harvested, I'll put together a full harvest log covering the entire run.
Before harvest, the girls were flushed and are now hanging to dry. Now it's just a waiting game while they slowly dry before moving on to curing.
I'm really looking forward to seeing how they smoke because everything about this strain from the structure and frost to the terpene profile has been impressive so far. Hopefully the dry and cure do them justice 🔥
Late Flower / Harvest Notes
🌿 Two plants harvested this week
💧 Flushed before harvest
🌬️ Currently hanging to dry
✂️ One remaining plant to be harvested by the end of the week
And don’t forget to use my discount code ISLANDT for 15% off your next order at Fast Buds 🌿🔥

Processing
Likes
4
Share


Likes
7
Share


@R_Owl_Mirror
Follow
She has slowed her growth and begun putting on quite a bit of heavy buds. The 3 inches of growth is purely due to the increased size of the top cola. She has been drinking much more water so, I have reduced the nutrients per feeding since I am watering much more often. The plant doesn't give off much of an aroma but, if you rub a leaf between your fingers the scent smells similar to Garlic. I have reduced the number of large fan leaves so as to allow more light to reach the lower buds. My huge photoperiod Sativa is about one week away from finishing so, by next week I should be able to move this plant into the 8-foot tall tent. This will allow me more headroom as well as provide some side-lighting. That should help the lower buds to receive more light and hopefully bulk-up. Well, that is it for this week. I hope people are following this grow. I haven't heard from anybody so, it's almost like I am producing this diary for myself.

Likes
7
Share


Likes
14
Share


@SUMAN
Follow
I'm in the fade waiting for 30% amber it's taking forever tho, no amber as of yet on any plant also the barneys farm runtz muffin strain hermed on me...😮💨also put the runtz muffin in 3days of darkness Friday chopped today Tuesday Sept 5


Likes
47
Share

@ElNass
Follow
🌱 General Development
White Russian had a more eventful week. She reacted to light intensity and showed first signs of top bleaching, so I raised the lamp slightly, which immediately helped. Buds are chunkier than Bubblegum and stacking more aggressively, with a classic frosty look.
🌿 What I Did This Week
• Raised the light to prevent bleaching and heat stress on top colas.
• Enzyme tea (light) to boost microbial activity and help the plant handle the mid-flower nutrient demand.
• Adjusted irrigation to 5–6 L, keeping the soil evenly moist.
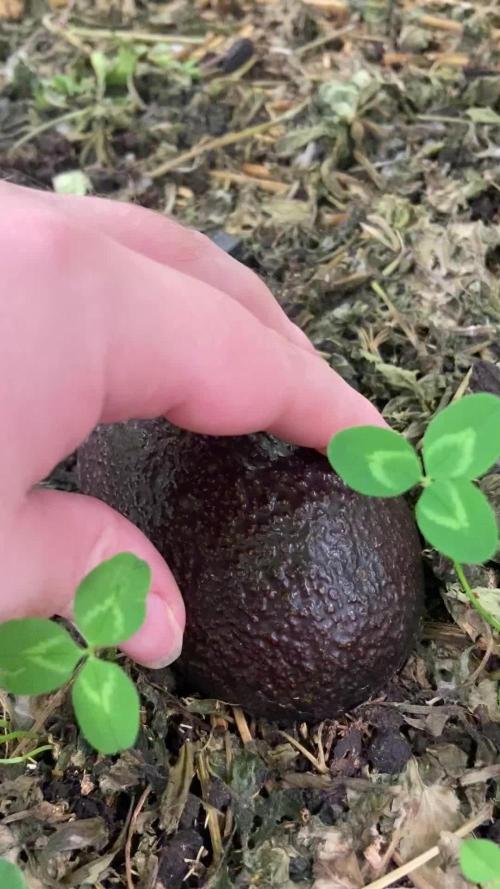
• Checked worms under the avocado → great activity, soil thriving.
⚠️ Issues Noticed
• Some upper sugar leaves slightly yellowing → normal light stress + high metabolism in mid-flower.
• A few lower leaves yellow → absolutely normal for Week 5–6 flower in living soil.
Nothing alarming, the plant is stable and responding well.
📈 This Week’s Progress
• Buds thickened significantly.
• Aroma stronger; more citrus/spice notes coming through.
• Resin production clearly increasing.
• Structure tightened after the light adjustment.
✨ Closing Note
White Russian is definitely the more vigorous one this cycle. After raising the light she bounced back instantly. Buds are swelling, resin is coming, and the canopy looks incredibly uniform.
Next week should be her “sparkle moment.” ❄️🔥
#livingsoil #organic #scrog #season2 #seriousseeds #ledgrow #nemessis200w #elnassgrow


Likes
5
Share


@DerEkstaseHase
Follow
3 Headies haben angefangen zu Schimmeln, ich hab sie dann sofort entfernt.
Schade, aber ist ja noch n Haufen dran.
Dann Daumen drücken und hoffen das die Pflanze die paar Tage noch übersteht.
Ich habe den Luftentfeuchter aufgestellt!

Likes
Comments
Share

@GeekWeed
Follow
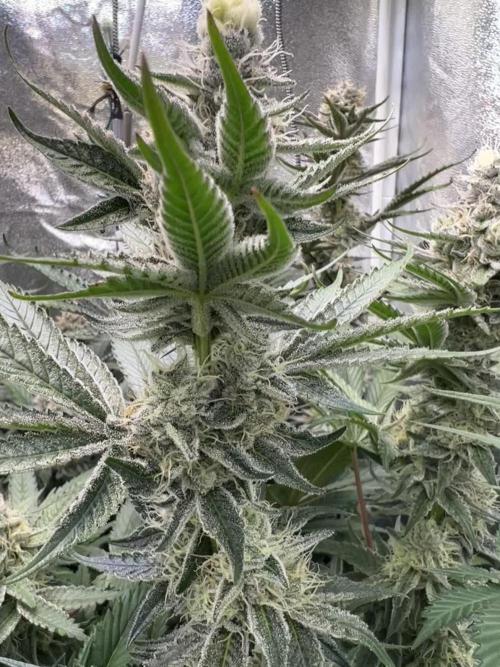
Entering the final stage of this run.. in other words, late flowering. Just giving 1600ml of RO water enriched with Ca and Mg. Guess I will feed a last time with Enhancer and Green Power tomorrow.

Processing
Likes
2
Share


@TolaMcFly
Follow
La planta ha comenzado a crecer vigorosamente en su 5ta semana de floración debido al estrés que sufre la floración se ha realentizado pero la planta se ve bastante sana y vigorosa como si recién se estuviese preparando para la explosión de la floración, todo caso noto que la cepa en sí tiene una floración retardada , florece parejo toda la floración y no avanza a explosiones como normalmente lo hacen algunas genéticas , predigo cogollos bastante compactos aunque no se ven Tan resinosas aún su efecto final lo dirá todo, hay una gran densidad de ramas y los entreudos son muy cortos debido a los leds y su ataque en espectros monovanda (450 nm royal blue) las hojas se ven muy sanas casi partiéndose de vigor y algunas raíces sobresalen sobre el sustrato.
Likes
31
Share


@TacoKart
Follow
switched to flower, 12 hours of dark and 12 of light.
All the plants seem to be caught up in growth and all are booming.
Still kinda just eyeballing nutrients doing good so far.
Got new camera mounts also so the bud growth can be watched better
Likes
22
Share


@julian100614
Follow
La pequeña ak48 esta empezando a llenarse de tricomas y empieza a desprender un olor bastante agradable y potente 🔥
Esta será la ultima semana en la que utilizaremos los productos para ir empezando a limpiar las raices de un modo mas progresivo 👌
31/10: Hemos hecho lavado de raices para prepararla en la cosecha
BUENOS HUMOS 🔥

Likes
16
Share


@CapeGrows
Follow
This week was mainly about making sure there are no leaks in the RDWC system. I germinated the seeds straight in to the easy plugs and placed them in the the net pots surrounded by clay pebbles. The Fastbuds genetics did the rest and came through with a 100% germination rate.
I will leave them running on clean water for the next couple of days. I will be making sure to monitor ph balances closely.
In regards to oxygen for the roots I constructed a waterfall system with added air stones from my air pumps to cater for healthy root development and sufficient oxygen.
Even though I have a lot of light in there, I have them all dimmed down to their lowest percentage.


Likes
20
Share


@Santica_Garden
Follow
So this is how things are looking for the ladies at the end of Week 2 from Seed. I have uploaded a video for you guys with all the information, any questions just ask away 👍🏾😎🔥

Likes
29
Share


@Belverde
Follow
Welcome mates
Two months have already passed since the harvest
I have only grown one plant of this Kush strain, so as always, the review may differ from the others due to the phenotype encountered
Anyway
With this I used the topping technique and a hardcore oretty defoliation ..
And I do not recommend doing it with this type of plants because it can suffer in the final yield
The flowers are pretty full of trichomes and present a very delicate sweet aroma and also in the taste...but the structure dosen't has a good appeal..
The effect it's a usual Kush, wich i really enjoy
Mind quite and body relaxed 👌
To me it's better using with a vaporizer, but it's enjoyable also in smoke
In the video i used organic rolling papers and filters by Raw and only pure dryed & cured flowers 🔥
And that's all
Maybe i cannot raccomended this one, cause my pheno as nothing to special...but i can definetly raccomended Barney's Farm because their feminuzed strains are pretty good with different terps and effects..
Thanks to everyone watched and readed 👍👍👍💪
And thanks to GD 🙏
✌️
🇮🇹

Likes
22
Share


@Njaak
Follow
Login issues led to missing a couple weeks, but things have been super smooth.
Buds are looking sweeeet and hairy. And they're really fattening up. She's one thick hairy lady.
Following the nutrient schedule without deviation, swapping and cleaning the reservoir every week (H2O2 clean), and keeping the humidifier filled.
I swapped the pump. First one randomly stopped working for no apparent reason. New one I spec'd with a much lower pump rate and it's a great improvement. No splashing, just a trickle recirculation so I keep it on 24/7.
The pH monitoring is so so so much easier now with the good Apera pen. What a difference it makes over the generic ones.