The Grow Awards 2026 🏆 


Likes
24
Share
@Lycheegrow
Follow
They didn't show any transplant shock after the transplant to their final pots. They do all show increasingly bad signs of calcium deficiency though. I'm going to give them a feed consisting of at least 0.5 ec of calmag in the next week.
At the end of the week, I moved them to the flower tent in preparation of flipping them. They are now on a 18/6 light schedule. First days didn't look too great, seems like the humidity in the room was off.

Likes
5
Share
@Hiddengrower
Follow
2/29 - 3/7: Thing started to shoot off very quickly, took the first batch of nutrients very very well so Im sticking around with the same thing for a little bit longer until shes big enough to where I think I can up it a little bit.


Likes
Comments
Share
@Kardo
Follow
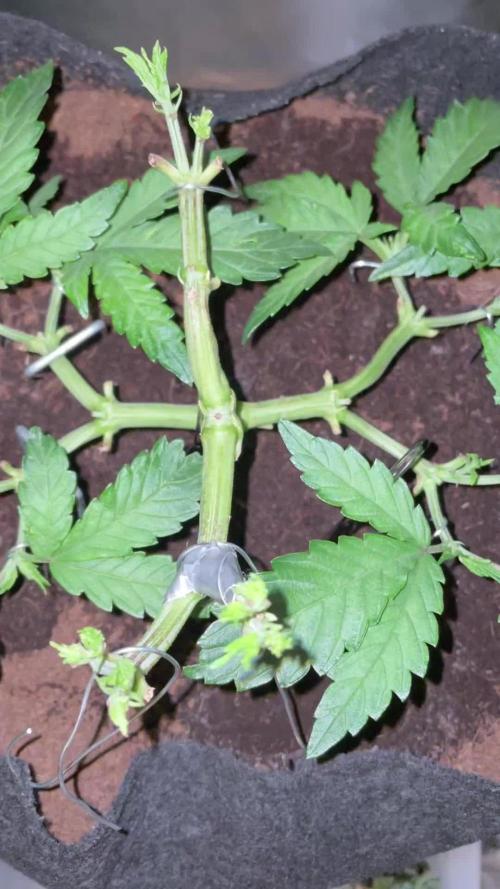
Die Purple wird nicht mehr getoppt wir schauen jetzt was die Triebe für eine Kraft bekommen
Likes
1
Share
@hinterhofgrower
Follow
.
🌱 : test harvest on day 86, 40,3g, day 88 44,5g, day 90 54g, day 92, 60,6g
💧 :
💡 :
🤔 :


Likes
11
Share
@Thigh
Follow
- Because it was very windy, I added some soil to support the plant. Once a week it is poured with 1 liter.
- Dadurch das es sehr windig war habe ich etwas Erde dazugegeben um die Pflanze zu stützen. Einmal die Woche wird mir 1 Liter gegossen.
Likes
25
Share
@DrGanj
Follow
Spread this girl out a bit using some string and mild LST. She's responded super well and all the bud sites seem to be getting a nice dose from the TS1000 :)
Bit late uploading this week but the pictures were taken back on Tuesday meaning this is still an accurately dated upload.
Likes
15
Share
@Shizzlemanizzle
Follow
Topping was great ! Starting now with LST using a wire but gently don’t want to harm the plant they opened up pretty good 🙏🏽 I am increasing water by looks.

Likes
30
Share
@SqwshKush
Follow
6th week of flowering, now noticing 1/2 hairs or hanged up and very very aromatic.
2 Oct - looking great.
3 Oct - installed insulated ducting
4 Oct - watered 2L/each, 3ml per 5L of P & K & bud burst. Feeding less past couple times as looked over fed.
5 Oct - gf now looking after them as away 3 weeks
7 Oct - watered.


Processing
Likes
10
Share
@BodyByVio
Follow
This week I Supercrop all the plants and spred them out over both lights. One more week of Veg and they are ready to explode
Check me out on Instagram @growmorestressless

Likes
161
Share
@Roberts
Follow
Girl scout cookies extreme autoflower has been growing well. She got her first lst, and defoliation today. Looking really good so far. Thanks again ILGM.
Thank you grow diaries community for the likes, follows, and subscriptions on my YouTube channel. Happy growing everyone 🌱🌱🌱

Likes
45
Share
@Alpengrower
Follow
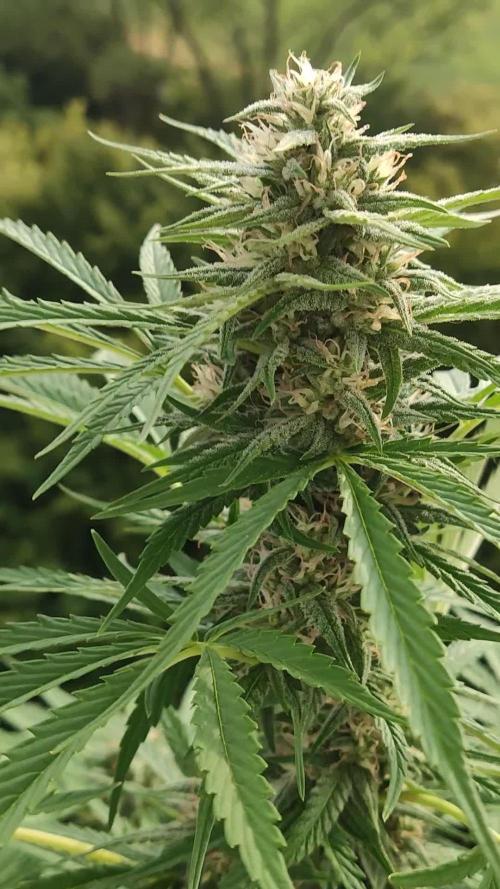
(CHOPPED AT DAY 100 ) great strain - long branching - strong lemon pledge smell - gigantic buds - pest resistant
this is the only pheno i grew , but i would definatelly try Lemon-Ak again
Likes
13
Share
@3lementa1
Follow
This is just a beautiful strain to grow. The leaves have a rich dark green appearance and the shape is a mix of fatter indica leaves and longer sativa leaves. It's tendency is a fairly manageable and predictable grow/stretch and it responds well to training and powerful lights. The leaves on one of them changed colour at the end of flush and went yellow with some purples and pinks but the buds themselves have almost a silver glow to them. The pistils come out in early flower in a very strong, spikey and symmetrical way that amplifies the cool glow given off by the trichomes. With the rich, dark, beautiful leaves, the whole appearance is really beautiful and otherworldly. One of the Wedding Cake plants self-pollenated and there are some seeds in the CBD Blue Shark, but they're few and far between. It's not a disaster like the Wedding Cake. Honestly I can't say enough good things about this strain. The plants were hardy, easy to work with and forgiving of mistakes and experiments. The flowers looked amazing through every stage of development, and the finished product smells great, tastes great, looks great, and makes you feel great. This is my favourite strain to grow so far.

Likes
19
Share
@KambleFrost
Follow
Wow the amount of growth over the last week have been staggering!
Keeping the plants on the same strength feed as not nute burn or deficiency has been shown yet.
HOWEVER I did notice some of them showing signs of sex!!!! I can’t tell yet so hopefully soon!
Installed a filter in the tent with an actual exhaust fan instead of my pc fan pushing air out.
The airflow seems great and it keeps temps nice and balanced
Heater gets temp to 81° With the fan pulling air out slightly then the heater stops and the exhausts kicks up faster to pull air in until temps drop to 75° rinse and repeat.
The runt is finally starting to grow lots now as well.
And I have a short time lapse video that I’ll try and post in a bit!
Noticing some mild weed smell now too, filters working as I don’t smell it outside only in the tent :) that makes me pretty happy lol

Likes
8
Share
@MG2009
Follow
01/01/2022
Potting up this weekend I hope 🙏🏻 then on last week of veg feed with coast of Maine Stonington plant food
5-2-4? I think l gotta check that.

Likes
9
Share
@xmackobox
Follow
Semillas regulares Alioli de Dr. Ganjah
Simplemente alucinante la calidad a pesar del pesimo cultivador xd
Likes
10
Share
@Dunk_Junk
Follow
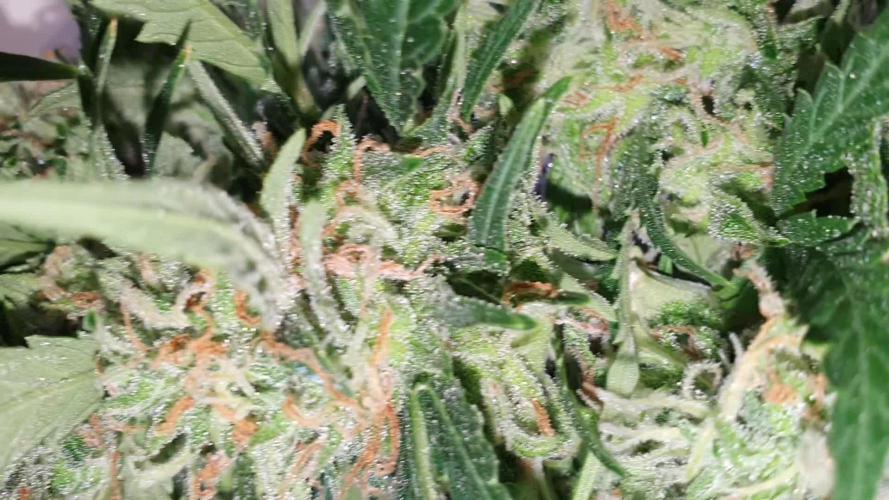
She's done!!
Super, super stinky!!!!!!!!
Covered in trichomes!!!!!!!!!!!
Will be harvested within 24h.
Likes
41
Share
@Growing88
Follow
Ripenes plant and deafling for penetration light pop corn buds,trichome is milky,wait other 2 week for harvest day
