


Likes
Comments
Share


@Madeofstardust13
Follow
2/3 plants started showing signs of too much light. Dialed light back and symptoms of yellowing tips have slowed. All have been defoliated as needed.

Likes
8
Share


@SkunkyDog420
Follow
Hallo zusammen 🤙.
Sie wächst sehr schön und macht keine Probleme.
Rabattcode für den BIOTABS-Webshop https://biotabs.nl/en/shop/ GDBT420, damit erhalten Sie 15 Prozent

Likes
11
Share


@4_Pro2Bono_0
Follow
These ladies did'nt stretched much so far in week 2 but that could be due to the light intensity and distance I had it at in week 1 of the stretch period. This strain is really starting to show signs of that Gassy, Sweet, Creamy smelly that I was looking for and so far these ladies have been a breeze to grow.

Likes
9
Share


@Sensemillia
Follow
day 28 from seed
No flower...
day 29 from seed
No flower...
Day 30 from seed
Finally signs of flower.
First pistils came trough.
Around 550-600 ppfd


Likes
2
Share

@Seabass
Follow
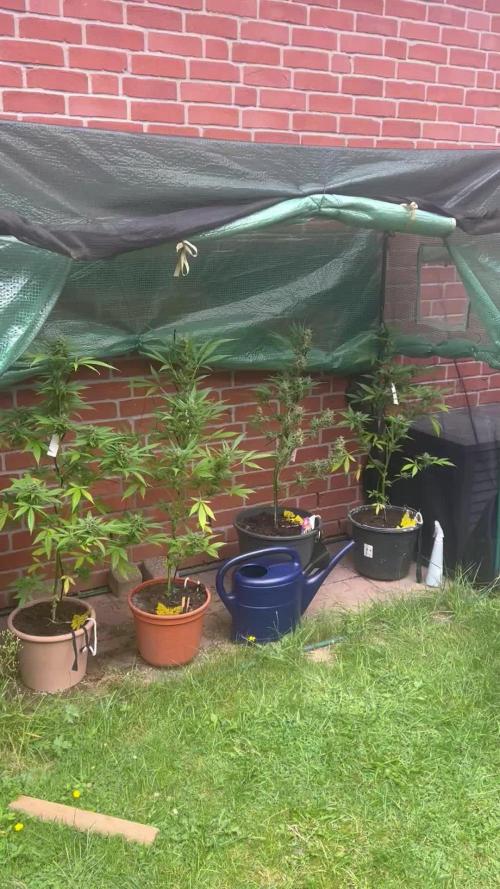
3.8. Weiterhin Schimmelprobleme.
Eine Pflanze notgeerntet und 1/3 der Blüten verloren. Schimmel auch unterhalb der Töpfe gefunden. Jetzt zum Glück wieder trockenes Wetter angesagt.

Likes
8
Share


@DeepRootsGrowTrees
Follow
Week #12 Baby Boom By Kannabia
Week#12 Jan. 13th-20th
This week Plant was flushed RO water she smells yummy of sweet berries and looks great. She has nice trichome coverage and overall she a great plant to grow. Grows quickly seed to harvest in 86 days.

Likes
45
Share


@masterofsmeagol
Follow
8/1 This wad the most fucked up morning ever. Didn't get much time with the girls. I was able to take a few pics when I got back amd a video this morning. Pillars are still around. I killed a couple but I probably should spray BT. I think we got rain last night. Bags are heavy. I defoliated a little bit more on the interior and found some small yellow leaves. Event horizon is still on point to flower first. I NEED to lst and add supports for flower bit I've got a lot of other things going on too. I'm going to TRY to spray BT tonight if weather permits and I should have the supports up this weekend. At least that's what I'm hoping.
8/2 Quickly watered as I had to fix a flat tire to get my wife to the doctor. Gave most a gallon but closer to 3/4 on one event horizon and the sherb pie. Half g for the 10 and I gave the 5 and the 50 a little water. I didn't give the 50 much. That holds water far longer. I'm glad I got it done. It was 90°+ and sunny all day. Earlier everything looked great. I think I'm gonna go check them and maybe add a few pictures.
WENT OVER AND FOUND THE EVENT HORIZON I GAVE A LUTTLE LESS WATER TO, IN THE BACK COMPLETELY DEOOPED OVER AND DRY. I QUICKLY WATERED A GALLON. I CHECKED THE OTHER PLANTS AND SAW A COUPLE THAT "MIGHT'VE STARTED DROOPING BUT WERE LIGHT SO I GAVE ALL THE GMO'S HALF A GALLON. I WATERED THE CONTAINER PLANTS AND THE ONE IN THE 50. BETTER SAFE THAN SORRY. THEY WERE SUPER LIGHT. SOME ARE SHOWING SOME HEAT STRESS BUT I DONT BLAME THEM WHEN ITS PUSHING 100° OUT. I HOPE THIS PLANT WILL PICK UP BUT ILL HAVE TO WAIT UNTIL MORNING TO SEE. I GOTTA GO EAT DINNER AND IT WAS IN ROUGH SHAPE. CANT BELIEVE THIS. ITS THE FURYHEST IN FLOWER TOO. INTERNET TOO SLOW TO UPLOAD
8/3 This morning it was "maineing" out. Basically like raining but more of an alternating mist. The event horizon that looked DEAD is completely recovered! I'm so stoked. I've had a really rough few days but at least I've still got my girls. After this little bit of rain I'll do the supports and a spray of BT for the pillars. I'm noticing more damage and I don't want them arpund when they can burrow into buds.
WENT BACK AT LIKE FIVE. THE 5 GAL WAS DROOPING AND THE 10 WAS DRY AF. OTHERS WERE ALSO LIGHT. I USED 5 GALLONS ON THE GARDEN AS SOME STILL "LOOKED GOOD" BUT WERE DUSTY AND DRY. I ONLY GAVE THE GMO IN THE 30 A HALF GALLON. DIDNT WATER THE ECENT HORIZON IN THE BACK AND THE GMO IN THE FRONT BY THE DOOR ASXTHE LOOKED GOOD AND STILL HAD SOME WEIGHT TO THEM. THIS WAS ANOTHER DAY IN THE 90s THAT WAS SUPPOSED TO HAVE RAINED. LUCKILY IVE GOT THAT INTUITION AND I CAN CHECK. CAMS HELP WITH THAT BUT ITS BEST TO CHECK A FEW TIMES A DAY IN WEATHER LIKE THIS. FAR TO HOT TO SPRAY ANYTHING.
8/4 Chose not to water as we were supposed to get an inch of rain, then a half in and now it says .1in. I'm going to go over and check on the garden and see what they look like. I took pictures but I'll have to wait to upload them.
WENT BACK OVER IN THE AFTERNOON AROUND 2ISH. GMO IN THE FRONT WAS DROOPY. WATERED THAT A GALLON AND IT WAS UP BY THE TIME I LEFT. THE GMO ON THE END (MY CANARY) WAS SUPER LIGHT SO SHE GOT A GALLON. THE EVENT HORIZON I DIDNT WATER YESTERDAY GOT ABOUT 3/4 OF A GALLON AND I WATERED THE ONE IN THE 10 1/2 GALLON. SHOWERS ARE IN THE FORECAST AND EVERYTHING ELSE LOOKED PRETTY GOOD AND WASNT DEAD LIGHT. AS OF 3 EVERYTHING IS GOOD. I IMAGINE ILL PROBABLY NEED TO WATER SOMETHING TOMORROW. IT SUCKS HAVING TO DO THIS SEPERATELY BUT SOMETIMES THATS HOW IT GOES. I DONT EXPECT THESE 90 TEMPS WILL CONTINUE. ALSO NOTICING SOME FADING AS THEY TURN TO FLOWER. DEF NEED NUTES. AND ONCE THE TEMPS GO DOWN I NEED TO SPRAY EITHER BT OR SPINOSID.
8/5 It Rained last night so I didn't need to water. Everything was nice and heavy. Beautiful day today. Hopfully I can do an app of bt tonight. Weather man needs to get things right. It says we got .005in last night but I heard it and it was way more than that. This is a tiny town.
WENT BACK OVER AND FED. EVERYTHING GOT 1.75 PINTS. THE 10 GOT HALF THAT. THE FIVE A LITTLE LESS. I DEFINATELY NEED TO SPRAY FOR PILLARS. I ALSO HAVE A BIT OF DEFOLIATING ON A COUPLE PLANTS THAT I NEED TO DO. USUALLY I'VE LOST TONS OF LEAVES BY NOW. I JUST NEED TO IMPROVE AIRFLOW. THE TRELLIS WILL HELP WITH THAT PLUS SUPPORT. I THINK I MAY BE ABLE TO SPRAY PISSIBLY TONIGHT (DEPENDING ON WEATHER) AND SUPPORTS AND DEFOLIATION THE NEXT FEW DAYS.

Likes
10
Share

@WeedleyScott
Follow
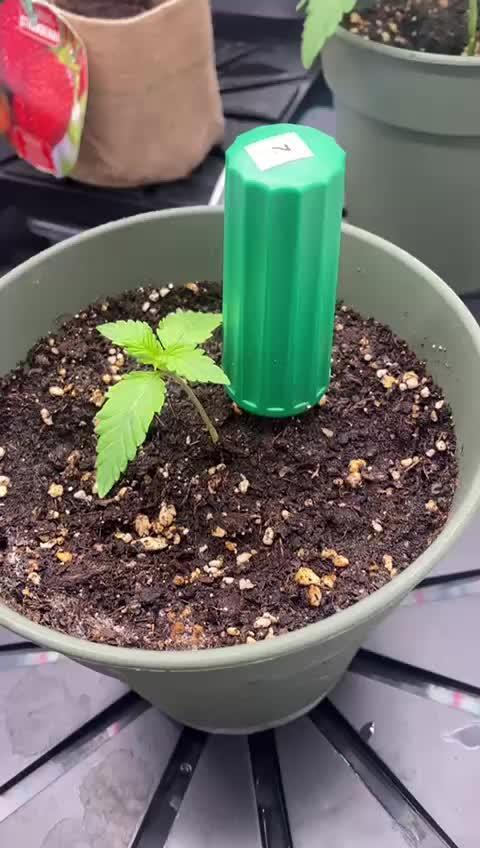
Woche zwei der Nachzügler hat sich gut entwickelt und die Hauptpflanze ist fast schon ready für den nächsten Top, ich werde mal Erde ansetzten und alles vorbereiten.

Likes
Comments
Share

@eldruida_lamota
Follow
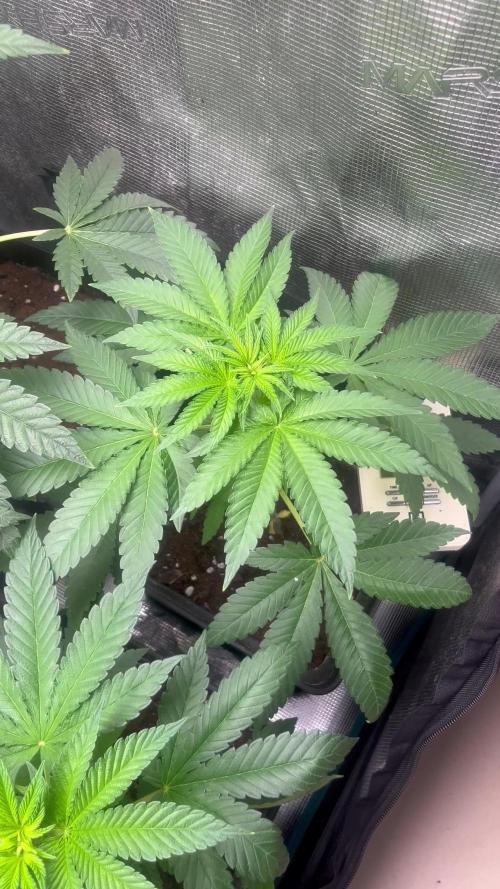
Que pasa familia, vamos con la quinta y última semana de crecimiento de estas Pink Sunset feminizadas de silentseeds.
Vamos al lío ,se trasplantaron en macetas de 7 litros definitivamente.
El ph se controla en 6.0 , la temperatura la tenemos entre 24/20 grados y la humedad ronda el 50%.
El ciclo de crecimiento puse 16h de luz, el foco está al 50% de potencia.
De momento van creciendo a buen ritmo y tienen un buen color, aplique de manera foliar el tetra 9 ahora cara a la floración.
Agradecer Agrobeta por el envío de un kit para la temporada, son unos jefes.
- os dejo por aquí un CÓDIGO: Eldruida
Descuento para la tienda de MARS HYDRO.
https://www.mars-hydro.com
Hasta aquí todo, Buenos humos 💨💨💨

Likes
22
Share


@daggaDNA
Follow
Welcome to the first week of flowering in this run with BIG BLOCK by Cannabis Brothers. 7 days ago I took cuts and now I'm happy to show you the first shots of roots and also the amazing green canopy which I'm truly proud of.
Each plant is marked as pheno 1, 2, 3, ...and here is a cut of pheno #9 showing the great success. Soon others will follow and then we will see after 3 weeks how many males or females we have and then we can have a first selection of potential keepers. For now I'd keep them all as they grow all equally good but time will tell how many ladies we actually have.


Likes
24
Share


@DogDoctorOfficial
Follow
Hello, Grow Diaries fam! 🌿✨
We’re now in Week 10 from seed, and what a journey it’s been. This week, the grow room has transformed into a breathtaking display of autumnal beauty, with the plants showcasing stunning fades and vibrant colors as they enter their final stages of life. It’s a true celebration of nature’s cycles, and the energy in the room is palpable. Let’s dive into this epic week!
🌟 Week 10 Highlights 🌟
The plants are embracing their last days with grace, each one revealing a unique spectrum of colors and expressions. The transition to 12/12 light cycle continues to push them toward their full potential, all thanks to the Big Demon, who’s still leading the charge with her massive stature. Here’s a closer look at what’s been happening:
1. Moon Rock 🚀:
• Appearance: Moon Rock is a sight to behold, with her compact buds now radiating deep purples and blues. The fading leaves add a touch of gold and burgundy, creating a gorgeous contrast.
• Maturity: Trichomes are nearing their peak, with a beautiful mix of milky and amber hues. The plant is exuding a rich, earthy aroma that’s both soothing and powerful.
• Notes: Moon Rock’s structure remains solid, with every bud dense and resinous. She’s almost ready to harvest, but we’re giving her a bit more time to fully mature and express her genetics.
2. Opium 🌸:
• Appearance: Opium has embraced the autumn spirit with a stunning display of fiery reds, oranges, and purples. The buds are heavy, covered in a thick layer of trichomes, and the leaves are curling into a final, beautiful farewell.
• Maturity: The buds are at their densest, with pistils mostly curled and darkened. The scent is intoxicating, with sweet and spicy notes filling the room.
• Notes: Opium is reaching her final form, with the fade adding to her allure. She’s almost ready to give up her bounty, and we’re closely watching the trichomes to catch the perfect harvest moment.
3. Big Demon 💪:
• Appearance: Big Demon continues to dominate, with her towering colas still swelling and gaining density. Her leaves are just beginning to show signs of fade, with a mix of deep greens and light yellows starting to emerge.
• Maturity: She’s not quite there yet, still pushing out new growth and adding weight to her massive buds. The trichomes are mostly clear, indicating that she’s got more to give before she’s ready.
• Notes: Big Demon is the reason we switched to 12/12, and she’s proving to be worth the wait. Her potential is enormous, and we’re excited to see how much more she’ll develop in the coming weeks.
🌟 The Beauty of the Fade 🌟
This week, the grow room has become a canvas of color, with each plant expressing its own unique fade:
• Moon Rock: Deep purples and blues with a touch of gold.
• Opium: Fiery reds, oranges, and purples, creating a warm, autumnal palette.
• Big Demon: Still mostly green, but with hints of yellow signaling the beginning of her fade.
The fade is not just a visual treat—it’s also a sign that the plants are nearing the end of their life cycle. As the leaves lose their chlorophyll, they reveal the hidden pigments underneath, resulting in the stunning colors we see now. It’s a reminder of the natural process of life, death, and renewal, all happening within the grow room.
🌟 Environmental and Nutrient Strategy 🌟
We’re continuing with our tried-and-true strategy:
• Water:
• TDS: 400 ppm
• pH: 6.2
• Temperature: 18°C
• Grow Room Conditions:
• Temperature: 30.3°C
• Relative Humidity (RH): 51%
The Lumatek Zeus 465 Compact Pro LED is still our powerhouse, providing the perfect light spectrum for these final weeks. The TrolMaster Hydro X controller keeps the environment stable, ensuring that the plants have everything they need to finish strong.
🌟 Reflecting on the Journey 🌟
As we approach the end of this run, it’s amazing to see how far the plants have come. From tiny seeds to these magnificent, flowering beauties, it’s been a journey of growth, learning, and appreciation for the magic of cultivation. Each plant has its own story, and the fades we’re witnessing now are like the final chapter of a well-written novel.
🌱 Next Steps 🌱
• Monitoring Maturity: We’re keeping a close eye on the trichomes and the overall appearance of the plants to determine the perfect harvest window.
• Final Feed Adjustments: We’re starting to consider a flush for the plants that are nearing harvest, ensuring the smoothest, cleanest smoke possible.
• Harvest Preparations: With harvest just around the corner, we’re getting everything ready for a seamless transition from plant to drying room.
Thank you for following along on this incredible journey. The finish line is in sight, and we can’t wait to share the final results with you all!
Happy growing, and may your gardens be ever green! 🌿💚
#DivineSeeds #Week10FromSeed #Week7Flower #AptusHolland #MoonRock #Opium #BigDemon #GrowDiaries #PlantMagic #GreenThumb #Inspiration #LumatekZeus #TrolMasterHydroX
Germination method 🌱 @thecannakan
Nutrition
@aptusholland 🌿
@aptus_world 🌎
@aptus_es 🌍
@aptusbrasil 🌱
@aptus_thailand 🌿
@aptus_portugal 🌳
@aptususa_official 🍀
@aptusplanttechnz 🌺
@aptusplanttechaus 🍃
Ambient controls🎮
@trolmaster.eu @trolmaster.eu.support @trolmaster.support @trolmaster.agro
Soil @promix_growers_eur @promix_cannabis
LED - @lumatekeu
Watering- @autopot_usa @autopot_global
Love and attention- @dogdoctorofficial
#aptus #aptusplanttech #aptusgang #aptusfamily #aptustrueplantscience #inbalancewithnature #trolmaster #trolmastereurope #trolmastersecrets #Autopots #GreenJoy
As always thank you all for stopping by, for the love and for it all , this journey of mine wold just not be the same without you guys, the love and support is very much appreciated and i fell honored and so joyful with you all in my life 🙏
With true love comes happiness 💚🙏 Always believe in your self and always do things expecting nothing and with an open heart , be a giver and the universe will give back to you in ways you could not even imagine so 💚
More info and complete updates from all my adventures can be found ⬆️ link in the profile description ⬆️
Friendly reminder all you see here is pure research and for educational purposes only
💚Growers Love To you All 💚

Processing
Likes
28
Share


@DaddyGimmy
Follow
Day 44 - Hi everyone. Last week I dropped Bio-Grow down to 2.0ml but lower growth is starting to get a little yellow so I'm upping it back to 2.5ml. I also tried upping the Bio-Bloom to 2.5ml but it caused minor nutrient burn so she's going to stay at 2ml the rest of her life.
Day 46 - I picked off some leaves that looked bad and or were blocking bud sites. I hope this won't slow her down much. I heard that even if a leaf doesn't look good you should keep it but I definitely needed to get rid of a few because they were on top of each other down towards the bottom. I got rid of 9 leaves in total.
Likes
23
Share


@HomeGrownFamz
Follow
Just keeping the temps correct is always a challenge in certain indoor grow areas but a tube heater seems perfect. Fan heaters should never be used as they ruin the flavours of the final product. I used a very small fan heater in my first run (obviously not blowing at my plants) but they are too aggressive in heating the air in my opinion and results in on off operation causing fluctuations in temperature. I have purchased a cylinder ceramic heater that does the job perfectly. I know that the temperature in the tent will always be in the good zone.
Likes
8
Share


@jayizrollin
Follow
Top Gun #2 finishing up nicely, checking for mold every day, humidity is back in the 50s.
I just trimmed up Top Gun #1 yesterday. 9 day dry, humidity started dropping into the 40s the last couple of days.
Only one other tip of the buds had some mold on it. I’m smoking it idc🤷.
Total dry weight was 50grams minus the molded buds, I’ll make butter with those.
Small plant but smoking it right after drying it was one of the best things I’ve tried, very proud.

Likes
3
Share


@timbarin
Follow
Dec 22
She got cleaned up and tied down. Moving back into the tent with net on to avoid growing up. She looks healthy and will make a recovery from the cleanup
Likes
42
Share


@Dunk_Junk
Follow
Wow look at that bush!!!
I've not seen that much bush since Debbie Does Dallas! 😂 😍
She's grown another 18cm this week vertically too.
Hope she enters flowering soon 😬 😎

Likes
18
Share


@xtchill
Follow
Onto week 7
Gave them a proper lst as you can see.
Think I'm going to put into flower 2morrow and see what the results are doing a 7 week veg instead of a 12 week veg.
Going to set the scrog net up and get tucking.
Looking lovely and healthy atm
Peace


Likes
5
Share


@crouch74
Follow
Unfortunately, this week I have overwatered her as I was going on vacation and a bit over protective and because of that I can see wilted leaves and brown spots.
I left it to dry for 3-4 days and now I can see some new green leaves showing up.
Sep 2nd: I can see that she is becoming healthier now and the green leaves are taking over