


Likes
Comments
Share


@grungedetox
Follow
Moved them to my main grow tent, then i transplanted the girls, gave them more fertilizer.
I topped phenos 1,2,4 a second time. Pheno 3 the slowest to develop not gonna do it again with her.
Pheno 4 is kind my favorite at the moment with better lower branches.
I also started LST on them.
They are really resillent with heat 💪🏻 it's been really hot where i lived and i don't have air conditioner unfortunally

Likes
14
Share


@eldruida_lamota
Follow
Que pasa familia, vamos con la cosecha de estas Gorilla Zkittlez Auto de FastBuds.
Por dónde empezar, es una autofloreciente que es normalita de cultivar, tiene un periodo corto de crecimiento y de floración igual no es largo, o igual tendría que haberla dejado alguna semana más no entiendo bien.
En cuanto a la alimentación , pues la aplique una vez por semana y a sido suficiente, se a comportado bien en interior, la flor pues no es muy prieta porque no deja de ser una autofloreciente, pero es una flor que va repleta de tricomas.
El periodo de luz pues de principio a fin a 18 horas, fue suficiente para completar el ciclo de vida como esperaba.
Agrobeta:
https://www.agrobeta.com/agrobetatiendaonline/36-abonos-canamo
Hasta aquí todo, Buenos humos 💨💨💨

Likes
17
Share


@m0use
Follow
This was a fun project that was a few years in the making and a year later to see if they would last a season for this upload to happen. Before any of this I would bike aorund town grabbing up all the old Ikea solid pine bed slats that I could find and storing them in the basement. I have a lot of wood down there, any size worked as long as I have enough of them. The hot days to find them were the first and last of the months because that's when people where moving in/out. I also kept an eye on the free section on local online classifieds as well. The entire purpose of this was to recycle as much off the streets as I could before buying anything to finalize the project. In the end I only bought sealer, screws and some takeaway/beers. All the wood was 100% free and salvaged off the streets of Toronto saving it from the dumpster bin.
After collecting all the slats for about 2 years I was playing aorund with them on how I wanted to make this work. I had previously done a little project like this before but I messed it up and the boxes where crap. did not last longer then 2 seasons, they where thin and shallow as well could not grow much of anything in them. I Was talking to my friend who is renovating their house and we brainstormed some ideas on the boxes, I found some designs I liked online and said lets make something like this out of what I have here. We tossed out a few of the design features when looking at them as it would have been wasted wood and extra work not needed. If I had more wood them maybe it could have been an option but simple was the name of the game. They taught me what I needed to know like how the miter saw and sander worked, plus all the other tools I was using. They did help out with a table saw and creating the triangle support joints in the corners, They used some pine left overs they had while making a staircase indoors. I did not feel up to the task of using a table saw given all the relatives I know who have lost a finger to them.
In the end we decided the design would be three boards high and take an alternating pattern on corners. layer one short, layer 2 long, layer 3 short. Went with a galvanized and painted deck screw so it can take the weathering. Ran into some problems like making everything level as some of the boards were warped and other ones had undesired aspects like knots and tacky sticker goo I could not remove. So I used them for the base that will not been seen so much. Clamped everything down and called it a day.
Once it was all done and over with, I then brought them back home from my buddies work garage and started to seal them. I went with a boiled linseed oil as its a food safe option should the wood degrade into the soil I will plant in them. I will need to reapply it to the boxes year after year but the main coat is the most important one and I put it on 3 layers with a good dry in between coats. the inside of the boxes that where coated did not degrade at all as the sun did not hit them so it will not need a new coat just the outside. Overall the end result was very impressive for myself, I've never taken a woodworking class ever and It was a near perfect outcome for me. Heavy Duty Planter Boxes for all my gardening needs. I made a last min decision to add in a plastic liner to preserve the wood even longer and stapled that into the frame. it has held up quite well and may need replacing end of 2nd or 3rd year out in the sun. Used a thick moisture wrap plastic with UV protectors in its formula.
Lets see what I can grow in them this year!
m0use's haus of projects - garden box edition
Likes
7
Share


@Totistefanini
Follow
Subo estas fotos 5 días después de la última semana...crecieron un poco más los cogollos, las plantas están en buen estado.

Likes
17
Share


Likes
3
Share

@sellem
Follow
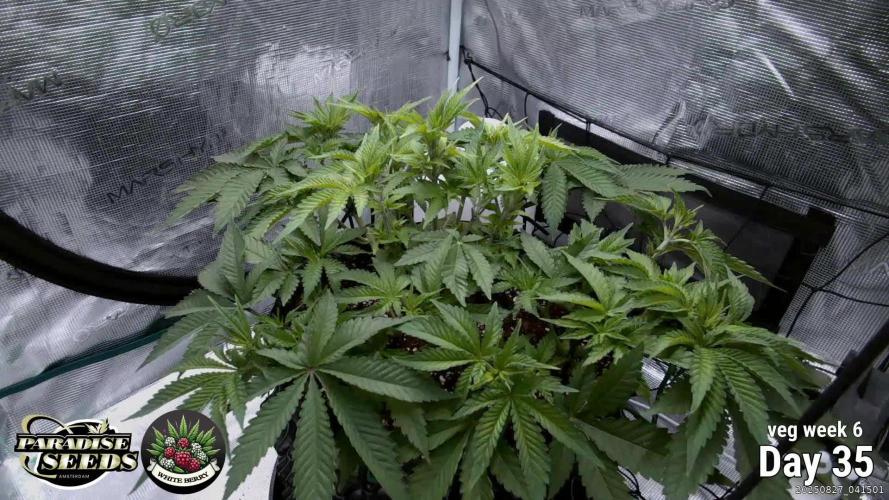
Here we are again!
Flower Switch happened on Day 37, so in the middle of week 6, but for simplicity, i will condense the last Days of Veg into this here week 6. So a few days are missing from the final week count as i want to keep flowering weeks seperated from weg. Just keep in mind that she's about 3 days older then the week here would suggest.
Its the end of the first flowering week and we can already spot lots of pistils, and the tops are getting ready to bud up!
I defoliated her once before the flip and once on Day 43 because im scissor happy. Also, she was getting REALLY bushy, as you can see on the timelapse.
Feeding is still the same 6L, around 6.0 PH, 5ml/L Grow and 1ml/L powerrots, will keep that going as long as shes stretching, then ill switch to flower nutes. Happens now every 3 days, though i suspect that it might be every 2 days soon, she is getting hungry. Pot is already somewhat light again and i watered her yesterday at the time of writing 😱😮

Likes
1
Share


@vidofighter
Follow
The 4. Week of Flowering begins...
Watering: ca every 3. day 1.5l per plant :
- - ->
Feed - Feed - Water only (ph 6.3) - Feed - Feed - Water only (ph 6.3) - Feed - ...

Likes
10
Share


@Gg_kush
Follow
Last days before harvest ! I was expecting a color change but i have to harvest now becauseit’s really cold outside


Likes
64
Share


@Cheeba_Inu
Follow
Overall, I am extremely happy with the genetics of the Auto Euforia and the general success of the grow. I always like to reflect on mistakes I have made, so let me lay them out here:
I overlit the plant during veg, contributing to it's bushy nature. It grew well but this would be a waste of electricity if I was growing more commercially.
During the last week of flower, my region of Ontario was hit with tons of rain and humidity. I took some steps to increase circulation of dehumidified air, but lowering 95rh to 65-70rh is still insufficient and I lost some control of the environment. The awful result was the start of mold in some select areas, particularly in the fattest buds and where leaves were cut away and petioles remained. This issue is not due to Dutch Passions great genetics, and is entirely due to a combination of an unseasonable environment and my own overconfidence.
This mold was never clearly apparent on the outside of the buds, but I found it will trichomes scouting under magnification. This forced me to speed up the harvest and drying process. It also means that I have had to carefully grade the buds into those safe for smoking and vaping, those mold free but needing a second examination (will be rosin pressed), and those close enough to spots of mold to be only for for edibles. Any moldy bud was of course cut away and will be disposed of.
Nevertheless, I have many ounces of fantastic buds, and will be making some nice pressed rosin based 510 cartridges. I will edit the harvest post with more information after the cure, and showing the various processing I will be doing.
Happy growing! 🌱


Likes
105
Share


@Coopmc
Follow
Looking good Id say about 3 weeks left
Booming!!
This plant is blowing up!!!
5 foot tall exactly

Processing
Likes
16
Share


@Andres
Follow
I have problems with her. I think it's because of the local water. the earth is not fertilized with any product. only earthworm humis.

Likes
81
Share


@Mtmtc
Follow
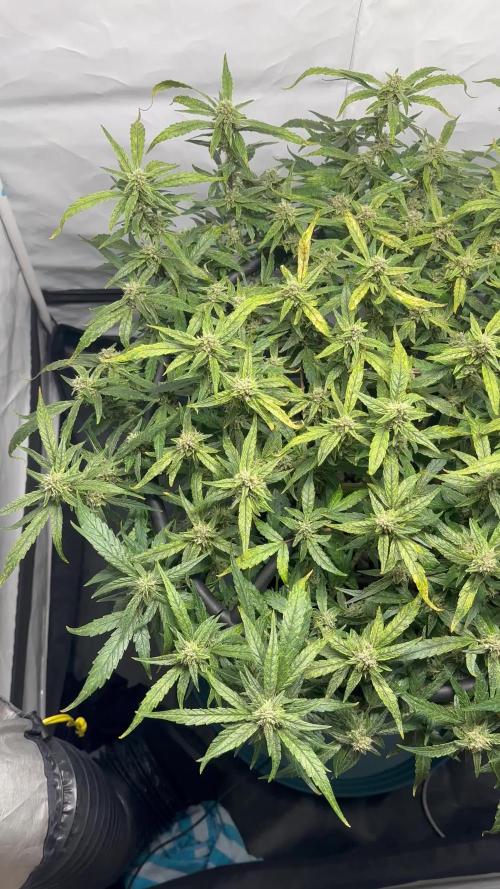
It harvest time for this Sunset sherbet auto. I’m happy how it turned out! thanks to Zamnesia seeds for sponsoring this grow 🙌🌱


Likes
Comments
Share


@Northern_Ent
Follow
June 28: rainiest June on record but average temperatures. Godfather OG is behind schedule because of the weather but is doing fine.

Likes
11
Share


@McShorty
Follow
They grew a lot this week or so it seems to me, because i was on vacation and havent seen them the last 5 days.
SQ#1 and Blue cheese are now my biggest plants Even though i germinated 1 week later and also from the other strain there was one plant that was always bigger than the Rest and now its the second smallest.
So far everything was nice, no issues with nutrients, desease or bugs, every plant develops hairs and is female. I think i give them 1 more week to grow and then i‘m changing the light cycle and start the flowering Phase, really excited for that :)
Likes
10
Share


@Hoso_sake1
Follow
Seconda settimana di vita delle nostre Strawberry Pie di Fastbuds!
Continuiamo a mantenere l'umidità relativa abbastanza alta 50-60% per permettere alle plantule di svilupparsi al meglio, senza però farle prendere troppo freddo!
Tra qualche giorno potremo procedere anche al prossimo passo: Dare i nutrimenti necessari per permetterle di crescere sane e forti per le prossime tre settimane di crescita.
😎
Likes
8
Share


@Oldwied
Follow
Day 23
The third week of flowering is complete. Most of the height growth is finished. Time for a radical defoliation.
The girls look great.
Unfortunately, Kush has formed hermaphrodites on the flowers in the shade. I hope that I have removed them all.
The lamp will be raised to 100% output in two stages.
