
Likes
Comments
Share


@Roberts
Follow
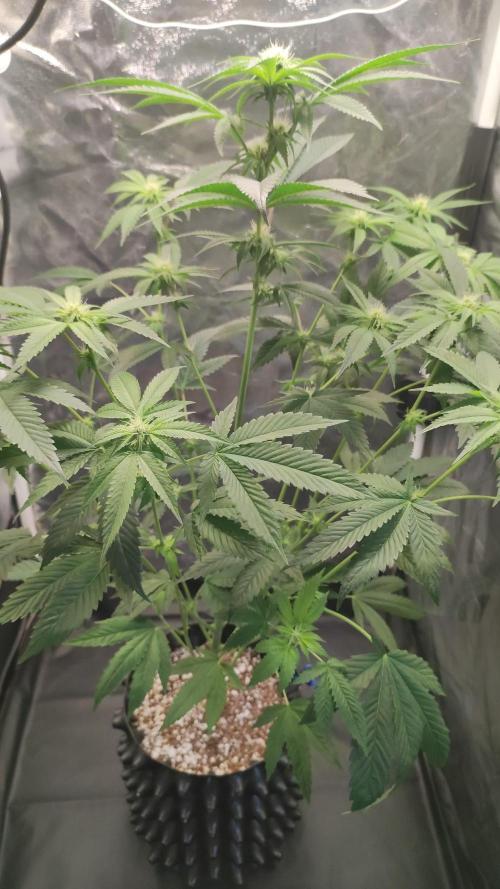
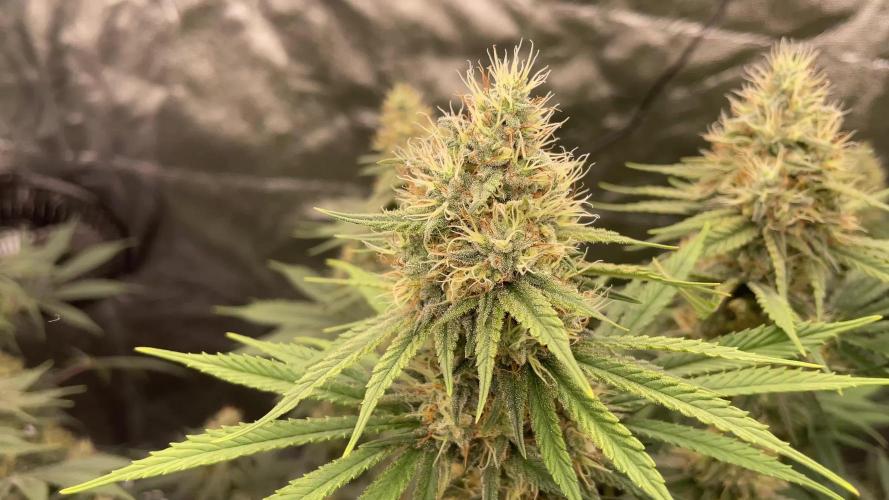
Blue Dream is on her final push of ripening. I have cut off her feed and she is just on ph water now. She smells great, but is smaller due to colder conditions with winter. My next update will likely be the harvest. Thank you Medic Grow, and Seedsman. 🤜🏻🤛🏻🌱🌱🌱
Thank you grow diaries community for the 👇likes👇, follows, comments, and subscriptions on my YouTube channel👇.
❄️🌱🍻 https://www.seedsman.com/?a_aid=Mrsour420.
This is my affiliate link to seedsman.
Thank you Happy Growing 🌱🌱🌱
https://youtube.com/channel/UCAhN7yRzWLpcaRHhMIQ7X4g.

Likes
14
Share


@BOMbolenath
Follow
the weather still very hot but it is doing well.
Terpene is very strong now. Very sweet and fruity, but have some wood in it. Amazing. Keep growing.

Likes
11
Share


@Lahuertade_Bototo
Follow
🌱🌱🌱Continuamos este cultivo, con esta hermosa cepa de FastBuds, Girl Scout Cookies Auto, entrando en el periodo de crecimiento mas exuberante vegetativo.🌱🌱🌱
👨🍳👨🌾🏻 Nutrición y Bitácora 👨🌾🏻👨🍳
Día 15 se riega con una solución nutritiva NPK de 1 Litro con Plagron Power Roots (0.3 ml), Plagron Pure Zym (0.5 ml), Plagron Alga Grow (0.7 ml) y Plagron Sugar Royal (0.3).
Día 16, se mantiene saludable creciendo 👨🌾🏻, asimilando de muy buena manera el riego nutritivo del día 15
Día 17, sigue creciendo y creciendo y cada vez mas hermosa esta bella planta 😍
Día 18. Se ajusta el LST para bajar el apical. Se riega con una solución nutritiva NPK de 1 Litro con Plagron Power Roots (0.3 ml), Plagron Pure Zym (0.5 ml), Plagron Alga Grow (0.7 ml) y Plagron Sugar Royal (0.3). También se ve la producción de mas ramas bajas que comienzan a tomar fuerza como posibles colas principales y también se ve la aparición de los primeros pistilos, así que estamos prontos a comenzar la Pre Floración, pero aun le queda un buen tiempo en su etapa vegetativa de máximo crecimiento.
Día 19 sin novedades.
Día 20 se instala la malla para direccionar las ramas. Se realiza defoliación para mejorar la penetracion lumínica y se riega con 1 litro de solución NPK + Trichodermas.
Día 21 la malla mejora el uso del espacio, mejora considerablemente la penetracion lumínica y el crecimiento sigue de manera constante. La planta ya esta pidiendo mas alimentación y riegos, en 24 horas el sustrato se encuentra casi seco. Va de maravilla entrando a la cuarta semana 💪
🚀Equipamiento🚀
Indoor de 60x60x159 cm y una iluminación BlackCob F320, se activa solamente 1 modulo (160w) a 70cm para estimular su crecimiento, pero evitar estrés lumínico (en el día 21 se ajusta la iluminación a 55cm del canopy), se agrega un humidificador HUMIPRO para mantener estable entre 55 y 65 % la Humedad, intractor de 100mm, extractor de 100mm, filtro de carbon, ventilador "oscilofan", ventilador "clip fan", 2 termohigrometros y se agrega el día 20 una malla SCROG de kanovi
Acompáñenme para ver los resultados de este hermoso desafío, un saludo cultivadores 🔥🔥🔥

Likes
53
Share


@BudBoutique
Follow
! this is my current status, gonna upload my last veg weeks within the next week - got a bit busy around Spannabis - thank you for your understanding! 💚
Welcome to Bud Boutique Grow Diary - really appreciate all your love and support :)
Dont forget to check out my other current grows!
🗓️ This Week:
- Day 24: attaching once a week APTUS Foliar with Regulator & Nutrispray with the amazing CannaFogger by Petra Grow
- Day 28: bud development is super beautiful on each pheno #1 and #2
Thank you for still staying with me 💚
___________________________________________
--- 🌱 Strain (Sponsor) ---
🏷️ P.C.R. by Art Genetix
https://www.artgenetix.world/product-page/p-c-r
--- 🥗 Nutrients and Feeding (sponsored by APTUS: APTUS Ambassador) ---
🍸 APTUS: full nutrient schedule extreme
-- Regulator, N-Boost, P-Boost, CaMg-Boost, K-Boost, Allin1 Liquid, Startbooster, Topbooster, Enzym+ every feeding
-- Fulvic-Blast, NutriSpray as Foliar each once a week
🔗 https://aptus-holland.com/
--- ♻️ Grow Control (Sponsor) ---
TROLMASTER: TENT-X + LM14 Light Adapter to dim/sunrise/sunset lights + Temp & rH Sensor all remote on App
🔗 https://www.trolmaster.eu/
--- 🚿 PetraGrow (Sponsor) ---
CannaFogger Foliar Spray
🔗 https://www.petratools.com/product/petragrow-cannafogger-atomizer-new-mini-fogger
--- 🏭 Grow Setup ---
💡LUMATEK Zeus Pro 600
* 🏠🌿 Indoor: Homebox 120x120x200cm (4x4)
* 📐🌀 PrimaKlima exhausting Fan 1180m3/h (running on 60-80%)
* 🌀 Can Light Filter 800m3/h & 1x Fanbox 1x Dyson fan for Air circulation
🔗 https://lumatek-lighting.com/zeus-600w-pro-29/
🔗 https://primaklima.com/de/shop/ventilatoren-de/ec-ventilatoren/pk160ec-tc/
🔗 https://canfilters.com/products/filters/
All Likes and comments are highly appreciated!!!
👨🌾 don't forget to check out my Instagram for daily educational content: budboutiquee
- Bud Boutique

Likes
11
Share


@WIKETFOLE
Follow
She has very nice smell already, I think his bloom will be very sticky and satisfying ,Already Its 5th week and she’s getting bigger and bigger.

Likes
43
Share


@TheBudWhisperer
Follow
Week 3 update and all systems go for launch. We’re flipping to flower exactly 21 days from seed and so far, the mix looks to be impressive. Counting about 4 males (one that won’t make the cut), 2 indica leaning phenos and the rest are sativa leaning. Side branching has also been impressive so we should be able to pull some rootable cuts within the next week or two. If we got the sexes right (it is a little early to be certain), then the dutchy cabinet will be full up for bud testing👍. Next week will tell the tale🤟.
Background
This project has been a year in strain selection (and another year in the actual making) to get to this point with a viable potential cross. It’ll be a true polyhybrid with a mix of sativa and indica leaning properties for each. We’ve combined an especially powerful hybrid sativa strain of Strawberry with an equally manageable and hard hitting strain of indica dominant Skywalker OG.
The hope has always been to combine them and boil out the best characteristics of each. The strawberry is phenomenal in terms of terp profile and a mix of strong head and body effects while the Skywalker is a mind bending, body butter kind of indica with that earthy Kush profile and flowery undertones.
The strawberry is prone to botrytis and fasciation but features excellent terps and yields if grown correctly. She’s Also stretchy and somewhat unruly when she gets going. The Skywalker is a contrast in growth characteristics with a squat structure, medium sized buds and excellent resilience and resistance.
The plan is to seed out the available females and take cuts of what we can post-stretch to get a closer look at any differing phenos. Still very much early stages for a stabilized new strain but we’ve got the right foundation of solid genetics. Now we just gotta get it off the ground to the next generation👍. We’re predominantly focused on the plants that demonstrate that hybrid vigour and wasting no time with any problem plants or runts. Stay tuned - with a little luck, this cross is gonna be straight 🔥😎👌.
Likes
8
Share


@GrowZex
Follow
Hello beautiful people!
Another week of veg.
I started to train the girls and pull them down.
I topped them once, not rly planning to do it more.
Nutes still the same.
These girls are rly more indica. Big leaves and very stout.
Thats it!
Love & Peace 4 all!

Likes
4
Share


@rafito
Follow
When the medium got dry again, the roots starts to look for water and that's the time to turn the autopot on. The Autopot System is a gravity fed watering system which requires no power, pumps or timers to operate. I am using the easy2grow model and a flexitank as a reservoir.
I filled the reservoir with 4 gallons of water:
- 0,2 mS/cm - Calimagic
- 0,4 mS/cm - BioGrow
- ph - 5.8
Keeping an eye on the reservoir ph during the week.

Likes
19
Share


@Arcadium
Follow
Hot dry week, had a wild storm roll through with tons of lighting, but barely a drop of rain. Added one last layer of netting for support. Removed a few more inner nodes that weren't keeping up with canopy.
Did another batch of compost tea this week, spray of LCPT. Will start BT next week as I've seen some cattepillars.
Flowering is coming along nicely as well, lots of pistils, and node tightening.
Likes
8
Share


@ButterfliesLittleFarm
Follow
Hello Diary,
The Milky Way F1 is ready to harvest soon, although the Titan F1 ripened first and is already ready, the Milky Way F1 and Apollo F1 will have to wait another week in my estimation.
The Milky Way F1, as seen in the photos, is truly a sight for the eyes.
The flowers started to get more and more brown pistils, but looking under the microscope, the trichomes are not all milky yet.
So I'll leave her for another day.
Otherwise, the flowers are full of trichomes, from which a strong fragrance spreads.
Here and there a yellowish leaf appears, which I immediately remove.
Watering is a little more frequent due to the high temperatures, but I stopped adding any nutrients.
Here's a quick recap of the week.
26/06/2023 - Day 58.
Watering.
Only two days later, the plants drank all the water, so I watered them with two liters for each individual plant.
29/06/2023 - Day 61.
Watering. I repeated the procedure as I did three days earlier.
01/07/2023. - Day 63.
Photographing plants.
That's all for this week, see you soon.

Likes
2
Share

@Diaaz
Follow
Week 12 and the finish line is getting close! The buds are looking noticeably denser now, with great resin production and healthy colors throughout the canopy. The Green Sensation and CO₂ seem to be doing their job. It's always rewarding to see a grow come together after a smooth flowering cycle. Looking forward to seeing the final swell and harvest results.
Likes
32
Share


@Proto420
Follow
So 3 weeks in, 4 were males, unfortunately all 4 were descendants of mephisto’s gen’s. Bit disappointed about that but what can ya do.
After growing 10 of the bitches at once I am NEVER doing that again. People always talk about how many they want to grow before they do… to those that haven’t started in this pursuit yet, heed my warning lol.
They just hit their pre flower growth spurt, I did have 30 days marked on their lives on a reminder on my phone to defoliate because last grow I had so much larf. The fog dog grows nice and stout, the glue sniffers tall and lanky. Both phenos differ very little.
I cut off like 3/4 of the bottom nodes off each. Fingers crossed they take it well.

Likes
6
Share


@UnorthadoxDude
Follow
So this week has really absolutely crawled by from my perspective, I imagine it is common with growing that the closer you get to harvest the further away it seems. Anyway I am a bit worried about the middle sized plant - she has a lot more yellowing of fan leaves from the inside out. My reaction to this was to flush her with clean water, my thinking is that everything was fine before I started feeding, and perhaps I didn't mix properly and the soluble stuff was unevenly distributed. That was yesterday (week 6 day 4) It's too soon to tell if this has helped, fingers crossed it doesn't begin to affect other leaves.
Despite this being only 5 days into week 6, there have already been fairly drastic changes. Some of the buds are starting to fatten more, and I'd say we're at about 15% pistils amber now, the smell has noticeably increased day by day. It's really beautiful to look the plants in the dark with a flashlight or phone light, the way the light bounces off the frosting of trichomes, as if someone had sneaked in the middle of the night and misted my plants with a million tiny diamonds.
I think I will stop feeding the middle plant now and water only (unless it gets worse). The other two I will continue to feed until the end of this week. At the rate of accelerated change I suspect harvest time may not be too long past the end of next week. It's a shame they don't have much more time to grow but at least what small quantity does come from them, I am determined it is harvested at the right time.
At the end of week six I have watered only as I now think these plants are maybe 7-12 days away from harvest.

Processing
Likes
33
Share


@Rasta_Faraev
Follow
Hello everyone, brothers and sisters.
CMOG: 75 Days. W / C / C: 40/17/18.
Nutrition 2.5 ml / l Canna Coco a / b. Ph = 5.8 / 6.3; ppm = 900/1050.
The conditions are stable, good.
A week passed, I didn’t do anything special, just a cliff of leaves, a disturbing bump. Smog is beautiful, she is one of those who owe nothing to anyone, neither by weight, nor by anything; she is exceptionally gorgeous, graceful and fragrant.

Likes
19
Share


@HeavyHead
Follow
First week of flower :)
Did some final touches on some LST and a very light de leaf of some shading leaves. Pulling down the room temp slightly and will add some pre flowering nutrients towards the end of this week or early next week.
Likes
18
Share


@thenotillwizard
Follow
Harvested at day 76, after 72h of darkness.
Very good yield!
3.3 pounds of dry buds + 1 pound of trim
The 2 keepers yielded 366 and 342g of premium quality smoke.
Very uplifting and energizing high :) Love it!

Processing
Likes
15
Share


@MG2009
Follow
06/09/2020
Red Sky #2, #3, 4 are male, #1 is female #5 not showing yet. Males seem to be developing quickly,
She will get two buds selectively pollinated by, male #3, and male #5 I'am growing
Likes
5
Share


@Cootabykiz
Follow
So it’s been 11 days since I last seen them we’ve had a couple showers of rain between that time, she’s started flowering..
Some animal has helped itself to a few tips and leaves, only took probably 2-3 tops and a couple leaves but mustn’t of enjoyed it.. I hope so anyway. 🤞
So everyone how does it look??
Anything I should do?? Any tips on how to support the branches for when they get abit heavier?
Thanks everyone!!


Likes
9
Share


@Bread_n_Buds
Follow
Don't be fooled, this specimen of Pineapple express was born only a week after the other F1 hybrids from Zamnesia but with these latest generation autoflowering plants called f1 noin you're joking, they are really fast, the flower comes together in an instant and poof it's ready .
She has begun to grow a lot, she has made a central main cola take off which promises to be very, very interesting, and she is composing the gems.
The conditions are all there, we await the decisive weeks for the construction of the flower, cup after cup, we will see what this young lady with the famous name will do.
We are sure it will be very interesting.
The fertilizer is always a hair too much but I have very little of the paranoia of Italian grandmothers about leaving my girls hungry.
Buy seeds on Zamnesia at the link https://www.zamnesia.io/it/10681-zamnesia-seeds-pineapple-express-f1-automatic.html
Food by Plagron
https://plagron.com/en
Light www.viparspectra.com/
Tent & Air www.secretjardin.com
Music of the week www.radionula.com
+++ 432 hz frequencies for keep in line my Girls to Gaia.
Site Description
ZAMNESIA SEEDS - PINEAPPLE EXPRESS F1 HYBRID AUTOMATIC: FRUITY FLAVORS AND ENERGETIC EFFECTS
Combining Trainwreck with Hawaiian, Pineapple Express F1 Hybrid Automatic brings a beloved strain to new heights. This autoflowering F1 hybrid cultivar ensures exceptional uniformity, reliability, and stability, making it well-suited to growers of all experience levels. If you've not checked out Pineapple Express F1 hybrid Automatic for yourself just yet, now is the time.
GROWING PINEAPPLE EXPRESS F1 HYBRID AUTOMATIC
All it takes is 8–9 weeks from germination before Pineapple Express F1 hybrid Automatic is ready to harvest. Thankfully, very little effort is required throughout the growing process, aside from a bit of maintenance, to ensure ample, high-quality harvests. Thanks to its F1 genetics, Pineapple Express F1 Automatic offers superb resilience and uniformity, meaning all plants will have a similar height and appearance, and will churn out comparably large yields. Reaching heights of 50–70cm, Pineapple Express F1 Automatic is not an overbearing plant and can effortlessly slot into any setup. Once ready to yield, growers can see a return in the region of 400–550g/m² indoors and up to 200g/plant outdoors.
AROMAS, FLAVORS, AND EFFECTS OF PINEAPPLE EXPRESS F1 HYBRID AUTOMATIC
Just one hit of Pineapple Express F1 hybrid Automatic treats users to a rich assortment of flavors and aromas. This strain offers strong pineapple notes alongside moments of citrus, spice, and pine, making for a mouth-watering blend that's extremely moreish. Bolstered by 21% THC and an array of cannabinoids, Pineapple Express F1 Automatic showcases an energetic and uplifting high that will have you feeling chatty in no time. So if you've been looking for a strain to enjoy with friends, Pineapple Express F1 Automatic could be just the thing.
All F1 Hybrids and more and more and more on
www.zamnesia.io