
Processing
Likes
Comments
Share


Likes
6
Share


@FumateAlgoo
Follow
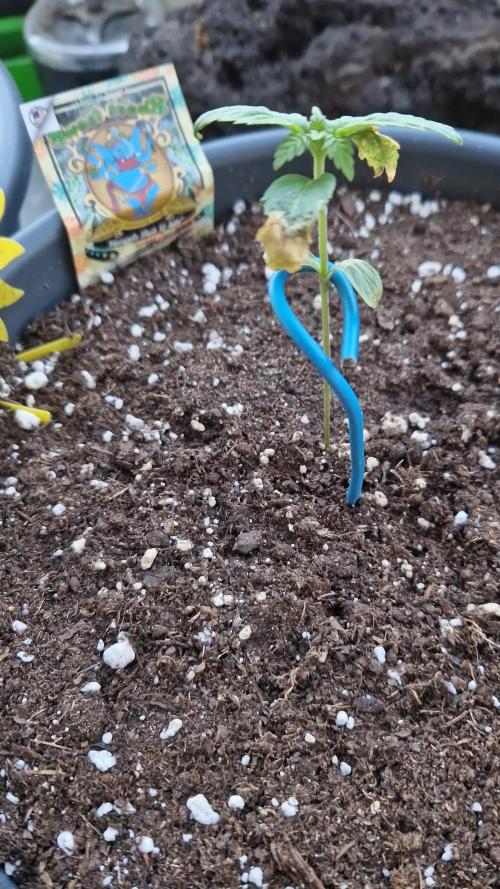
¡Ah, bueno! ¡Una nueva semanita! Empecé a agregar CalMag porque ya se notaba una pequeña carencia: las puntitas de las primeras hojas estaban secas y las nuevas empezaban a ponerse un poco amarillas en los bordes. También, en estos riegos, bajé un poco el pH agregando la solución con agua más ácida para regularlo. Así que calculo que ahora debe estar en un 6.4, que sigue siendo un buen rango.

Likes
34
Share


@Robbaus
Follow
Discretamente bene direi. A parte purtroppo un dubbio di una ermafrodita, penso e spero di aver scongiurato il peggio eliminando tutti i bulbi sottostanti al fiore di ciascun apicale facendo la massima attenzione.
Ad ogni modo i fiori si stanno gonfiando parecchio, il profumo è invitante, i tricomi hanno un bell'aspetto. Vediamo come va a finire.. 🤞🏼🍀💪🏼

Processing
Likes
2
Share


@SlickRick
Follow
I got these as clones. Using a cheap 600 watt led light from China paid like 50 bucks. Started with a few weeks of Buddha grow from aurora. I topped the sugar candy a week before Veg was done. I topped the peyote and topped it again on one side by accident which made the plant look like a U but missing half of the U. They grew about 3-4 feet tall. Very white looking hairs. Just started week 5. Used regular lite soil with aurora soul bloom. Also used fish shit and terpinator during flowering. Week 6 just bloom and terp I plan on lowering nutrients from here on as I start to plan the flushing in week 7


Processing
Likes
20
Share


@LockDownGrow
Follow
This girl is set on hold back on flowering
This girl is going too be a beast

Likes
12
Share


@SkunkyDog
Follow
Hallo zusammen 🤙.
Sie wächst sehr schön und macht keine Probleme und sieht dabei noch richtig schön aus 🤙🤤😜
Likes
8
Share

@TrickzGrowz
Follow
Servus Moin!
Die Pinapple Slush XL hat sich wohl erstmal erholt. Diese Woche ist super Wetter und das nutze ich, sie gleich draußen hinzustellen.


Likes
241
Share


@Tropicannibis_Todd
Follow
Well growmies ive been looking forward to the Banana Purple Punch 👊 for sometime now , and there both keeper that's for sure 👈 couldn't of asked for better Genetics 😉
The smell coming from both plants during the entire grow was just dreamy 👈.... It's very sweet with that Banana Peel smell 😍
Amazing Plants
👉 Big thanks to all my Growmies out there in GD land 👈 Much appreciated 🙏
Thanks To MarsHydro for the TS1000
👉I used NutriNPK for nutrients for my grows and welcome anyone to give them a try .👈
👉 www.nutrinpk.com 👈
NutriNPK Cal MAG 14-0-14👉 All Weeks
NutriNPK Grow 28-14-14👉 Weeks 2 & 3
NutriNPK Bloom 8-20-30👉 Weeks 4 to 8
NutriNPK Bloom Booster 0-52-34👉 Weeks 4 & 9 & 10
Likes
9
Share


@LittleBigTrees
Follow
Looking nice and compact with strong growth 🙂
Still only fed her water so far.


Likes
11
Share


@Lushbloomz
Follow
After a comeback, the train is in the station! Even though I broke the main stem, she was an easy grow. I just basically let her do her with great results. Buds are thick and dense. Time for the drying and curing.
Likes
39
Share


@Esoteric_growing
Follow
Recovered well from the defoliation on day 21 of flower. Pretty much plain sailing from now on as stretch has stopped and only need a few heads and maybe remove the odd leaf.
Likes
20
Share


@PureMedicin
Follow
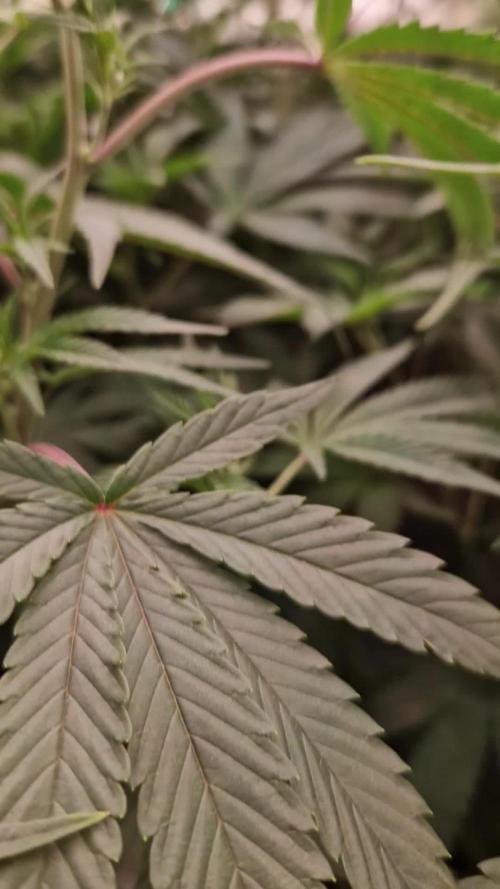
Cal mag deffeciency. No problem I knew I would run Into it using soil nutes. Some rapid growth on most sherberts. Pink kush Is more stubborn and difficult but one of them seem to be thriving. Not sure why most pink kushs are just a bit slower. The seeds also seemed to NOT be germinating as fast as all the other strains.
This is some really solid genetics so far with some rapid growth to them.
Scrog installed 20 - 23 cm above the highest point of the pots. I will just them grow into the scrog and then train them into the trellis. I might raise the lights so they can stretch just a bit.
Call mag issue was fixed very fast changing to Coco nutrients and i have some really healthy growth now at the end of week 4
Likes
13
Share


@GrowerGaz
Follow
As usual plain sailing the autopots are such a bonus when it's 28c indoors. This week they have had pH water and Iguana juice Bio. Also they have had two times KNF foliar feed.


Likes
5
Share


@Rizza78
Follow
Sorry busy week. They are getting close. Just turned the lights down 20% to simulate fall for last couple weeks. Will add ice in 6 days to flush.


Likes
11
Share


@Urunascar
Follow
Since she's the one closest to the outside wall I decided to place some weight on it so it wouldn't grow that much taller and started to grow the lower branches
Likes
24
Share


@Jays_Not_Here_Man
Follow
The Apple Betty babies are doing great 😊 I’m very pleased with the results so far, I just wished I would have known they would have such a large stretch, they D almost doubled in size in 14 days.
At day 8 I stopped tucking the branches and allowed them to grow up. In hindsight, I probably should have kept going for another couple of days. They continued to stretch rapidly all the way up to date 12 or so, much more than my other strain that I have going as well.
At day 10 I cleaned up some of the small bud sites and leaves that were below the 1st trellis. These sites do not get enough light to make anything good, and take away energy from the main tops as they grow and compete. A quick snip here and there will really help the end result.
At day 13 I decided to add a second trellis net to provide support to the tops that came up so fast. They seem to have stopped their main stretch faze, and are looking happy and healthy now. I’ve continued my water, water, feed schedule and have not seen any cause for concern. The girls are taking a little over a gallon of water every 72 hours at this point.
Humidity is being controlled automatically with my in-line fan and humidifier. RH is set to 57% and temps hover between 77-80 degrees with lights on, and about 70-72 with light off thanks to my furnace being back on for the cooler temps.
The 2x4 5 gallon girl is doing great as well. 😊During the stretch, she flourished just as the girls in my big tent did as well. She is going to have some great bud, the branch structure is nicely developed with tight node spacing and large tops.
I’ve been plucking off all the lower growth, and tucking leaves as they block bud sites. I will be doing a defoliation next week. Happy Gardening 🇨🇦👊❤️


