
Likes
Comments
Share


@Ninjabuds
Follow
My permanent marker plants are looking really interesting! The short and stocky one with the purple leaves is super vibrant. I love that pop of color against the green of the other plants. It's a little different from the taller plant, which has this really cool stacked-up look to it. I'm curious to see if those stacked-up leaves will change color too.
The past few weeks have been so beautiful, watching the plants grow and change. It's amazing how something so small and fragile can turn into something so strong and vibrant. Now that they're getting ready to bloom, it feels a little bittersweet. I'm so excited to see the finished product, but I'll definitely miss having them around while they're growing.

Likes
7
Share


@Ice_R
Follow
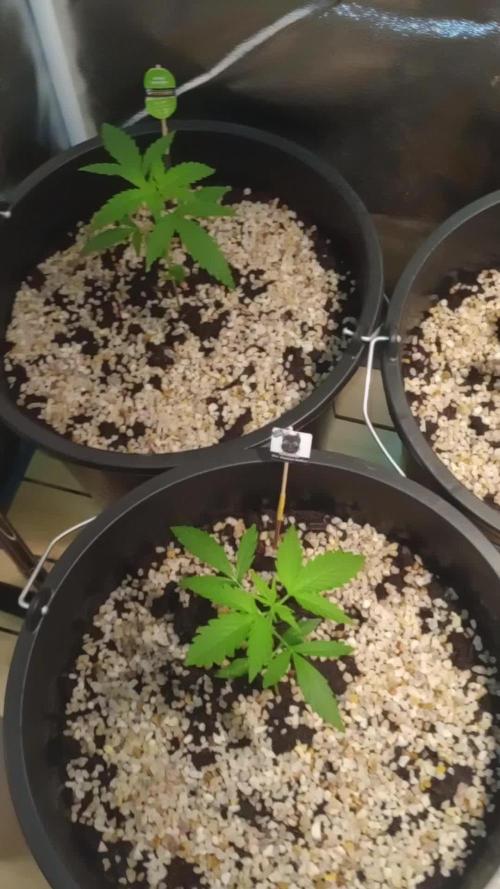
Early this week found 2 fungus gnats on the soil of one of the plants so was afraid of an infestation but after getting rid of the 2 havent seen any other one. Yesterday (day 14) had to give some support to 1 of the plants cause it was bending over. Overal not perfect but think these problems are all minor. So lets see.


Likes
54
Share


@AsNoriu
Follow
Day 43 since seed touched soil. Hard week past. Those long not drinking days when cycle was taking 8 days to dry out made damage, i still see magnesium, but now added some rusty spots and i cant understand is it calcium or my spraying of Leaf Coat and burn. No spray this week, will check if new will appear. Because of troubles i postponed flip and top up till next watering. It should be in 4-5 days.
Done huge clearing, few more new ties added, reajusted old. 4 liters of 6.3 phed dechlorinated water went in after training.
AK grows very nice, branches thick, will have solid size colas, can see now. Was damaged least, but beeing picky you can see some ;))
Planning to create scrog this week too.
Mars Hydro TSL2000 is on 70% output, thinking to increase it with flip to 75. Light is working fine , really covers all space , great affordable light for colder climate.
Day 45. Girls recovered from training very nice ! In few days flip .
Day 47. Girls got top up. Put first level of scrog. Flipped to 12/12, tent is rammed ;) light output on 75%, 4 liters of 6.3 phed water went in.
Top up was dosed, mixed well and laid on top, then i rough and mix top lair of soil with top up and only then i water.
All pots are 30 litres ( grams and ml , have in mind ) :
Ecothrive - Biosys - 5 ml / pot
Ecotrive - Charge - 120 ml / pot
Ecothrive - Life Cycle - 60 g. / pot
Ecothrive - Bio Blend - 200 ml / pot.
Think this will be my standart top up, i run out of Great White, have for one top up, will do it in 2-3 waterings seperately from all.
Planning to repeat same top up at begining of week 4 of flower. Girls look better without spraying, most prob burn from too intense light, despite me giving 30-60 min of reduced to minimum after spraying. From now on - only when lights off. Will apply in few days, think Saturday.
Happy Growing !!!


Likes
19
Share


@berserker1
Follow
Gave her a big dose of GO bloom and GO bio bud, and molasses. I just feed her once a week, 16L is what I take down .

Likes
20
Share


@CityFarmer
Follow
Hello everyone,
I've had a busy week, so this is what I have for you guys
See y'all next week 🤘🤘

Likes
19
Share


@adam_pawloski87
Follow
What a fun run this was ! These Ogreberrys finished up from 81 days to 102 days with nice hints of gassy , sour purple , sweetness and glistening with frost! These ladies will cure up for a month an will be ready to test out ! So much fun , I highly recommend this strain if your looking for some oooy gooohy resiny grape smelling nugs !


Likes
31
Share


@Chubbs
Follow
SuperSativaSeedClub
PurplePunchOG Auto
Week8
Weekly update on these three ladies. Been an eventful week for them. I decided to transplant from the original 1gal fabric pot to a 3gal fabric which I never do on autos but I was fighting keeping them happy in the smaller pots. So will see how they take it. Plus I lollipoped the bigger one taking off the lower nodes. All in all Happy Growing.

Likes
5
Share


@HoneyBlunt42
Follow
I started the spring with the experimental "Black Mamba 42," and here are my impressions. The plant spent 108 days indoors. Roots appeared on day two, and the seedlings shed their seed shells on day four.
The plant stretches significantly in height; I managed to fit it into a 130 cm tall grow box by topping it and training the branches outward with plastic clips. At day 108, the buds were still a bit small; they could have easily gone another 2–4 weeks.
The scent was moderately intense—nothing overpowering. Visually, the buds turned out to have medium density. The maximum wet weight for the two plants combined was 300g; I expect to harvest a solid 50g dry.
We’ll know the exact figure in seven days—I don't like weighing wet material with the stems attached. As for issues: one plant suffered from acidification around day 15 (due to a faulty meter), which severely stunted its growth. Towards the end, the grow box was hit by spider mites. I also left it on an auto-watering system (using a 15L jug) for a week, and it dried out a bit. I had another plant from an international seed bank in the same group for comparison, and it handled the identical conditions perfectly.
This strain isn't the easiest to grow and is a bit finicky. It requires a 2-meter-tall indoor grow space; in a one-meter space, without bending or training, the tops will get burned by the light around day 30–40 from seed. Bottom line: I didn't love the strain, though I’ll give it another shot later with the remaining seed. I plan to try seeds from two other banks.
I recommend this strain to anyone with a 2-meter grow box who enjoys long grow cycles and cultivating massive Sativa monsters—and to anyone wanting to support our local breeders.
Thanks for the experience! See you in future reports.
Likes
14
Share


@Grey_Wolf
Follow
Peyote wifi x High level again
25th October 2021
Starting to take shape now , not much much to report on this early in the grow
Thanks again for stopping by 👍
Likes
14
Share


@LokalGrenz
Follow
Got a dehumidifier it’s reading different from what mine controller 69 is saying but I have it set at 40% it’s the lowest so it’s going pull humidity regardless right now it’s about 53% which is okay would like it to get down to the 40’s I also changed the light schedule today to 20/4 the humidity raises at in my tent when lights are out so I figured change it to 20/4 instead of the 18/6 I’ve been running so if humidity does go over it won’t be for as long as before hopefully this works just trying to avoid any mold situation
So far the Amneisa Haze 2 is at stretching she’s going be big I can but the haze 2 is done seems to just be flowering the sour diesel is looking good as well so far I’m happy with its looking like left town for two days and the auto watering pots worked!


Likes
5
Share


@Kinghaze
Follow
Week 2 of flower
The plants are healthy and doing good.
2 of the blue zushi where a little short in comparison with the cupcake, so i lifted them up.
Tomorrow i will defoliate them and put up a second trellis.


Likes
2
Share

@D1kke_Zwaar_Rook_420
Follow
Dzień 21. Moje młode warzywa rosną zdrowo i wyglądają niewdzięcznie. Warunki w growboxie pozostają bez zmian. Oświetlenie 16/8, temperatura 25°C w dzień / 21°C w nocy. Glebę spryskuje mieszanką wody i odżywki BIOBIZZ Bio Grow 1,3 ml / 0,75 litra. Nawadnianie stosuje według oceny.miernika wilgotności w ziemi oraz po sprawdzeniu metodą na palca. Ok. 250ml roztworu na roślinę, co 48 godzin


Processing
Likes
14
Share


@Slurpy_Terpy
Follow
Day 84 (day 21 flower):
Major defoliation on both the Brain Cake and Bakers Delight. Both the ladies are getting sticky! The Brain Cake smell is pretty neutral but the Bakers Delight has a bit more smell and reminds me a bit of a Tangine Kush (Rare Dankness) I grew a while back.
Changed the water reservoirs to the flower bloom booster nutrients (Plagron green sensation).
Day 86 (day 23 flower):
They seem to be coming along nicely, a tiny bit of progression in the buds since defoliating. The Bakers Delight is more sensitive to nutrients so added some tap water to dilute the nutrients a little (TDS 510 -> 470).
Day 87 (day 24 flower):
Both doing well. The Bakers Delight seems to be reacting positively to the slightly lower nutrient concentration. Both water reservoirs between 5.7 and 6.3 at all times and around 20-21c.
Day 89 (day 26 flower):
Everything seems fine, water stats are stable, for as far as I can see no deficiencies or excess, bud are growing in height and seem to be producing nice amounts of thc giving the buds a slightly grey color. Some of the pistils are turning orange very early, might be due to stress the past weeks, or the new full spectrum light or just genetics. The Bakers Delight currently has a stronger smell, also a more peppery background. The Brain Cake has a neutral fresh 'plant material' green hash smell, nothing special going on yet with her odor.
--> Slowly been hanging the light closer, at 50cm from the Brain Cake and 60cm from the Bakers Delight, will slowly lower till its approx 40cm from the Brain Cake and 50cm from the Bakers Delight (because the BD is 10 cm shorter...). Hopefully this will get the top buds to get even bigger and stronger and hopefully aswell the bottom buds will pull some weight and most importantly the bottom buds need to ripen as fast as the top buds which is usually the main issue when they dont get enough light... Curious to see how it plays out. Might need another minor defoliation around day 40-44.

Likes
4
Share


@MoneyMorris
Follow
Looking like 3 more weeks until harvest. I’m going to start flushing in about 10-12 days

Likes
22
Share


@GrowinHome
Follow
The buds and trichimes are developing nicely. The defoliation didn't harm them at all.
The plants are starting to get really thirsty so I'm giving bigger amounts of water. 10 liters at the moment.

Likes
37
Share


@Pugbutt
Follow
Everything going great, not to much to report this. Plenty of new bud sites, and some very beautiful tops. Added in just a few inches of fresh fox farms soil to keep roots covered. They feel as they finally stopped stretching so much, so I'm feeling alot better about my taller girls getting too tall.
Likes
19
Share


@eldruida_lamota
Follow
Buenos días familia, finalizamos la segunda semana y es que van a muy buen ritmo están bastante sanas y sin problemas.
Ph controlado en 6,2 poco a poco iremos alimentándolas ya que tienes algo menos de tiempo que el resto.
La temperatura es ideal al día, por la noche algo baja pero sin problemas mayores.
