
Likes
Comments
Share


Likes
20
Share


@QueenOfTheKind
Follow
I put her into darkness today so this won’t be a full week. She looks beautiful and smells amazing. Description to follow when she comes out of the dark.

Likes
9
Share

@TangerineDre4m
Follow
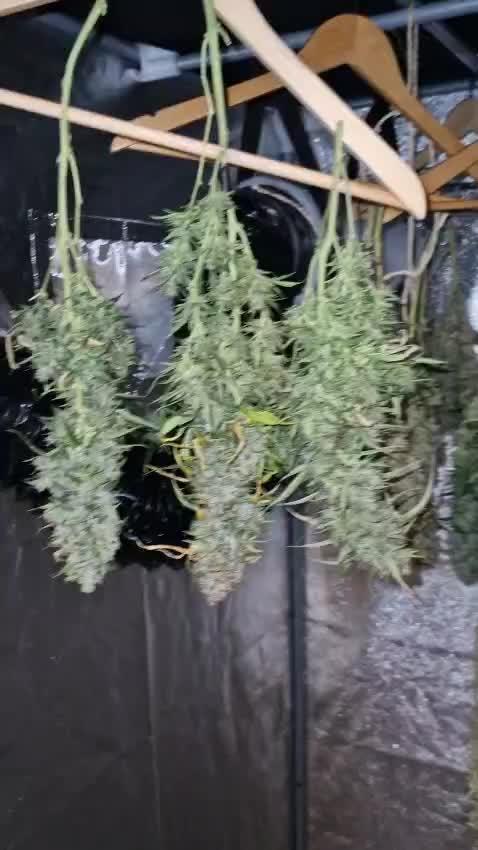
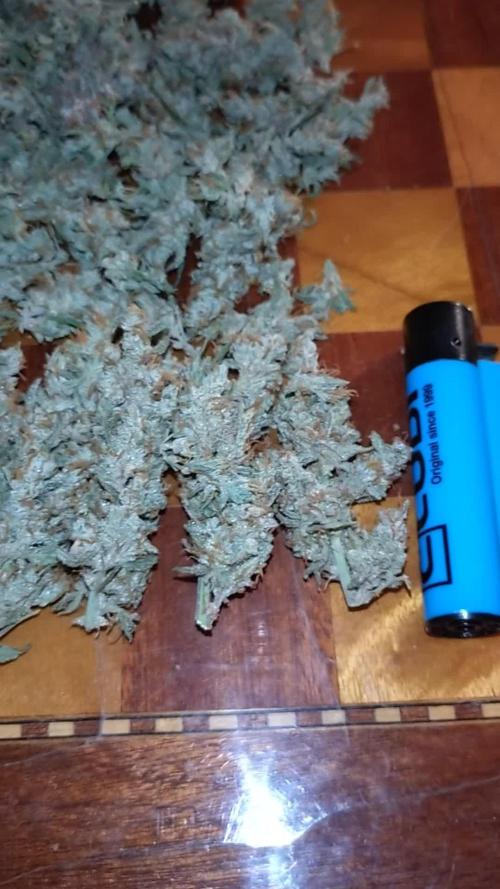
Day 106
Plant 2 has been dried and jarred. She ended up bigger than I expected at 148g dry. Super sticky and relatively dense buds. It was about 120g of top shelf and the rest was smaller bud. I ended up smoking around 25g before taking these pics already.
Plant 3 probably has about 2 weeks left. She is starting her final bulk and is looking nice and frosty.
Stunty was harvested on 25-12-2025 and ended up weighing around 750g wet after trimming fan leaves.

Likes
27
Share


@RDWCGrowing
Follow
3/25/2023
Week 6- Day 1 of Veg (Day 52 overall)
Added my first between changes SILICA Top offs. Was worried that when you add it to pre mixed Nutes that it can make the whole thing turn into a gummy looking substance. I was ready to drain the system and start it over for the week if needed, but no issues adding it to the tank. the Silica going into the Res didn't gummy the system up, it did drop my PH by quit a bit causing me to have to bring it back in balance.
36 Gallons in the Tank
Silica
Add .5mil/Gal = 18Mil
I topped some that needed to be topped, I defoliated some that needs to be defoliated. Since I have moved into Week 6 I have increased the light intensity up to just over 500 maxing it out for Veg Cycle. Next increase will be Week 1 of Flower.
3/26/2023
Week 6- Day 2 of Veg (Day 53 overall)
All conditions looked great. Other than me not putting one of the humidifiers back right which means it didn't work last night so Humidity was lower than I like. But got the Humidifier back on it's stand correctly and it is now pumping away. With that I decided to give the plants a day off from any stresses, no topping, no FIMing, no Defoliation for today. Just some good old soaking up the light rays and the ability to get all the Nutes they would like..
3/27/2023
Week 6- Day 3 of Veg (Day 54 overall)
Looking kind of Bushy today, so I defoliated some, and topped some.
3/28/2023
Week 6- Day 4 of Veg (Day 55 overall)
PH was a little lower than I like 5.74 so I added a few Mil of PH UP and brought it back up to 5.94.
Not much else at this stage, just I topped a little and I defoliated a little.
3/29/2023
Week 6- Day 5 of Veg (Day 56 overall)
Topped a little, Defoliated a little Watched them grow!!
3/30/2023
Week 6- Day 6 of Veg (Day 57 Overall)
Main action today was breaking down my old tent and setting up a new tent and getting my second RDWC system setup and ready for clones. I Topped a little, I Defoliated some and started taking a good look at what I would like to take for clones in the coming days. I have a few bottom branches that look every promising for my clone material on each.
3/31/2023
Week 6- Day 7 of Veg (Day 58 overall)
#3 is at 16" Tall
#2 is at 13" Tall

Likes
21
Share


@YeOldeGrower
Follow
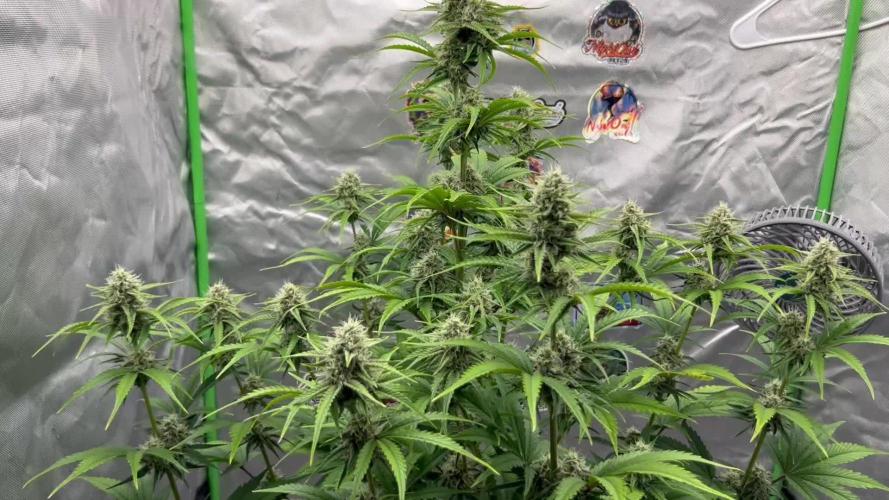
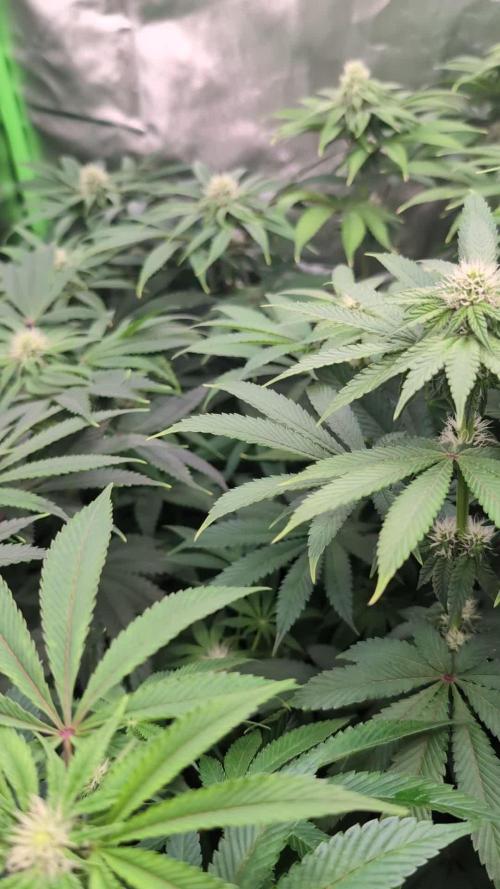
week 3 of the flowering stage of MD XXL 🙌
1 of the 3 is realy not doing good and is yellowing alot, i dont know why this is, i think its heat stress combined with nutrient deficiency but im not 100% sure. I think shes doing better since i went from 3ml/l alga bloom to 4ml/l and adding 1ml/l green sensation to it. Other 2 MD XXLs are doing just fine, 😉 its still very hot where i live, around 30 degrees celcius every day, global warming all the way...
i wonder what my harvest amount will be!
For the people in the Grow Questions, i dont check PH/TDS simply because my budget couldnt sustain the equipment, ill get it next grow. Also the alga grow/bloom line from plagron states that you dont need to check PH levels because the algae in the nutrients will regulate it apparently,
I also choose NOT to defoliate since i read alot of different stuff about it. I think i just let nature do its way and only remove those bad fans blocking my beautiful buds 👹


Likes
8
Share

@sanibelisl
Follow
Mulberry F3 Day 56
Things are going well today with Miss Mulberry. Up her nutrition level and she has a better green look about her now then same time last week. No more vertical growth and all energy going to flower production.
Likes
37
Share


@MG2009
Follow
08/21/2018
Day 1 week 2 of flower.
Last bit of supercropping, keep the canopy low as possible
08/22/2018
#5 is the only 9 fingered leaves plant, all other GTH plants have 5 & 7 finger leaves, #5 took 3 clones she's my keeper of this batch. She is very diesely citrus,musky smell.can smell her at 90". #4 similar smell not as much stink.
#3 minty chlorophyll smell.
#2 orange,citrusy,mint.
Ps.
Gonna hit a selected branch or 2 of GTH #5 with mystery cookie males pollen I saved from earlier pollen harves. (week 19 mystery cookie grow) & some 2017 cherry pie pollen.( See Breeding Project, pollen test)@growdiary.
#1 most similar to #2.rubs Smells from stem rubs on #1#2#3#4 , #5 no stem rubs needed she straight up stinks.👊🔥🚀⛽♨️
Likes
2
Share


@gr3g4l
Follow
Al inicio de la semana fueron sacadas fuera del armario al quedarnos sin luz por el apagón , posiblemente hizo que las plantas crecieran o se estirasen un poco más de lo que venían haciendo.
Esta semana ya se notó claramente el inicio de flora y las plantas coparon bien todo el espacio, casi que no cabe ya ni un alfiler. En pocos dias, 11-12 dias realizaré una poda de bajos de todas las secundarias, hojas yemas y ramas y así queden listas para terminar de florecer.
D9 foliar
14 dias pequeña poda de algunas ramitas bajeras , las primeras . Muy poquito para no estresarlas mucho y en una semana , con 21 dias a 12/12h. terminaré de vaciar lo que quede.
Likes
45
Share

@JaramnieJazz
Follow
03.06.26 Erster Tag der 19 Veg Woche ...Läuft im Video die Reihenfolge ist: Black Lemon, Sour Diesel, Chocobang, GDP, Apple Betty, Skunk Haze
04.06.26 Letzte Tage nur Regen hoffe es wird besser die Tage und Wochen ist aber noch Zeit bis zur Blüte die Frage ist nur wann, wie die Jahre zuvor am 01.08 oder doch früher wie letztes Jahr und es regnete nur und versaute mir die Ernte letztes Jahr
Daumen drücken
05.06.26 Läuft die kleinen wachsen und scheinen immer noch nicht hungrig zu sein haben immer noch ein schönes Grün wäre cool wenn ich gar nicht mehr füttern müsste aber wenn ich sie zum 01.08.26 in die Blüte schicke werden sie wohl was haben müssen sind noch 2 Monate und 1 Monat sind sie schon in den end Töpfen wir werden sehen muss weiter beobachten werden 🏻 Peace
06.06.26 Läuft das Wetter scheint auch besser zu werden ich hoffe nur ich bekomme das hin alle Tops gut zu entwickeln weil es sind teilweise so über 30 Stück bei der Apple Betty zB
Und ich glaube ich benutze Mental Rainbow 🌈 zum Samen machen sie wird einfach Gang gebangt von allen Männchen die ich finde der name past ja auch Rainbow 🌈 alle Farben des Regenbogens werde dazu die Männchen falls ich welche finde mit ihr Weck bringen damit ich hier nur ausgewählte Äste bestäuben kann und sie wird ja.....,😚😘😍🌋❤️🔥❤️🌈
Hab an der Sour Diesel Rum gespielt und den einen doppelten trieb geteilt der andere hat sich von selbst geteilt 1 von den 2 wächst normal der andere aber als ob es immer noch 2 wären da es zur Seite wächst wie der trieb den ich geteilt habe jetzt liegt das Innere des stiehls frei hoffe das da kein Infekt/Pilz sich breit macht ansonsten werde ich ihn abschneiden muss weiter beobachtet werden Peace 🏻 🕊️
08.06.26 GDP geht ab
09.06.26 Läuft das Wetter ist leider Mies hoffe das geht nicht so weiter sonst endet es noch wie letztes Jahr


Likes
2
Share


@CannaIGrow
Follow
Topped this girl this week, she’s growing pretty good. Very nice looking plant to my eye.
Likes
56
Share

@GrowerBaal
Follow
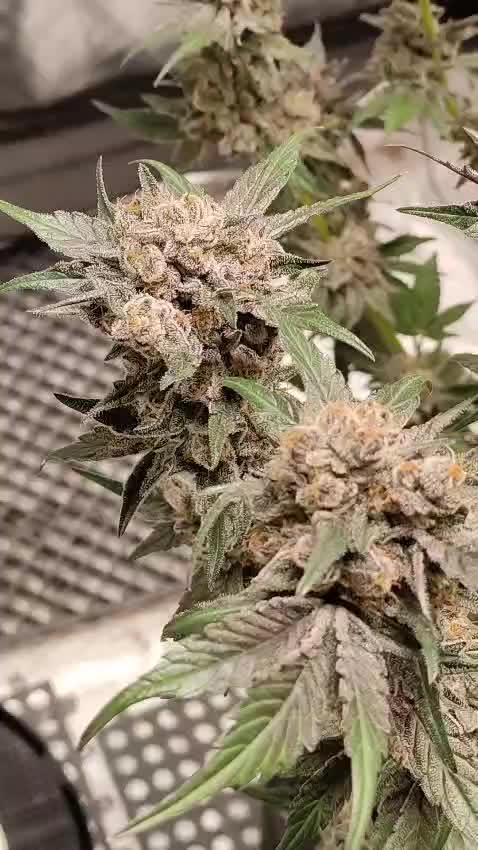
For her last week or so she had to move, as i needed the other tent. The temperature and humidity fall over the last days. On day 96 it looks like she can be harvested the next days as first amber trichomes on the side buds have appeared. Probably she will be chopped this weekend.
She got very frosty and looks liked powdered with flour.

Likes
6
Share


@Naujas
Follow
56 days!!!!! wow this week it really rained a lot, there were storms during which I had to bring the girl inside so that she wouldn't be broken by the strong wind:) but all that stopped, and the nice weather has already started:) the girl still doesn't show any signs of flowering:) good luck to everyone:).

Likes
7
Share


@The_Chef_420
Follow
Well it seems like I have amnesia already with how quickly this one grew and finished, haha. I did a check with the 100x microscope and trichomes are beginning to turn translucent/milky with no amber at all. I noticed this, trimmed up some more fading leaves and got her ready for flush since I had used Beastie Bloomz and Overdrive late in the flowering phase. I need to do some more research on organic alternatives for boosters and be prepared for next time. Usually with a fully organic system there is no need for a flush because of the active rhizosphere and the breakdown of organic substances. I removed the lid containing the net pot, roots and screen that they grew through and had my girl slide a shallow tote underneath. I left an air line/stone with the roots and filled 2 gallons of RO with Clearex which is a commercial flushing agent, mostly composed of citric acid as well as a half of a tsp of Microbes in each gallon. Planning on leaving her like this for a couple days, continuously flushing by the day, pouring from the top of the net pot to fill.

Likes
7
Share

@PhinolaGreen
Follow
Harvest
Ooooooh ihr glaubt ja gar nicht, wie Geil die Sorte beim Wet Trim gerochen hat. Es hat was von Tangie, dieses Moschusmäßige, schwer aber mit Noten von Schokolade und Weintrauben... Hätte ich nicht gedacht und echt toll geworden.
Mache nochmal ein Update, wenn die rdy to dry Trim ist 😄
Likes
19
Share


@GreenhouseGrowing
Follow
Auto Berryblue is going great. I am now in the stage where the buds will start fattening up. I definitely have at least four to five more weeks left. She smells amazing and growing crystals all over.
My other autos are exploding with leaves and bud sights. They are beautiful! Cant wait to see how she buds. I have lots and lots of support. She is gonna have heavy branches. Fingers crossed they continue on there gorgeous road of flowering!
https://youtu.be/UG_GNplZJts
AK74 was the only strain I did a Leaf tuck on and her canopy turned out beautiful! No trimming no training.


Likes
7
Share


@MediciGrade
Follow
I went out of town for the holidays and had a friend check in on my plants every 3 days.
12/27 - Day 85 - Watered all 3 plants with 2 ml/l of flawless finish. The largest plant was completely dry and took 5 L. The other two were still damp and took about ~3L
12/30 - Day 88 - Plain water for all 3 plants. PH 6.2. Largest plant took 5L and the smaller two a little less than 4L.
1/02 - Day 91 - Large plant got 5L w/ Recharge. Front 2 got 3.5-4.0L w/ Flawless finish. Flowers on the front two were so heavy they were falling over so she used some pipe cleaners to support them. Some fan leaves had started yellowing.

Likes
11
Share


@k0nz1
Follow
Last few days till harvest
Only ph-regulated water for the last week, no nutes
ICC Looks and smells incredible, Lots of trichomes. Sweet Aroma
HJ more herbal and gasy, unique for Sure
Leaves gettin intense autumn colours. Nutes are pulled out of the leaves. 2 days left, then harvest the last two.


Likes
6
Share


@rvabudman
Follow
Cant take my eyes off my plant. This is my second round of growing and I am the type of person who learns through failure (not gonna upload the pics of the first round plants lol). The buds are thickening up very nicely. Hoping to get between 3-4oz , the strain is high yielding but I have a smaller tent. My auto yielded 2oz with the same space (2 plants in one tent splitting the space), but the buds definitely didn't develop as well as these buds.

Likes
17
Share


@StickyFingah420
Follow
Planta de crecimiento no muy exigente, no demanda grandes cantidades de agua y nutrientes.
En este caso solo apliqué LST y respondió bastante bien. Formó un buen tallo principal y una estructura ramificada y firme.
Lo mejor de todo viene en la floración, adivina porque?... COLORES!, alrededor de la 3era semana comienzan a aflorar tonalidades rojizas, púrpura, rosas que deslumbrarán a cualquiera.
Sus cogollos son más bien aireados y desprenden un fuerte olor cítrico como a cáscara de naranja intensamente dulce.
En fin, una genética de calidad y con una visual hermosa y aromas asombrosos!. En lo personal prefiero los brotes más densos y compactos, pero me encantó todo el proceso de esta hermosa planta, totalmente recomendada!