


Likes
Comments
Share

@Olduffybastard88
Follow
Week 4 fpr the tropicanna sorry for the confusion I'm getting more seeds to start from week 1 I have my other page on twitter just starting out here

Likes
6
Share


@FumateAlgoo
Follow
¡Primera semana y seguimos con buena positividad! Las plántulas ya empiezan a crecer y a abrirse, se ven fuertes y ojalá sigan así. Todavía están dentro del propagador para mantener una buena humedad, ya que en esta etapa las raíces apenas están formándose. La mayor parte del agua la absorben por las hojas, así que no se necesita tanto riego, sino más bien mantener alta la humedad en estas primeras semanas.

Likes
99
Share


@GrowWithFlow
Follow
Hallo meine Freunde . Wir befinden uns in der 2 Wachstumswoche . Die Orange Sherbet FF von 420 Fast Buds wachsen etwas langsamer wie man auf den Bildern erkennen kann . Auch Sie wurden von 0,5l in 8l Grownest Stofftöpfe umgepflanz . Der PH Wert wurde angepasst auf 6.2 . Die Ladys sehen gut aus aber brauchen halt ein bisschen . Dazu bekommen Sie jetzt bei jeden 2 gießen die hälfe der angegebenen Dosis von Hesi Bio Grow mit halber Dosis Hesi Wurzelkomplex und natürlich auch Hesi Super Vit . Gießmenge gebe ich nicht an da Sie durch die außen Temperaturen gerne unterschiedlich trocknet . Das wars auch schon hier mit der Orange Sherbet FF, vielen Dank fürs zuhören und bis nächste Woche meine Growmies . Much love ❤️💛💚

Likes
65
Share


@GrowsHimself
Follow
Continuing to feed compost tea each Wednesday with added Bio Pk. Plain water all other feedings.
Her buds are really starting to swell nicely, they are nice and dense already. I am lightly defoliating to uncover any bud that is looking shaded.
No issues currently, seems to be growing fantastically.

Likes
51
Share


@Organic_LarF
Follow
High GD community,
Week 25,
I dont want to start to pessimistic, but all waiting could been for nothing.
Bad weather all week long, and its here to stay for a little while. The buds are not dense, so that might save it from budrot.
The idea of just tturning the whole plant into hash, becomes stronger than before.
I took off some branches of the wild child, so its a bit more open canopy.
The greenhouse lady is pretty much save, but theres much less airflow passing there and humidity is skyrocketing.
That will be it for this week,
See yall soon
Grow safe buds
🙏🍀🍀🍀🙏

Likes
8
Share

@LegalGrowMyOwn
Follow
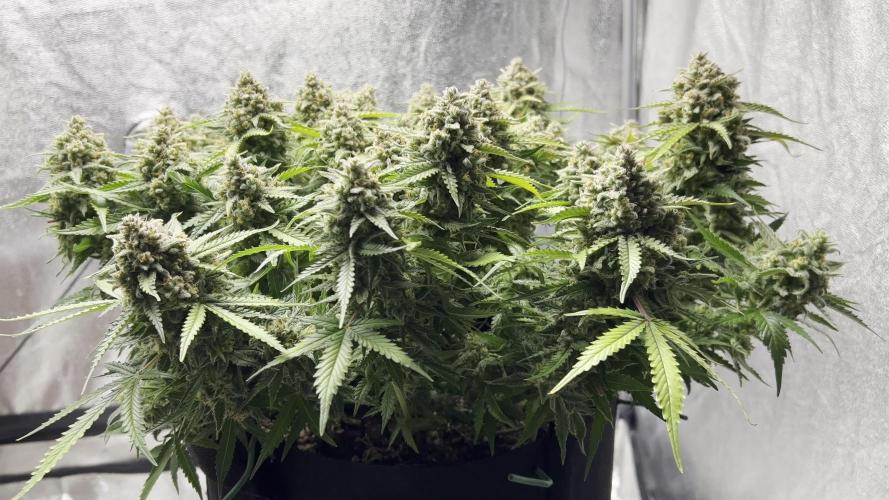
The last two weeks are beginning. I'm getting hungry and are slowly starting to get amber.I'm starting to give only half the nutrients.
Processing
Likes
15
Share


@eldruida_lamota
Follow
Que pasa familia, arrancamos la 3 semana con un trasplante a 7L, en tierra all mix, y es que sin contar ese error con la caída, los 2 ejemplares están perfectos y sanos.
La humedad la tenemos algo por debajo pero 55% estaría dentro de nuestro parámetro.
Esta cepa pinta de 10 familia.


Likes
3
Share


@Kingmecoop
Follow
I'm switching my nutrients from Foop to ILGM Bergman's Plant Nutrients. Shouldn't be a problem Foop works well with other nutrients. However, my irrigation lines were getting clogged and the smell. I think because I'm using small lines... Regardless I'm using 1/8 of 800ppm level=100 ppm.

Likes
151
Share


@BioBuds
Follow
This Xtrakush keeps surprising. What a vigorous plant it's a pleasure to grow. All week we've seen huge bud formation and shes filling out.
Only the last day growth has stunted a little. I think it was heat and I was pushing the light to its max.
She seems to recover and I might have lost a day or two of growth. Her roommate, the Orange Hill Special, outperformed her a little in bud development.
It was my mistake and this sort is made to grow outdoors in N European conditions.
When we push for the limit, it's logical we find or sometimes go over the edge.
Thank you for checking in this week, Im getting more and more impatient to see these plants develop and the harvest.
Hug Bud
Likes
52
Share


@DogDoctorOfficial
Follow
Let's realign our cosmic compass and embark on a harvest report for our magnificent Cosmos F1, a pure CBD strain that has taken us on an extraordinary journey. Brace yourself for cosmic revelations and interstellar delights!
After an impressive 11 weeks from seed and 7 weeks of flowering, the time has come to witness the cosmic culmination of our efforts. I carefully hung the entire Cosmos F1 plant to dry, allowing the cosmic energy to infuse every inch of this botanical marvel. It's a sight to behold, with majestic branches reaching for the cosmos, reminiscent of a cosmic dancer frozen in time.
As our cosmic queen gracefully dries, her vibrant hues continue to amaze. The shades of green, intertwined with delicate hints of purple and gold, are a testament to her genetic splendor. It's as if she has absorbed the cosmic essence of the universe, transforming it into a visually stunning spectacle.
Now, let's talk about the cosmic power of CBD. Our pure CBD strain holds the key to a transformative experience. With minimal psychoactive effects, this cosmic treasure offers a realm of therapeutic benefits. It's like a cosmic massage for the mind and body, soothing and relaxing, allowing us to explore the depths of cosmic tranquility.
The decision to hang the entire plant for drying is a testament to our dedication to preserving the cosmic integrity of our harvest. By allowing the branches to hang freely, we encourage a slow and controlled drying process, ensuring that the cosmic essence remains intact. It's a ritual that honors the plant's journey, preserving its cosmic magic for us to enjoy.
As we eagerly await the cosmic transformation, let us express our gratitude to the celestial forces that have guided us on this cosmic odyssey. The cosmos has aligned to bring us the extraordinary Cosmos F1, a gift from the cosmic garden gods themselves. We extend our heartfelt appreciation to the cosmic harmony orchestrated by @James and Royal Queen Seeds.
In the coming days, our dried cosmic buds will be ready for the next stage of our journey. From cosmic concoctions to cosmic culinary delights, the possibilities are infinite. Imagine infusing the cosmic power of CBD into soothing teas, cosmic creams, or cosmic confections. The universe is our canvas, and with our cosmic harvest, we can create cosmic masterpieces.
As we bid farewell to our Cosmos F1, let us cherish the cosmic memories we've shared. The vibrant colors, the pure CBD power, and the cosmic connection we've established with the universe. May our future endeavors be as cosmic and awe-inspiring as this one.
Until we meet again, my cosmic friends, lets keep exploring the cosmic wonders, nurturing our cosmic gardens, and let the cosmic energy guide our cosmic creations. May our harvest be abundant, our cosmic experiences be enlightening, and our cosmic journey be filled with celestial blessings.
As always thank you all for stopping by and for supporting me on this journey, i am super passion about growing and fell blessed to have you all with me on

Likes
20
Share


@Skunklerman
Follow
The week looked as such:
Nothing until Wednesday: 1 gal each pot water with gnarley barley ground and bubbled for 24 hours.
Topped each pot w ground gnarly barley, build a soil special blend, kashi and neem meal.


Likes
Comments
Share


Likes
132
Share


@rhodes68
Follow
2/8 Week 13 !
Her drinking is falling, almost a quart less today.
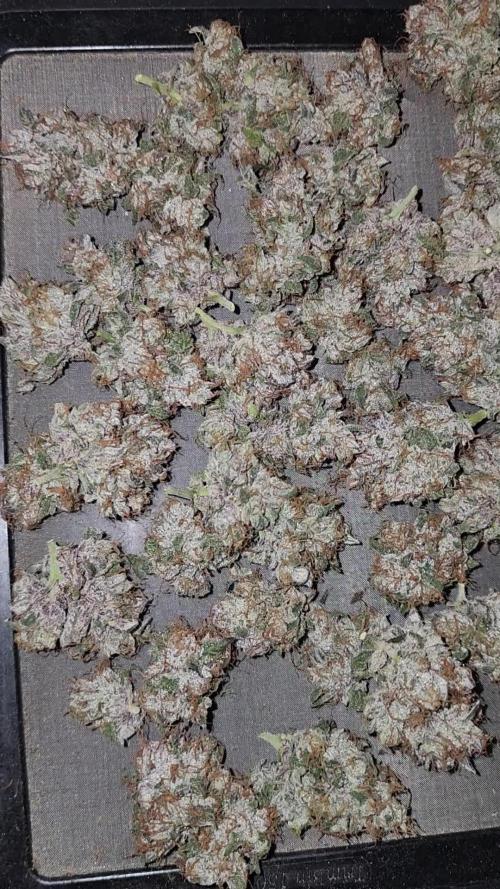
Moving into flush range as the hairs are beginning to curl and seeing some small showings of amber.
Reducing the Bloom nuets to 5ml until I see its time to change again, increasing PK slightly.
Prob two days then go to full PK (15ml) to take her into flush.
Plan a fast flush with an agent to speed things along.
2/9 Fed 5ml/gal CT Bloom A/B 12ml/gal Peak
Another day
2/10 Leaving feeding as is, building nicely leaving the plant positioned as is think this is the best compromise between all the plants in the tent.
Not sure how long this will go at this point, but not cutting her short for anything.
Pics
2/12 Beginning to back off the PK leaving the CocoTek at a low dose. Plan to have the PK gone in a day or so but leaving the CT until flush.
Just following some new ideas on using PKs and Finishers.
Pics and vid of buds using a couple of filters just trying to show these two foot long buds without messing with the dark cycle.
Hope it helps
2/13 Pics that you can actually see!
Due to some issues, one is on this grow (I need to increase potency on Tara), changing out the HPS for MH for a while, may finish under it depends on the other grow.
Looking at the trics I have decided to drop the PK and go to normal levels of Bloom nuets until flush.
Continuing to keep her cleaned out as much as needed so light gets all the way down.
2/14
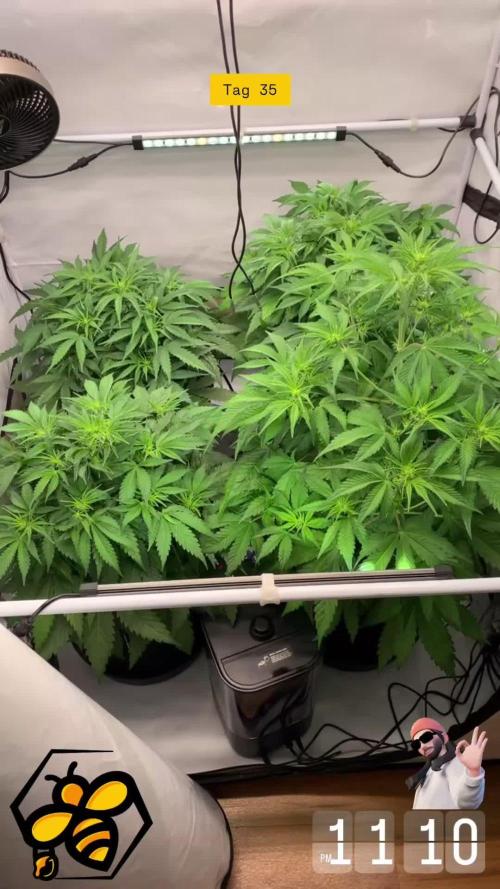
Pics of the rearranged tent to end the week,
Realize now how much time switching the lights to 12-12 has added to Tara's finishing time.
Had no real choice but its a point learned.
Happy with her progress

Likes
4
Share


@SlickCityOrganics
Follow
Stretch Stretch Stretch! She's really showing her sex now. Pistols popping up everywhere. Just plain water this week and a little defo.
During defo, I split the 2 branches from the topping. But didn't effect. Just taped the bih right up lol. Cane back the next day, they were praying to the light! These girls are resilient 😌
Likes
31
Share


@MrJones
Follow
MrJones VIPARSPECTRA XS1000 LED
📜 SUMMARY - I have been given the opportunity to run the next generation of LED lights by VIPERSPECTAR, the XS1000! I set up a Stealth Cabnient and moved 3 Cream Manderain Auto XL.s under these lights, the cabinet set up is automated with WIFI light controllers, and INKBIRD Temperature and Humidity Controllers, I am very excited about this opportunity!
Specs and Discount Codes Listed Below.
🔹🔹🔹🔹🔹🔹WEEKLY GOALS 🔹🔹🔹🔹🔹🔹
🌞Environment - 80F and 50%Humidity - using Humidfyer as needed.
💧 Feeding - Feeding with FOOP Canna Organic Nutrient Line
🍃Training / Keeping Stems Stable and Strait
🕷️ IPM - Will be using Green Cleaner" 1 OZ per Gallon, and CannControl from Mammoth alternating between product each month for Integrated Pest Management.
💡 Vegetation & Flower (new) Viparspectra XS-1000 Release on March 15th.
🔹🔹🔹🔹🔹🔹🔹🔹🔹🔹🔹🔹🔹🔹🔹
📜 Week 7 underway and these girls gave finally stopped stretching, but now I need to super crop them, as they have grown up past the lights, this has never happened, a great combination of Lights, Nutrients, Environment, and Strain.
🔹🔹🔹🔹🔹🔹🔹🔹🔹🔹🔹🔹🔹🔹🔹
▶️Monday 04.05.21 / Fed about 30 ounces today - looking great!
▶️Tuesday 04.06.21 / Fed about 30 ounces today - looking great!
▶️Wednesday 04.07.21/ Today I went ahead and super cropped these auto flowers today, out about 4 inches between the lights and the canopy, much better, hoping that I have not stunted these ladies! Holding off on the feeding tonight the buckets were heavy.
▶️Thursday 04.8.21 / The ladies are responding well to the training and defoliation, these lights are full-on beast mode! The FOOP nutrients are kist pushing these plants to the max!
▶️Friday 04.09.21 / Fed about 30 ounces today - looking great!
▶️Saturday 04.10.21 / Skipped Feeding Today.
▶️Sunday 04.11.21 / Fed about 30 ounces today, the weeks ending and the girls are looking pretty good, just hoping next week to see the buds to start to get larger.
🔹🔹VIPARSPECTRA XS1000 LED🔹🔹
Amazon US:
XS1000 10% off: in10MrJones http://yx-8.cn/0y-6
XS1500 5% off: in15MrJones http://yx-8.cn/0yA
XS2000 5% off: in20MrJones http://yx-8.cn/0y2Y
XS4000 5% off: in40MrJones http://yx-8.cn/0y5k
Amazon Canada
XS1000 10% off it10MrJones https://amzn.to/38udUVe
XS1500 5% off: it15MrJones https://amzn.to/3esVUyr
XS2000 5% off: it20MrJones https://amzn.to/3l5zAfg
XS4000 5% off: it40MrJones https://amzn.to/3l7k5Uj
Likes
18
Share


@Staffedition
Follow
Привет друзья. Моей растихе сегодня 119 дней
20.10 перевёл свет в режим 12/12
Начал применять LST технику на 19 дне и продалжаю применять её через день, а 18 августа добавил ДЕФОЛИЗАЦИЮ
С 20.08 ДЕФОЛИЗАЦИЮ делаю каждые 3,4 дня
С 20.08 LST технику делаю каждые 4.6 дней
На сегодняшний день влажность 54%
5.09.2023 заметил высокий Ph 7.9
С 48 дня Ph не ниже 5.8
На сегодняшний день Ph 6.0
Начал кормить с 60 дня Canna Terra Vega
PPM 870
Всем мира и добра!
Не забудь поставить лайк❤️, если понравилась как прошла неделя
И читайте наш TELEGRAM: https://t.me/smail_seeds
#Smail_Seeds 😀
Likes
21
Share


@indoorontario
Follow
She's really showing those burn marks from a couple of weeks ago now and is looking pretty well aged because of it. It's unfortunate but she's still fine even though I'm sure she would be absolutely beautiful if I hadn't have burned her. The buds look great and very frosty at this point, some are cloudy now and I'm sure it will only be another week or two before she is done. I will start flushing very soon more than likely.