
Likes
Comments
Share


@SmithNuggets
Follow
2/10 No feed tonight just water ph'd at 6.2
2/12 gave them a trim yesterday to open them up. Feeding tonight pots are feeling light. I will lst Blueberry muffin either tonight or tomorrow.

Processing
Likes
21
Share


@LittleBigTrees
Follow
I've cut down on grow at this point as the soil seems to have a lot.
I'll feed for another week then think about Flushing.
The kalimist will keep getting fed bloom and grow as its only been flowering for about 3 weeks due to taking longer to force flower.
Likes
32
Share


@Bread_n_Buds
Follow
The Zenviations have been processed specifically differently I must say that they are both beautiful but one suffered the attack a little more even if he has very dignished flowers. The low one has a few beasts as you but you seem to end up great, hopefully good


Likes
16
Share


@Big_Rade_SCLA
Follow
Great week. I simply keep watering more. I'm going to start with the juices and more kelp meal sprinkles next week.
They're getting taller by the day and no sign of being waterlogged and no runoff either. Green, smelly, in pre-flowering or transition state, companion plants taking off also. Haven't spotted any males or male pollen sacks in the grow area after the removal of 6 identified males. No pollination from my grow, but the environment is wild for pollen around here--i get seeds every year--even if it's just 8 seeds from a whole pound of harvest--a bee lands on the flowers in mid-october and it's like 50/50 seed or not in that location--just saying that it's part of growing outdoors without a net.

Likes
Comments
Share


@hfwbr420
Follow
Last Week of flowering is done. The plants got chopped end of the week.
Harvest Report will be done after curing!

Likes
7
Share


@FrecheOma60
Follow
Die Pflänzchen sind aktuell immernoch am stretchen. Ich muss die Lampe nahezu jeden Tag weiter wegstellen. Alle sind absolut gesund, keine Anzeichen auf Spinnmilben, Nährstoffbrand oder ähnliches. Die Fächerblätter sind teilweise riesig. Gestern habe ich gegossen, die 30 Liter im Becken wurden innerhalb eines Tages aufgenommen. Ich hab aktuell (dem Sommer entsprechend) meine Lüftung auf dem Maximum plus Luftentfeuchter aber ich habe Probleme die Temperatur und Luftfeuchtigkeit in Griff zu kriegen. Im Zelt selbst sind 3 Ventilatoren aufgebaut, ein oszilierender richtiger Ventilator und 2 Schreibtisch Mini Ventilatoren. Damit ich wenigstens die Luftzirkulation im Griff habe. Alles in allem etwas chaotisch aber trotz der nicht optimalen bedingungen explodieren die Pflänzchen förmlich.

Likes
321
Share


@Tropicannibis_Todd
Follow
🤔🤔🤔🤔🤔 HAPPY GROWING 🤔🤔🤔🤔🤔
We are now 42 Days into flowering and everything is going great 👍 👈 We are now playing the waiting game 42 days down👌
Did a good strip 👌 defolation is complete 👌 and happy with out come 😄
👍 decided to showcase the Mini BigBand , was a extra seed that germed so I kept it as a Mini Me 😊 She's killing it 👈
Except for some watering it's been pretty smooth I've done a little maintenance and manipulation of the canopy 👈
👉Soil Medium Provided by ProMix.ca
👉Nutrients Provided by Agrogardens
👉Lighting Provided by MarsHydro.ca
I would like to thank the many growmies for support throughout the years 🙏 So Let's Do This 👊👊👊 Happy Growing

Likes
9
Share


@Icedoutgreen
Follow
Die Woche läuft eigentlich ganz gewöhnlich, keine besonderen Vorkommnisse. Die Blätter fangen so langsam an sich zu verfärben und die Herbstzeit ist angebrochen. Bereite mich schon so langsam auf die Ernte vor.

Likes
28
Share


@MadeInGermany
Follow
Hey guys :-) .
Today the plant was sprayed again with neem oil.
There weren't any more trips to be seen after the second application, but to be on the safe side, you did it again today get a cure.
That's why the beautiful dark shimmer on the leaves :-).
She has developed very well this week.
I will give you 7-10 days before I switch to flowering.
This week it was poured 3 times with 1 l each (nutrients see table above)
Otherwise everything was cleaned and, as always, everything was checked.
Have fun with the update and stay healthy 🙏🏻
👇🏼👇🏼👇🏼👇🏼👇🏼👇🏼👇🏼👇🏼👇🏼👇🏼👇🏼👇🏼
You can buy this Nutrients at :
https://greenbuzzliquids.com/en/shop/
With the discount code: Made_in_Germany you get a discount of 15% on all products from an order value of 100 euros.
👇🏼👇🏼👇🏼👇🏼👇🏼👇🏼👇🏼👇🏼👇🏼👇🏼👇🏼👇🏼
Water 💧 💧💧
Osmosis water mixed with normal water (24 hours stale that the chlorine evaporates) to 0.2 EC. Add Cal / Mag to 0.4 Ec Ph with Organic Ph - to 5.8 - 6.4
MadeInGermany

Likes
3
Share


Processing
Likes
5
Share


@Mr_nugs_lover_David
Follow
She looks super healthy and strong too on her second week of life in this crazy world. Let's see how she performs! 💎🌱💚👨🌾

Likes
4
Share


@ThatoneAKguy
Follow
These are strong little autos! I got them topped last week and they are re starting to flower. They are under a little 90 watt HLG and I think I should be able to move them into one of the main tents as the timing is totally perfect with my others finishing just as these go into flower.
I’d rather be lucky than good ;)

Likes
1
Share

@El_cultivador
Follow
Hola a todos!!!
Esta semana es la ultima en su periodo de vegetacion en exterior y desde hoy domingo 28-Dic comienza su floracion en interior.
Likes
47
Share


@420DeepGrow
Follow
Sorprendido por la noticia de mi primera colaboracion con MarsHydro 😊🙏 y muy sorprendido tambien por el envio de las semillas por parte de 420FastBuds.
La marca numero uno en focos 💡, carpas de cultivo ⛺️, extractores 🌬️ y demás aparatos que necesitas para tu cultivo.
Para esta aventura arrancaremos con 💡Mars Hydro TS 1000 Full Spectrum LED Grow Light 150W Regulable y 1 semilla autofloreciente a un ciclo de 20/4.
Verdaderos 150w con este TS1000, la mejor luz de cultivo LED para principiantes.
Ofrece una luz adecuada para 2-4 plantas 🌱. Su precio razonable, la marcada mejora del rendimiento y el control variable de la producción la hacen amigable para los nuevos cultivadores. Todo un tesoro para cualquier cultivador que este comenzando.
Usaremos para esta aventura una carpa de 60x60x90, MarsHydro una carpa para los más exigentes.Con una solapa de cremallera mejorada, dobles cremalleras de metal con forro,reflectante diamante tipo Mylar, postes de metal para una estructura mas solida, no se puede pedir nada mas.
Garantizando una respuesta en solo 24 horas tanto si has usado antes la marca como si no.
Que decir de 420FastBuds, uno de los mejores bancos de semillas a nivel muendial. Si quieres una Auto de verdad, esta es tu cepa.
Wedding Glue auto:
Perfecta para concentrados.
Una enorme cantidad de resina la hace ideal para aquellos que buscan los mayores rendimientos en extracciones.
Auto súper productiva. ¡Esta variedad puede producir hasta 550gr/m2 en 70 días!
¡Entre las más fuertes del 2022! Una autofloreciente potente con un 26% de THC.
Terpenos ideales para los golosos. Un delicioso sabor a vainilla dulce que te deja la boca agua.
Perfectamente equilibrado. Un efecto bien equilibrado adecuado para uso diurno y nocturno.
💡 MarsHydro TS1000:
https://www.amazon.com/gp/product/B07PLY1WKK
⛺️ 60 x 60 x 90 MarsHydro:
https://www.amazon.com/dp/B081PN2QDN/
🌻 Wedding Glue Auto:
https://2fast4buds.com/es/seeds/wedding-glue-auto
Solo le aplique en la estapa de crecimiento agua con un PH6.5 y humus de lombriz.
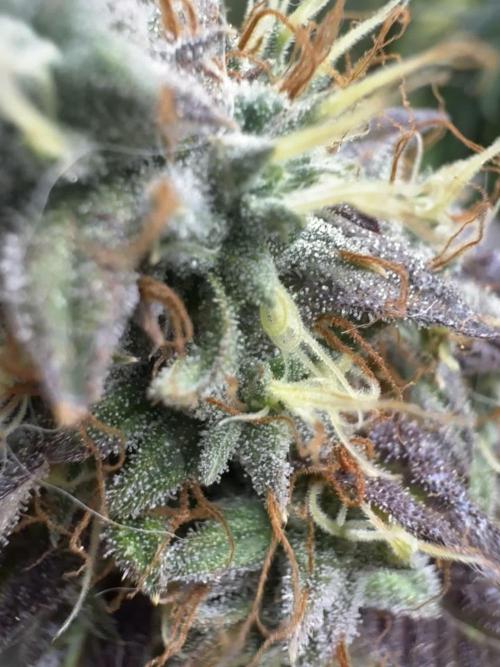
Octava semana de floracion.
Es una planta que ha requirido mas nutrientes que el resto, se han formado los cogollos y han engordado como locos, se han cargado además hasta las hojas de resina.
Comienzo a disminuir la cantidad de nutrientes.
📆 Día 71: Riego con nutrientes EC 850.
📆 Día 72: Descanso
📆 Día 73: Riego con agua + flawless finish. Comienza el lavado de raíces. Ha quedado una planta sorprendente.
📆 Día 74: Descanso
📆 Día 75: Riego con agua
📆 Día 76: Descanso
📆 Día 77: Riego con agua

Likes
21
Share


@CannabisRomania
Follow
The plants seem pretty strong and resilient, have a interesting smell.
The buds are very different from a plant to another in shape and trycome production.
I had to cut them early because of the high heat, but the majority of the trycomes were milky.


Likes
13
Share


@YOUNGSTERBR
Follow
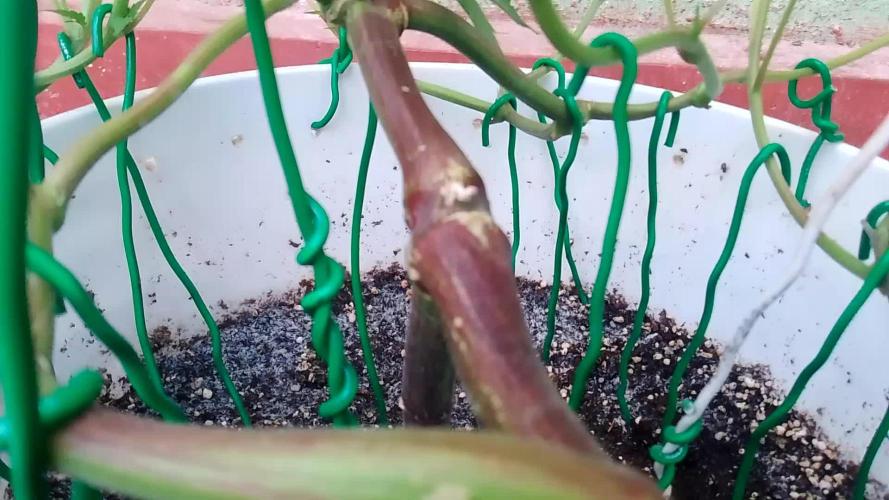
semana evolutiva, acertando os fatores que faltavam, mantendo o VPD, coloquei a Tela de SCROG para segurar o topo que já tinha ultrapassado a borda do vaso, os demais ramos continuo puxando para a borda, até agora nenhum Pistilo, fechando 4 semanas muito bem, sem estresse e com diferentes intensidades de técnicas em cada Auto, to fazendo meus próprios testes, coloquei as Auto do vaso mais largo para Green House que eu fiz, para posicionar os vasos do Indoor na posição final e adicionar a tela de SCROG, as Auto Outdoor adoraram a casa nova! seguimos..

Likes
21
Share


@Siriuz
Follow
Day 37
We started with nutes today
Then all day long outdoors
From 6AM to 6PM
Plus CFL afterwards
They rest for 3 hours and then CFL again
Btw accidentally snapped one part of one big leave but that okay
Since we don't do defoliation on her
We guessing it's okay she will recover soon
Day 38
Since she's such a queen we wanted to upload a video showing how she starts flowering for the record, thanks a lot
You can Always follow me at Instagram
@cannagrowersiriuz
Also don't forget to add your comment below, it is important to us!
We want to learn, any tips, suggestion, more than welcome my friends
Happy Growing
Day 39 Some mins before installing ScroG
Day 40 Wonderful, she's out of there already so huge, full of buds
Day 41 she's actually doing great full of buds but those 2 first leaves are a little bit sad looking weird plus those black dots idk and it's turning yellow in between I decided to remove it and well, I'm hoping she's doing well what else I could think of guys any help or concerns?
At the end of the day, she's overall healthy and strong
Day 42 Time to feed the babies, so we added 900PPM (300ml) floranova grow
Followed by 1590ppm (300ml) flora nova bloom to make sure she's got all nutrients balanced well, also added 400ml of plain water after that so they could get a nice run off.
I think they're happy and we gonna check on them in a couple days to see how they go, Ph is around 6.2
which is great
Temp outdoors from 7-@
1pm around 25C to 36C
Then back indoors
Temp is 28C and drop to 22 at night and dawn so they're good and comfortable
Keeping humidity lvls around 40/65% top
Nice AC and Fan for air circulation
Thank you all for your support
Likes
4
Share


@QixxGrows
Follow
Day8: First day of the new week. I assume still pretty much focusing on roots, as the top didn't really do much today.
Day9: Nothing special. But she's growing
Day10: Still roots, it seems. Very little happening up top.
Day11: Effort being put into growing the top leaves. They increased in size. I assume that the next node will start tomorrow - kicking off the switch into Veg.
Day12: Next node already showing :D
Day13: I put in a humidifier and changed the cycle of the extractor to keep more moisture in the growbox. My humidity was way too low.
Day14: This time the humidity was too high. It was sitting at around 95% when the lights went on.


