


Likes
Comments
Share


Likes
8
Share


@wheedtobeus420
Follow
Day 32 she’s flowering beautifully like all of a sudden poof. HahH I’m super happy with her. She’s beautiful. I have not ever grown this strain it was my husbands idea we shall see how this turns out so far so good.

Likes
55
Share


@Organic_LarF
Follow
High GD community
Week 16,
Zuchinis all around, tomatoes getting ready on a daily. Cucumbers are getting almost mature proportions. Everything going well.
Terra preta
Location: center perma garden
Surface: 125cm x 105cm
Depth: 115cm
The hole was dug out over 3 days, it were very sunny days. 😅
Theres mostly loamsand with a small sandloam bottom that was very hard. The sand was also very compressed and hard. The top layer is this grey dusty soil of about 40cm deep.
At the bottom theres pure sand thats soft, easy drainable.
First step is to fill up the entire bottom with fine chopped wood, progressively using bigger pieces of wood. I try to use some hardwood like oak to for its extra K (potassium = pot ash). A bit of charcoal to.
This will take the entire first day, bcs it needs to have a minimal ticknes of pure ashes of around 5cm. Otherwise, after compressing it with the upcoming layers, the ash-line would almost disappear. Not all the wood needs to be burned entirely. Its a first layer with lots of N and K. Bones can be used to in the fire making the NPK complete. But it can be added also as a separated layer. I dont have that much bone material because my 2 dogs, or eating, or burry them somewere.
Little warning at the end, be aware of your local laws applied to open fires. 😅😉
After a good burn ive got between 8 and 12cm of ashes in total over the entire surface.
A small layer of soil (5cm) is put on top of that. Theres no need to harden out that layer, pressure will to the work and the layers will compress over time into ideal circumstances.
On to the next layer!!
Next is a layer of the compost, but the part that isnt allready decomposed. Its green/brown/yellow of color. And a bit of everything, grass, weeds, leafs and some thin branches.
Another layer soil to cover that up.
Now i formed a thin layer of chopped(10mm) wood(beech), just enough to make a thin,almost 1 piece high, layer. On to this i added a complete wheelbarrel of compost(black) with small pieces of still not completly decomposed materials. Lots of worms here.
On that, you guessed it, an other layer of soil. I try to have both types of soil in that mix, the almost pure sand and the more grey type.
Next, back to the beech. This time the rest of the bag follows. Theres a good layer of around 3cm deep. On this ive layed down some new small woodsticks to make a small fire again. Starting at the center and adding some last branches i found. It turned out really smoky!!
Half way the burn ive opend the core of the fire, trying to spread the small pieces of char over the complete surface. After that, i added for the first time some water here.
And an other layer of soil again, this is just covering up each time. Max 5cm!!
Now we are at the upper half of the pit. Still 50cm to go.
Now ive added some compost again, the green/brown/yellow one, with on top of that, a 15 liter bucket with compressed bokashi fermentated kitchen leftovers. Making a layer out of that and some fresh bokashi juice with 10 liters of water to drain those benificial bacteria into to compost layer just underneath it. This layer is almost 20cm tick.
Again, yeah, soil, 5cm.
Ive bought some blond peat to at to to toplayers. Last 25 to 30cm of soil, is a mix of the peat(20%) and the two other types of soil. First ill do tiny layers of each, last 10cm i try to mix it.
And to finish the job, ive took some 100% reused and composed soil with some perlite in it from past use.
I havent watered a lot, but the meteo predicts a good amount of water in the upcoming days.
The soil that stayed and didnt get back to its original place, ive used to make a new top layer on the rest of the mini field.
I havent used clay because it was hard to find or just to expensive. Beside the peat(250l), i didnt buy anything. So its labor intensive, but real cheap. If you dont get a sanction by the community ofcours! 😅😅😅
Feel free to comment and give your toughts.
🙏🌿🌿🌿🙏
Thats it for this week boys and girls,
Thanks for reading and passing by and 💚💚💚👏👏👏👍👍👍 for Marshydro leds. Quality/price top!
Grow safe buds and feel free to check out my other ladies doing fine thanks!
🙏🌿🌿🌿🙏
Weedseedsexpress!!!! 👏👏👏
LarfxWSE for discount at weedseedsexpress!!! 15% off!!!
Zamnesia!!! 👽👽👽
Add OrganicLarF as a code when buying your own MarsHydro LED light and get a nice reduction!!!👽🚀🛸
Likes
102
Share


@Aleks555
Follow
Dear team TrolMaster Europe,
We would like to express our sincere gratitude for providing us with the Tent-X controller. We are delighted with its functionality and performance! We are confident that this controller has significantly aided us in our journey with our beloved plant Jealousy from Zamnesia.💪🤝
We were pleasantly surprised by the efficiency and ease of use of the Tent-X. It seamlessly integrated into our plant care system and helped us achieve incredible results.
Once again, thank you very much for your support and high-quality equipment. We are immensely satisfied with your product and hope for long-term cooperation in the future.
Today marks the end of our journey with Jealousy from Zamnesia💚, and we want to express our heartfelt gratitude to Zamnesia for their support throughout this entire journey. We also want to extend our thanks to Plagron for providing us with their high-quality fertilizers. Their products are not only effective but also incredibly easy to use. We highly recommend them to everyone!

Likes
48
Share


@PapaNugs
Follow
This was a week. The drama at the beginning was one of the fans falling down onto my gorilla cookies. It snapped a branch off really bad but the girl hung onto it by threads. I duct taped her up and somehow took. 😎😢
I defoliated and did a little lst on a couple of the girls. Nothing major. Also increased the light to 80% now. I think I'll stay there until late flower when I switch to 12/12.
I also added blocks to a couple of the girls to make the canopy level. That put the light at 15" as recommended by Medic Grow.
Strawberry Banana is growing ok. I added one row of blocks to raise her up. Lst tied one branch off to the side. I'm hoping she starts to pick up in the week. I see potential but we'll see.
Dimmed to 80%
Here are the lights details:
Medic Grow Mini Sun-2 150W LED
Model: MN150-022
Spectrum mode: V1
Efficacy: 2.8 umol/J
Thanks for stopping by!
You can find the light on Grow Diaries:
https://growdiaries.com/grow-lights/medic-grow/mini-sun-2-150-watts
You can find the light on Medic Grow's website:
https://medicgrow.com/
Likes
8
Share

@GERGrowDesigns
Follow
Dear Growers ,
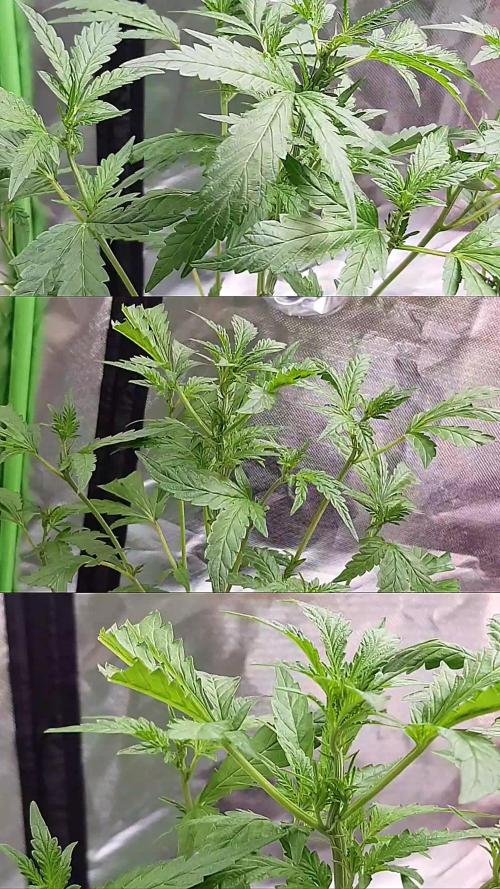
Over the next weeks, we’re excited to share a very special project with you: Sensi Seeds Berliner Automatic 2025 Release
With dedication, knowledge, and hands-on practice, we’ll guide you step by step through the journey—watch with us as growth, development, and small wonders unfold before your eyes.
Whether you're a beginner or an expert, you are warmly invited to join, ask questions, and share your own experiences along the way!
Project Setup & Conditions:
• Brand/Manufacturer: Sensi Seeds
• Tent: 120cmx60cmx80cm
• Light: 2x 200 Watt Full Spectrum
• Humidity: 50%
• Soil: Narcos Organix Mix
• Nutrients: Narcos Products
• pH Value: 6
A Special Thanks To
Sensi Seeds
for the amazing collaboration, trust, and generous support in making this project possible. Your contribution is truly appreciated!
Congratulations on Your Own Projects!
We celebrate your growth, your creativity, and the passion you bring to the table. It’s truly inspiring to witness at Each visit .
Stay curious and keep up Growing —we look forward to welcoming you back for the next chapter soon!
Likes
11
Share


@Original_Growers
Follow
Cuttings are growing very fast, we added 2 more lights for a total of 800 W led grow light. On day 11 since have been put in the box we decided to switch to flow as we tought cuttings has reached the right dimension to fullfil the box. Still using only pH 6.5 water with no nutrients


Likes
14
Share


@BoboLacetti
Follow
I'm super happy and really looking forward to trying the Sherbelato. But I'll have to be patient for another 2 weeks


Likes
7
Share


@420homegrownuk
Follow
We are now on week 4 of flower about another 3 to go but they are getting there now and loving the purple on the lsd-25 will be doin another on my next run with fastberry


Likes
23
Share


@555ABKY555
Follow
Hi guys, here's the report of the week. I continued to apply Big Bud in two twenty-litre buckets and I added 30 ml dividing them and always a small percentage of herba line booster to keep the roots alive. I continued to add just under 5 ml on the total of b 52 I increased .👌
2 days later the mature duck exploded I increased the molasses and lowered big bud to 10 ml then I continued to give 30 ml x 20 liters of TOP CANDY from the top crop... the week ended
😨WINTER AND RAIN HAS ARRIVED!! after an evening of fine rain I decided to move all the little ones under the roof to have full control of the washing.


Likes
2
Share


@Fatbudz
Follow
I switched the girls aside.
wedding crasher on the right and el patron on the left.
The two in front are the autos 😏
Likes
18
Share


@Mr_Dior21
Follow
This week has been all about shaping the plant. I’ve learned from last that the colas weren’t the same height, because I let the plant do it’s things with just a bit of training. Now I know what to look for so I’m trying my hardest.
I top dressed this week with crab meal, Gaia green all purpose 4-4-4, insect frass, kelp meal, bone meal, azomite, and covered it with a healthy serving of worm castings (about an inch to 2 inches). All of which was sprinkled on all the chopped and dropped leaves/branches. I believe in adding biomass to soil, especially for an indoor growing who is money conscious. Doing that can help save me money going back to the store for more soil.

Processing
Likes
14
Share


@Canadian
Follow
This girl has been just cruising through looking beautiful and being easy to raise and take care of is a really nice exotic genetic to have in your garden thank you for reading I will continue to update a happy grow


Likes
16
Share


@HegauHillsFarmers_M11
Follow
Tag 56 - Beginn der 9 Woche.
Die Buds entwickeln sich weiterhin super. Starker Duft und extrem eisig. Wie schon erwähnt, entwickelt diese Pflanze für ihre Größe wirklich unglaublich dicke Buds.
Diese Woche wurde nochmal gedüngt und auch schon mit den ersten Vorbereitungen zur Ernte begonnen.
Am Tag 54 wurde das erste mal mit Advanced Nutrients Flawless Finish gespült.
Dabei gebe ich 1,5 - 2ml/Liter als Zusatz zum normalen Wasser dazu. Der Plan ist dies 5 mal vor der Ernte zu wiederholen und das letzte mal mit normalen Wasser zu gießen.
Gedüngt wurde an Tag 51 der letzten Woche. 3 Tage bevor mit dem Spülen begonnen wurde. Dies war natürlich die letzte Düngung.
Nährstofflösung:
1 ml/l - Overdrive Advanced Nutrients
1 ml/l - Bud Candy Advanced Nutrients.
1 ml/l - B-52 Advanced Nutrients.
2 ml/l - pH Perfect Sensi Bloom Part A.
2 ml/l - pH Perfect Sensi Bloom Part B.
Likes
16
Share


@Siriuz
Follow
Very happy to start my new Collection from sweet seeds 👽🌱
Thanks a lot for all your kindess
May God bless you always
We are running photoperiod
For the very first time
I think its time for us to grow big
And hopefully we get her into bloom
Happy growing everyone
Day 1 - Place seed into peat pellet and left her fully in a dark
RH was 45/60%
Temp 22/25C
Day 2 - took her out of the dark to get light for 12 HRS
Then back to darkness again
Until next morning
Day 3 - She is finally up and got to fix her a lil since its root was not attach well to peat pellet, just cover her lightly with more Peat moss and place better its root and cotyledons for better growing
She is all set and good to grow
Happy growing everyone 🌱👽
Likes
2
Share

@MrWeeedWorld
Follow
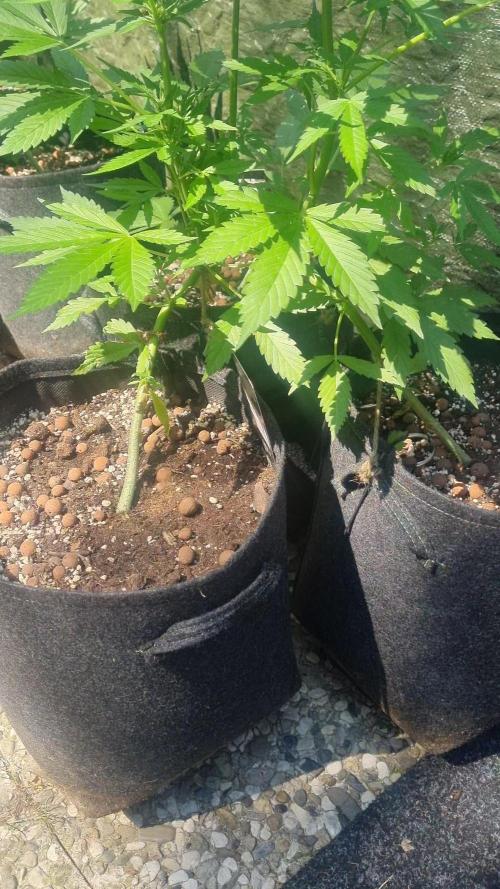
Meine drei Lemon Cherry Cookies entwickeln sich weiterhin hervorragend und haben die Blüte inzwischen vollständig eingeleitet. Überall erscheinen frische weiße Blütenstempel und an jedem Trieb bilden sich neue Budsites. Es ist schön zu beobachten, wie jede der drei Pflanzen ihren eigenen Charakter entwickelt.
Die größte Dame hat aktuell den stärksten Stretch hingelegt und ragt deutlich über ihre beiden Schwestern hinaus. Dennoch entwickeln sich auch die beiden kleineren Pflanzen ausgezeichnet und holen Woche für Woche weiter auf. Alle drei wirken gesund, kräftig und voller Energie.
Besonders zufrieden bin ich mit der gleichmäßigen Blattfarbe und der vitalen Entwicklung. Trotz der wechselhaften Wetterbedingungen der vergangenen Wochen zeigen die Pflanzen keinerlei Anzeichen von Stress oder Nährstoffmängeln. Das Plagron-Düngeschema liefert weiterhin alles, was sie für eine kräftige Blütenentwicklung benötigen.
Jetzt beginnt die spannendste Zeit des Grows. Der Stretch nähert sich langsam seinem Ende und schon bald wird die gesamte Energie in den Aufbau der Blüten fließen. Ich freue mich schon darauf, die Entwicklung der Colas in den kommenden Wochen zu verfolgen und bin gespannt, welches Aroma die drei Ladies am Ende entfalten werden.
Vielen Dank an Fast Buds für diese fantastische Genetik und an Plagron für die zuverlässige Versorgung während des gesamten Grows. Ich freue mich schon auf Blütewoche 3! 🍋🍒💚
--------------------------------------------------------------------------------------------------------------------------------------------------------------------
All three of my Lemon Cherry Cookies are progressing beautifully and have fully entered the flowering stage. Fresh white pistils are appearing everywhere, and every branch is producing new bud sites. It's exciting to see each plant developing its own unique growth pattern.
The tallest lady is currently showing the strongest stretch and has taken the lead in height. However, her two sisters are performing just as well and continue catching up week after week. All three plants look healthy, vigorous, and full of energy.
I'm especially happy with their rich green foliage and overall vitality. Despite the challenging weather conditions earlier in the grow, none of the plants show signs of nutrient deficiencies or stress. The Plagron feeding schedule continues to provide everything they need for strong flower development.
The most exciting stage is just beginning. The stretch is slowly coming to an end, and soon all of their energy will be focused on building dense, resinous flowers. I'm really looking forward to watching the colas develop over the coming weeks and discovering the unique aromas each of these three ladies will produce.
A huge thank you once again to Fast Buds for this outstanding genetic and to Plagron for providing the perfect nutrition throughout the entire grow. I can't wait for Flower Week 3! 🍋🍒💚
Processing
Likes
18
Share


@Cannibalgardens
Follow
These beans have been taking a beating and she still is pulling threw and starting her stretch now as she is heading into the second week of flowering .. I like the smell of this one right now and the structure is good very open just needs buds to start forming up.
These were part of the grower of the month contest a while back very good quality genetics ...cheers

Likes
5
Share


@crouch74
Follow
Unfortunately, this week I have overwatered her as I was going on vacation and a bit over protective and because of that I can see wilted leaves and brown spots.
I left it to dry for 3-4 days and now I can see some new green leaves showing up.
Sep 2nd: I can see that she is becoming healthier now and the green leaves are taking over
Likes
Comments
Share


@SGCFarms
Follow
Not topped, only supercropped and lst. I should have did an actual scrog, but I didn’t and will probably regret it later. Still developing pistils, haven’t started really releasing any smells. No growth issues, though will probably defoliate at some point to help with light penetration. Loving her so far!
