
Likes
Comments
Share


@nijuana
Follow
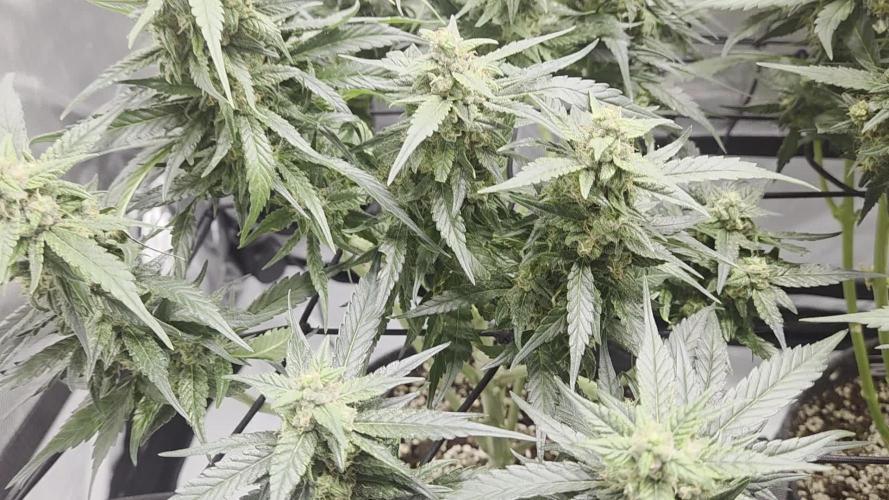
Today is the harvest day , you can see the trichomes are ~50% amber and cloudy it's enough for this 😁

Likes
13
Share


@DieselKush
Follow
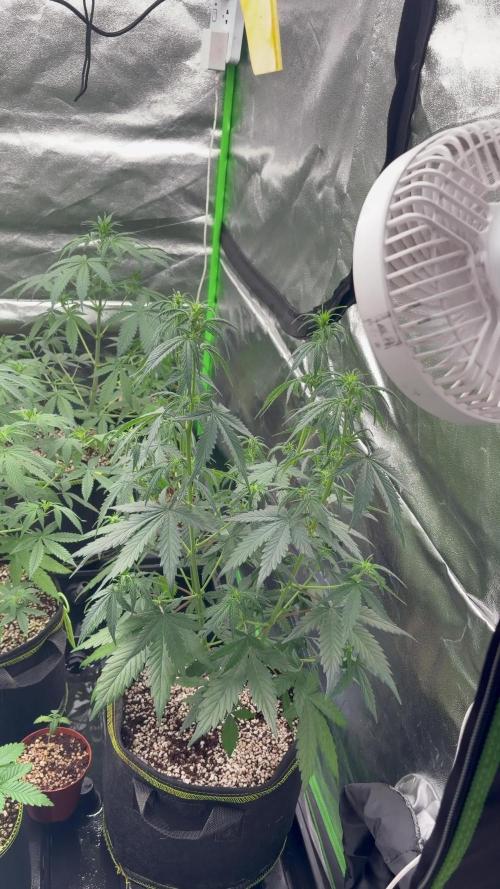
Nov.8 - Watered girls 250mL each, 0.25mL of each nutrient for each plant
Nov.9 - Moved these girls into Vivosun tent under Phlizon 1200w light from a Marz Hydro tent 5x5 with Marz Hydro ts 1000 light. We needed to move these girls to this tent and have our DWC in the bigger tent so the DWC plants don’t get too hot at the bottom
*once girls were transported to new tent the leaves turned to curl and lift upwards, the light is on veg and is 24” high
Nov.10 - Watered girls 250mL each, 0.25mL of each nutrient for each plant
Nov.10 - Decided we don’t like the blurple light and took one of our Mars Hydro lights from our big tent and switched it
Nov.11 - Watered each plant, 500mL, 1mL of each nutrient. Our girls drank soo fast so we are bumping it up a bit
Nov.12 - Our girl #1’s leaves are a little droopy and are looking a bit weird in some spots (darker green and almost wrinkled). Our girl #2 though is going great and we started some LST training on her today. Let her growww
Nov.14 - Started our girl #1 on LST her leaves are much happier now! Ohhh boy #2 is sprouting so nice she’s starting to fill out so well and she just blossomed once we started LST, she was facing upwards in less than 24h!!
Nov.15 - Our girls are thriving so I wanted to FIM #2 and my boyfriend wanted to Top girl #1
Let’s see how these girls groooww
Nov.15 - Watered each girl 250mL and 0.25 mL of each nutrient we are going to water them just enough to soak into the ground every day for them to soak up as much nutrients and drink as possible without over watering.

Likes
7
Share


@Bam91
Follow
Le piante hanno un bel aspetto, le foto non gli rendono giustizia.
Questa è stata l'ultima settimana di fertilizzanti, grazie Plagron i vostri prodotti hanno velocizzato la crescita in modo sano senza problemi eccetto per il fenotipo B3 che ha avuto qualche accenno di bruciatura, ma niente di rilevante.
Per il resto tutte e 4 hanno dei profumi diversi molto fruttati e dolci🤤🤤.

Likes
26
Share


@HowtoBubatz
Follow
The first signs of the plant that she went to the first week of the flowering stage appeared, thats where the cannabis plant experiences rapid growth known as "the stretch," to support future bud development.
Low-Stress Training (LST) is applied to manage this growth and optimize light distribution.
Beneficial nematodes were introduced for natural pest control, effectively eliminating soil-dwelling pests.
The nutrient regimen is adjusted to focus on increased phosphorus and potassium levels, promoting bud development. Together, I hope that these techniques support the plant's health and set the stage for a successful harvest with high-quality buds.
stay tuned 😋


Likes
Comments
Share

@Archentar
Follow
Separating the Heat from the Garbage ✂️🗑️
Week 9, and it's time for some honest talk.
This week was all about damage control and heavy pruning. To be completely blunt, these FastBuds RF3 genetics are a massive mixed bag. The Strawberry is looking absolutely terrible, and it’s clear the Guava is going to be a total disappointment too. Just zero potential on those two.
The only saving grace in the tent right now is the Banana Purple Punch she is actually holding it down, stacking nicely, and showing some real quality.
At this stage, I'm just cleaning up the trash phenos, focusing on the Banana, and pushing through to the finish line. Not every run can be a winner, but we ride it out until the end! 🤷♂️💨
Likes
14
Share


@MWHomegrow
Follow
Vegetative Woche 3:
Tag 29 gab es das erste LST nach dem Umtopfen für die Ladys, damit sie das Zelt bald schön ausfüllen zu viert 😊
Hierfür einfach bodenhaken für die Triebe und am Hauptstamm nutze ich gerne die roten Clips.
Tag 30+31 gab es nichts besonderes zu tun 😊
Tag 32 wurde das erste Mal gegossen nach dem Umtopfen mit 2l ph 6.2 Wasser mit 0,8g/l Enhancer, das Wasser habe ich zum ersten Mal mit meiner neuen Akkugießlanze verteilt und ich hoffe so noch gleichmäßiger gießen zu können 😊
Tag 33 wurden wieder mit LST gearbeitet und die Triebe mit den Bodenhaken weiter nach außen gebogen, damit ich möglichst bald ein relativ gleichmäßiges Blätterdach habe welches die gesamte Grundfläche des Zeltes ausfüllt.
Tag 34 war wieder Ruhetag
Tag 35 wurde wieder gegossen und zwar wieder mit 2l pro Pflanze mit ph Wert von 6.2 und 1ml/l Calmag und auch hier wurde zum Gießen di Akkulanze verwendet.
Und so endet Woche 3 der Veg


Processing
Likes
5
Share


@Blakoby
Follow
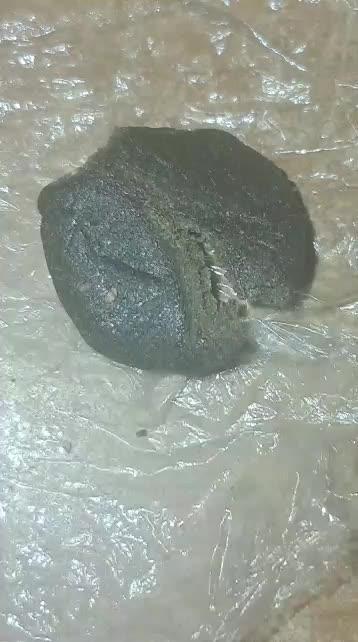
This weeks a little early, wanted to show the cut. Going to flower in 1-2 weeks depending on how she recovers.

Processing
Likes
12
Share


@TrueNorth
Follow
-Strain: STRAWBERRY NUGGETS by Mephisto
-Tent: 5x5 Gorilla Grow Tent
-Lights: Budget LED Grow Lights 2 x 250 Watt
LED Full Spec/Red Spec mixed boards
-Light Cycle: 18/6
-Soil: Fox Farm
-Air Circulation: AC Infinity Cloudline T6 Inline Duct Fan
WECLOME BACK GROWMIES! Week 10 here with our STRAWBERRY NUGGETS by Mephisto
February, 02, 2020 (DAY 71) - What up what up growmies! Welcome to week 11 where we see her finally blowing up the way i wanted, it finally chilled out in bushing and FINALLY focused on growing buds. She is really thick and frosty now i think the big bud is really going to shine on this one. Wont be any crazy big plant but im just happy with the progress and how she looks and smells.
Im sorry the last two weeks werent filled with updates, life has been busy and complicated i truly am sorry and will do better i promise.

Likes
18
Share


@Roberts
Follow
Zealix is growing really well. She is starting to stack her super frosty Cola sits. I did some hst training on her taller tops. She was getting a little too close to the light for my liking. She has been growing well and I imagine she will handle it well. I did a solution change about mid week. Thank you Spider Farmer, and Terpyz mutant Genetics. 🤜🏻🤛🏻🌱🌱🌱
Thank you grow diaries community for the 👇likes👇, follows, comments, and subscriptions on my YouTube channel👇.
❄️🌱🍻 Happy Growing 🌱🌱🌱
https://youtube.com/channel/UCAhN7yRzWLpcaRHhMIQ7X4g.


Likes
4
Share


@Brentb2607
Follow
10 days of darkness during the flush begins. Had great results with Wanda and her genetics. Blessed for a first grow. Cut Wanda down at the end of the week. She’s now drying. I will be giving a thorough review for my harvest diary. Excited to share what I’ve experienced and learned from this grow.

Likes
2
Share

@Fyno_TH
Follow
Some strains are hitting their limit—slight nute burn detected. Dialing back the ppm.
Likes
121
Share


@Cruzsider
Follow
Well I think I could have gone another 2 to 3 weeks but I'm happy and need to move on to the next relm of life. I'll be back at the end of the week with total weights for everything once curred. Thank you for for you interest and likes 👍


Likes
1
Share


Likes
15
Share


@AmnZhz
Follow
Week 4, 22/3/2020 - 29/3/2020, as seen in the pics the growth since last week was tremendous. She's gained 4 times her mass and she very healthy. Of course increased the nutrient strength this week and the watering. This week will water 4 times per day for 45 mins each time.