




Likes
45
Share


@BodyByVio
Follow
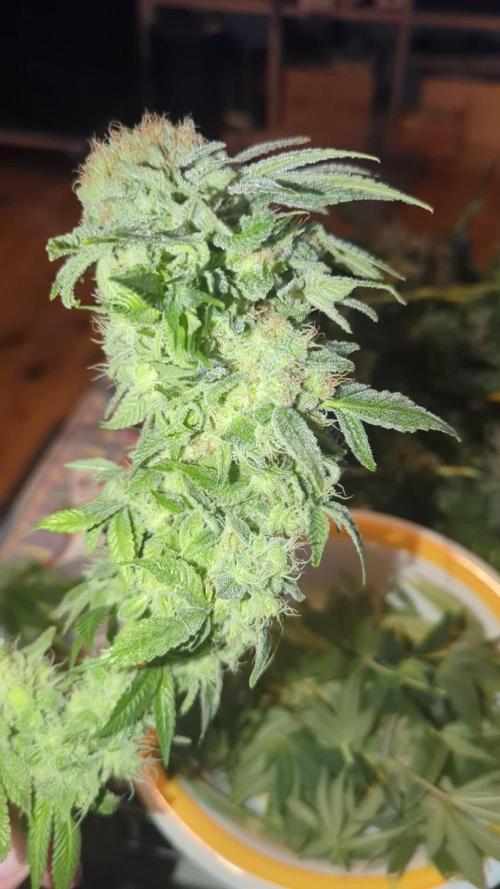
Beautiful flower full of trichomes. Smell and test fantastic. Very fast flowering. She was done on day 49 but I cut her down few days later.
I love the strain, the only thing that I will like this strain to have is a better yield. Beast quality buds I ever grew.

Likes
74
Share


@AsNoriu
Follow
Day 92. First of 3 girls down. Amazing, super productive strain !!! Loved that girl a lot !
Others still to come...
Day 101. #1 is jared and #2 is chopped, busy day !
Day 111. #2 is Jared. Only Monster girl left. She is still pushing in ex dry tent.
Day 125. Last girl is down !
Day 135. 240 g of nugs from her !!!! My record breaker by a mile !
Happy Growing !!!





Likes
28
Share

@DerFredlFesl
Follow
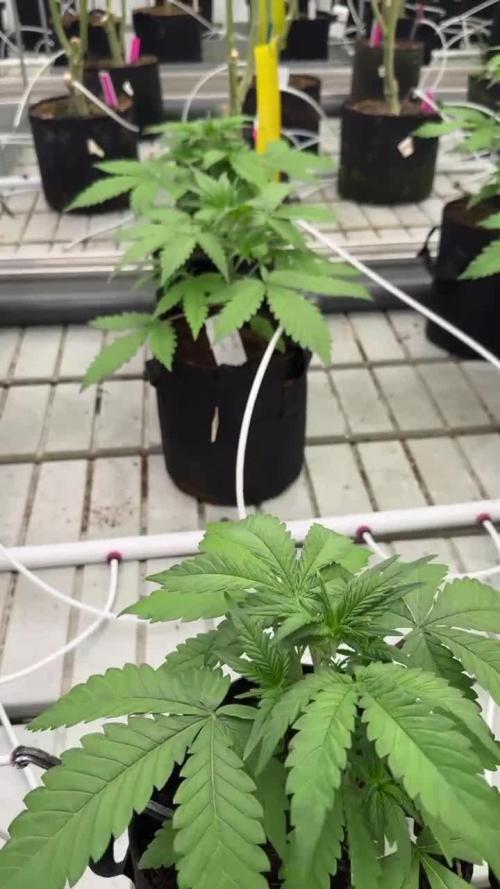
Hat alles reibungslos funktioniert. Kann das Setup mit Biotabs und Autopots nur jedem empfehlen der nicht jeden zweiten Tag gießen möchte.
Freue mich in ein paar Monaten hier den nächsten Grow zu starten.

Likes
62
Share

@RockoCalenberg
Follow
Blütetag 52 | Tag 112 gesamt
Klima – Frühling im Anmarsch
Draußen zeigt sich der Frühling deutlicher. Mehr Licht, mildere Tage, mehr Bewegung in der Luft.
Im Zelt ist dieser Umschwung spürbar. Die Pflanzen trinken mehr, der Dryback läuft zügiger durch, das Substrat trocknet gleichmäßiger ab. Der Rhythmus wirkt insgesamt ausgeglichener als noch vor einigen Wochen. Die Kurven verlaufen ruhiger, die VPD liegt häufiger im gewünschten Bereich.
Wir sind klar in der Endphase. Der Stoffwechsel arbeitet aktiv, kleine Schwankungen zeigen sich sofort – insgesamt aber ein ruhiger und stimmiger Verlauf.
🌿 Pflanzenstatus
White Gushers 33
Sie reagiert feiner auf Veränderungen, bleibt aber insgesamt stabil.
Die Blattverfärbungen nehmen weiter zu – deutliche Herbststimmung. Energie wird sichtbar aus dem Blattwerk gezogen und konsequent in die Blüten verlagert.
Das Stacking läuft weiter. Die Buds gewinnen an Volumen, wirken kompakter und schwerer. Die Oberfläche erscheint dichter, geschlossener, reifer.
Trichomstatus:
Überwiegend milchige Köpfe, nur noch vereinzelte klare. Kaum Amber. Sie bewegt sich klar in Richtung Erntefenster.
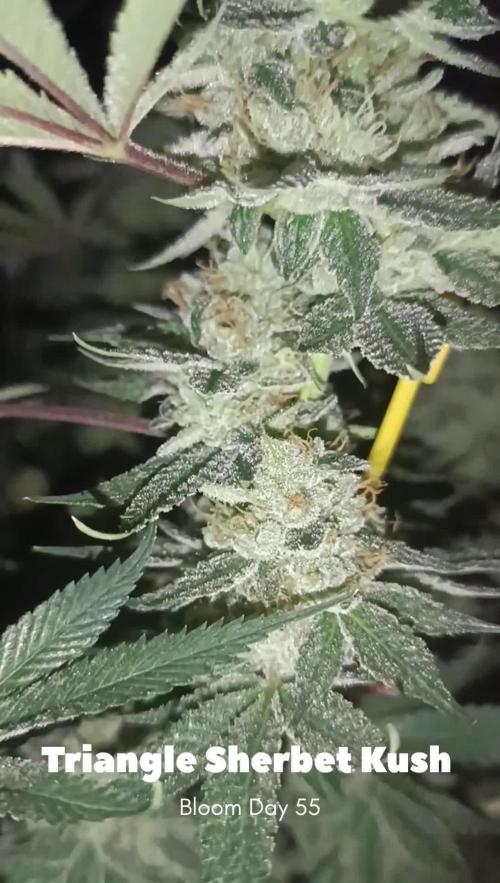
Triangle Sherbet Kush
Auch sie zeigt nun deutlichere Herbsttöne im Blattbild. Optisch etwas gelassener, aber klar in der Endphase angekommen.
Die Blütenstruktur wirkt sehr kompakt und sauber aufgebaut, extrem frostig. Minimal hinter der White im Reifegrad – jedoch im gleichen Zielkorridor.
Trichomstatus:
Milchig dominiert auch hier, mit leicht höherem Anteil klarer Köpfe als bei der WG 33. Eindeutig in der späten Reifephase.
🌸 Blüten & Duftbild
Die Buds gewinnen weiter an Struktur und Geschlossenheit.
Die Verdichtung ist sichtbar, die Form wirkt ausgereifter als noch vor einer Woche.
Aromatisch entwickelt sich das Profil weiter.
Die Frucht bleibt präsent, wird jedoch zunehmend von einer würzigeren Tiefe begleitet.
Die Komplexität nimmt zu, ebenso die Intensität.
Das Zusammenspiel der Noten wirkt runder, dichter und vielschichtiger.
Beim Öffnen des Zeltes steht der Duft klar im Raum – nicht lauter, sondern konzentrierter.
💧 Nährstoffe
Unverändert gefahren:
CalMag: 1,5 ml/L
Bloom: 1 ml/L
Keine Anpassungen.
Keine Experimente.
Konstanz bis zum Schluss.
🐞 IPM / Biologischer Pflanzenschutz
Keine neuen Maßnahmen.
Das bestehende System läuft weiter ohne zusätzliche Eingriffe.
Schimmel ist bislang kein Thema.
Aufmerksamkeit bleibt – Überreaktion nicht nötig.
🔎 Ausblick
Wir sind auf der Zielgeraden.
Noch wenige Tage – realistisch im Bereich von 7–10 Tagen, abhängig von der weiteren Trichomentwicklung.
Jetzt heißt es:
Klima stabil halten.
Nicht unnötig eingreifen.
Den Lauf sauber ins Finale führen.
🔎 Wochenfazit
Die Zeichen stehen klar auf Reife.
Herbstfarben im Blatt, milchige Trichome, fortschreitende Verdichtung.
Wir sind auf der Zielgeraden –
aber noch nicht an der Ziellinie.
Noch ein paar Tage Geduld.
Dann fällt der Vorhang.
— Rocko 🌿🔥💚
Flower Day 52 | Day 112 Overall
Climate – Spring Moving In
Outside, spring is becoming more noticeable. More light, milder days, more movement in the air.
That shift is clearly reflected inside the tent. The plants are drinking more, the dryback cycle moves faster, and the substrate dries more evenly. Overall, the rhythm feels more balanced compared to a few weeks ago. The curves look calmer, VPD stays in the target range more consistently.
We’re clearly in the final phase now. Metabolism is active, and even small fluctuations show up in the leaf expression — but overall the run feels steady and composed.
🌿 Plant Status
White Gushers 33
She reacts a bit more sensitively to changes, yet remains stable overall.
Leaf fade is progressing — clear autumn tones setting in. Energy is visibly being redirected from the foliage into the flowers.
Stacking continues. The buds are gaining volume, becoming denser and heavier. The surface looks tighter, more mature, more consolidated.
Trichome status:
Mostly cloudy heads with only a few remaining clear ones. Hardly any amber. She is clearly approaching the harvest window.
Triangle Sherbet Kush
She is now showing stronger autumn coloration as well. Slightly calmer in overall appearance, but unmistakably in late flower.
The bud structure is very compact and clean, extremely frosty. Slightly behind the White in maturity — yet within the same finishing corridor.
Trichome status:
Cloudy dominant here as well, with a slightly higher percentage of clear heads compared to WG33. Clearly in the late ripening phase.
🌸 Flowers & Aroma Profile
The buds continue gaining structure and density.
Their formation appears tighter and more developed than a week ago.
Aromatically, the profile keeps evolving.
The fruity notes remain present, but are increasingly supported by a deeper, warmer spice layer.
Complexity is increasing, and so is intensity.
The overall expression feels more layered, more concentrated, more mature.
When opening the tent, the aroma doesn’t feel louder — it feels fuller.
💧 Nutrients
Unchanged:
CalMag: 1.5 ml/L
Bloom: 1 ml/L
No adjustments.
No experiments.
Consistency through the finish.
🐞 IPM / Biological Pest Management
No new measures.
The existing system continues running without additional intervention.
No mold issues so far.
Awareness remains — overreaction does not.
🔎 Outlook
We are on the home stretch.
Likely within 7–10 days, depending on how trichome development continues.
Now it’s about:
Keeping the climate steady.
Avoiding unnecessary interference.
Guiding the run cleanly into the finale.
🔎 Weekly Conclusion
The signs are clear: ripening is advancing.
Autumn tones in the leaves, cloudy trichomes, increasing density.
We are on the home stretch —
but not at the finish line yet.
A few more days of patience.
Then the curtain falls.
— Rocko 🌿🔥💚


Likes
Comments
Share


@Chronickarl
Follow
Trichromes are starting to be produced and buds are starting to form and get sticky, each plant is developing a nice smell but the strawberry is out performing the rest by a mile definitely a vigorous strain that just wants to go go go! Inter node spacing is crazy and looks like the girls are setting up to make some fat buds hopefully

Likes
21
Share


@cheetah844
Follow
Wow another one that's jumped 3" inches. This is the first grow of the very first strain I've ever created. I'm excited to say the least. Hopefully it's a female and we'll see how the flower turns out. If it's a male I'll have extra pollen for future seeds & breeding.
Likes
2
Share


Likes
37
Share


@Pugbutt
Follow
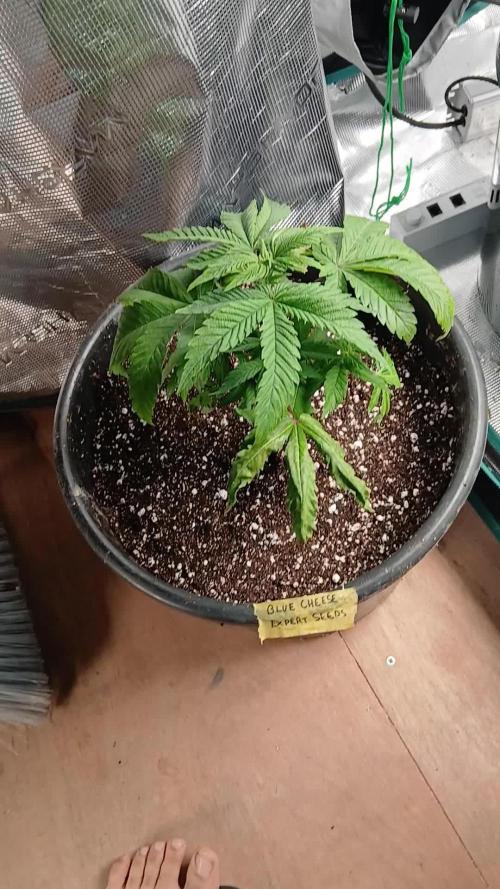
Still flushing to get ph back, nothing added to water this week. Buds are packing on weight and the smell is getting very sweet. Also, had to add in another support net for the extra weight these girls could start making.

Likes
43
Share

@Natrona
Follow
Apricot Auto FastBuds
This week I had to increase watering on Apricot #1 4.5 liters and #2 3 liters.
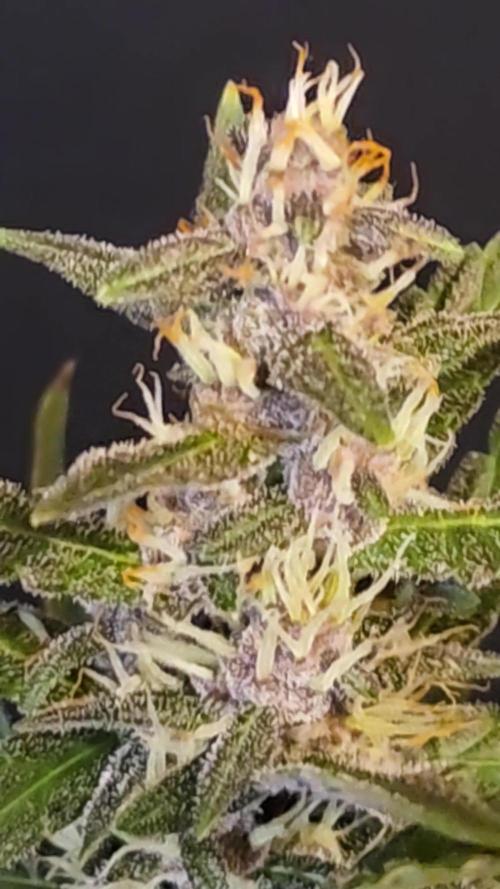
Since NYC Diesel leaves look so dark green with some clawing and all the gals in the tent are receiving the same nutrients as NYC Diesel, I determined I ‘ve overfertilized. The apricots don’t show dark leaves but to be cautious I gave them Calmag the first time and the second flush 1 gallon PH 6.15 water. I defoliated some large fans that were damaged by low cal mag. Only one of the Apricot is showing colors as Fastbuds describes. Purples in the buds with orange pistils.
Stay green, growers love 💚🌿
💫Natrona💫
Likes
2
Share

@Maggie_de_Block
Follow
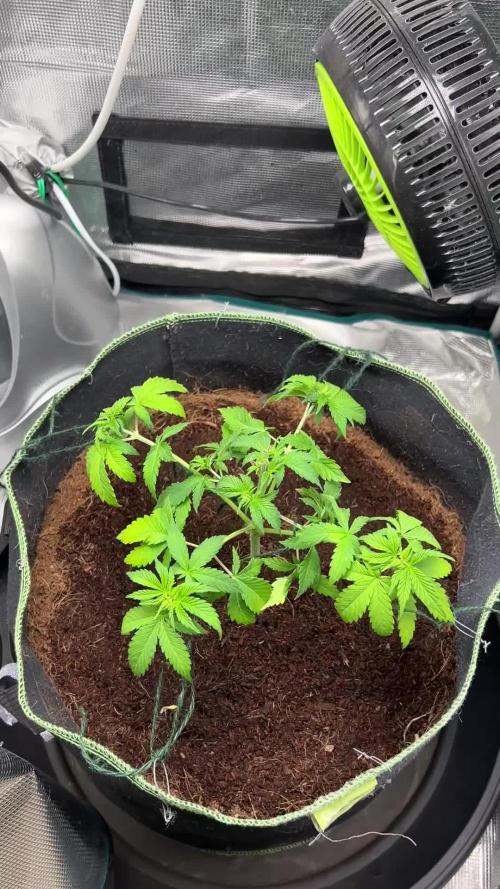
Was away for 2 weeks so left my girl to water the plant, wanted to do the training myself. Was underwatered a bit and a lil low on calmag and high on other nutes so adjusted the water and just gave a first proper feeding. Defoliated quite a bit, topped her as well and did some LST. Lets hope she recovers fast and is looking better by next week!

Likes
1
Share


@greengenetics420
Follow
11.05.24 So wie es aussieht, hat keine Thripse überlebt, die Behandlung mit BAC Vital hat geholfen, die Luftfeuchtigkeit konnte ich ein wenig höher halten, indem ich mehrmals am Tag Wasser versprühte. heute wurden
die Damen in ihre 2 Liter Töpfe gepflanzt, dort können sie jetzt wachsen bis es in die 30 Liter Töpfe geht. es gab einen kräftigen schluck wasser mit Terra Aquatica Root Booster, Terra Aquatica Seaweed und Glückspilze Mykorrhiza Soluble.
12.05.24 Pflanzen haben das Umtopfen bisher super überstanden, sie zeigen keinerlei Stressreaktion, die Blätter stehen super gegen die Sonne.
13.05.24 Die Kleinen zeigen schon wieder ein starkes Wachstum, daher wurden sie heute mit der Pinzette getoppt, ich denke mal, dass sie nun die nächsten drei Tage den Stress abbauen und dann die unteren Triebe anfangen, nach oben zu wachsen.
Da wir eine Fläche von 120x120 mit einem geschlossenen Kronendach bekommen wollen, ist es wichtig, dass die Kleinen frühzeitig in die Breite wachsen.
16.05.24 Pflanzen zeigen generell ein gutes Wachstum, trotz nicht passender Umgebung, die Temperatur und die Luftfeuchtigkeit sind zu hoch, an Besserung wird gearbeitet, aber die aktuellen Außentemperaturen machen es nicht leichter. Phänotyp 1 zeigt ein merkwürdiges Kräusel Wachstum, wächst aber trotzdem normal in Höhe und Breite, Phänotyp 2 zeigt sehr komische braune Flecken an den unteren großen Blättern, es scheint fast zu verbrennen und nekrose zu werden, ein Nährstoffmangel schließe ich aus da es allen anderen Pflanzen gut geht. Phänotyp 3 entwickelt sich bis jetzt vollkommen zu meiner Zufriedenheit.


Likes
56
Share


@Master_weeda
Follow
Bonjour à tous les padawans et maîtres jedis
Jour84 arrosage avec 2 litres d'eau ph6.3
Jour86 arrosage avec 2. 5litres d'eau ph6.3
Jour89 arrosage avec 2 litres d'eau ph6.3
LE MEILLEUR MOMENT POUR RINCER SON CANNABIS
Le rinçage commence en général deux semaines avant la récolte. Si le plant a une période de floraison de huit semaines, le rinçage doit commencer six semaines après le début de la période de floraison. Il est préférable de regarder de près les trichomes sur le plant pour déterminer quand votre cannabis est prêt à être récolter. Si les petits trichomes commencent juste à passer d’une couleur transparente à une teinte laiteuse et blanche, c’est une bonne indication que les plants peuvent commencer à être rincés. Il faut s’arranger pour que la majorité des trichomes aient changé vers la couleur désirée pour la récolte après deux semaines – ça devient plus facile à faire avec l’expérience, alors accrochez-vous !
Le rinçage peut également être un bon moyen de remettre à zéro la terre quand un plant est toujours en phase de croissance végétative. Parfois, un cultivateur suralimente par accident son cannabis, ce qui provoque un changement de couleur et un flétrissement du bout des feuilles. Ceci est appelé une « brûlure par nutriments ». Rincer la terre peut éliminer les nutriments excédentaires, ce qui aide à résoudre le problème. Cependant, c’est une mesure drastique à ce stade de la culture, alors assurez-vous que le problème soit bien une brûlure par nutriments et non quelque chose d’autre.
Le rinçage ne concerne pas que le moment de la récolte. Cette technique peut aussi être mise en place durant la phase de croissance afin de débarrasser le sol des nutriments. Bien évidemment, les nutriments permettent à votre plante de rester en bonne santé et vous assurent des rendements maximaux, mais une trop grande quantité peut causer une accumulation et un état statique durant lequel la plante ne peut plus y accéder.
Le blocage des nutriments peut être causé par une accumulation saline ou des niveaux de pH incorrects. Ces deux causes peuvent être résolues par un rinçage de votre plante à l’eau claire. Les fluides viendront pousser les nutriments en dehors du substrat et le débarrasseront de l’accumulation, permettant ainsi aux racines de pouvoir accéder à nouveau aux nutriments.
EMPÊCHER LE BLOCAGE D'ABSORPTION DES NUTRIMENTS AVANT QU’IL NE POSE PROBLÈME
Au mieux, le blocage des nutriments peut être un problème, au pire, il peut être un vrai désastre. Comme le dit l’adage, il vaut mieux prévenir que guérir. Il vaut mieux prendre de l’avant pour empêcher le blocage des nutriments plutôt que de s’y atteler lorsque c’est trop tard.
Empêcher le blocage des nutriments peut se faire par le biais d’un rinçage de routine. En rinçant vos plantes une fois avant la floraison et une fois au milieu de cette dernière, vous minimiserez l’accumulation de nutriments.
LES ENZYMES À LA RESCOUSSE
Après le rinçage pour contrer l’accumulation ou le blocage des nutriments, vous remarquerez peut-être que vos plantes ont une apparence vert foncé, c’est le signe d’un excès de nutriments. Dans ce cas, certains cultivateurs choisissent d’ajouter une formule riche en enzymes à leur substrat.
Au cas où vous auriez oublié vos cours de biologie, les enzymes sont des protéines qui catalysent les réactions. Elles aident à rincer le substrat en décomposant l’amidon, les glucides et les nutriments. Il existe sur le marché toute une variété de produits qui contiennent des formules d’enzymes très efficaces.
Si l’eau ne suffit pas à vos plantes, ces petites protéines ne feront qu’une bouchée de l’accumulation de nutriments !
COMMENT BIEN RINCER SON CANNABIS
Rincer votre plant de cannabis est un processus simple. À chaque fois que vous apporteriez normalement des nutriments, vous rincez à la place. De l’eau du robinet non traitée est tout ce dont vous avez besoin pour rincer, assurez-vous juste que son pH est sans danger pour le cannabis. La plupart de l’eau de puits a un pH sain et ne nécessite pas de traitement, mais s’il est nécessaire de traiter l’eau de rinçage pour avoir un pH adapté, faites-le. Les ajustements du pH seront donc la seule chose à considérer.
Inonder la terre avec autant d’eau fraîche qu’elle puisse contenir. Laissez l’eau durant quelques minutes pour qu’elle puisse absorber les nutriments, puis inondez la terre encore pour rincer les nutriments loin du plant. Si vous cultivez en intérieur dans des pots, notez la couleur de l’eau qui s’échappe du fond des pots. Elle sera tâchée et aura une couleur sale. C’est à cette étape qu’un appareil de mesure des TDS (Total des Solides Dissous) est utile. Si vous récupérez et mesurez le TDS de l’eau « évacuée », elle devrait avoir un taux de 1300ppm, ce qui est assez élevé. Il est important de rincer le plant jusqu’à ce que total baisse à un niveau de 50ppm, ou du moins qu’il s’approche du TDS de l’eau fraîche que vous utilisez pour rincer le plant. La couleur de l’eau d’évacuation va s’éclaircir et apparaîtra plus propre. Vous devez tirer autant que possible de minéraux dissous du plant.
Comment et Quand Rincer les Plants de Cannabis
Rincer les plants de cannabis avant la récolte peut faire la différence entre les meilleurs têtes ou la plus rude pour la gorge. Cette petite tâche est simple et facile à faire. Ajoutez juste de l’eau ! Attention car le moment du rinçage joue un rôle critique.
Le b.a.-ba du rinçage de ses plants de cannabis.
Sommaire:
1. Qu’est-ce que le rinçage ?
2. Le meilleur moment pour rincer son cannabis
3. Empêcher le blocage d'absorption des nutriments avant qu’il ne pose problème
4. Les enzymes à la rescousse
5. Comment bien rincer son cannabis
6. Comment rincer ses plantes en hydroponie
7. Les résultats du rinçage de son cannabis
8. Quand éviter de rincer son cannabis
Vous avez enfin fini vos cultures et vous vous retrouvez avec un magnifique plant couvert de super têtes, maintenant sèches, vous avez fait le curing et vous êtes prêt à fumer – et pourtant quelque chose ne va pas. La weed semble ne pas vouloir se consumer et quand vous tirez une bouffée, c’est comme si on vous avait donné un coup de poing dans les poumons et vous toussez en craignant pour votre vie ! Le goût est rude et décevant. Si c’est une situation que vous avez vécue, il y a des chances pour que vos plants n’aient pas été rincés correctement avant la récolte.
Cette fumée bien loin d’être agréable est provoquée par la présence dans le plant des nutriments et minéraux utilisés lors de la culture, ce qui altère la façon dont le plant se consume. Rincer le plant élimine ces nutriments restants, ce qui améliore la qualité des sensations. Heureusement, le rinçage des plants de cannabis se fait facilement et sans effort, et cela vous permet de produire des têtes douces et délicieuses en un rien de temps.
ARTICLE LIÉ
Comment Utiliser les Nutriments pour Cannabis
QU’EST-CE QUE LE RINÇAGE ?
L’acte de rincer un plant implique d’utiliser de l’eau pour éliminer tout nutriment présent dans la terre. Une grande quantité d’eau est passée à travers la terre et drainée sur une base régulière. Tous les minéraux et nutriments présents dans la terre sont rincés avec le temps avec l’eau, ce qui laisse une terre propre.
Mais pourquoi vouloir éliminer tous les minéraux de la terre ? N’est-ce pas mauvais pour la récolte ? En fait, cela aide à la récolte de manière significative. Quand les nutriments sont éliminés de la terre, ceci force le plant de cannabis à utiliser tous les nutriments toujours présents dans le plant. C’est comme pour le corps humain. Quand on consomme beaucoup d’aliments, ce que nous n’utilisons pas est transformé en graisses. Dans les situations extrêmes où la nourriture est rare, le corps s’appuie sur cette graisse stockée pour tirer de l’énergie.
Comme rincer force le cannabis à utiliser tous les nutriments restants dans le plant, aucun ne devrait rester et altérer les têtes récoltées. Cependant, si vous le faites trop tôt, cela peut nuire à la santé du plant, le moment est donc clé.
LE MEILLEUR MOMENT POUR RINCER SON CANNABIS
Le rinçage commence en général deux semaines avant la récolte. Si le plant a une période de floraison de huit semaines, le rinçage doit commencer six semaines après le début de la période de floraison. Il est préférable de regarder de près les trichomes sur le plant pour déterminer quand votre cannabis est prêt à être récolter. Si les petits trichomes commencent juste à passer d’une couleur transparente à une teinte laiteuse et blanche, c’est une bonne indication que les plants peuvent commencer à être rincés. Il faut s’arranger pour que la majorité des trichomes aient changé vers la couleur désirée pour la récolte après deux semaines – ça devient plus facile à faire avec l’expérience, alors accrochez-vous !
Le rinçage peut également être un bon moyen de remettre à zéro la terre quand un plant est toujours en phase de croissance végétative. Parfois, un cultivateur suralimente par accident son cannabis, ce qui provoque un changement de couleur et un flétrissement du bout des feuilles. Ceci est appelé une « brûlure par nutriments ». Rincer la terre peut éliminer les nutriments excédentaires, ce qui aide à résoudre le problème. Cependant, c’est une mesure drastique à ce stade de la culture, alors assurez-vous que le problème soit bien une brûlure par nutriments et non quelque chose d’autre.
Flushing
Le rinçage ne concerne pas que le moment de la récolte. Cette technique peut aussi être mise en place durant la phase de croissance afin de débarrasser le sol des nutriments. Bien évidemment, les nutriments permettent à votre plante de rester en bonne santé et vous assurent des rendements maximaux, mais une trop grande quantité peut causer une accumulation et un état statique durant lequel la plante ne peut plus y accéder.
Le blocage des nutriments peut être causé par une accumulation saline ou des niveaux de pH incorrects. Ces deux causes peuvent être résolues par un rinçage de votre plante à l’eau claire. Les fluides viendront pousser les nutriments en dehors du substrat et le débarrasseront de l’accumulation, permettant ainsi aux racines de pouvoir accéder à nouveau aux nutriments.
EMPÊCHER LE BLOCAGE D'ABSORPTION DES NUTRIMENTS AVANT QU’IL NE POSE PROBLÈME
Au mieux, le blocage des nutriments peut être un problème, au pire, il peut être un vrai désastre. Comme le dit l’adage, il vaut mieux prévenir que guérir. Il vaut mieux prendre de l’avant pour empêcher le blocage des nutriments plutôt que de s’y atteler lorsque c’est trop tard.
Empêcher le blocage des nutriments peut se faire par le biais d’un rinçage de routine. En rinçant vos plantes une fois avant la floraison et une fois au milieu de cette dernière, vous minimiserez l’accumulation de nutriments.
LES ENZYMES À LA RESCOUSSE
Après le rinçage pour contrer l’accumulation ou le blocage des nutriments, vous remarquerez peut-être que vos plantes ont une apparence vert foncé, c’est le signe d’un excès de nutriments. Dans ce cas, certains cultivateurs choisissent d’ajouter une formule riche en enzymes à leur substrat.
Au cas où vous auriez oublié vos cours de biologie, les enzymes sont des protéines qui catalysent les réactions. Elles aident à rincer le substrat en décomposant l’amidon, les glucides et les nutriments. Il existe sur le marché toute une variété de produits qui contiennent des formules d’enzymes très efficaces.
Si l’eau ne suffit pas à vos plantes, ces petites protéines ne feront qu’une bouchée de l’accumulation de nutriments !
Comment et Quand Rincer les Plants de Cannabis
COMMENT BIEN RINCER SON CANNABIS
Rincer votre plant de cannabis est un processus simple. À chaque fois que vous apporteriez normalement des nutriments, vous rincez à la place. De l’eau du robinet non traitée est tout ce dont vous avez besoin pour rincer, assurez-vous juste que son pH est sans danger pour le cannabis. La plupart de l’eau de puits a un pH sain et ne nécessite pas de traitement, mais s’il est nécessaire de traiter l’eau de rinçage pour avoir un pH adapté, faites-le. Les ajustements du pH seront donc la seule chose à considérer.
Inonder la terre avec autant d’eau fraîche qu’elle puisse contenir. Laissez l’eau durant quelques minutes pour qu’elle puisse absorber les nutriments, puis inondez la terre encore pour rincer les nutriments loin du plant. Si vous cultivez en intérieur dans des pots, notez la couleur de l’eau qui s’échappe du fond des pots. Elle sera tâchée et aura une couleur sale. C’est à cette étape qu’un appareil de mesure des TDS (Total des Solides Dissous) est utile. Si vous récupérez et mesurez le TDS de l’eau « évacuée », elle devrait avoir un taux de 1300ppm, ce qui est assez élevé. Il est important de rincer le plant jusqu’à ce que total baisse à un niveau de 50ppm, ou du moins qu’il s’approche du TDS de l’eau fraîche que vous utilisez pour rincer le plant. La couleur de l’eau d’évacuation va s’éclaircir et apparaîtra plus propre. Vous devez tirer autant que possible de minéraux dissous du plant.
COMMENT RINCER SES PLANTES EN HYDROPONIE
Le rinçage des plantes en hydroponie est bien plus simple que de se débarrasser des nutriments en terre. Les cultivateurs en hydroponie pourront simplement drainer leur système et le remplacer par une eau au pH neutre.
Le rinçage des plantes en hydroponie est aussi un processus bien plus court. Une fois que la réserve d’eau aura été modifiée, les plantes en hydro n’auront pas accès aux nutriments externes. Pour cette raison, un rinçage de deux jours suffira.
LES RÉSULTATS DU RINÇAGE DE SON CANNABIS
Après la récolte des têtes, prenez du temps pour bien faire le curing pour atteindre le potentiel le plus élevé. Un affinage correct par curing permet de réduire encore plus le côté rude des têtes, en éliminant des choses comme un excès de chlorophylle. Vous serez étonné de voir la différence que ce petite effort peut avoir sur votre produit. Tout votre travail se sentira dans la première bouffée de cette weed douce comme de la soie, qui caresse la gorge comme du miel. Le plus doux de la nature. Vous pouvez donc améliorer la qualité de votre cannabis en ajoutant juste de l’eau !
QUAND ÉVITER DE RINCER SES PLANTES
Le seul moment où nous recommandons d’éviter le rinçage de son cannabis est lorsque l’on travaille avec une terre biologique amendée ou un super soil. Ces substrats ont été développés avec précaution afin d’héberger des micro-organismes bienfaisants tels que des bactéries ou des champignons. Cette délicate biodiversité pourrait être éliminée et endommagée par le rinçage.
Une fois de plus, l’absence de rinçage ne devrait pas poser de soucis, car aucun nutriment externe ou synthétique n’aura été ajouté au substrat. À la place, les plantes comptent sur les micro-organismes pour décomposer la matière organique et la livrer aux racines.
May the force be with you 💪

Processing
Likes
3
Share


@Reaper
Follow
week 7 flower:
big fanleaves start to die off and the purple/yellow colors appear on the plant. one more week before harvest
Likes
27
Share


@RDWCGrowing
Follow
1/20/2023- So much to do pre grow and over the next 16 days, absolute first order of business is that I have to take down my current Grow---TIMBER-- Then I have a list of things I have to get done in order to be ready to start this grow 1 Feb.
With that said
T - 2 days until start 48 hour Flush
T - 2 days until Start 48 hours of Light
T - 4 days until TIMBER!!!
Items that need to be done before 1 Feb 2023
1. I need to clean the tent out
2. I need to clean the equipment- Proper Sanitization between grows in Hydro is a must!!!
3. I need to get the hole in the ceiling above my tent repaired- For my last grow I had a deep sink installed in my grow room, to make Hydroponics a little bit easier and have a water source in the same room. The seals on the pipes they were installing broke and leaked through the ceiling causing some damage all the way across my grow room, I was already weeks into my grow and couldn't risk them working above my tent and it would have been very awkward positon for them to be working in as well, so have to get this done quickly between chop and germination.
4. I have to install my new light- I was using a Vivosun 4000 and for this grow I am switching up to a Spider-farmer SF 7000.
1/20/23- For this upcoming grow I am working with M/F photo seeds so I ordered 4 Sex determination kits. I recieved my my 4 Sex determination testing kits from Rimrock Analytics today. I will be using these to test my plants at week 2 of Veg so that when/if I take clones I know I am taking them off females. As well as I don't want to accidently pollinate my tent during this grow I am looking for big beautiful buds not seeded buds. :-)
1/24/2023- Harvest of current grow- Started at 2:00pm and finshed wet trim and firt batch into the freeze dryer.
1/25/2023- Next batch into the freeze dryer and cleaning all my equipment for this Grow.
T-1 Day until the workers are supposed to be here to fix the hole in the Grow Room.
T-3 days until I instll my new Gorilla Grow Tent and my New Light Spider Farmer SE-7000 for this grow.
T-7 Days until Start of Germination
1/26/2023- Harvest is done ran through the Freeze dryer and dry tim completed.
1/27/2023- Grow Room repairs completed. Hole is gone Letting the paint dry before I install the new tent.
T-2 days until Install the New Gorilla Grow tent and the new Light
T-3 days until I put the hydro equipment in the new tent
T-5 days until Germination
1/29/2023- Day 0- Final Pre Germination activities
Germination Start T-3 days
The paint on the ceiling was dry and it was time to finish prepping for Germination. I got the following items knocked off my list.
New 4X4 Gorilla Grow Tent is up and ready
New Spider Farmer SE-7000 Light is installed- Thanks Moony Grows for the suggestion and for the Code that got me some money off and free shipping (Moonygrows)!! I turned the lights all the way up to max and set the timer to 18/6 0600-0000. I will keep an eye on the temperature and humidity without my plants and see how hot it gets with the new light.
I put my Hydro system back together and put in 40 gallons of water into it, time to monitor for leaks the next few days.
I Setup my cloning machine for Germination Days 3-11
1/30/2023
let me break down the situation, ROOM in the TENT.. Enough said.. No really I tried putting my exhaust system up in the new tent with my new light, The light is so big corner to corner that it really didn't give me enough room for the lights be be raised, with the exahust hanging the buckets my plants are Starting in are 2 and 1/2 feet off the ground, great for plenty of room for roots but not so great for upwards space for the plant to grow. In a 6' 11 tent with the exauhst in side and hanging that only gave me a little over 4 feet of grow room to play with. My last grow if you saw my diary, anyone could tell I was struggling to keep the buds off the lights. No good, Since space was such an issue I was running my carbon filter inside on the ground but It really needed to be up sucking the heat out not shooting the cool out. With that setup I was sucking air through the filter and pushing it out the tent at a bottom exhaust hole cold out. Wasn't doing me any good for my heat. I was hitting temps of up to 85 degrees. I bought a portable AC unit and have been running it in the grow room to try and keep temps below 85 and I have had to lower the power on my lights during grow also not ideal.. With that said a friend of mine MoonyGrows (Check out his diary) took the time to look at my issue send me a picture of my grow tent setup with detailed instructions on how to suck the air out from the top but putting my filter and fan on top of my tent so no room issue and I am sucking the air out from the top where the heat is instead of pushing the air out from the bottom where the cool is... THANK YOU MoonyGrows For taking the time to help me get this straightened out.. Now I have room and I have the exhausts working right and now my temps with everything at 100% are topping out at 80 this dropped the temp by 5 + degrees at 100% max.
T-2 days until Start of Germination
Prepped my seed tray with humidity dome
Prepped my Rapid Rooter plugs. I Used RO water, and I added a few drops of Hydrogen peroxide to Oxygenate the water. I then PH balanced between 5.7-6.0 the same that they will be getting in the Cloning Machine and when they get to thier final grow pod. I perfere the 5.8x range and I hit 5.84 for these rapid rooters. If you want to see a complete video on the process HowWeedGrow has an amzing video that shows step by step how to do it and explains it better than I ever could including how to plant the seeds. Which I will cover when I get to that step on Wed. https://www.howweedgrow.com/how-germinate-weed-seeds-cannabis-rapid-rooters/
1/31/2023
T-1 day until Germination Start
All set and ready have my Rapid Rooter plugs ready to go have my seeds out.. Have my seed tray warming up tonight. Tomorrow morning right into the Rapid Rooter then strait into the tray. I will spray the dome to start the humidity in there.
2/1/2023
Germination Day!!
Let the games begin!
0600am Put the seeds into the Root Riots. And then put the seeded Root Riots into their first home the Seed tray. I have them under the light 24/7. Sprayed the dome
7:30pm Sprayed the Dome to keep humidity going on the dome.
2/2/2023
Day 1 of Germination
Sprayed the Dome in the morning
Sprayed the Dome in the evening
2/3/2023
Day 2 of Germination
Roots are starting to come out the bottom of the root riot plugs and the heads are slowly popping out of Number 4 just below the surface.
Afternoon- Number 4 has popped up
Evening- Number 3 has popped up as well. Happy Dance!!
2/4/2023
Day 3 - Germination
Surprise Surprise Surprise- all 4 have now poked their heads up.. Happy day!! 100% Germination succeeded.
Now major milestone to track is how many are female and how many are male.
I will take look at the roots this afternoon/evening and see if they have enough root to go into the cloning machine for the next 7 days before they go into their Hydro Pods.
Day 3 - Germination - Evening..
Roots looked good and they were tall enough to make it into the cloning machine.
Now that they are all in the cloning machine I have switched the lighting to veg state 18 on 6 off.
2/5/2023
Day 4 - Germination - Morning
All the Ladies (fingers crossed) looking great stretching nicely and look nice and green, Photo synthesis underway....
UPDATE!! After a very interesting POD cast on FSTS by Dr. Bruce Bugsbee from Utah University, I have shifted my lighting to 24 hours on through seedling and then I am going to shift to 20 hours on the rest of Veg.
2/6/2023
Day 5 - Germination
While Checking on my conditions inside the new tent last night, I found that the Humidity was down to 39 Percent. I added an AquaOasis Cool Mist Humidifier, the reason I selected this humidifier is that I needed one that could be turned on and off utilizing my Inkbird Humidity Controller IHC200 that I have my Pro Breeze Dehumidifier currently running with.
Root structures are starting to get there about 1/4 of an inch.
2/7/2023
Day 6 - Germination
Everything seems on track more roots poking out of each today. They are each getting a little taller as well.
Checked in the evening and number 3 was drooping the Root riot plug on the bottome was dry and the roots were not in the water yet. I raised the water just enough that the longest root that was sticking out is now hitting the water.
2/8/2023
Day 7 - Germination
Everything looked good while checking in on them this morning number 3 is now full up and no droop again.
2/9/2023
Day 8 - Germination
T-2 days until Plant into Forever Pods and we start week 1 of Veg .. :-)
Surprising thing to me is that number 1 and 2 were later in popping then 3 and 4 but the roots are growing longer in 1 and 2.
2/10/2023
Day 9 - Germination
Number 1 and Number 2 are definitely ready for transplant today.. Based on how they were yesterday and where they are today I am hoping by tomorrow 3 and 4 are ready. Today they look to me where 1 and 2 did yesterday.. I really hope 3 and 4 catch up by tomorrow since..
T-1 day until transplant to new/ final home for grow.
Need the roots long enough to have some clay down in the basket to keep the root riot out of the water and only roots in the water..
2/11/2023
Day 10 - Germination
Today they got placed in thier forever Home, 7 days from Sprout and 7 days until Week 1 Start.
PPM- 180 this is water out of the Tap
Temp Water: 70.7
Temp Tent: 77
Humidity: 40% I have a humidifier going 24/7 to try and bring this up.. I also have Humidity Domes on each plant.
2/12/2023
Day 11 - Germination
Sprayed the domes, all are looking good.. Nothing much to do at this phase but Keep monitoring the PH level in the system and making sure they have a comfortable home.
T-6 days until Week 1 start
2/13/2023
Day 12 - Germination
Sprayed the domes, They were looking a little yellow today so I moved the light down to assist. Nothing much to do at this phase but Keep monitoring the PH level in the system and making sure they have a comfortable home.
T-5 days until Week 1 start
2/14/2023
Day 13 - Germination
Sprayed the domes, They were looking a little Florissant yellow today, with what looks like slight burn on the tips, I talked with a fellow grower and we agreed that It was probably that I was drowning them, Yes you can drown you plants even in Hydro, but only early on.. :-) It usually happens with the water being too high, which soaks not only the roots but the medium (root Riot plug in this case). I lowered the water from touching the bottom of the pot to about 1" away. This will probably take 3-4 days to resolve. I will continue my daily monitoring.
T-4 days until Week 1 start
2/15/2023
Day 14 - Germination
Sprayed the domes, continue my daily monitoring they look a little darker green instead of lime green now that I lowered the water levels in the system, so I think that I might have resolved the issue but it will take a few days for recovery to happen.
T-3 days until Week 1 start
2/16/2023
Day 15 - Germination
I looked in on them this morning, 3 and 4 look like they are doing well and recovering nicely. Number 1 not so much it has brown spots on the leaves, this very well can still be a side effect of the overwatering but I decide to go ahead and add Nutes earlier than I was planning just incase. I was going to wait until Saturday but I think intervention is necessary now especially after drowning them early on.
I added 1/2 what I am planning on adding for week 1 start. I also think I am going to adjust my chart to add 1/2 2 days after plant from now on. I don't think it would hurt it to have some Nutes to pull from.
.25ml/Gal Calmag = 12.5ml
1ml/gal GH FloraMicro= 50ml
1ml/gal GH FloraGro = 50ml
1ml/gal GH FloraBloom = 50ml
T-2 days until Week 1 start = I will drain the system and start it over on Saturday with Week 1 Nutes.
2/17/2023
Day 16- Germination
I didn't even want to post today after looking in on them this morning, 3 of the 4 are now showing signs of dronwing.. Brown spots on the leaves, the water levels were still too high.. I drained about another inch out of the tanks.. Will see how quick they recover.. I start week 1 tomorrow and will have to ensure my water levels are at least 1" away from the basket on this round.

Processing
Likes
5
Share


@NewbieLearner
Follow
Plants took a few days to get stripped down. Missed the second week of flowering and stretching but oh well there is always next time. Very excited to see this canopy full of uniform buds its going to be a sight to behold haha.